2012 Seat Ibiza 5D interior lights
[x] Cancel search: interior lightsPage 5 of 280

Table of Contents
Manual structure . . . . . . . . . . . . . . . . . . . . 5
Content . . . . . . . . . . . . . . . . . . . . . . . . . . . . . . . . 6
Safety First . . . . . . . . . . . . . . . . . . . . . . . . . . . . 7
Safe driving . . . . . . . . . . . . . . . . . . . . . . . . . . . . . . . 7
Brief introduction . . . . . . . . . . . . . . . . . . . . . . . . . 7
Proper sitting position for occupants . . . . . . . . . 10
Pedal area . . . . . . . . . . . . . . . . . . . . . . . . . . . . . . . 16
Storing objects . . . . . . . . . . . . . . . . . . . . . . . . . . . 16
Seat belts . . . . . . . . . . . . . . . . . . . . . . . . . . . . . . . . . 18
Brief introduction . . . . . . . . . . . . . . . . . . . . . . . . . 18
Why wear seat belts? . . . . . . . . . . . . . . . . . . . . . . 20
Seat belts . . . . . . . . . . . . . . . . . . . . . . . . . . . . . . . 24
Seat belt tensioners* . . . . . . . . . . . . . . . . . . . . . . 27
Airbag system . . . . . . . . . . . . . . . . . . . . . . . . . . . . . 29
Brief introduction . . . . . . . . . . . . . . . . . . . . . . . . . 29
Front airbags . . . . . . . . . . . . . . . . . . . . . . . . . . . . . 33
Side airbags . . . . . . . . . . . . . . . . . . . . . . . . . . . . . 37
Deactivating airbags* . . . . . . . . . . . . . . . . . . . . . . 40
Child safety . . . . . . . . . . . . . . . . . . . . . . . . . . . . . . . 42
Brief introduction . . . . . . . . . . . . . . . . . . . . . . . . . 42
Child seats . . . . . . . . . . . . . . . . . . . . . . . . . . . . . . . 44
Securing child seats . . . . . . . . . . . . . . . . . . . . . . . 47
Operating Instructions . . . . . . . . . . . . . 53
Cockpit . . . . . . . . . . . . . . . . . . . . . . . . . . . . . . . . . . . 53
Overview . . . . . . . . . . . . . . . . . . . . . . . . . . . . . . . . 53
Instruments . . . . . . . . . . . . . . . . . . . . . . . . . . . . . . 55 LPG system* . . . . . . . . . . . . . . . . . . . . . . . . . . . . . 56
Digital instrument panel display . . . . . . . . . . . . . 57
Warning lamps . . . . . . . . . . . . . . . . . . . . . . . . . . . 63
Steering column controls* . . . . . . . . . . . . . . . . . 76
General information . . . . . . . . . . . . . . . . . . . . . . . 76
Audio Control . . . . . . . . . . . . . . . . . . . . . . . . . . . . . 77
Audio + Telephone Control . . . . . . . . . . . . . . . . . . 78
Opening and closing . . . . . . . . . . . . . . . . . . . . . . 80
Central locking . . . . . . . . . . . . . . . . . . . . . . . . . . . 80
Keys . . . . . . . . . . . . . . . . . . . . . . . . . . . . . . . . . . . . 85
Radio frequency remote control* . . . . . . . . . . . . . 86
Anti-theft alarm system* . . . . . . . . . . . . . . . . . . . 88
Rear lid . . . . . . . . . . . . . . . . . . . . . . . . . . . . . . . . . . 91
Windows . . . . . . . . . . . . . . . . . . . . . . . . . . . . . . . . 93
Panoramic tilting sunroof* . . . . . . . . . . . . . . . . . . 96
Lights and visibility . . . . . . . . . . . . . . . . . . . . . . . . 98
Lights . . . . . . . . . . . . . . . . . . . . . . . . . . . . . . . . . . . 98
Interior lights . . . . . . . . . . . . . . . . . . . . . . . . . . . . . 105
Visibility . . . . . . . . . . . . . . . . . . . . . . . . . . . . . . . . . 106
Windscreen wipers . . . . . . . . . . . . . . . . . . . . . . . . 107
Rear view mirrors . . . . . . . . . . . . . . . . . . . . . . . . . . 110
Seats and storage compartments . . . . . . . . . . 113
The importance of correct seat adjustment . . . . . 113
Head restraints . . . . . . . . . . . . . . . . . . . . . . . . . . . 114
Front seats . . . . . . . . . . . . . . . . . . . . . . . . . . . . . . . 116
Rear seats . . . . . . . . . . . . . . . . . . . . . . . . . . . . . . . 118
Storage compartment . . . . . . . . . . . . . . . . . . . . . . 120
Ashtrays, cigarette lighter and power socket . . . 123
First-aid kit, warning triangle, fire extinguisher* 125
Luggage compartment . . . . . . . . . . . . . . . . . . . . . 126
Air conditioning . . . . . . . . . . . . . . . . . . . . . . . . . . . 128
Heating . . . . . . . . . . . . . . . . . . . . . . . . . . . . . . . . . 128
Air conditioning* . . . . . . . . . . . . . . . . . . . . . . . . . . 131 Climatronic . . . . . . . . . . . . . . . . . . . . . . . . . . . . . . 134
General notes . . . . . . . . . . . . . . . . . . . . . . . . . . . . 136
Driving . . . . . . . . . . . . . . . . . . . . . . . . . . . . . . . . . . . . 138
Steering . . . . . . . . . . . . . . . . . . . . . . . . . . . . . . . . . 138
Safety . . . . . . . . . . . . . . . . . . . . . . . . . . . . . . . . . . . 139
Ignition lock . . . . . . . . . . . . . . . . . . . . . . . . . . . . . . 139
Starting and stopping the engine . . . . . . . . . . . . 141
Start-Stop function* . . . . . . . . . . . . . . . . . . . . . . . 144
Manual gearbox . . . . . . . . . . . . . . . . . . . . . . . . . . 147
Automatic gearbox* . . . . . . . . . . . . . . . . . . . . . . . 148
Handbrake . . . . . . . . . . . . . . . . . . . . . . . . . . . . . . . 155
Acoustic parking aid system* . . . . . . . . . . . . . . . 157
Cruise speed* (Cruise control system) . . . . . . . . 159
Practical Tips . . . . . . . . . . . . . . . . . . . . . . . . . 163
Intelligent technology . . . . . . . . . . . . . . . . . . . . . 163
Brakes . . . . . . . . . . . . . . . . . . . . . . . . . . . . . . . . . . 163
Anti-lock brake system and traction control ABS 164
Electronic Stability Control (ESC)* . . . . . . . . . . . . 165
Driving and the environment . . . . . . . . . . . . . . . 168
Running-in . . . . . . . . . . . . . . . . . . . . . . . . . . . . . . . 168
Exhaust gas purification system . . . . . . . . . . . . . 169
Economical and environmentally friendly driving 171
Driving abroad . . . . . . . . . . . . . . . . . . . . . . . . . . . . 173
Trailer towing . . . . . . . . . . . . . . . . . . . . . . . . . . . . . 173
Vehicle maintenance and cleaning . . . . . . . . . 176
General notes . . . . . . . . . . . . . . . . . . . . . . . . . . . . 176
Care of the vehicle exterior . . . . . . . . . . . . . . . . . . 177
Vehicle interior maintenance . . . . . . . . . . . . . . . . 182
3
Table of Contents
Page 6 of 280

Accessories, replacement of parts and
modifications . . . . . . . . . . . . . . . . . . . . . . . . . . . . . 185
Accessories and spare parts . . . . . . . . . . . . . . . . 185
Technical modifications . . . . . . . . . . . . . . . . . . . . 185
Roof aerial* . . . . . . . . . . . . . . . . . . . . . . . . . . . . . . 186
Mobile telephones and two-way radios . . . . . . . . 186
Fitting a towing bracket* . . . . . . . . . . . . . . . . . . . 187
Checking and refilling levels . . . . . . . . . . . . . . . 189
Refuelling . . . . . . . . . . . . . . . . . . . . . . . . . . . . . . . 189
LPG system* . . . . . . . . . . . . . . . . . . . . . . . . . . . . . 191
Petrol . . . . . . . . . . . . . . . . . . . . . . . . . . . . . . . . . . . 194
Diesel . . . . . . . . . . . . . . . . . . . . . . . . . . . . . . . . . . . 194
Working in the engine compartment . . . . . . . . . . 195
Engine oil . . . . . . . . . . . . . . . . . . . . . . . . . . . . . . . . 198
Coolant . . . . . . . . . . . . . . . . . . . . . . . . . . . . . . . . . 202
Washer fluid and windscreen wiper blades . . . . 204
Brake fluid . . . . . . . . . . . . . . . . . . . . . . . . . . . . . . . 208
Vehicle battery . . . . . . . . . . . . . . . . . . . . . . . . . . . 209
Wheels . . . . . . . . . . . . . . . . . . . . . . . . . . . . . . . . . . 211
If and when . . . . . . . . . . . . . . . . . . . . . . . . . . . . . . . 218
Vehicle tools, spare wheel . . . . . . . . . . . . . . . . . . 218
Wheel change . . . . . . . . . . . . . . . . . . . . . . . . . . . . 219
Tyre repair kit* (Tyre Mobility-System) . . . . . . . . . 224
Fuses . . . . . . . . . . . . . . . . . . . . . . . . . . . . . . . . . . . 226
Bulb change . . . . . . . . . . . . . . . . . . . . . . . . . . . . . 229
Single headlight bulb change . . . . . . . . . . . . . . . 231
Double headlight bulb change . . . . . . . . . . . . . . . 233
Changing the bulbs of AFS headlights . . . . . . . . 237
Changing the fog light bulbs . . . . . . . . . . . . . . . . 238
Changing the rear, side and interior light bulbs . 239
Jump-starting . . . . . . . . . . . . . . . . . . . . . . . . . . . . . 242
Towing and tow-starting . . . . . . . . . . . . . . . . . . . . 246 Technical Specifications
. . . . . . . . . . . 249
Description of specifications . . . . . . . . . . . . . . . 249
Important information . . . . . . . . . . . . . . . . . . . . . 249
Information on fuel consumption . . . . . . . . . . . . 251
Towing a trailer . . . . . . . . . . . . . . . . . . . . . . . . . . . 251
Wheels . . . . . . . . . . . . . . . . . . . . . . . . . . . . . . . . . . 252
Technical specifications . . . . . . . . . . . . . . . . . . . . 253
Checking fluid levels . . . . . . . . . . . . . . . . . . . . . . . 253
Petrol engine 1.2 44 kW (60 PS) . . . . . . . . . . . . . 254
Petrol engine 1.2 51 kW (70 PS) . . . . . . . . . . . . . 255
Petrol engine 1.2 TSI 63 kW (85 PS) . . . . . . . . . . 256
Petrol engine/LPG 1.6 60 kW (81 PS) . . . . . . . . . 257
Petrol engine 1.4 63 kW (85 PS) . . . . . . . . . . . . . 258
Petrol engine 1.2 TSI 77 kW (105 PS) . . . . . . . . . 259
Petrol engine 1.2 TSI 77 kW (105 PS) Start-Stop 260
Petrol engine 1.6 77 kW (105 PS) . . . . . . . . . . . . 261
Petrol engine 1.4 110 kW (150 PS) . . . . . . . . . . . 262
Diesel engine 1.2 TDI CR 55 kW (75 PS) DPF
Start-Stop Ecomotive . . . . . . . . . . . . . . . . . . . . . . 263
Diesel engine 1.2 TDI CR 55 kW (75 PS) DPF . . . . 264
Diesel engine 1.6 TDI CR 66 kW (90 PS) DPF . . . . 265
Diesel engine 1.6 TDI CR 77 kW (105 PS) with/
without DPF . . . . . . . . . . . . . . . . . . . . . . . . . . . . . . 266
Diesel engine 2.0 TDI CR 105 kW (143 PS) DPF . 267
Dimensions and capacities . . . . . . . . . . . . . . . . . 268
Index . . . . . . . . . . . . . . . . . . . . . . . . . . . . . . . . . . . 269
4Table of Contents
Page 94 of 280
92Opening and closing
WARNING
● Always close the rear lid properly. Risk of accident or injury.
● The rear lid must not be opened when the reverse or rear fog lights
are lit. This may damage the tail lights
● Do not close the rear lid by pushing it down with your hand on the
rear window. The glass could smash. Risk of injury!
● Ensure the rear lid is locked after closing it. If not, it may open unex-
pectedly while driving.
● Never allow children to play in or around the vehicle. A locked vehicle
can be subjected to extremely high and low temperatures, depending on
the time of year, thus causing serious injuries/illness. It could even have
fatal consequences. Close and lock both the rear lid and all the other
doors when you are not using the vehicle.
● Closing the rear lid without observing and ensuring it is clear could
cause serious injury to you and to third parties. Make sure that no one is
in the path of the rear lid.
● Never drive with the rear lid open or half-closed, exhaust gases may
penetrate into the interior of the vehicle. Danger of poisoning!
● If you only open the rear lid, do not leave the key inside. The vehicle
will not be opened if the key is left inside.
Emergency opening
This allows the vehicle to be opened if the central locking
does not operate (for example, if the battery is flat)
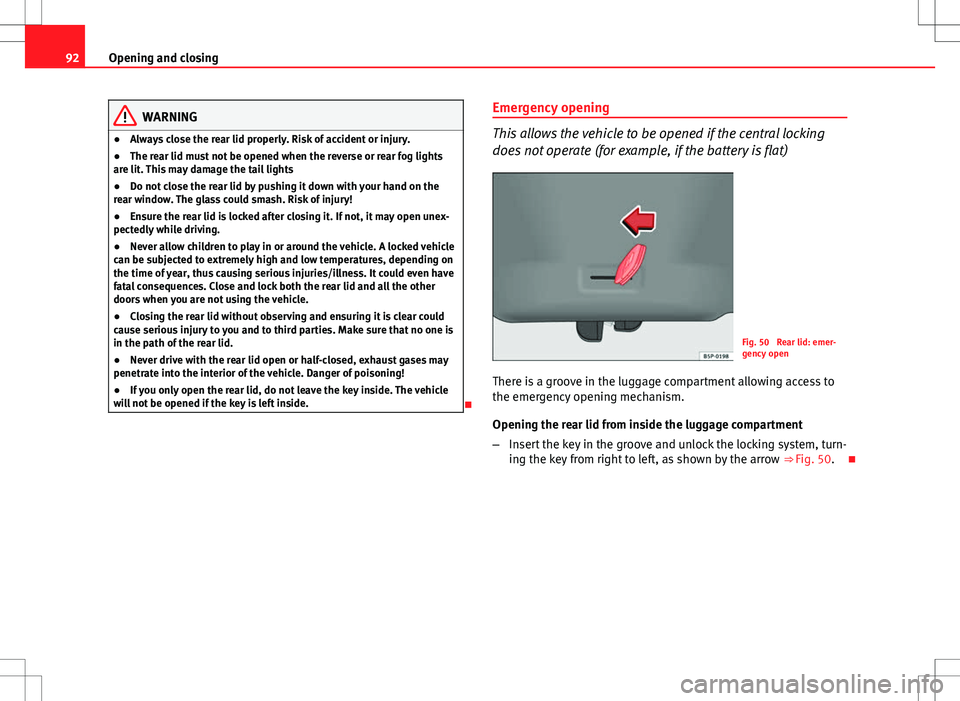
Fig. 50 Rear lid: emer-
gency open
There is a groove in the luggage compartment allowing access to
the emergency opening mechanism.
Opening the rear lid from inside the luggage compartment
– Insert the key in the groove and unlock the locking system, turn-
ing the key from right to left, as shown by the arrow ⇒ Fig. 50.
Page 107 of 280
105
Lights and visibility
Note
● The turn signals only work when the ignition is switched on. The corre-
sponding warning lamp or flashes in the instrument panel. The control
lamp flashes when the turn signals are operated, provided a trailer is
correctly attached and connected to the vehicle. If a turn signal bulb is de-
fective, the control lamp flashes at double speed. If the trailer turn signal
bulbs are damaged, control lamp does not light up. Change the bulb.
● The main beam headlights can only be switched on if the dipped beam
headlights are already on. The warning lamp then comes on in the instru-
ment panel.
● The headlight flasher comes on for as long as you pull the lever – even if
no other lights are switched on. The warning lamp then comes on in the
instrument panel.
● When the parking lights are switched on, the headlight and the tail light
on the corresponding side of the vehicle light up. The parking lights will on-
ly work if the key is removed from the ignition. If the lights are switched on,
an audible warning will be emitted while the driver door is open.
● If the turn signal lever is left on after the key has been taken out of the
ignition lock, an acoustic signal sounds when the driver door is opened.
This is a reminder to switch off the turn signal, unless of course you wish to
leave the parking light on. Interior lights
Front interior light
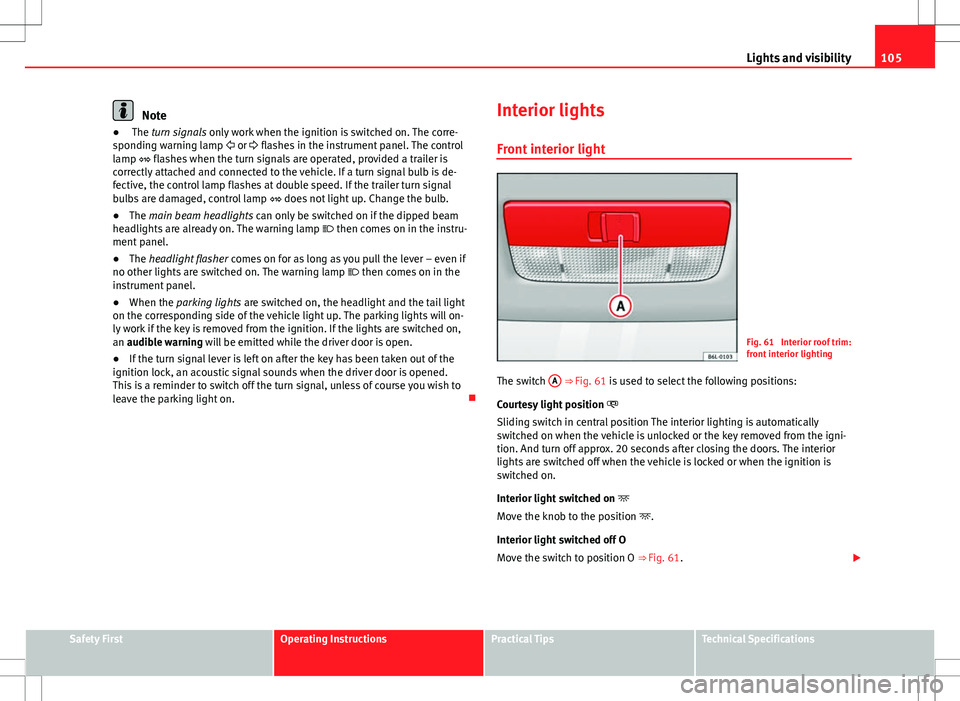
Fig. 61 Interior roof trim:
front interior lighting
The switch A
⇒ Fig. 61 is used to select the following positions:
Courtesy light position
Sliding switch in central position The interior lighting is automatically
switched on when the vehicle is unlocked or the key removed from the igni-
tion. And turn off approx. 20 seconds after closing the doors. The interior
lights are switched off when the vehicle is locked or when the ignition is
switched on.
Interior light switched on
Move the knob to the position .
Interior light switched off O
Move the switch to position O ⇒ Fig. 61.
Safety FirstOperating InstructionsPractical TipsTechnical Specifications
Page 108 of 280
106Lights and visibility
Note
If not all the vehicle doors are closed, the interior lights will be switched off
after approx. 10 minutes, providing the ignition key has been removed and
the courtesy light position selected. This prevents the battery from dis-
charging.
Front reading light*
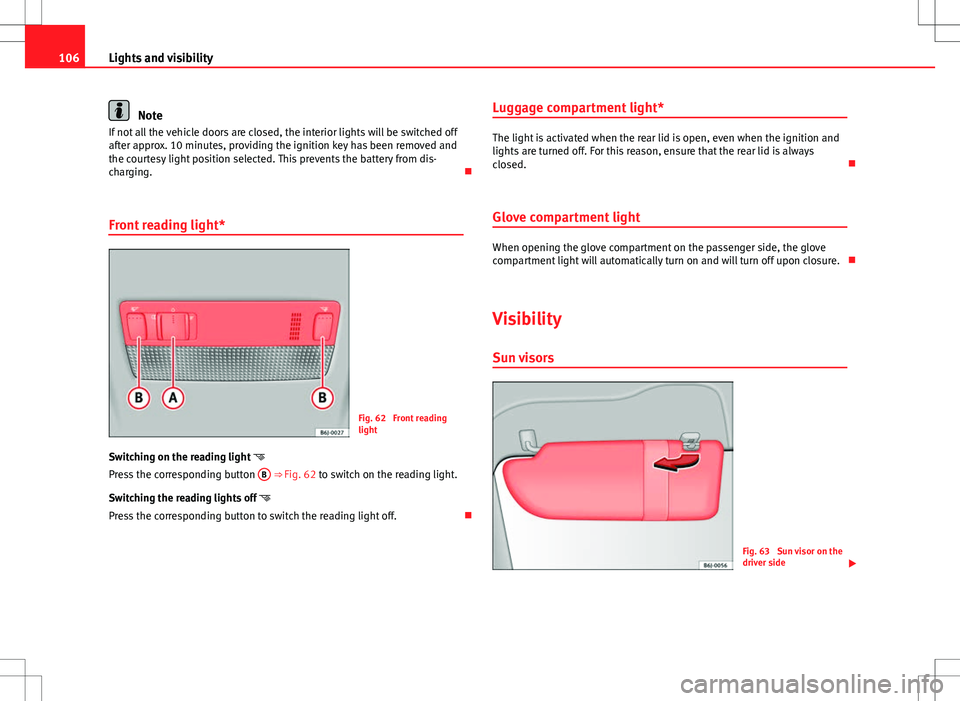
Fig. 62 Front reading
light
Switching on the reading light
Press the corresponding button B
⇒ Fig. 62 to switch on the reading light.
Switching the reading lights off
Press the corresponding button to switch the reading light off. Luggage compartment light*
The light is activated when the rear lid is open, even when the ignition and
lights are turned off. For this reason, ensure that the rear lid is always
closed.
Glove compartment light
When opening the glove compartment on the passenger side, the glove
compartment light will automatically turn on and will turn off upon closure.
Visibility Sun visors
Fig. 63 Sun visor on the
driver side
Page 112 of 280
110Lights and visibility
Headlight washer*
The headlight washers clean the headlight lenses.
The headlight washers are activated automatically when the windscreen
washer is used and the window wiper lever is pulled towards the steering
wheel for at least 1.5 seconds – provided the dipped beam headlights or
main beams are switched on. Clean off stubborn dirt (insects, etc.) from the
headlights at regular intervals, for instance when filling the fuel tank.
Note
● To ensure that the headlight washers work properly in winter, keep the
nozzle holders in the bumper free of snow and remove any ice with a de-icer
spray.
● To remove water, the windscreen wipers will be activated from time to
time, the headlight washers will be activated every three cycles.
Rear view mirrors
Adjusting the rear view mirrors
Before beginning any journey, adjust the rear view mirrors for correct visibil-
ity. Interior rear vision mirror
It is dangerous to drive if you cannot see clearly through the
rear window.
Manual anti-dazzle function for interior rear vision mirror
In the basic mirror position, the lever at the bottom edge of the rear vision
mirror should be at the front. Pull the lever to the back to select the anti-
dazzle function.
Automatic anti-dazzle interior rear vision mirror*
The automatic anti-dazzle function can be switched on and
off as desired.
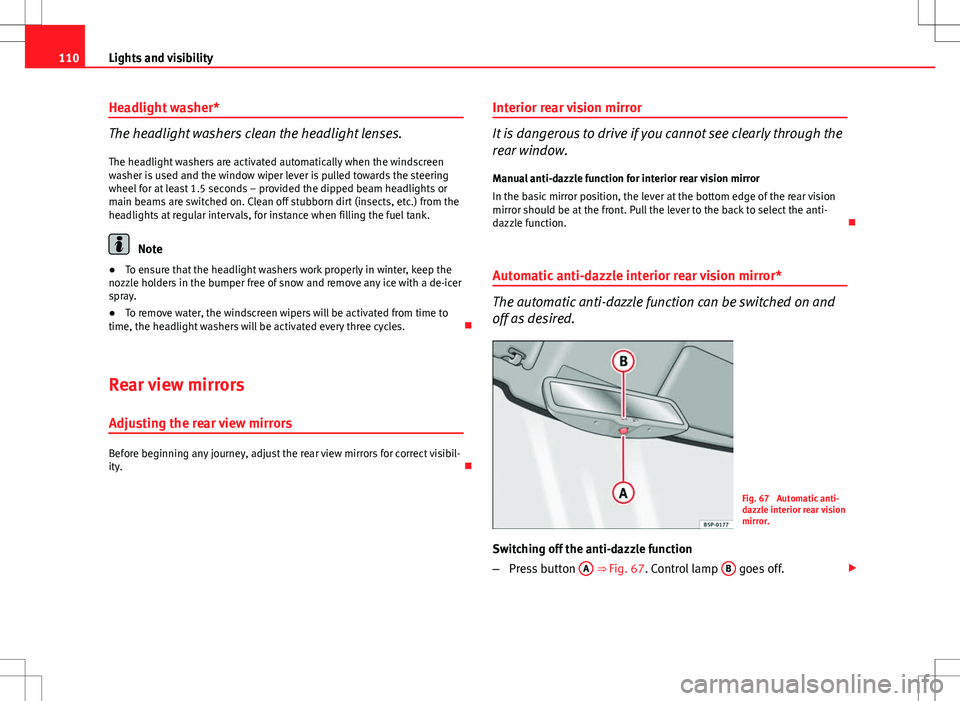
Fig. 67 Automatic anti-
dazzle interior rear vision
mirror.
Switching off the anti-dazzle function
– Press button A
⇒ Fig. 67. Control lamp B goes off.
Page 113 of 280
111
Lights and visibility
Switching on the anti-dazzle function
– Press button A
⇒ Fig. 67. Control lamp is lit.
Anti-dazzle function
The anti-dazzle function is activated every time the ignition is switched on.
The green indicator lamp lights up in the rear vision mirror housing.
When the anti-dazzle function is enabled, the interior rear vision mirror will
darken automatically according to the amount of light it receives. The anti-
dazzle function is cancelled if reverse gear is engaged.
Note
● The automatic anti-dazzle function will only work properly if the sun
blind* for the rear window is retracted and there are no other objects pre-
venting light from reaching the interior rear vision mirror.
● If you have to stick any type of sticker on the windscreen, do not do so in
front of the sensors. Doing so could prevent the anti-dazzle function from
working well or even from working at all.
Folding in the exterior mirrors
The exterior mirrors of the vehicle may be folded in. For this, press the mir-
ror housing towards the vehicle.
Note
Before washing the vehicle with an automatic car wash, fold in the exterior
mirrors to avoid damage. Electric exterior mirrors*
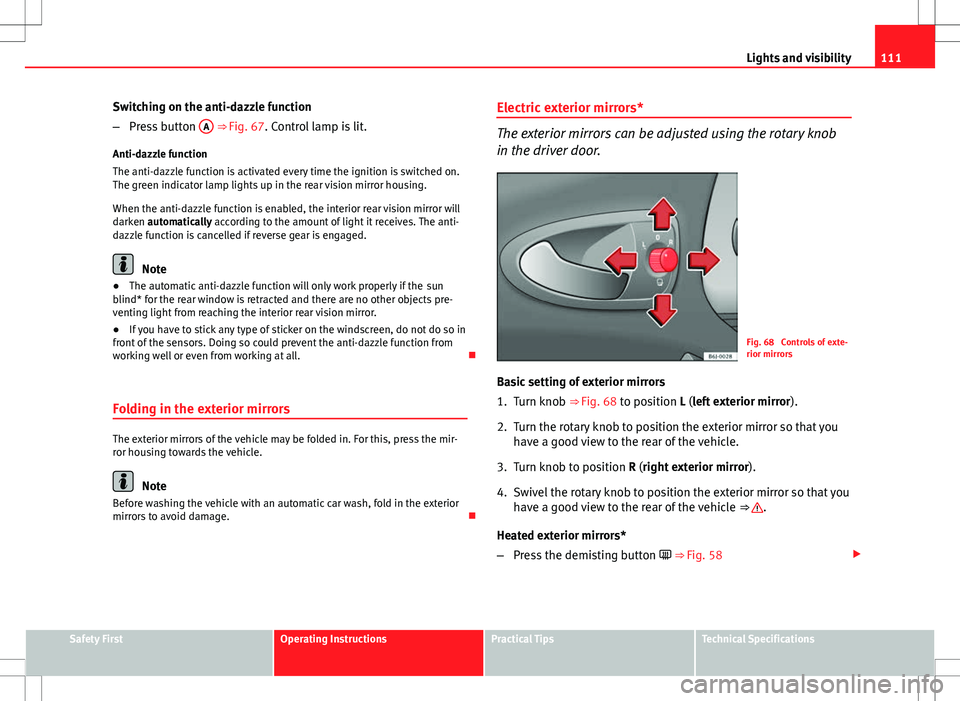
The exterior mirrors can be adjusted using the rotary knob
in the driver door.
Fig. 68 Controls of exte-
rior mirrors
Basic setting of exterior mirrors
1. Turn knob ⇒ Fig. 68 to position L (left exterior mirror ).
2. Turn the rotary knob to position the exterior mirror so that you have a good view to the rear of the vehicle.
3. Turn knob to position R (right exterior mirror ).
4. Swivel the rotary knob to position the exterior mirror so that you have a good view to the rear of the vehicle ⇒
.
Heated exterior mirrors*
– Press the demisting button ⇒ Fig. 58
Safety FirstOperating InstructionsPractical TipsTechnical Specifications
Page 130 of 280
128Air conditioning
Air conditioning
Heating
Controls
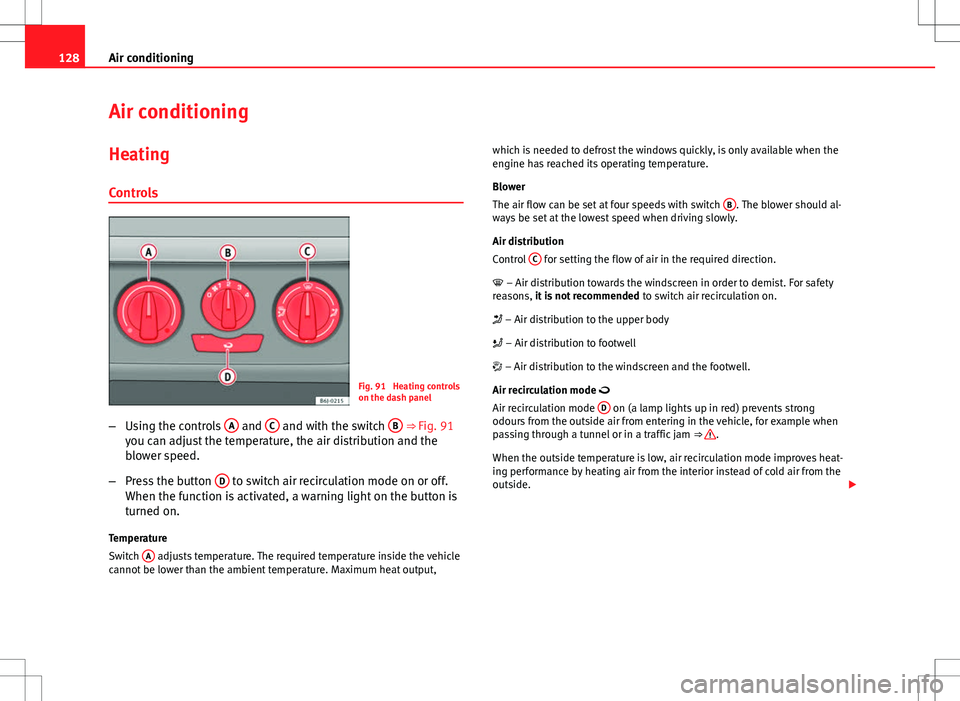
Fig. 91 Heating controls
on the dash panel
– Using the controls A
and C and with the switch B ⇒ Fig. 91
you can adjust the temperature, the air distribution and the
blower speed.
– Press the button D
to switch air recirculation mode on or off.
When the function is activated, a warning light on the button is
turned on.
Temperature
Switch A
adjusts temperature. The required temperature inside the vehicle
cannot be lower than the ambient temperature. Maximum heat output, which is needed to defrost the windows quickly, is only available when the
engine has reached its operating temperature.
Blower
The air flow can be set at four speeds with switch
B
. The blower should al-
ways be set at the lowest speed when driving slowly.
Air distribution
Control C
for setting the flow of air in the required direction.
– Air distribution towards the windscreen in order to demist. For safety
reasons, it is not recommended to switch air recirculation on.
– Air distribution to the upper body
– Air distribution to footwell
– Air distribution to the windscreen and the footwell.
Air recirculation mode
Air recirculation mode D
on (a lamp lights up in red) prevents strong
odours from the outside air from entering in the vehicle, for example when
passing through a tunnel or in a traffic jam ⇒
.
When the outside temperature is low, air recirculation mode improves heat-
ing performance by heating air from the interior instead of cold air from the
outside.