2012 NISSAN QASHQAI ESP
[x] Cancel search: ESPPage 203 of 297

Downloaded from www.Manualslib.com manuals search engine and varies the brake fluid pressure to prevent each
wheel from locking and sliding. By preventing each
wheel from locking, the system helps the driver to
maintain steering control and helps to minimise
swerving and spinning on slippery surfaces.
Using the system
Depress the brake pedal and hold it down. Depress
the brake pedal with firm steady pressure, but do
not pump the brakes. The ABS will operate to pre-
vent the wheels from locking up. Steer the vehicle to
avoid obstacles.
WARNING
Do not pump the brake pedal. Doing so may in-
crease the stopping distance.
Self-test feature
The ABS includes electronic sensors, electric
pumps, hydraulic solenoids and a computer. The
computer has a built-in diagnostic feature that tests
the system each time you start the engine and move
thevehicleatalowspeedinforwardorreverse.
When the self-test occurs, you may hear a “clunk”
noise and/or feel a pulsation in the brake pedal. This
is normal and does not indicate a malfunction. If the
computer senses a malfunction, it switches the ABS
off and illuminates the ABS warning light on the
instrument panel. The brake system then operates
normally, but without anti-lock assistance.
If the ABS warning light illuminates during the self-
test or while driving, have the vehicle checked by a
NISSAN dealer or qualified workshop.
Normal operation
The ABS will not initiate at speeds below 5 to 10
km/h (3 to 6 MPH). The speeds will vary according
to road conditions.
When the ABS senses that one or more wheels are
close to locking up, the actuator rapidly applies and
releases hydraulic pressure. This action is similar to
pumping the brakes very quickly. You may feel a
pulsation in the brake pedal and hear a noise from
the actuator under the bonnet when it is operating.
This is normal and indicates that the ABS is working
properly. However, the pulsation may indicate that
road conditions are hazardous and extra care is re-
quired while driving. When accelerating, driving on slippery surfaces or
suddenly avoiding obstacles on roads, the vehicle
might swerve or slip. The Electronic Stability Pro-
gramme (ESP) system continuously monitors and
compares the driver’s intended speed and the travel
direction. The system adjusts wheel brake pressure
and engine torque to assist in improving vehicle sta-
bility.
When the ESP system is operating, the “SLIP”
indicator light () in the combination meter
blinks.
When only the traction control (TCS) system in
the ESP system is operating, the “SLIP” indica-
tor light (
) in the combination meter will also
blink.
If the “SLIP” indicator light () blinks, the
road conditions are slippery. Be sure to drive
carefully. See “Warning/indicator lights and au-
dible reminders” in the “2. Instruments and
controls” section.
Indicator light
If a malfunction occurs in the system, the “SLIP”
indicator light (
) and the ESP indicator light
() come on in the combination meter.
As long as these indicator lights are on, the trac-
tion control function is cancelled.
The ESP system uses Active Brake Limited Slip
(ABLS) system to improve vehicle traction. The Ac-
tive Brake Limited Slip (ABLS) system works when
one of the driving wheels is spinning on a slippery
ELECTRONIC STABILITY
PROGRAMME (ESP) SYSTEM
(where fitted)
5-40Starting and driving
Page 204 of 297
Downloaded from www.Manualslib.com manuals search engine surface. The Active Brake Limited Slip (ABLS) sys-
tem, brakes the spinning wheel to distribute the driv-
ing power to the other driving wheel.
If the vehicle is operated with the ESP system turned
off, all ESP and TCS functions will be turned off.
The Active Brake Limited Slip (ABLS) system and
ABS will still operate with the ESP system off. If the
Active Brake Limited Slip (ABLS) system or the ABS
is activated, the “SLIP” indicator light (
) will
blink and you may hear a clunk noise and/or feel a
pulsation in the brake pedal. This is normal and does
not indicate a malfunction.
While the ESP system is operating, you may feel a
pulsation in the brake pedal and hear a noise or
vibration from under the bonnet. This is normal and
indicates that the ESP system is working properly.
The ESP computer has a built in diagnostic feature
that tests the system each time the engine is started
and the vehicle moves forwards or reverses at a
slow speed. When the self-test occurs, you may
hear a clunk noise and/or feel a pulsation in the
brake pedal. This is normal and is not an indication
of a malfunction.
WARNING
The ESP system is designed to help improve
driving stability but does not prevent accidents
caused by abrupt steering operation at high
speeds, or careless or dangerous driving
techniques. Reduce vehicle speed and be es-
pecially careful when driving and cornering on
slippery surfaces. Always drive carefully.
If engine related parts, such as a muffler, are
not standard equipment or are extremely de-
teriorated, the ESP OFF indicator light (
)
and/or the “SLIP” indicator light () may
illuminate.
If brake related parts, such as brake pads,
rotors and callipers, are not standard equip-
ment or are extremely deteriorated, the ESP
system may not operate properly and the ESP
OFF indicator light (
) and/or the “SLIP”
indicator light () may illuminate.
Do not modify the vehicle’s suspension. If
suspension parts, such as shock absorbers,
struts, springs, stabiliser bars and bushings,
are not NISSAN-approved or are extremely
deteriorated, the ESP system may not oper-
ate properly. This could adversely affect ve-
hicle handling performance and the ESP OFF
indicator light (
) and/or the “SLIP” indi-
cator light () may illuminate.
When driving on extremely inclined surfaces,
such as higher banked corners, the ESP sys-
tem may not operate properly and the ESP
OFF indicator light (
) and/or the “SLIP”
indicator light () may illuminate. Do not
drive on these types of roads. If ESP OFF indi-
cator light
does illuminate after driving
on extreme surfaces, restart the engine to re-
set the ESP system.
If wheels or tyres other than the
recommended ones are used, the ESP sys-
tem may not operate properly and the ESP OFF indicator light (
) and/or the “SLIP”
indicator light () may illuminate.
The ESP system is not a substitute for winter
tyres or snow chains on a snow covered road.
NOTE
The ESP system should be switched on under
normal circumstances although it may be ad-
vantageous to switch off the ESP system to
allow wheelspin under the following condi-
tions:
– When driving in deep snow or mud.
– When trying to rock a vehicle free that is stuck in snow.
– When driving with snow chains.
If the ESP system has been switched off, drive
carefully with reduced speed. When road con-
ditions allow, ESP should be switched back
on.
Starting and driving5-41
Page 205 of 297
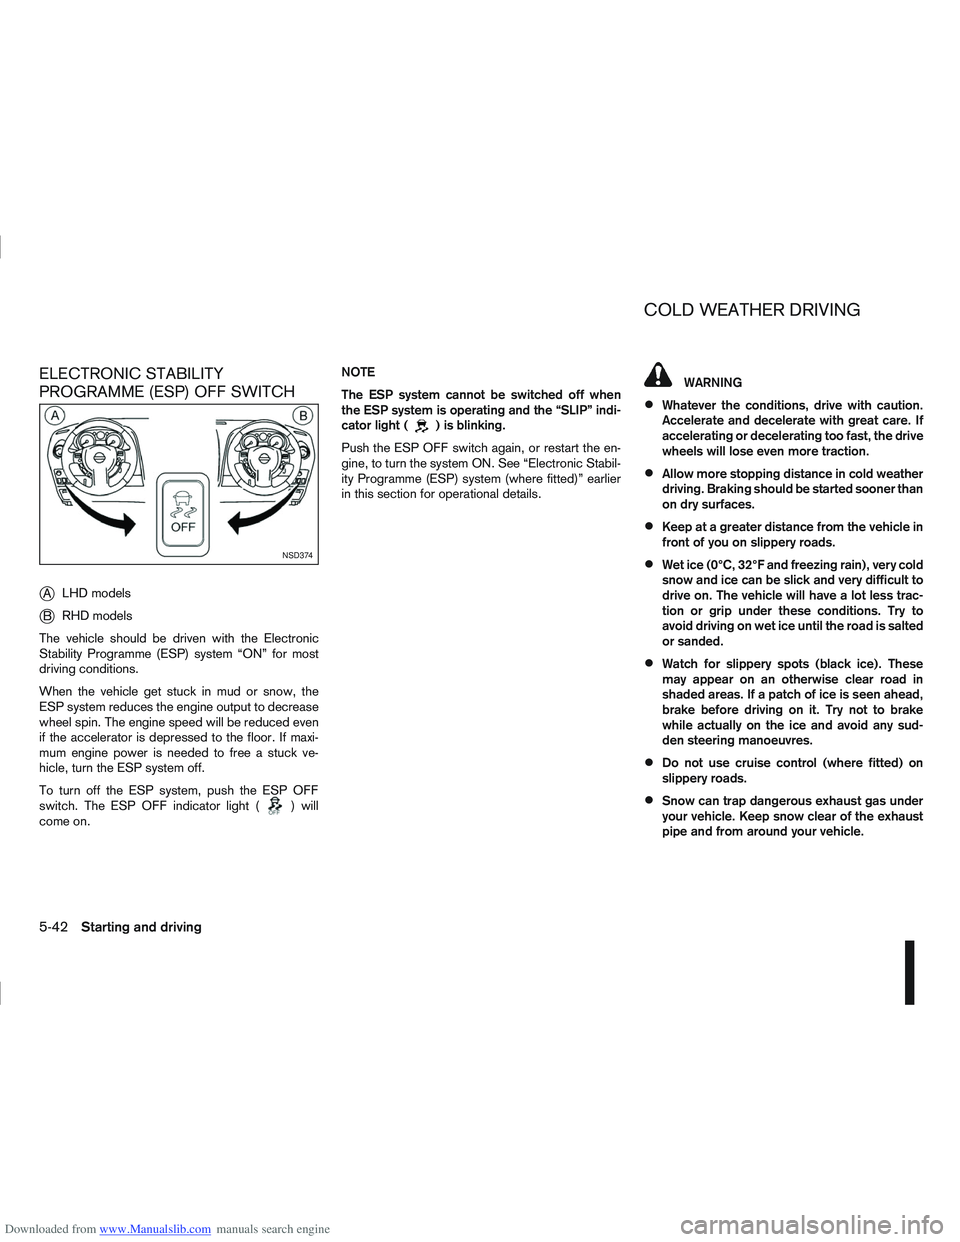
Downloaded from www.Manualslib.com manuals search engine ELECTRONIC STABILITY
PROGRAMME (ESP) OFF SWITCH
j
ALHD models
jB RHD models
The vehicle should be driven with the Electronic
Stability Programme (ESP) system “ON” for most
driving conditions.
When the vehicle get stuck in mud or snow, the
ESP system reduces the engine output to decrease
wheel spin. The engine speed will be reduced even
if the accelerator is depressed to the floor. If maxi-
mum engine power is needed to free a stuck ve-
hicle, turn the ESP system off.
To turn off the ESP system, push the ESP OFF
switch. The ESP OFF indicator light (
) will
come on. NOTE
The ESP system cannot be switched off when
the ESP system is operating and the “SLIP” indi-
cator light (
) is blinking.
Push the ESP OFF switch again, or restart the en-
gine, to turn the system ON. See “Electronic Stabil-
ity Programme (ESP) system (where fitted)” earlier
in this section for operational details.
WARNING
Whatever the conditions, drive with caution.
Accelerate and decelerate with great care. If
accelerating or decelerating too fast, the drive
wheels will lose even more traction.
Allow more stopping distance in cold weather
driving. Braking should be started sooner than
on dry surfaces.
Keep at a greater distance from the vehicle in
front of you on slippery roads.
Wet ice (0°C, 32°F and freezing rain), very cold
snow and ice can be slick and very difficult to
drive on. The vehicle will have a lot less trac-
tion or grip under these conditions. Try to
avoid driving on wet ice until the road is salted
or sanded.
Watch for slippery spots (black ice). These
may appear on an otherwise clear road in
shaded areas. If a patch of ice is seen ahead,
brake before driving on it. Try not to brake
while actually on the ice and avoid any sud-
den steering manoeuvres.
Do not use cruise control (where fitted) on
slippery roads.
Snow can trap dangerous exhaust gas under
your vehicle. Keep snow clear of the exhaust
pipe and from around your vehicle.
NSD374
COLD WEATHER DRIVING
5-42Starting and driving
Page 226 of 297
Downloaded from www.Manualslib.com manuals search engine Always follow the manufacturer’s instructions
supplied with the wax.
Do not use a wax containing any abrasives,
cutting compounds or cleaners that may dam-
age the vehicle finish.
If the vehicle surface cannot polish easily, ap-
ply a road tar remover prior to waxing the ve-
hicle.
Machine compounding or aggressive polish-
ing on a base coat/clear coat paint finish may
dull the finish or leave swirl marks.
CLEANING GLASS
Use glass cleaner to remove smoke and dust film
from the glass surfaces. It is normal for glass to
become coated with a film after the vehicle is parked
in the hot sun. Glass cleaner and a soft cloth will
easily remove this film.
CLEANING REAR-VIEW CAMERA
(where fitted)
Clean the transparent camera cover regularly. If dirt,
rain or snow attaches to the cover, the monitor may
not display objects clearly.
CAUTION
Do not use alcohol, benzine or thinner to clean
the transparent camera cover. This will cause
discoloration. To clean the cover, first use a
cloth dampened with diluted mild cleaning
agent and then wipe with a dry cloth.
Do not use body wax on the transparent cam-
era cover.
When washing the vehicle with a high pres-
sure water spray, make sure not to spray it
around the transparent camera cover. Other-
wise, water may enter the camera unit caus-
ing water condensation on the lens and it may
result in a malfunction or an electric shock.
UNDERBODY
In areas where road salt is used in the winter, the
vehicle’s underbody must be cleaned regularly. This
will prevent dirt and salt from building up and caus-
ing underbody and suspension corrosion.
Before the winter period and again in the spring, the
underseal must be checked and, if necessary, re-
treated.
CARE OF WHEELS
Wash the wheels when washing the vehicle to
maintain their appearance.
Clean the inner side of the wheels when the
wheel is changed or the underside of the vehicle
is washed.
Do not use abrasive cleaners when washing the
wheels.
Inspect wheel rims regularly for dents or corro-
sion. This may cause loss of pressure or damage
the tyre bead.
NISSAN recommends that the road wheels be
waxed to protect against road salt in areas where
it is used during winter.
CLEANING ALLOY WHEELS
Wash the wheels regularly with a sponge damp-
ened in a mild soap solution, especially during win-
ter in areas where road salt is used. The salt residue
from road salt could discolour the wheels if it is not
washed off regularly.
CAUTION
Follow the directions as described below in order
to avoid staining or discolouring of the wheels.
Do not use a cleaner that contains strong con-
tents of acid or alkali to clean the wheels.
Do not apply wheel cleaner when the wheels
are hot. The wheel temperature should be the
same as ambient temperature.
Rinse the wheel to completely remove the
cleaner within 15 minutes after the cleaner
has been applied.
CHROME PARTS
Clean all chrome parts regularly with a nonabrasive
chrome polish to maintain the finish.
Appearance and care7-3
Page 228 of 297
Downloaded from www.Manualslib.com manuals search engine The seat belts can be cleaned by wiping them with
a sponge dampened in a mild soap solution.
Allow the belts to dry completely in the shade before
using them.MOST COMMON FACTORS
CONTRIBUTING TO VEHICLE
CORROSION
The accumulation of moisture-retaining dirt and
debris in body panel sections, cavities, and other
areas.
Damage to the paint surface and other protec-
tive coatings caused by gravel and stone chips
or minor traffic accidents.
ENVIRONMENTAL FACTORS
INFLUENCE THE RATE OF
CORROSION
Moisture
Accumulation of sand, dirt and water on the vehicle
body underside can accelerate corrosion. Wet floor
coverings will not dry completely inside the vehicle,
and should be removed for drying to avoid floor pan-
els corrosion.
Relative humidity
Corrosion will be accelerated in areas of high rela-
tive humidity, especially those areas where the tem-
peratures stay above freezing, where atmospheric
pollution exists and road salt is used.
Temperature
A temperature increase will accelerate the rate of
corrosion to those parts which are not well venti-
lated.Corrosion will also accelerate in areas where the
temperatures stay above freezing.
Air pollution
Industrial pollution, the presence of salt in the air in
coastal areas, or heavy road salt use will accelerate
the corrosion process. Road salt will also acceler-
ate the disintegration of paint surfaces.
TO PROTECT YOUR VEHICLE FROM
CORROSION
Wash and wax your vehicle often to keep the
vehicle clean.
Always check for minor damage to the paint sur-
face and if any exists, repair it as soon as pos-
sible.
Keep the drain holes at the bottom of the doors
and back door opened to avoid water accumula-
tion.
Check the vehicle underbody for accumulation
of sand, dirt or salt. If present, wash with water
as soon as possible.
CAUTION
Never remove dirt, sand or other debris from
the passenger compartment by washing it out
with a hose. Remove dirt with a vacuum
cleaner or broom.
Never allow water or other liquids to come in
contact with electronic components inside the
vehicle as this may damage them.
CORROSION PROTECTION
Appearance and care7-5
Page 233 of 297

Downloaded from www.Manualslib.com manuals search engine Your new NISSAN has been designed to have mini-
mum maintenance requirements with longer service
intervals, to save you both time and money. How-
ever, some day-to-day and regular maintenance is
essential to maintain your NISSAN’s good mechani-
cal condition, as well as its emission and engine
performance.
It is the owner’s responsibility to make sure that the
specified maintenance, as well as general mainte-
nance, is performed.
As the vehicle owner, you are the only one who can
ensure that your vehicle receives the proper mainte-
nance care.
SCHEDULED MAINTENANCE
For your convenience, the required scheduled main-
tenance items are described and listed in the sepa-
rate Warranty Information and Maintenance book-
let. You must refer to that booklet to ensure that
necessary maintenance is performed on your
NISSAN vehicle at regular intervals.
GENERAL MAINTENANCE
General maintenance includes those items which
should be checked during normal day-to-day opera-
tion of the vehicle. They are essential if your vehicle
is to continue to operate properly. It is your respon-
sibility to perform these procedures regularly as pre-
scribed.
Performing general maintenance checks requires
minimal mechanical skill and a few general automo-
tive tools.These checks or inspections can be done by your-
self, a qualified technician or, if you prefer, your
NISSAN dealer or qualified workshop.
WHERE TO GO FOR SERVICE
If maintenance service is required or your vehicle
appears to malfunction, have the systems checked
and tuned by an authorised NISSAN dealer or quali-
fied workshop.
During the normal day-to-day operation of the ve-
hicle, general maintenance should be performed
regularly as prescribed in this section. If you detect
any unusual sounds, vibrations or smell, be sure to
check for the cause or have a NISSAN dealer or
qualified workshop do it promptly. In addition, you
should notify a NISSAN dealer or qualified work-
shop if repairs are required.
When performing any checks or maintenance work,
closely observe the “Maintenance precautions” later
in this section.
EXPLANATION OF GENERAL
MAINTENANCE ITEMS
Additional information on the following items with
an asterisk (*) is found later in this section.
The maintenance items listed here should be per-
formed from time to time, unless otherwise speci-
fied.
Outside the vehicle
Back door, doors and bonnet:
Check that the back door, all doors and the bonnet
operate properly. Also ensure that all latches lock
securely. Lubricate hinges and latches if necessary.
Make sure that the secondary latch keeps the bon-
net from opening when the primary latch is released.
When driving in areas using road salt or other cor-
rosive materials, check for lubrication frequently.
MAINTENANCE REQUIREMENTS
GENERAL MAINTENANCE
8-2Maintenance and do-it-yourself
Page 240 of 297
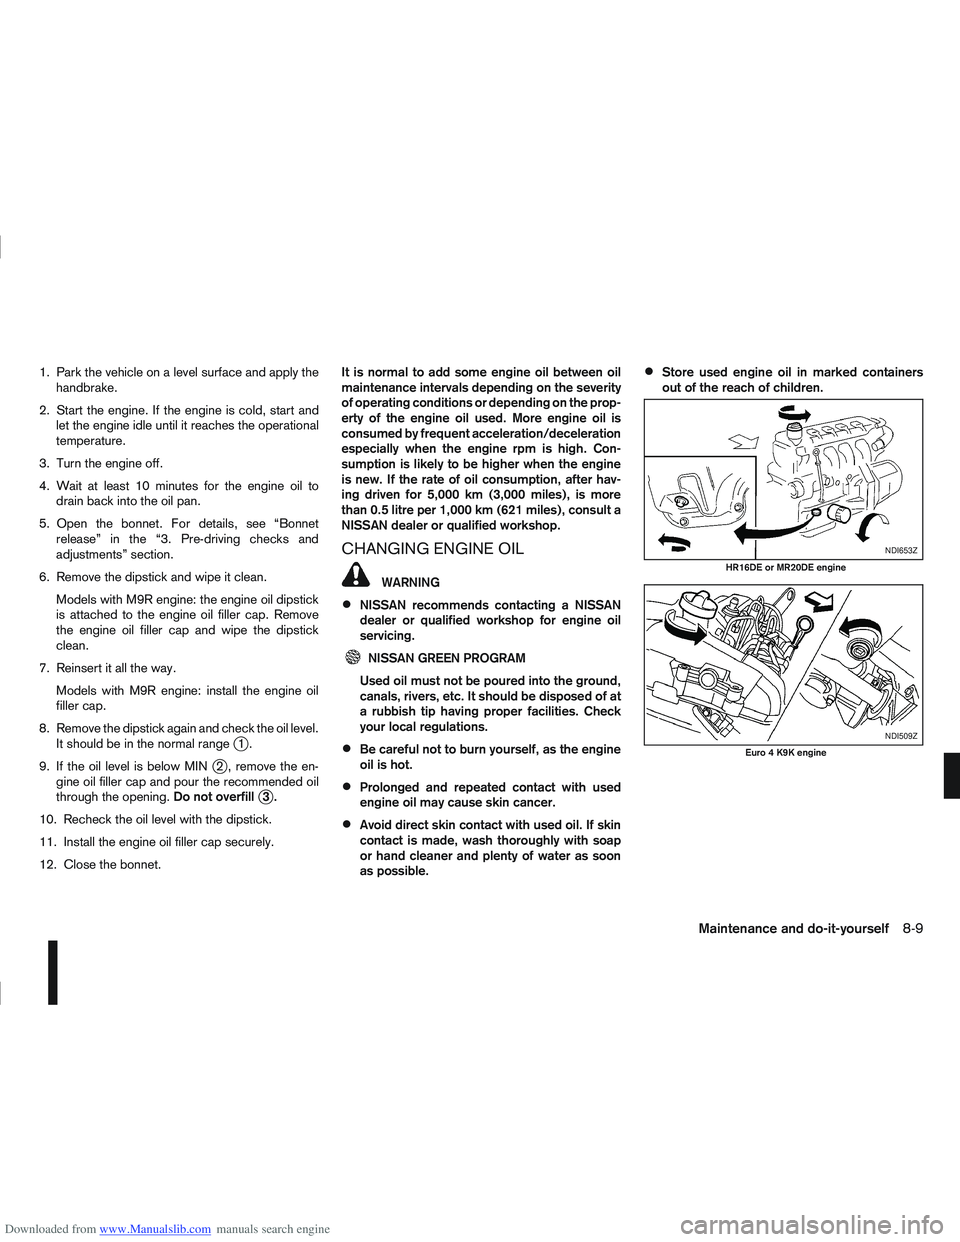
Downloaded from www.Manualslib.com manuals search engine 1. Park the vehicle on a level surface and apply thehandbrake.
2. Start the engine. If the engine is cold, start and let the engine idle until it reaches the operational
temperature.
3. Turn the engine off.
4. Wait at least 10 minutes for the engine oil to drain back into the oil pan.
5. Open the bonnet. For details, see “Bonnet release” in the “3. Pre-driving checks and
adjustments” section.
6. Remove the dipstick and wipe it clean. Models with M9R engine: the engine oil dipstick
is attached to the engine oil filler cap. Remove
the engine oil filler cap and wipe the dipstick
clean.
7. Reinsert it all the way. Models with M9R engine: install the engine oil
filler cap.
8. Remove the dipstick again and check the oil level. It should be in the normal range
j1.
9. If the oil level is below MIN
j2 , remove the en-
gine oil filler cap and pour the recommended oil
through the opening. Do not overfill
j3.
10. Recheck the oil level with the dipstick.
11. Install the engine oil filler cap securely.
12. Close the bonnet. It is normal to add some engine oil between oil
maintenance intervals depending on the severity
of operating conditions or depending on the prop-
erty of the engine oil used. More engine oil is
consumed by frequent acceleration/deceleration
especially when the engine rpm is high. Con-
sumption is likely to be higher when the engine
is new. If the rate of oil consumption, after hav-
ing driven for 5,000 km (3,000 miles), is more
than 0.5 litre per 1,000 km (621 miles), consult a
NISSAN dealer or qualified workshop.
CHANGING ENGINE OIL
WARNING
NISSAN recommends contacting a NISSAN
dealer or qualified workshop for engine oil
servicing.
NISSAN GREEN PROGRAM
Used oil must not be poured into the ground,
canals, rivers, etc. It should be disposed of at
a rubbish tip having proper facilities. Check
your local regulations.
Be careful not to burn yourself, as the engine
oil is hot.
Prolonged and repeated contact with used
engine oil may cause skin cancer.
Avoid direct skin contact with used oil. If skin
contact is made, wash thoroughly with soap
or hand cleaner and plenty of water as soon
as possible.
Store used engine oil in marked containers
out of the reach of children.
NDI653Z
HR16DE or MR20DE engine
NDI509Z
Euro 4 K9K engine
Maintenance and do-it-yourself8-9
Page 273 of 297

Downloaded from www.Manualslib.com manuals search engine Unit: mm (in)
5–seater 7–seater
Overall length 4,332 (170.6) 4,542 (178.8)
Overall width 1,780 (70.1) 1,780 (70.1)
Overall height 1,605 (63.2) 1,645 (64.8) 1,622 (63.9)*
Front tread 1,540 (60.6) 1,540 (60.6)
Rear tread 1,545 (60.8) 1,550 (61)
Wheelbase 2,630 (103.5) 2,765 (108.9)
* : with roof rail When planning to travel in another country,
you
should first find out if the fuel available is suitable for
your vehicle’s engine.
Using fuel with too low octane/cetane rating may
cause engine damage. Therefore, avoid taking your
vehicle to areas where appropriate fuel is not avail-
able.
When transferring your vehicle registration to an-
other country, check with the appropriate authori-
ties that the vehicle complies with the requirements
as it may not be possible to adapt it. In some cases,
a vehicle cannot meet the legal requirements and in
other cases, it may be necessary to modify the ve-
hicle to meet specific laws and regulations.
The laws and regulations for motor vehicle emission
control and safety standards vary according to the
country; therefore, vehicle specifications may differ.
NISSAN is not responsible for any inconvenience
when the vehicle is taken and registered into an-
other country. The necessary modifications,
transportation and registration are the owner’s
responsibility.
VEHICLE IDENTIFICATION PLATE
The plate is affixed as shown.
VEHICLE IDENTIFICATION NUMBER
(VIN) (chassis number)
The number is stamped as shown.
NTI171Z
NTI153Z
DIMENSIONSWHEN TRAVELLING OR
TRANSFERRING YOUR
REGISTRATION TO ANOTHER
COUNTRY VEHICLE IDENTIFICATION
9-8Technical information