2012 NISSAN CUBE battery
[x] Cancel search: batteryPage 128 of 331
3-16Pre-driving checks and adjustments
HOW TO USE REMOTE KEYLESS
ENTRY FUNCTION
WARNING
.Radio waves could adversely affect
electric medical equipment. Those
who use a pacemaker should con-
tact the electric medical equipment
manufacturer for the possible influ-
ences before use.
. The Intelligent Key transmits radio
waves when the buttons are
pushed. The FAA advises that the
radio waves may affect aircraft na-
vigation and communication sys-
tems. Do not operate the
Intelligent Key while on an airplane.
Make sure the buttons are not
operated unintentionally when the
unit is stored during a flight.
CAUTION
.Do not allow the Intelligent Key,
which contains electrical compo-
nents, to come into contact with
water or salt water. This could affect the system function.
. Do not drop the Intelligent Key.
. Do not strike the Intelligent Key
sharply against another object.
. Do not change or modify the Intel-
ligent Key.
. Wetting may damage the Intelligent
Key. If the Intelligent Key gets wet,
immediately wipe until it is comple-
tely dry.
. If the outside temperature is below
148F( −108C) degrees, the battery of
the Intelligent key may not function
properly.
. Do not place the Intelligent Key for
an extended period in an area where
temperatures exceed 1408F (608C) .
. Do not attach the Intelligent Key
with a key holder that contains a
magnet.
. Do not place the Intelligent Key near
equipment that produces a mag-
netic field, such as a TV, audio
equipment, personal computers or
cellular phone.
The remote keyless entry function can operate
all door locks using the remote keyless entry function of the Intelligent Key. The remote
keyless entry function can operate at a distance
of approximately 33 ft (10 m) from the vehicle.
(The operating distance depends upon the
conditions around the vehicle.)
The remote keyless entry function will not
operate:
.
When the Intelligent Key is not within the
operational range.
. When the doors are open or not closed
securely.
. When the Intelligent Key battery is dis-
charged.
The remote keyless entry function can also
operate the vehicle alarm.
Page 143 of 331
If you use the system with the engine not
running (ignition ON or ACC) for a long
time, it will discharge the battery, and the
engine will not start.
Reference symbols:
“Example” — Words marked in quotes refer to a
key shown only on the display. These keys can
be selected by touching the screen.
HOW TO USE TOUCH SCREEN
WARNING
.ALWAYS give your full attention to
driving.
. Avoid using vehicle features that
could distract you. If distracted,
you could lose control of your
vehicle and cause an accident.
CAUTION
.The glass screen on the liquid
crystal display may break if it is hit
with a hard or sharp object. If the
glass screen breaks, do not touch it.
Doing so could result in an injury. .
To clean the display, never use a
rough cloth, alcohol, benzine, thin-
ner or any kind of solvent or paper
towel with a chemical cleaning
agent. They will scratch or deterio-
rate the panel.
. Do not splash any liquid such as
water or car fragrance on the dis-
play. Contact with liquid will cause
the system to malfunction.
To help ensure safe driving, some functions
cannot be operated while driving.
The on-screen functions that are not available
while driving will be “grayed out” or muted.
Park the vehicle in a safe location and then
operate the navigation system.
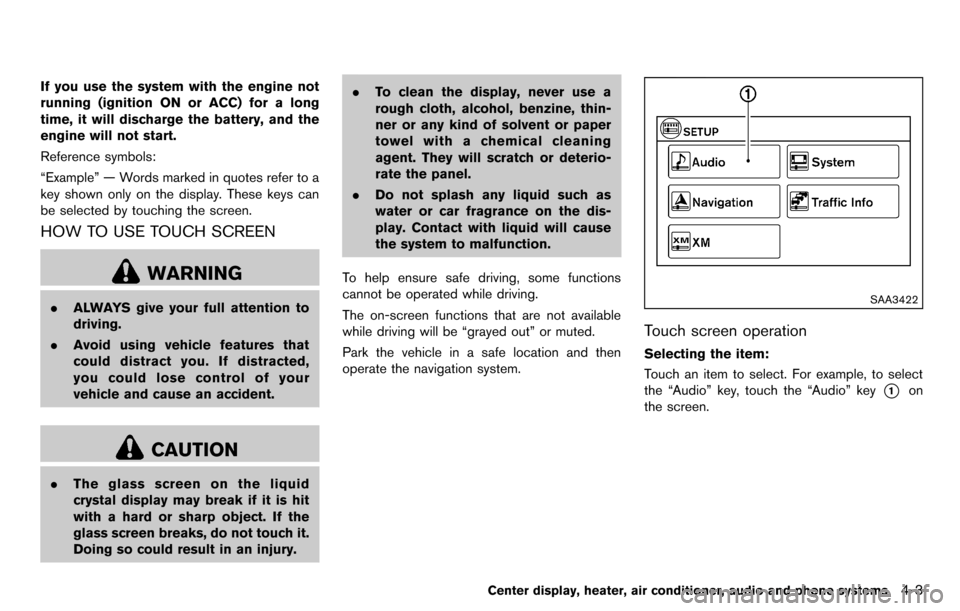
SAA3422
Touch screen operation
Selecting the item:
Touch an item to select. For example, to select
the “Audio” key, touch the “Audio” key
*1on
the screen.
Center display, heater, air conditioner, audio and phone systems4-3
Page 161 of 331
Static and flutter: During signal interference from
buildings, large hills or due to antenna position,
usually in conjunction with increased distance
from the station transmitter, static or flutter can
be heard. This can be reduced by lowering the
treble setting to reduce the treble response.
Multipath reception: Because of the reflective
characteristics of FM signals, direct and re-
flected signals reach the receiver at the same
time. The signals may cancel each other,
resulting in momentary flutter or loss of sound.
AM radio reception:
AM signals, because of their low frequency, can
bend around objects and skip along the ground.
In addition, the signals can be bounced off the
ionosphere and bent back to earth. Because of
these characteristics. AM signals are also
subject to interference as they travel from
transmitter to receiver.
Fading: Occurs while the vehicle is passing
through freeway underpasses or in areas with
many tall buildings. It can also occur for several
seconds during ionospheric turbulence even in
areas where no obstacles exist.
Static: Caused by thunderstorms, electrical
power lines, electric signs and even traffic lights.Satellite radio reception (if so equipped):
When the satellite radio is first installed or the
battery has been replaced, the satellite radio
may not work properly. This is not a malfunction.
Wait more than 10 minutes with the satellite
radio ON and the vehicle away from any metal or
large buildings for the satellite radio to receive all
of the necessary data.
The satellite radio mode requires an active XM
®
Satellite Radio subscription. The satellite radio is
not available in Alaska, Hawaii and Guam.
Satellite radio performance may be affected if
cargo carried on the roof blocks the satellite
radio signal.
If possible, do not put cargo near the satellite
antenna.
A buildup of ice on the satellite radio antenna
can affect satellite radio performance. Remove
the ice to restore satellite radio reception.
SAA0480
Compact Disc (CD) player
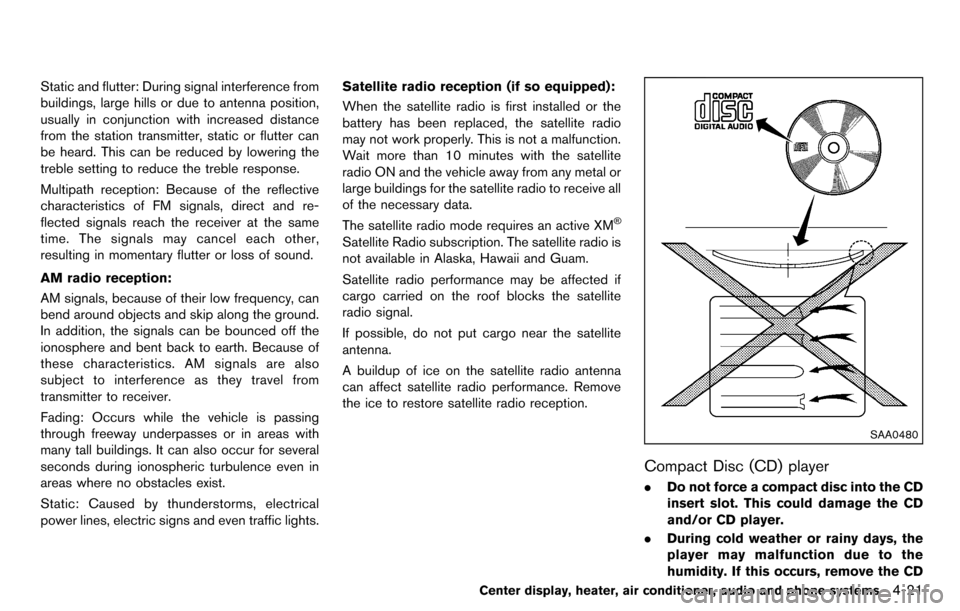
. Do not force a compact disc into the CD
insert slot. This could damage the CD
and/or CD player.
. During cold weather or rainy days, the
player may malfunction due to the
humidity. If this occurs, remove the CD
Center display, heater, air conditioner, audio and phone systems4-21
Page 173 of 331
TUNE (Tuning):
Push the TUNE button
orfor manual
tuning.
SEEK tuning:
Push the SEEK button
orto tune from
low to high or high to low frequencies and to
stop at the next broadcasting station.
SCAN tuning:
Push the SCAN tuning button to tune from low
to high frequencies and stops at each broad-
casting station for 5 seconds. Pushing the
button again during this 5 seconds period will
stop SCAN tuning and the radio will remain
tuned to that station.
If the SCAN tuning button is not pushed within 5
seconds, SCAN tuning moves to the next
station.
toStation memory operations:
Twelve stations can be set for the FM band (6
each for FM1 and FM2) and 6 stations can be
set for the AM band.
1. Choose the radio band AM, FM1 or FM2 using the radio band select button.
2. Tune to the desired station using the SEEK, SCAN or TUNE button. 3. Select the desired station and push and
hold the desired station preset buttons 1 to
6 until a beep sound is heard. (The radio
mutes when the select button is pushed.)
4. The station indicator will then come on and the sound will resume. Memorizing is now
complete.
5. Other buttons can be set in the same manner.
If the battery cable is disconnected, or if the fuse
blows, the radio memory will be erased. In that
case, reset the desired stations.
Compact Disc (CD) player operation
Place the ignition switch in the ACC or ON
position, and insert the CD into the slot with the
label side facing up. The CD will be guided
automatically into the slot and start playing.
After loading the disc, the number of tracks on
the disc will appear on the display.
If the radio is already operating, it will auto-
matically turn off and the CD will play.
If the system has been turned off while the CD
was playing, pushing the PWR button will start
the CD.
MP3 or WMA CDs are not supported with this
CD player. If an MP3 or WMA CD is inserted
into the slot, the counter on the audio display automatically advances without sound. However
this is a specification of the CD mechanism and
not a malfunction.
Do not use 3.1 in (8 cm) discs.
CD PLAY:
When the CD button is pushed with the system
off and the CD loaded, the system will turn on
and the CD will start to play.
When the CD button is pushed with the CD
loaded and the radio playing, the radio will
automatically be turned off and the CD will start
to play.
FF (Fast Forward) , REW (Rewind):
Push the FF or REW button while a CD is
playing to fast-forward or rewind through the
track.
When the button is released, the CD will return
to normal play speed.
APS (Automatic Program Search) FF,
APS REW:
When the
of the SEEK button is pushed
while the CD is being played, the next track or
the current track on the CD will start to play from
its beginning. Push several times to skip through
tracks. The CD will advance the number of times
Center display, heater, air conditioner, audio and phone systems4-33
Page 177 of 331
Radio operation
Radio (FM/AM) band select:
Pushing the FM·AM radio band select button will
change the band as follows:
AM ?FM1 ?FM2 ?AM
When the stereo broadcast signal is weak, the
radio will automatically change from stereo to
monaural reception.
When the radio band select button is pushed
while the ignition switch is in the ACC or ON
position, the radio will come on at the station last
played.
TUNE (Tuning):
Push the TUNE button
orfor manual
tuning. To move quickly through the stations,
push and hold the TUNE button.
SEEK tuning:
Push the SEEK button
orto tune from
low to high or high to low frequencies and to
stop at the next broadcasting station.
SCAN tuning:
Push the SCAN button to tune from low to high
frequencies and stops at each broadcasting
station for 5 seconds. Pushing the button again during this 5 seconds period will stop SCAN
tuning and the radio will remain tuned to that
station.
If the SCAN tuning button is not pushed within 5
seconds, SCAN tuning moves to the next
station.
toStation memory operations:
12 stations can be set for the FM band (6 each
for FM1 and FM2), and 6 can be set for the AM
band for easy access.
1. Choose the radio band using the radio band select button.
2. Tune to the desired station using the SEEK, SCAN or TUNE button.
3. Push and hold the desired radio station preset button
tountil a beep sound is
heard. (The radio mutes when the radio
station preset button is pushed.)
4. The station indicator will then come on and the sound will resume. Memorizing is now
complete.
5. Other buttons can be set in the same manner.
If the battery cable is disconnected, or if the fuse
opens, the radio memory will be erased. In that
case, reset the desired stations. Radio Data System (RDS):
RDS stands for Radio Data System, and is a
data information service transmitted by some
radio stations on the FM band (not AM band)
encoded within a regular radio broadcast.
Currently, most RDS stations are in large cities,
but many stations are now considering broad-
casting RDS data.
RDS can display:
.
Station call sign, such as “WHFR 98.3”.
. Station name, such as “The Groove”.
. Music or programming type such as “Clas-
sical”, “Country” or “Rock”.
. Traffic reports about delays or construction.
If the station broadcasts RDS information, the
RDS icon is displayed.
RADIO DISPLAY change:
When the DISP button is pushed during the FM
radio mode, the radio display will change in the
following order.
FM radio:
Frequency ↔PS/PTY
In the FM radio mode, pressing the DISP button
will switch the frequency display to the PTY
display (if available) , and if the DISP button is
not pushed again within 5 seconds, it will
automatically switch to the PS display. If PTY
Center display, heater, air conditioner, audio and phone systems4-37
Page 179 of 331
RANDOM (RDM)/REPEAT (RPT):
When the RPT button is pushed for less than
1.5 seconds while the CD is being played, the
play pattern can be changed as follows:
CD:
CD with MP3 or WMA:
CD EJECT:
When the CD EJECT button is pushed with the
CD loaded, the CD will be ejected.
When this button is pushed while the CD is
being played, the CD will be ejected and the
system will turn off.
If the CD is ejected and is not removed, it
will be pulled back into the slot to protect
it.SAA2352
Interface system for iPod®operation
Connecting iPod®:
The iPod®outlet connector is on the lower
center of the instrument panel. Connect the
cable
*1as illustrated, and then connect the
other end of the cable to your iPod®*2. Your
vehicle is equipped with the specialized cable
for connecting the iPod
®to your vehicle audio
unit. The battery of your iPod®is charged while it
is connected to the vehicle if the iPod®supports
charging via a FireWire®connection.
When the connection is complete, a NISSAN
logo will be displayed on the iPod
®and an iPod®
icon on the audio display illuminates. While connecting the iPod
®to the vehicle, the iPod®
can only be operated by the vehicle audio
controls.
To disconnect the cable from the vehicle outlet,
fully depress the center connector button to
unlatch the connector and pull the connector
straight out of the outlet. To disconnect the
cable from the iPod
®, fully depress the side
connector buttons and pull the iPod®connector
straight out of the iPod®.
*iPod®, iPhone®and FireWire®are a trademark of
Apple Inc., registered in the U.S. and other
countries.
Compatibility:
The following models are available:
. Third generation iPod
®(Firmware version
2.3 or later) (Audiobook and Podcast are not
available)
. Fourth generation iPod
®(Firmware version
3.1.1 or later)
. Fifth generation iPod
®(Firmware version
1.1.2 or later)
. iPod mini
®(Firmware version 1.41 or later)
. iPod photo®(Firmware version 1.2.1 or
later)
. iPod nano
®(Firmware version 1.2 or later)
The fourth generation iPod nano®, iPod touch®,
the second generation iPod classic®and
Center display, heater, air conditioner, audio and phone systems4-39
Page 183 of 331
TUNE (Tuning):
.For AM and FM radio
Turn the TUNE knob for manual tuning.
. For XM Satellite Radio
Turn the TUNE knob to seek channels from
all of the categories when any category is
not selected.
SEEK tuning:
. For AM and FM radio
Push the SEEK/CATEGORY button
or
to tune from low to high or high to low
frequencies and to stop at the next broad-
casting station.
. For XM Satellite Radio
Push the SEEK/CATEGORY button
or
to tune to the first channel of the next or
previous category.
Tuning with the touch screen (AM and FM
radio):
When in AM or FM mode, the radio can be
tuned using the touch screen. To bring up the
visual tuner, touch the “Tune” key on the lower
right corner of the screen. A screen appears
with a bar running from low frequencies on the
left to high frequencies on the right. Touch the
screen at the location of the frequency you wish
to tune and the station will change to that frequency. To return to the regular radio display
screen, touch the “OK” key.
toStation memory operations:
12 stations/channels can be set for the FM band
(6 each for FM1 and FM2), 18 for XM radio (6
each for XM1, XM2 and XM3) and 6 stations
can be set for the AM band.
1. Choose the radio band using the radio band select button.
2. Tune to the desired station/channel using the SEEK/CATEGORY button or the TUNE
knob.
3. Push and hold the desired station preset button
tountil the beep sound is
heard.
4. The station indicator will then come on and the sound will resume. Memorizing is now
complete.
5. Other buttons can be set in the same manner.
If the battery cable is disconnected, or if the fuse
opens, the radio memory will be erased. In that
case, reset the desired stations/channels.
Channels (XM Satellite Radio):
When the XM Satellite Radio is being played,
select “Channels” key to display a list of
channels. Select a preferred channel from the list to change to that channel.
Categories (XM Satellite Radio):
When the XM Satellite Radio is being played,
select “Categories” key to display a list of
channels. Select a preferred channel from the
list to display options within that category.
Compact Disc (CD) player operation
Place the ignition switch in the ACC or ON
position and insert the Compact Disc (CD) into
the slot with the label side facing up. The CD will
be guided automatically into the slot and start
playing.
If the radio is already operating, it will auto-
matically turn off and the CD will play.
If the system has been turned off while the CD
was playing, pushing the ON·OFF button will
start the CD.
Do not use 3.1 in (8 cm) discs.
PLAY:
When the CD button is pushed with the system
off and the CD loaded, the system will turn on
and the CD will start to play.
When the CD button is pushed with the CD
loaded and the radio playing, the radio will
automatically be turned off and the CD will start
to play.
Center display, heater, air conditioner, audio and phone systems4-43
Page 187 of 331
SAA3648
iPod®player operation
Connecting iPod®:
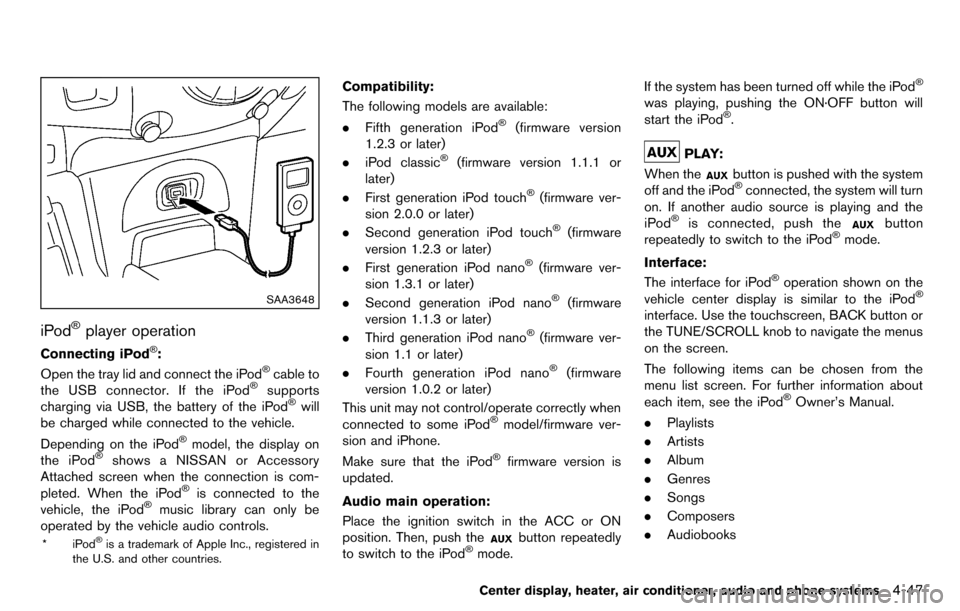
Open the tray lid and connect the iPod®cable to
the USB connector. If the iPod®supports
charging via USB, the battery of the iPod®will
be charged while connected to the vehicle.
Depending on the iPod
®model, the display on
the iPod®shows a NISSAN or Accessory
Attached screen when the connection is com-
pleted. When the iPod
®is connected to the
vehicle, the iPod®music library can only be
operated by the vehicle audio controls.
*iPod®is a trademark of Apple Inc., registered in
the U.S. and other countries.
Compatibility:
The following models are available:
. Fifth generation iPod
®(firmware version
1.2.3 or later)
. iPod classic
®(firmware version 1.1.1 or
later)
. First generation iPod touch
®(firmware ver-
sion 2.0.0 or later)
. Second generation iPod touch
®(firmware
version 1.2.3 or later)
. First generation iPod nano
®(firmware ver-
sion 1.3.1 or later)
. Second generation iPod nano
®(firmware
version 1.1.3 or later)
. Third generation iPod nano
®(firmware ver-
sion 1.1 or later)
. Fourth generation iPod nano
®(firmware
version 1.0.2 or later)
This unit may not control/operate correctly when
connected to some iPod
®model/firmware ver-
sion and iPhone.
Make sure that the iPod
®firmware version is
updated.
Audio main operation:
Place the ignition switch in the ACC or ON
position. Then, push the
button repeatedly
to switch to the iPod®mode. If the system has been turned off while the iPod
®
was playing, pushing the ON·OFF button will
start the iPod®.
PLAY:
When the
button is pushed with the system
off and the iPod®connected, the system will turn
on. If another audio source is playing and the
iPod
®is connected, push thebutton
repeatedly to switch to the iPod®mode.
Interface:
The interface for iPod
®operation shown on the
vehicle center display is similar to the iPod®
interface. Use the touchscreen, BACK button or
the TUNE/SCROLL knob to navigate the menus
on the screen.
The following items can be chosen from the
menu list screen. For further information about
each item, see the iPod
®Owner’s Manual.
. Playlists
. Artists
. Album
. Genres
. Songs
. Composers
. Audiobooks
Center display, heater, air conditioner, audio and phone systems4-47