2012 NISSAN ARMADA door lock
[x] Cancel search: door lockPage 182 of 489
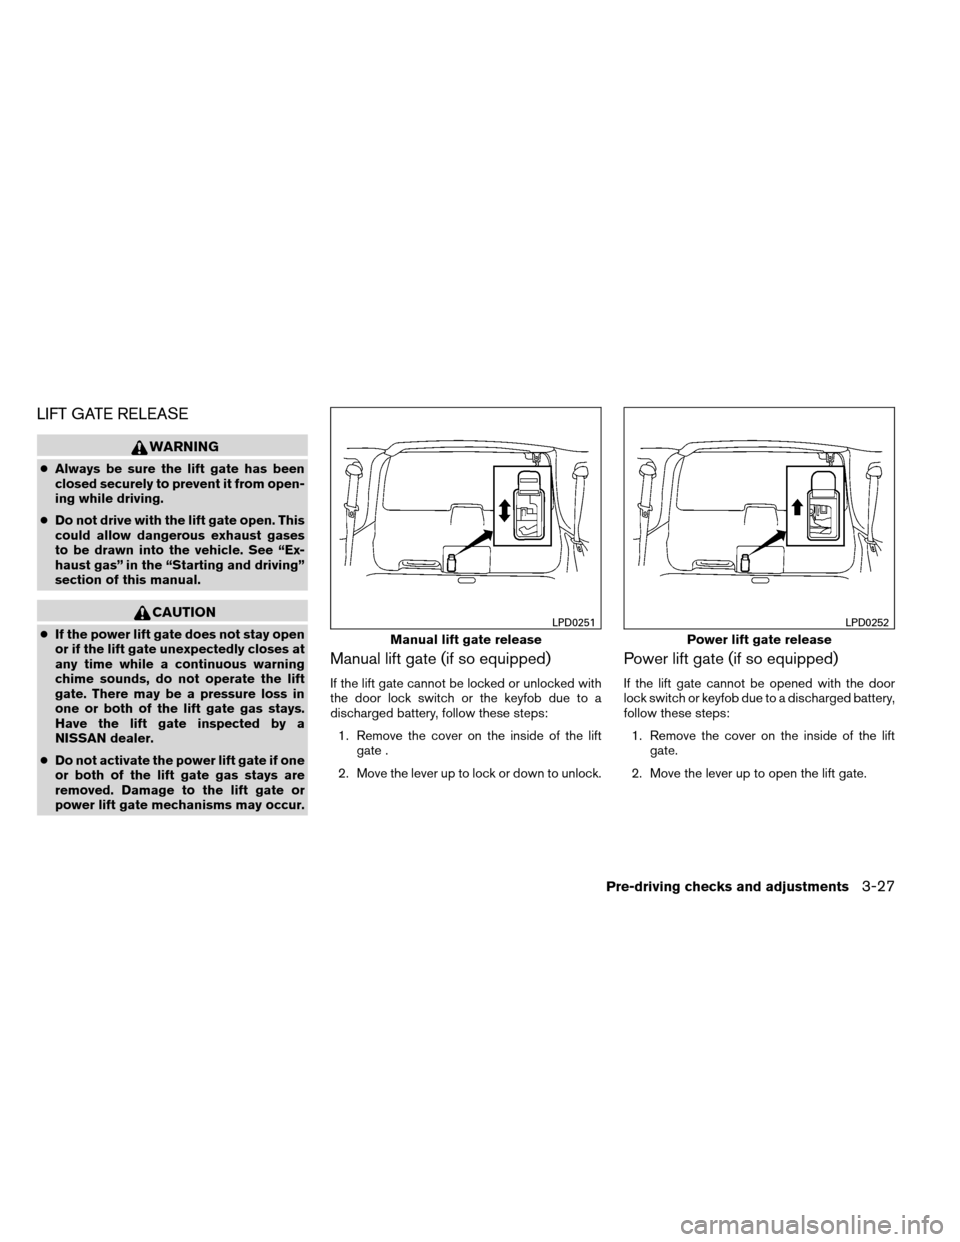
LIFT GATE RELEASE
WARNING
●Always be sure the lift gate has been
closed securely to prevent it from open-
ing while driving.
● Do not drive with the lift gate open. This
could allow dangerous exhaust gases
to be drawn into the vehicle. See “Ex-
haust gas” in the “Starting and driving”
section of this manual.
CAUTION
● If the power lift gate does not stay open
or if the lift gate unexpectedly closes at
any time while a continuous warning
chime sounds, do not operate the lift
gate. There may be a pressure loss in
one or both of the lift gate gas stays.
Have the lift gate inspected by a
NISSAN dealer.
● Do not activate the power lift gate if one
or both of the lift gate gas stays are
removed. Damage to the lift gate or
power lift gate mechanisms may occur.
Manual lift gate (if so equipped)
If the lift gate cannot be locked or unlocked with
the door lock switch or the keyfob due to a
discharged battery, follow these steps:
1. Remove the cover on the inside of the lift gate .
2. Move the lever up to lock or down to unlock.
Power lift gate (if so equipped)
If the lift gate cannot be opened with the door
lock switch or keyfob due to a discharged battery,
follow these steps: 1. Remove the cover on the inside of the lift gate.
2. Move the lever up to open the lift gate.
Manual lift gate release
LPD0251
Power lift gate release
LPD0252
Pre-driving checks and adjustments3-27
Page 183 of 489
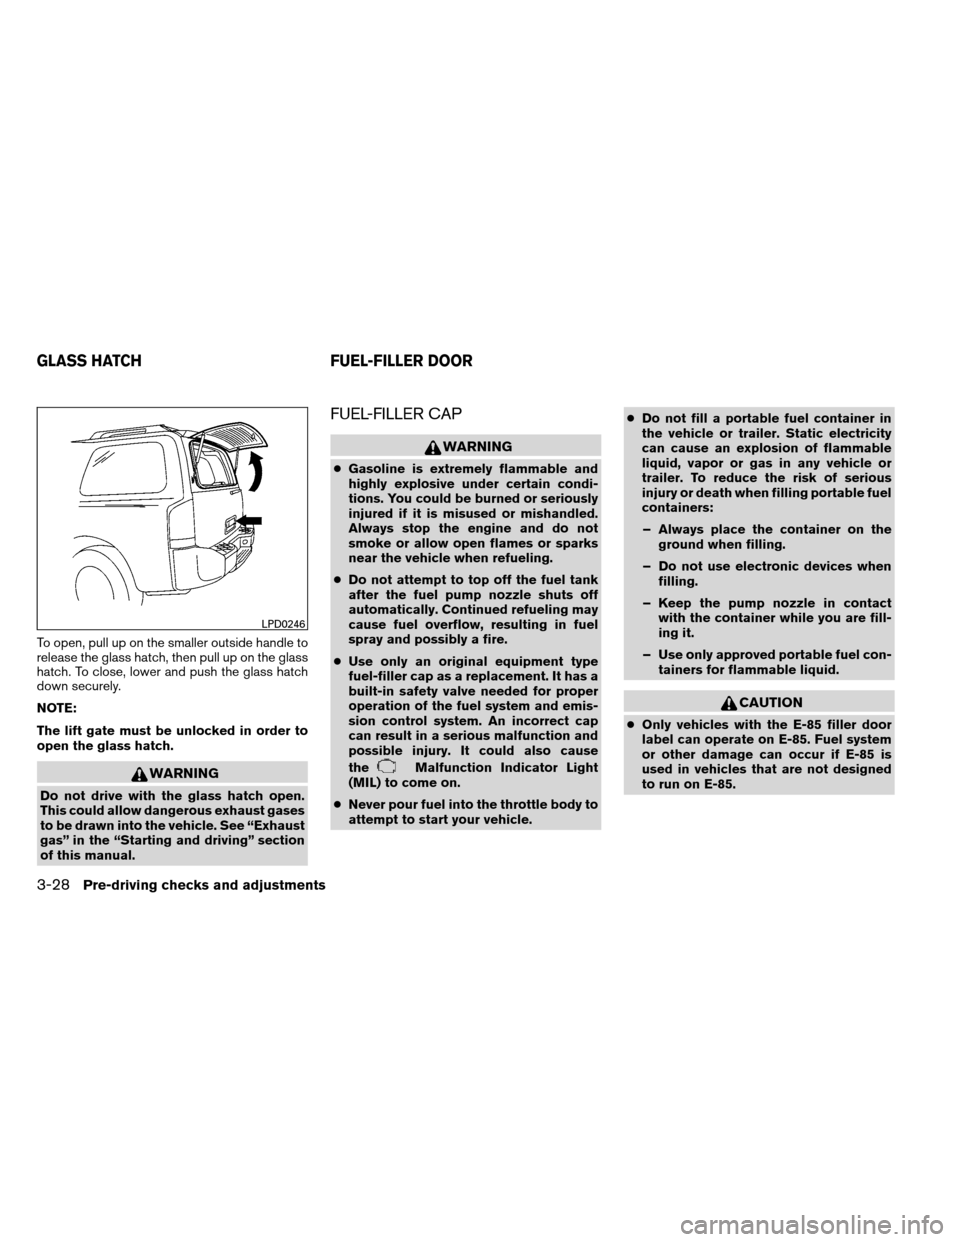
To open, pull up on the smaller outside handle to
release the glass hatch, then pull up on the glass
hatch. To close, lower and push the glass hatch
down securely.
NOTE:
The lift gate must be unlocked in order to
open the glass hatch.
WARNING
Do not drive with the glass hatch open.
This could allow dangerous exhaust gases
to be drawn into the vehicle. See “Exhaust
gas” in the “Starting and driving” section
of this manual.
FUEL-FILLER CAP
WARNING
●Gasoline is extremely flammable and
highly explosive under certain condi-
tions. You could be burned or seriously
injured if it is misused or mishandled.
Always stop the engine and do not
smoke or allow open flames or sparks
near the vehicle when refueling.
● Do not attempt to top off the fuel tank
after the fuel pump nozzle shuts off
automatically. Continued refueling may
cause fuel overflow, resulting in fuel
spray and possibly a fire.
● Use only an original equipment type
fuel-filler cap as a replacement. It has a
built-in safety valve needed for proper
operation of the fuel system and emis-
sion control system. An incorrect cap
can result in a serious malfunction and
possible injury. It could also cause
the
Malfunction Indicator Light
(MIL) to come on.
● Never pour fuel into the throttle body to
attempt to start your vehicle. ●
Do not fill a portable fuel container in
the vehicle or trailer. Static electricity
can cause an explosion of flammable
liquid, vapor or gas in any vehicle or
trailer. To reduce the risk of serious
injury or death when filling portable fuel
containers:
– Always place the container on the ground when filling.
– Do not use electronic devices when filling.
– Keep the pump nozzle in contact with the container while you are fill-
ing it.
– Use only approved portable fuel con- tainers for flammable liquid.
CAUTION
●Only vehicles with the E-85 filler door
label can operate on E-85. Fuel system
or other damage can occur if E-85 is
used in vehicles that are not designed
to run on E-85.
LPD0246
GLASS HATCH FUEL-FILLER DOOR
3-28Pre-driving checks and adjustments
Page 193 of 489
●If the battery cable is disconnected, or if the
fuse opens, the memory storage function will
be canceled and must be restarted before a
stored memory position can be set again.
Drive the vehicle over 25 MPH (40 km/h) to
restart the memory storage function. You
can also restart the memory storage function
using the following procedure.
1. Connect the battery cable or replace the fuse.
2. Open and close the driver’s door more than 2 times with the ignition switch in the LOCK
position.
Once the memory storage function has been
restarted, you can store a memory position.
See “Memory storage function” in this section.
Selecting the memorized position
Set the shift selector to the P (Park) position,
then:
● Within 45 seconds of opening the driver’s
door, push the memory switch (1 or 2) or
● Place the ignition switch in the ON position
and push the memory switch (1 or 2) .
The driver’s seat, accelerator and brake pedals,
and outside mirrors will move to the memorized
position with the indicator light blinking, and then
the light will stay on for approximately 5 seconds.
ENTRY/EXIT FUNCTION
This system is designed so that the driver’s seat
will automatically move when the shift selector is
placed in the P (Park) position. This allows the
driver to get into and out of the driver’s seat more
easily.
The driver’s seat will slide backward: ● When the key is removed from the ignition
switch and the driver’s door is opened.
● When the driver’s door is opened with the
ignition switch placed in the LOCK position.
● When the ignition switch is turned from
ACC to LOCK with the driver’s door open.
The driver’s seat will return to the previous posi-
tion: ● When the key is inserted into the ignition
switch and the driver’s door is closed.
● When the driver’s door is closed with the
ignition switch placed in the LOCK position.
● When the ignition switch is turned from
ACC to ON while the shift selector is in the P
(Park) position.
The entry/exit function can be adjusted or can-
celed. For vehicles with navigation system, see
“Comfort & convenience settings” in the “Moni-
tor, climate, audio, phone and voice recognition systems” section of this manual. For vehicles
without navigation system, see your NISSAN
dealer.
Restarting the entry/exit function
If the battery cable is disconnected or if the fuse
opens, the entry/exit function will be disabled.
Drive the vehicle over 25 MPH (40 km/h) to
restart the entry/exit function. You can also restart
the entry/exit function using the following proce-
dure.
1. Connect the battery cable or replace the fuse.
2. Open and close the driver’s door more than 2 times with the ignition switch in the LOCK
position.
The entry/exit function should now work properly.
SYSTEM OPERATION
The automatic drive positioner system will not
work or will stop operating under the following
conditions: ● When the vehicle speed is above 4 MPH (7
km/h) .
● When any of the memory switches are
pushed while the automatic drive positioner
is operating.
3-38Pre-driving checks and adjustments
Page 208 of 489
●OK:
Select to accept the changes made and
return to the clock setting display.
After selection/settings, press the BACK button
or any other mode button to accept the changes.
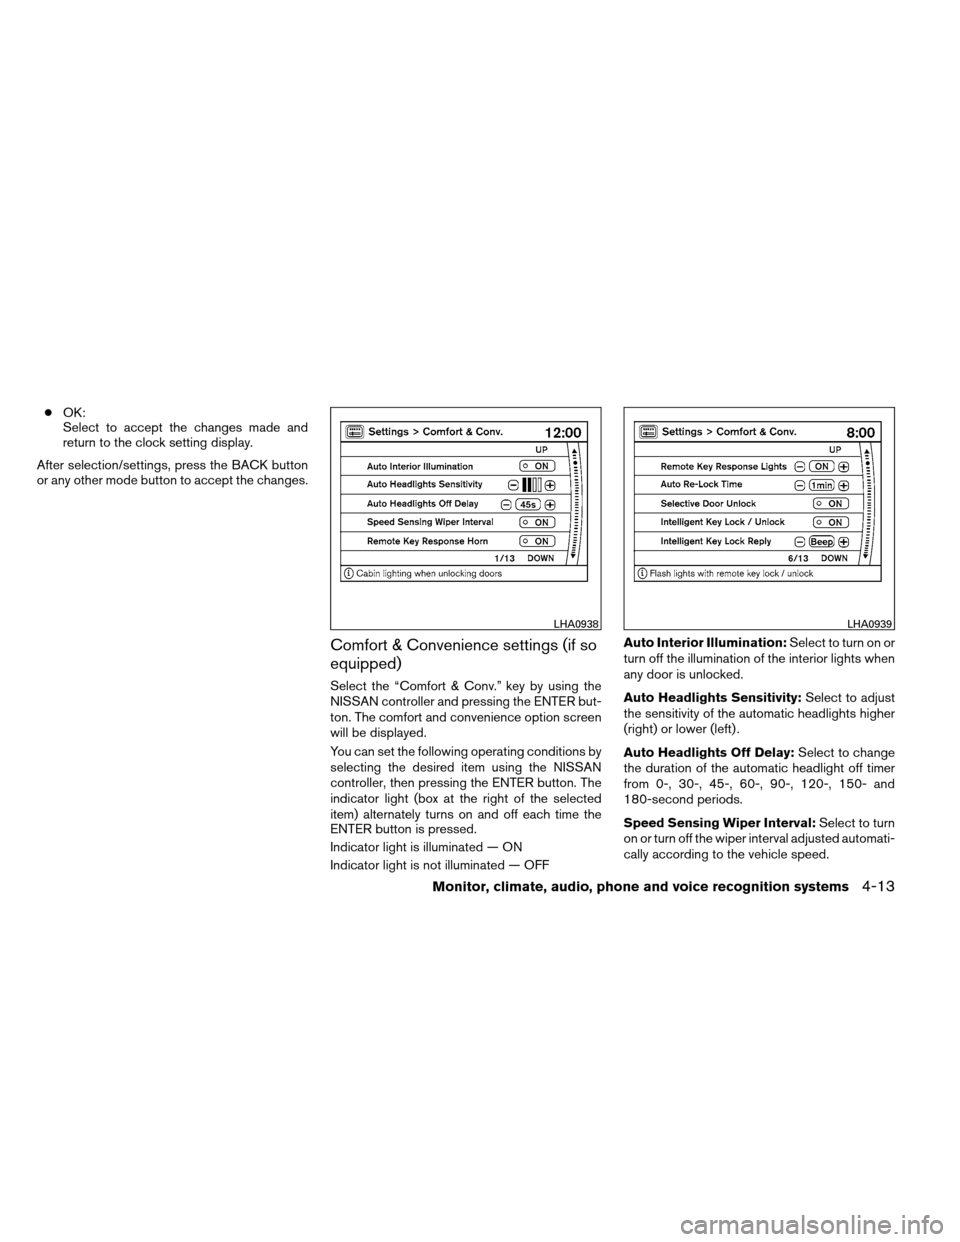
Comfort & Convenience settings (if so
equipped)
Select the “Comfort & Conv.” key by using the
NISSAN controller and pressing the ENTER but-
ton. The comfort and convenience option screen
will be displayed.
You can set the following operating conditions by
selecting the desired item using the NISSAN
controller, then pressing the ENTER button. The
indicator light (box at the right of the selected
item) alternately turns on and off each time the
ENTER button is pressed.
Indicator light is illuminated — ON
Indicator light is not illuminated — OFF Auto Interior Illumination:
Select to turn on or
turn off the illumination of the interior lights when
any door is unlocked.
Auto Headlights Sensitivity: Select to adjust
the sensitivity of the automatic headlights higher
(right) or lower (left) .
Auto Headlights Off Delay: Select to change
the duration of the automatic headlight off timer
from 0-, 30-, 45-, 60-, 90-, 120-, 150- and
180-second periods.
Speed Sensing Wiper Interval: Select to turn
on or turn off the wiper interval adjusted automati-
cally according to the vehicle speed.
LHA0938LHA0939
Monitor, climate, audio, phone and voice recognition systems4-13
Page 209 of 489
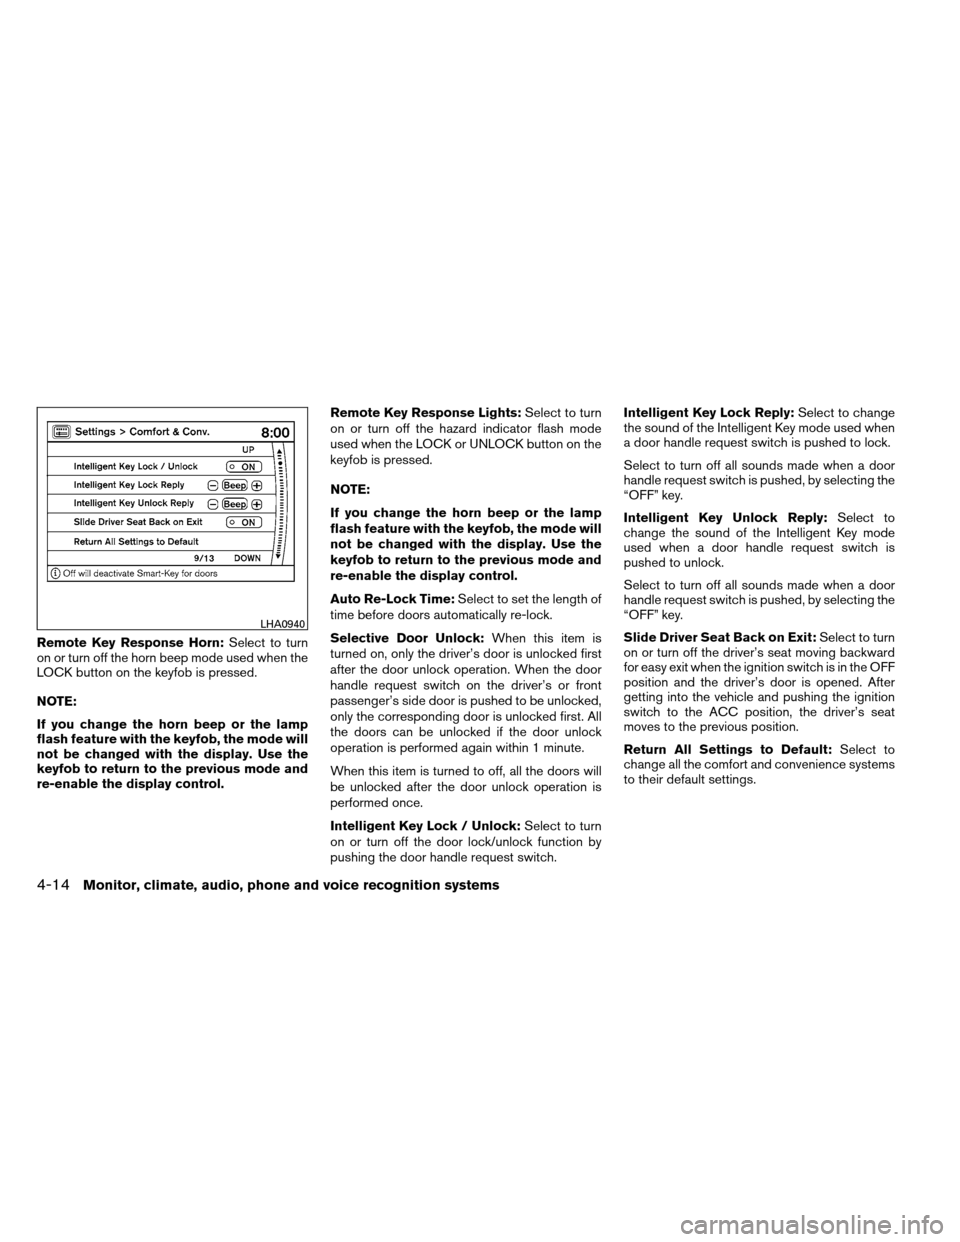
Remote Key Response Horn:Select to turn
on or turn off the horn beep mode used when the
LOCK button on the keyfob is pressed.
NOTE:
If you change the horn beep or the lamp
flash feature with the keyfob, the mode will
not be changed with the display. Use the
keyfob to return to the previous mode and
re-enable the display control. Remote Key Response Lights:
Select to turn
on or turn off the hazard indicator flash mode
used when the LOCK or UNLOCK button on the
keyfob is pressed.
NOTE:
If you change the horn beep or the lamp
flash feature with the keyfob, the mode will
not be changed with the display. Use the
keyfob to return to the previous mode and
re-enable the display control.
Auto Re-Lock Time: Select to set the length of
time before doors automatically re-lock.
Selective Door Unlock: When this item is
turned on, only the driver’s door is unlocked first
after the door unlock operation. When the door
handle request switch on the driver’s or front
passenger’s side door is pushed to be unlocked,
only the corresponding door is unlocked first. All
the doors can be unlocked if the door unlock
operation is performed again within 1 minute.
When this item is turned to off, all the doors will
be unlocked after the door unlock operation is
performed once.
Intelligent Key Lock / Unlock: Select to turn
on or turn off the door lock/unlock function by
pushing the door handle request switch. Intelligent Key Lock Reply:
Select to change
the sound of the Intelligent Key mode used when
a door handle request switch is pushed to lock.
Select to turn off all sounds made when a door
handle request switch is pushed, by selecting the
“OFF” key.
Intelligent Key Unlock Reply: Select to
change the sound of the Intelligent Key mode
used when a door handle request switch is
pushed to unlock.
Select to turn off all sounds made when a door
handle request switch is pushed, by selecting the
“OFF” key.
Slide Driver Seat Back on Exit: Select to turn
on or turn off the driver’s seat moving backward
for easy exit when the ignition switch is in the OFF
position and the driver’s door is opened. After
getting into the vehicle and pushing the ignition
switch to the ACC position, the driver’s seat
moves to the previous position.
Return All Settings to Default: Select to
change all the comfort and convenience systems
to their default settings.
LHA0940
4-14Monitor, climate, audio, phone and voice recognition systems
Page 215 of 489
2. Menu Selections:Shows the options to choose within that
menu screen (for example, Auto Interior Illu-
mination, etc.) .
3. UP/DOWN Movement Indicator: Shows that the NISSAN controller may be
used to move UP/DOWN on the screen and
select more options.
4. Screen Count: Shows the number of menu selections avail-
able for that screen (for example, 1/14) .
5. Footer/Information Line: Provides more information (if available)
about the menu selection currently high-
lighted (for example, Cabin lighting when
unlocking doors) .
HOW TO USE THE STATUS
BUTTON
To display the status of the audio, climate control
system, fuel consumption and navigation system,
press the STATUS button. The following information will appear when the
STATUS button is pressed:
Audio
→Audio and climate control system →
Audio, climate control temperature settings, av-
erage fuel economy and distance to empty →
Audio, climate control temperature settings and
Navigation System →Audio
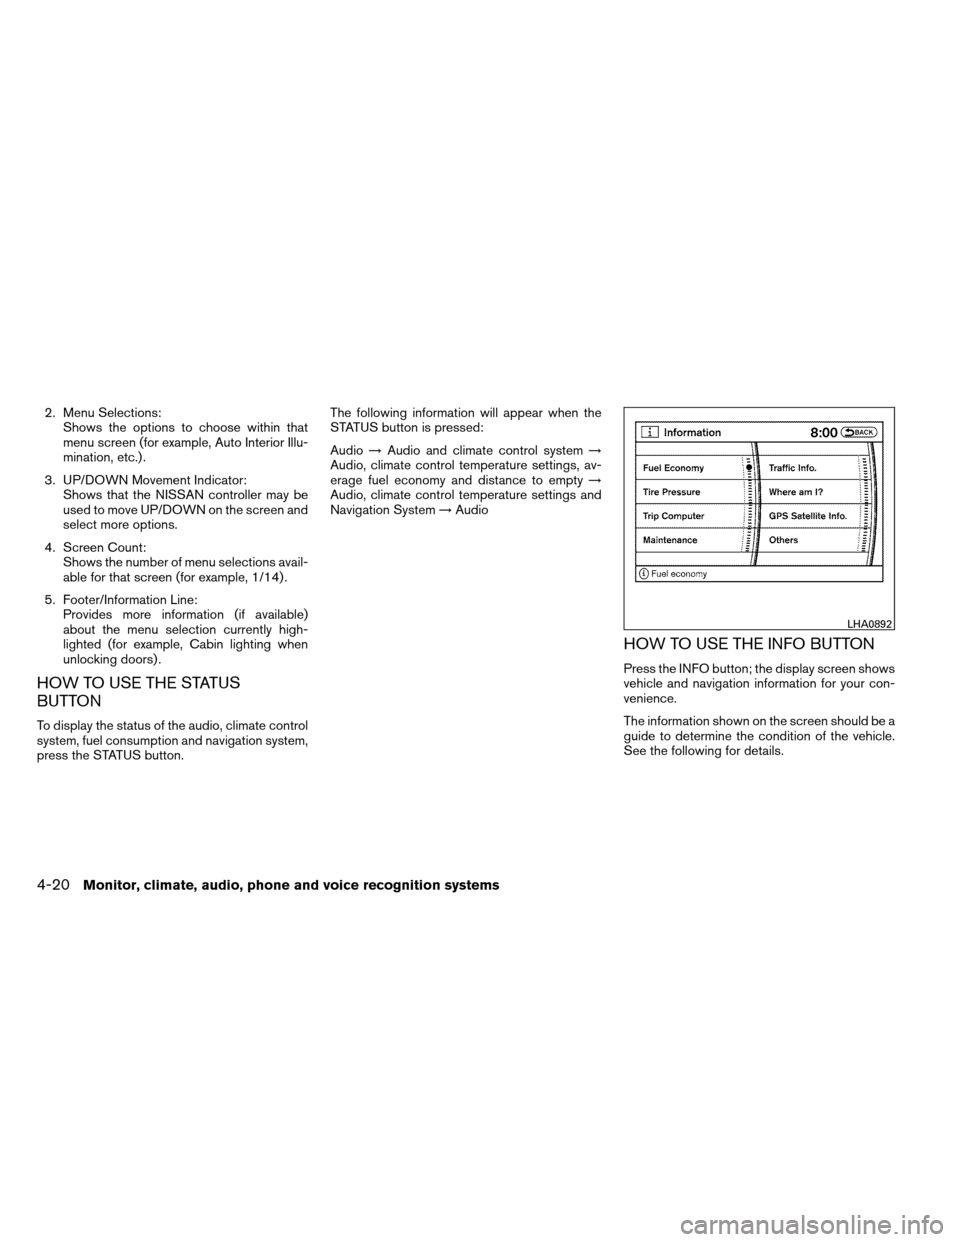
HOW TO USE THE INFO BUTTON
Press the INFO button; the display screen shows
vehicle and navigation information for your con-
venience.
The information shown on the screen should be a
guide to determine the condition of the vehicle.
See the following for details.
LHA0892
4-20Monitor, climate, audio, phone and voice recognition systems
Page 224 of 489
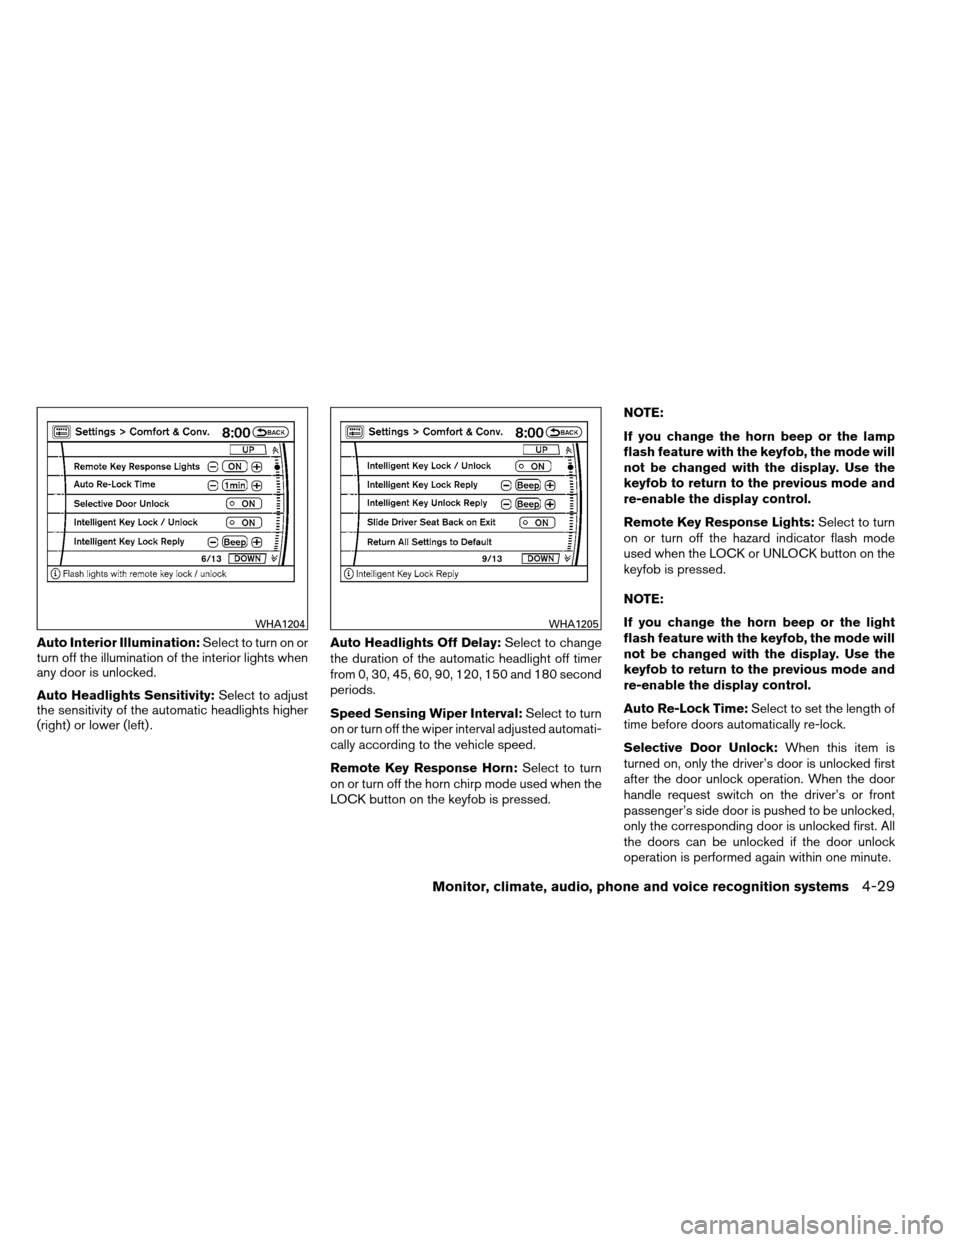
Auto Interior Illumination:Select to turn on or
turn off the illumination of the interior lights when
any door is unlocked.
Auto Headlights Sensitivity: Select to adjust
the sensitivity of the automatic headlights higher
(right) or lower (left) . Auto Headlights Off Delay:
Select to change
the duration of the automatic headlight off timer
from 0, 30, 45, 60, 90, 120, 150 and 180 second
periods.
Speed Sensing Wiper Interval: Select to turn
on or turn off the wiper interval adjusted automati-
cally according to the vehicle speed.
Remote Key Response Horn: Select to turn
on or turn off the horn chirp mode used when the
LOCK button on the keyfob is pressed. NOTE:
If you change the horn beep or the lamp
flash feature with the keyfob, the mode will
not be changed with the display. Use the
keyfob to return to the previous mode and
re-enable the display control.
Remote Key Response Lights:
Select to turn
on or turn off the hazard indicator flash mode
used when the LOCK or UNLOCK button on the
keyfob is pressed.
NOTE:
If you change the horn beep or the light
flash feature with the keyfob, the mode will
not be changed with the display. Use the
keyfob to return to the previous mode and
re-enable the display control.
Auto Re-Lock Time: Select to set the length of
time before doors automatically re-lock.
Selective Door Unlock: When this item is
turned on, only the driver’s door is unlocked first
after the door unlock operation. When the door
handle request switch on the driver’s or front
passenger’s side door is pushed to be unlocked,
only the corresponding door is unlocked first. All
the doors can be unlocked if the door unlock
operation is performed again within one minute.
WHA1204WHA1205
Monitor, climate, audio, phone and voice recognition systems4-29
Page 225 of 489
When this item is turned to off, all the doors will
be unlocked after the door unlock operation is
performed once.
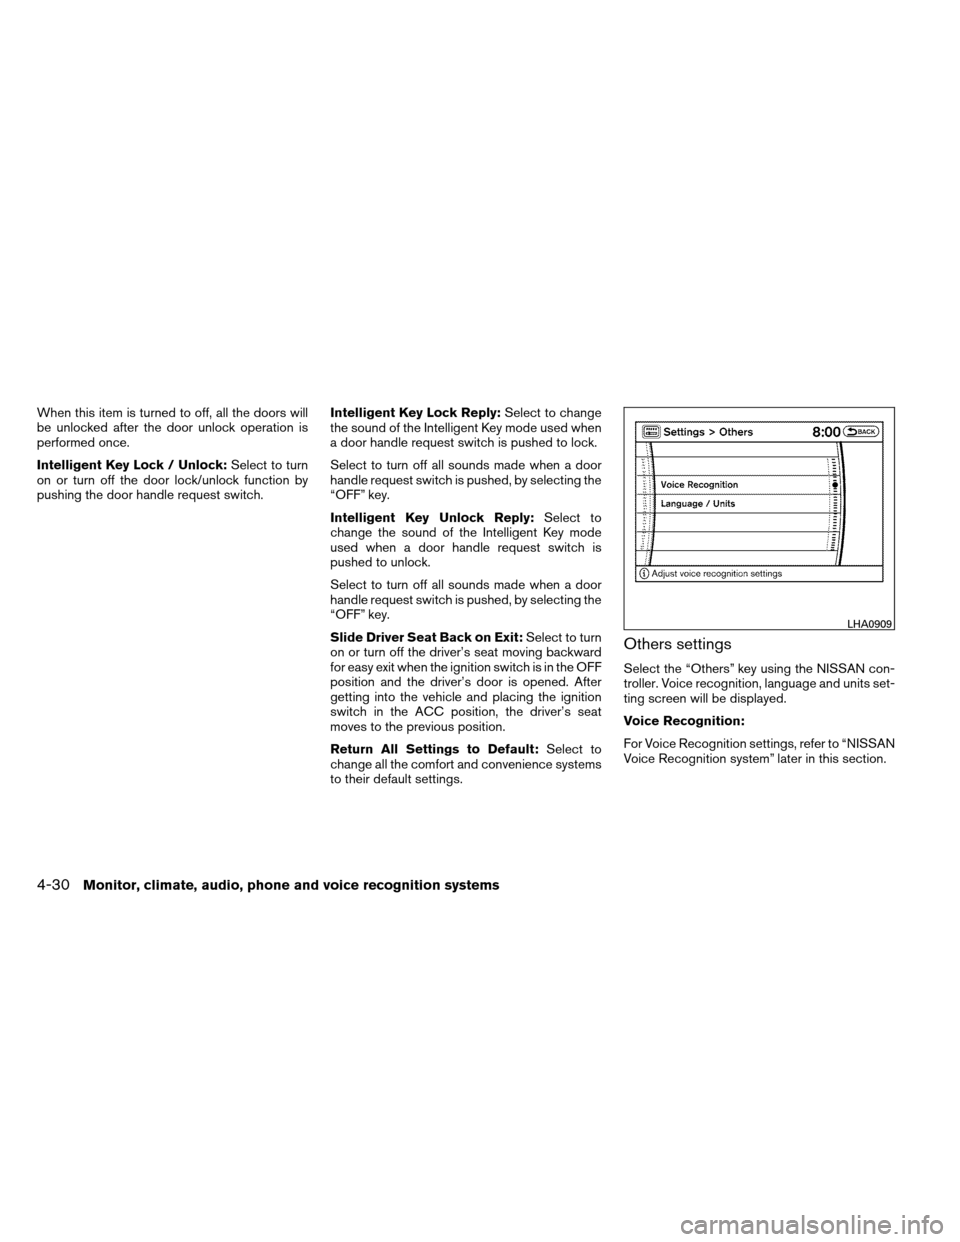
Intelligent Key Lock / Unlock:Select to turn
on or turn off the door lock/unlock function by
pushing the door handle request switch. Intelligent Key Lock Reply:
Select to change
the sound of the Intelligent Key mode used when
a door handle request switch is pushed to lock.
Select to turn off all sounds made when a door
handle request switch is pushed, by selecting the
“OFF” key.
Intelligent Key Unlock Reply: Select to
change the sound of the Intelligent Key mode
used when a door handle request switch is
pushed to unlock.
Select to turn off all sounds made when a door
handle request switch is pushed, by selecting the
“OFF” key.
Slide Driver Seat Back on Exit: Select to turn
on or turn off the driver’s seat moving backward
for easy exit when the ignition switch is in the OFF
position and the driver’s door is opened. After
getting into the vehicle and placing the ignition
switch in the ACC position, the driver’s seat
moves to the previous position.
Return All Settings to Default: Select to
change all the comfort and convenience systems
to their default settings.
Others settings
Select the “Others” key using the NISSAN con-
troller. Voice recognition, language and units set-
ting screen will be displayed.
Voice Recognition:
For Voice Recognition settings, refer to “NISSAN
Voice Recognition system” later in this section.
LHA0909
4-30Monitor, climate, audio, phone and voice recognition systems