2012 NISSAN 370Z COUPE language
[x] Cancel search: languagePage 89 of 427
SIC3992
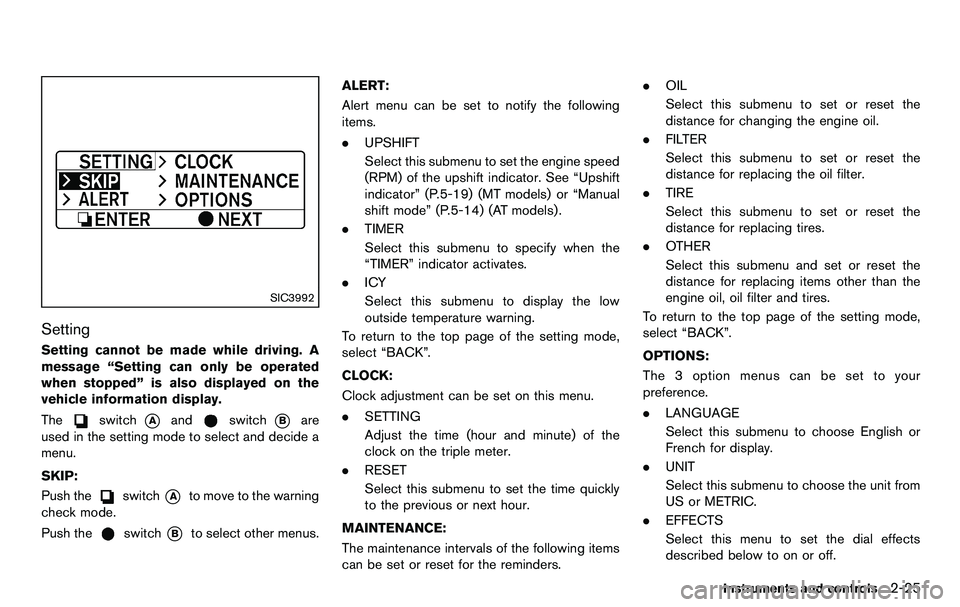
Setting
Setting cannot be made while driving. A
message “Setting can only be operated
when stopped” is also displayed on the
vehicle information display.
The
switch*Aandswitch*Bare
used in the setting mode to select and decide a
menu.
SKIP:
Push the
switch*Ato move to the warning
check mode.
Push the
switch*Bto select other menus. ALERT:
Alert menu can be set to notify the following
items.
. UPSHIFT
Select this submenu to set the engine speed
(RPM) of the upshift indicator. See “Upshift
indicator” (P.5-19) (MT models) or “Manual
shift mode” (P.5-14) (AT models) .
. TIMER
Select this submenu to specify when the
“TIMER” indicator activates.
. ICY
Select this submenu to display the low
outside temperature warning.
To return to the top page of the setting mode,
select “BACK”.
CLOCK:
Clock adjustment can be set on this menu.
. SETTING
Adjust the time (hour and minute) of the
clock on the triple meter.
. RESET
Select this submenu to set the time quickly
to the previous or next hour.
MAINTENANCE:
The maintenance intervals of the following items
can be set or reset for the reminders. .
OIL
Select this submenu to set or reset the
distance for changing the engine oil.
. FILTER
Select this submenu to set or reset the
distance for replacing the oil filter.
. TIRE
Select this submenu to set or reset the
distance for replacing tires.
. OTHER
Select this submenu and set or reset the
distance for replacing items other than the
engine oil, oil filter and tires.
To return to the top page of the setting mode,
select “BACK”.
OPTIONS:
The 3 option menus can be set to your
preference.
. LANGUAGE
Select this submenu to choose English or
French for display.
. UNIT
Select this submenu to choose the unit from
US or METRIC.
. EFFECTS
Select this menu to set the dial effects
described below to on or off.
Instruments and controls2-25
Page 170 of 427
4-14Center display, heater, air conditioner, audio, phone and voice recognition systems
system.
Clock Format (24h):
When this item is turned to ON, the 24-hour
clock is displayed. When this item is not turned
to ON, the 12-hour clock is displayed.
Offset (hour)/(min):
Adjust the time by increasing or decreasing per
hour or per minute.
Daylight Saving Time:
Turn this item to ON for daylight saving time
application.
Time Zone:
Choose the time zone from the following
.Pacific
. Mountain
. Central
. Eastern
. Atlantic
. Newfoundland
. Hawaii
. Alaska
SAA2489
Others settings
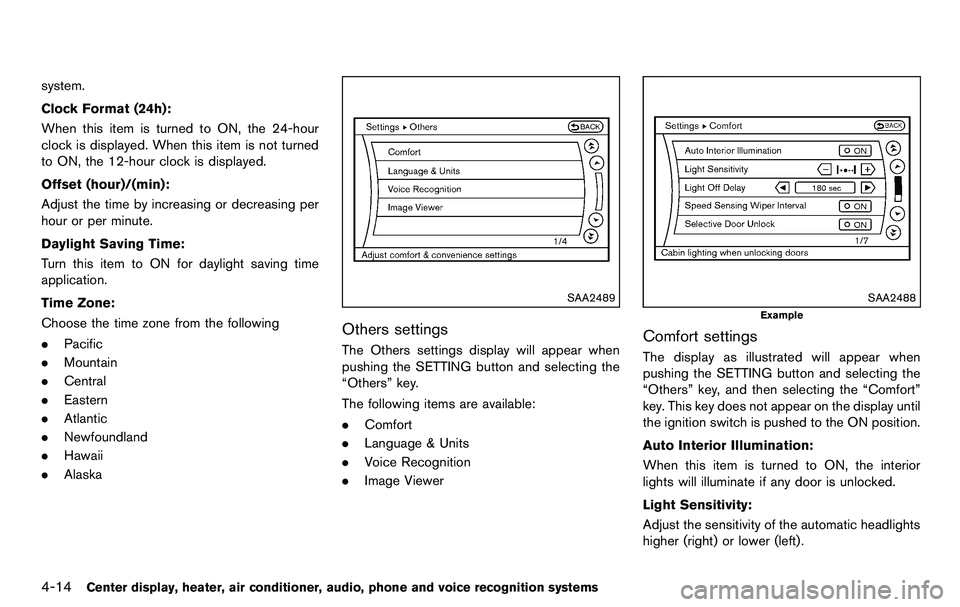
The Others settings display will appear when
pushing the SETTING button and selecting the
“Others” key.
The following items are available:
.Comfort
. Language & Units
. Voice Recognition
. Image Viewer
SAA2488
Example
Comfort settings
The display as illustrated will appear when
pushing the SETTING button and selecting the
“Others” key, and then selecting the “Comfort”
key. This key does not appear on the display until
the ignition switch is pushed to the ON position.
Auto Interior Illumination:
When this item is turned to ON, the interior
lights will illuminate if any door is unlocked.
Light Sensitivity:
Adjust the sensitivity of the automatic headlights
higher (right) or lower (left).
Page 171 of 427
Light Off Delay:
Choose the duration of the automatic headlight
off timer from 0, 30, 45, 60, 90, 120, 150 and
180 second periods.
Speed Sensing Wiper Interval:
When this item is turned to ON, the wiper
interval is adjusted automatically according to
the vehicle speed.
Selective Door Unlock:
When this item is turned to ON, only the driver’s
door is unlocked first after the door unlock
operation. When the door handle request switch
on the driver’s or front passenger’s side door is
pushed to be unlocked, only the corresponding
door is unlocked first. All the doors can be
unlocked if the door unlock operation is per-
formed again within 60 seconds.
When this item is turned to OFF, all the doors
will be unlocked after the door unlock operation
is performed once.
Intelligent Key Lock/Unlock:
When this item is turned to ON, door lock/
unlock function by pushing the door handle
request switch will be activated.
Return All Settings to Default:
Select this item and then select “YES” to return
all settings to the default.
SAA2490
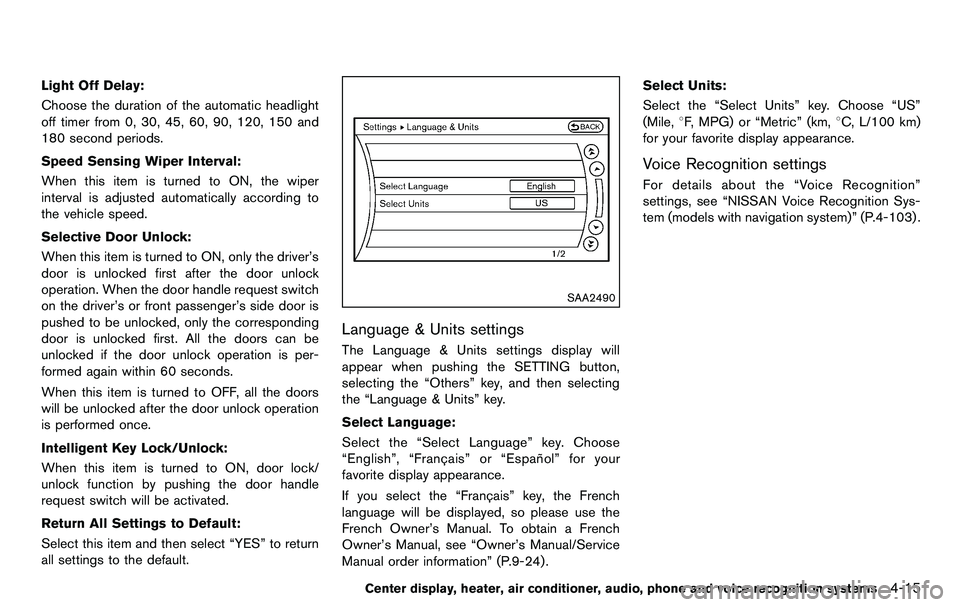
Language & Units settings
The Language & Units settings display will
appear when pushing the SETTING button,
selecting the “Others” key, and then selecting
the “Language & Units” key.
Select Language:
Select the “Select Language” key. Choose
“English”, “Franc¸ ais” or “Espan˜
ol” for your
favorite display appearance.
If you select the “Franc¸ ais” key, the French
language will be displayed, so please use the
French Owner’s Manual. To obtain a French
Owner’s Manual, see “Owner’s Manual/Service
Manual order information” (P.9-24) . Select Units:
Select the “Select Units” key. Choose “US”
(Mile, 8F, MPG) or “Metric” (km, 8C, L/100 km)
for your favorite display appearance.
Voice Recognition settings
For details about the “Voice Recognition”
settings, see “NISSAN Voice Recognition Sys-
tem (models with navigation system)” (P.4-103) .
Center display, heater, air conditioner, audio, phone and voice recognition systems4-15
Page 191 of 427
.DTS and DTS 2.0 “” are registered
trademarks of DTS, Inc.
Parental level (parental control):
DVDs with the parental control setting can be
played with this system. Please use your own
judgement to set the parental control with the
system.
Disc selection:
The following disc formats can be played with
the DVD drive.
. DVD-VIDEO
. VIDEO-CD
. CD-DA (Conventional Compact Disc)
. DTS-CD
USB (Universal Serial Bus) (models with
navigation system)
This system supports various USB memory
sticks, USB hard drives and iPod®players.
There are some USB devices which may not be
supported with this system.
. Make sure that the USB device is connected
correctly into the USB connector.
. Do not force the memory stick or USB cable
into the USB connector. This could damage
the connector. .
During cold weather or rainy days, the player
may malfunction due to humidity. If this
occurs, remove the USB device and dehu-
midify or ventilate the USB player comple-
tely.
. The USB player sometimes cannot function
when the passenger compartment tempera-
ture is extremely high. Decrease the tem-
perature before use.
. Do not leave USB memory in a place prone
to static electricity or where the air condi-
tioner blows directly. The data in the USB
memory may be damaged.
. The vehicle is not equipped with a USB
memory stick.
. A USB device cannot be formatted with this
system. To format a USB device, use a
personal computer.
. Partitioned USB devices may not be played
correctly.
. Some characters used in other languages
(Chinese, Japanese, etc.) are not displayed
properly on the vehicle center screen. Using
English language characters with a USB
device is recommended.
. Do not connect a USB device if a connector
or cable is wet. Allow the cable and/or
connectors to dry completely before con-
necting the USB device. If the connector is exposed to fluids other than water, evapora-
tive residue may cause a short between the
connector pins.
. Large video podcast files cause slow
responses in an iPod
®. The vehicle center
display may momentarily black out, but it will
soon recover.
. If an iPod
®automatically selects large video
podcast files while in the shuffle mode, the
vehicle center display may momentarily
black out, but it will soon recover.
. Audiobooks may not play in the same order
as they appear on an iPod
®.
. An iPod nano®(1st Generation) may remain
in fast forward or rewind mode if it is
connected during a seek operation. In this
case, please manually reset the iPod
®.
. An iPod nano®(2nd Generation) will con-
tinue to fast forward or rewind if it is
disconnected during a seek operation.
. An incorrect song title may appear when the
Play Mode is changed while using the iPod
nano
®(2nd Generation)
iPod®is a trademark of Apple Inc., registered in
the U.S. and other countries.
Center display, heater, air conditioner, audio, phone and voice recognition systems4-35
Page 215 of 427
DVD Language (DVD-VIDEO, VIDEO-CD):
Select the “DVD Language” key to open the
number entry screen. Input the number corre-
sponding to the preferred language and select
the “OK” key. The DVD top menu language will
be changed to the one specified.
Display:
To adjust the image quality of the screen, select
the preferred adjustment items.
Audio:
Select the preferred language for audio.
Subtitle (DVD-VIDEO, DVD-VR):
Select the preferred language for subtitles.
Display Mode (DVD-VIDEO, VIDEO-CD,
DVD-VR):
Select from the “Full”, “Wide”, “Normal” or
“Cinema” modes.
Title List (DVD-VR):
Select the preferred title from the list.
Play Mode:
Select the preferred play mode.
PG/PL Mode (DVD-VR):
Select the “PG” or “PL” mode.
SAA2499
USB MEMORY OPERATION (models
with navigation system)
Audio main operation
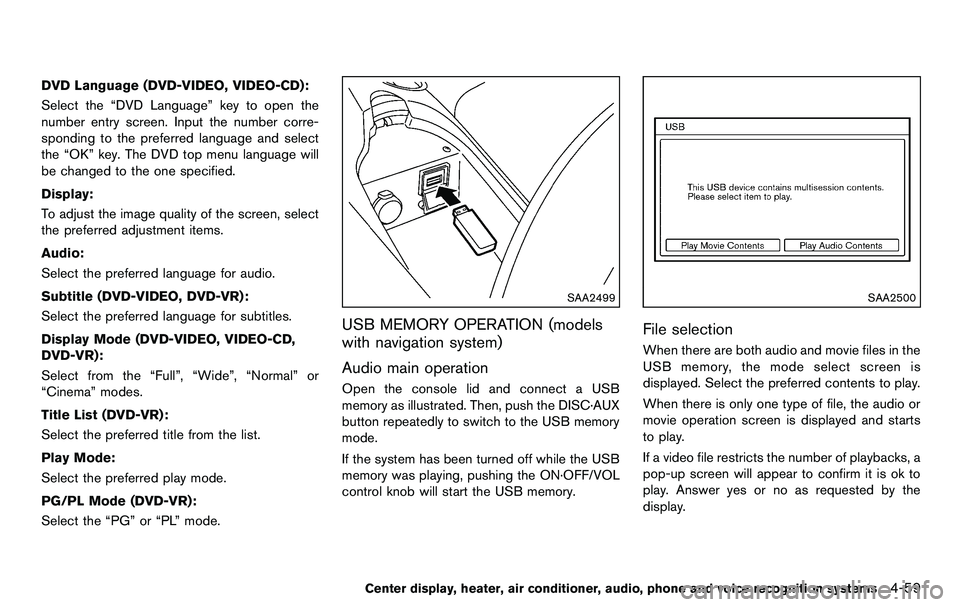
Open the console lid and connect a USB
memory as illustrated. Then, push the DISC·AUX
button repeatedly to switch to the USB memory
mode.
If the system has been turned off while the USB
memory was playing, pushing the ON·OFF/VOL
control knob will start the USB memory.
SAA2500
File selection
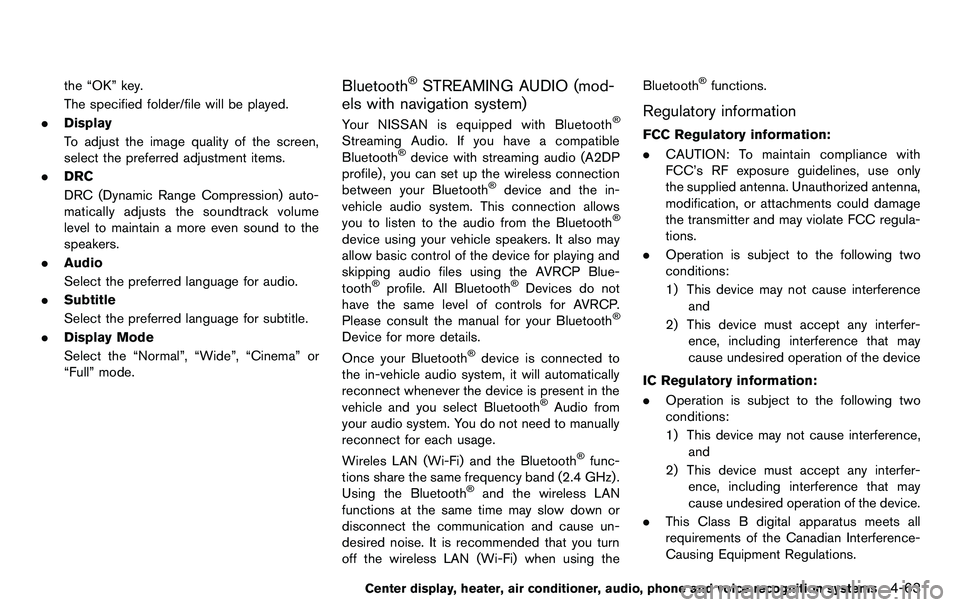
When there are both audio and movie files in the
USB memory, the mode select screen is
displayed. Select the preferred contents to play.
When there is only one type of file, the audio or
movie operation screen is displayed and starts
to play.
If a video file restricts the number of playbacks, a
pop-up screen will appear to confirm it is ok to
play. Answer yes or no as requested by the
display.
Center display, heater, air conditioner, audio, phone and voice recognition systems4-59
Page 219 of 427
the “OK” key.
The specified folder/file will be played.
. Display
To adjust the image quality of the screen,
select the preferred adjustment items.
. DRC
DRC (Dynamic Range Compression) auto-
matically adjusts the soundtrack volume
level to maintain a more even sound to the
speakers.
. Audio
Select the preferred language for audio.
. Subtitle
Select the preferred language for subtitle.
. Display Mode
Select the “Normal”, “Wide”, “Cinema” or
“Full” mode.Bluetooth®STREAMING AUDIO (mod-
els with navigation system)
Your NISSAN is equipped with Bluetooth®
Streaming Audio. If you have a compatible
Bluetooth®device with streaming audio (A2DP
profile) , you can set up the wireless connection
between your Bluetooth
®device and the in-
vehicle audio system. This connection allows
you to listen to the audio from the Bluetooth
®
device using your vehicle speakers. It also may
allow basic control of the device for playing and
skipping audio files using the AVRCP Blue-
tooth
®profile. All Bluetooth®Devices do not
have the same level of controls for AVRCP.
Please consult the manual for your Bluetooth
®
Device for more details.
Once your Bluetooth®device is connected to
the in-vehicle audio system, it will automatically
reconnect whenever the device is present in the
vehicle and you select Bluetooth
®Audio from
your audio system. You do not need to manually
reconnect for each usage.
Wireles LAN (Wi-Fi) and the Bluetooth
®func-
tions share the same frequency band (2.4 GHz) .
Using the Bluetooth
®and the wireless LAN
functions at the same time may slow down or
disconnect the communication and cause un-
desired noise. It is recommended that you turn
off the wireless LAN (Wi-Fi) when using the Bluetooth
®functions.
Regulatory information
FCC Regulatory information:
.
CAUTION: To maintain compliance with
FCC’s RF exposure guidelines, use only
the supplied antenna. Unauthorized antenna,
modification, or attachments could damage
the transmitter and may violate FCC regula-
tions.
. Operation is subject to the following two
conditions:
1) This device may not cause interference
and
2) This device must accept any interfer- ence, including interference that may
cause undesired operation of the device
IC Regulatory information:
. Operation is subject to the following two
conditions:
1) This device may not cause interference,
and
2) This device must accept any interfer- ence, including interference that may
cause undesired operation of the device.
. This Class B digital apparatus meets all
requirements of the Canadian Interference-
Causing Equipment Regulations.
Center display, heater, air conditioner, audio, phone and voice recognition systems4-63
Page 251 of 427
SAA2557
CONTROL BUTTONS
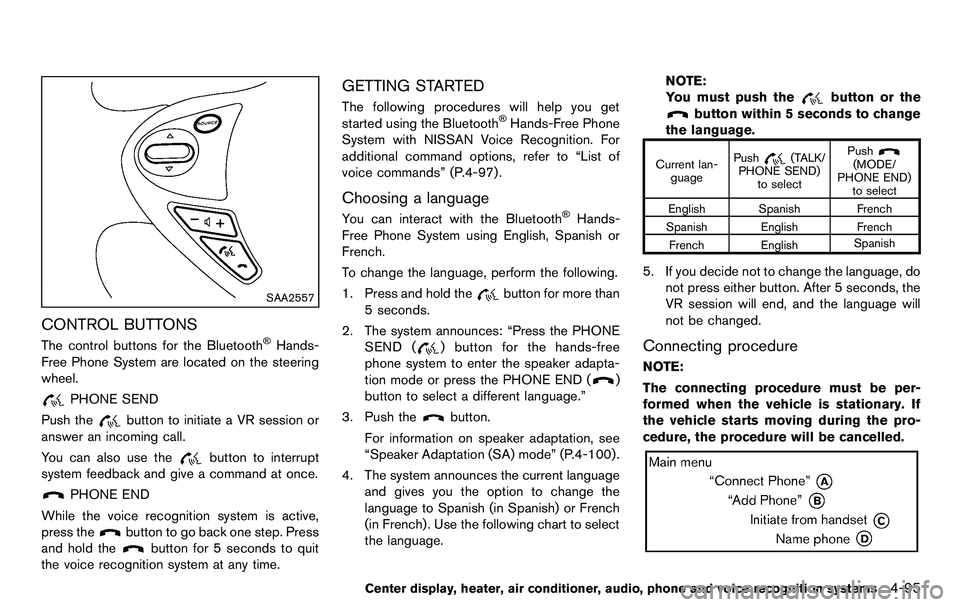
The control buttons for the Bluetooth®Hands-
Free Phone System are located on the steering
wheel.
PHONE SEND
Push the
button to initiate a VR session or
answer an incoming call.
You can also use the
button to interrupt
system feedback and give a command at once.
PHONE END
While the voice recognition system is active,
press the
button to go back one step. Press
and hold the
button for 5 seconds to quit
the voice recognition system at any time.
GETTING STARTED
The following procedures will help you get
started using the Bluetooth®Hands-Free Phone
System with NISSAN Voice Recognition. For
additional command options, refer to “List of
voice commands” (P.4-97) .
Choosing a language
You can interact with the Bluetooth®Hands-
Free Phone System using English, Spanish or
French.
To change the language, perform the following.
1. Press and hold the
button for more than
5 seconds.
2. The system announces: “Press the PHONE SEND (
) button for the hands-free
phone system to enter the speaker adapta-
tion mode or press the PHONE END (
)
button to select a different language.”
3. Push the
button.
For information on speaker adaptation, see
“Speaker Adaptation (SA) mode” (P.4-100) .
4. The system announces the current language and gives you the option to change the
language to Spanish (in Spanish) or French
(in French). Use the following chart to select
the language. NOTE:
You must push the
button or the
button within 5 seconds to change
the language.
Current lan- guage Push(TALK/
PHONE SEND) to select Push(MODE/
PHONE END) to select
English Spanish French
Spanish English French French English Spanish
5. If you decide not to change the language, do
not press either button. After 5 seconds, the
VR session will end, and the language will
not be changed.
Connecting procedure
NOTE:
The connecting procedure must be per-
formed when the vehicle is stationary. If
the vehicle starts moving during the pro-
cedure, the procedure will be cancelled.
Center display, heater, air conditioner, audio, phone and voice recognition systems4-95
Page 256 of 427
4-100Center display, heater, air conditioner, audio, phone and voice recognition systems
calls made from the vehicle.
“Incoming”
*B
Use the Incoming command to list the incoming
calls made from the vehicle.
“Missed”
*C
Use the Missed command to list the missed
calls made to the vehicle that were not
answered.
Connect Phone
NOTE:
Add Phone command is not available
when the vehicle is moving.
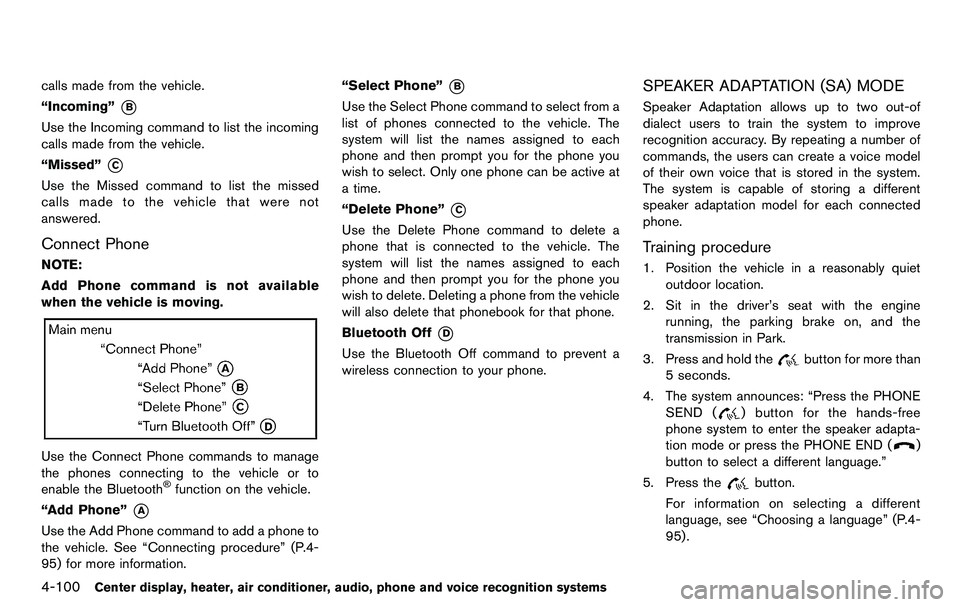
Use the Connect Phone commands to manage
the phones connecting to the vehicle or to
enable the Bluetooth
®function on the vehicle.
“Add Phone”
*A
Use the Add Phone command to add a phone to
the vehicle. See “Connecting procedure” (P.4-
95) for more information. “Select Phone”
*B
Use the Select Phone command to select from a
list of phones connected to the vehicle. The
system will list the names assigned to each
phone and then prompt you for the phone you
wish to select. Only one phone can be active at
a time.
“Delete Phone”
*C
Use the Delete Phone command to delete a
phone that is connected to the vehicle. The
system will list the names assigned to each
phone and then prompt you for the phone you
wish to delete. Deleting a phone from the vehicle
will also delete that phonebook for that phone.
Bluetooth Off
*D
Use the Bluetooth Off command to prevent a
wireless connection to your phone.
SPEAKER ADAPTATION (SA) MODE
Speaker Adaptation allows up to two out-of
dialect users to train the system to improve
recognition accuracy. By repeating a number of
commands, the users can create a voice model
of their own voice that is stored in the system.
The system is capable of storing a different
speaker adaptation model for each connected
phone.
Training procedure
1. Position the vehicle in a reasonably quiet
outdoor location.
2. Sit in the driver’s seat with the engine running, the parking brake on, and the
transmission in Park.
3. Press and hold the
button for more than
5 seconds.
4. The system announces: “Press the PHONE SEND (
) button for the hands-free
phone system to enter the speaker adapta-
tion mode or press the PHONE END (
)
button to select a different language.”
5. Press the
button.
For information on selecting a different
language, see “Choosing a language” (P.4-
95).