2012 NISSAN 370Z COUPE key
[x] Cancel search: keyPage 226 of 427
4-70Center display, heater, air conditioner, audio, phone and voice recognition systems
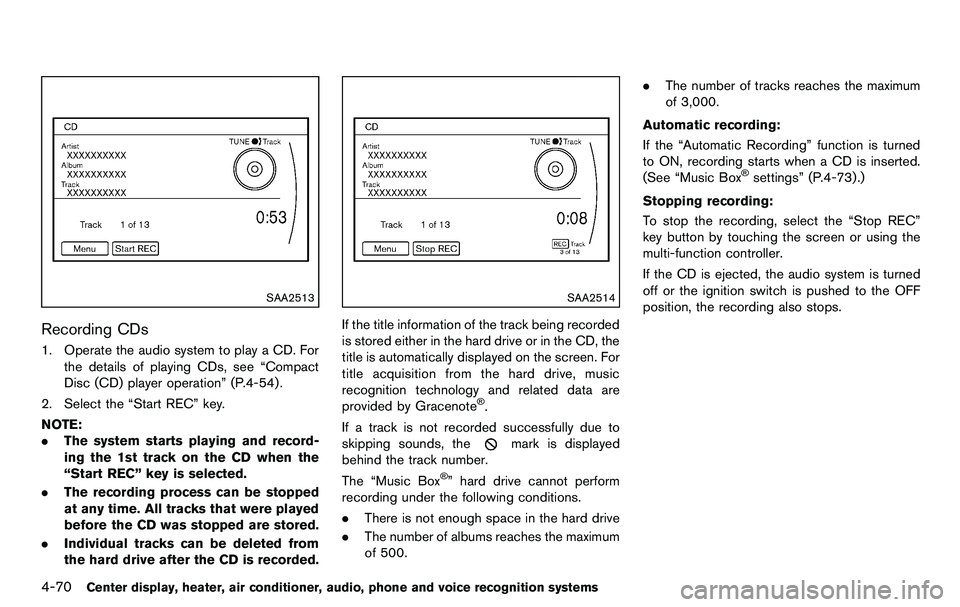
SAA2513
Recording CDs
1. Operate the audio system to play a CD. Forthe details of playing CDs, see “Compact
Disc (CD) player operation” (P.4-54).
2. Select the “Start REC” key.
NOTE:
. The system starts playing and record-
ing the 1st track on the CD when the
“Start REC” key is selected.
. The recording process can be stopped
at any time. All tracks that were played
before the CD was stopped are stored.
. Individual tracks can be deleted from
the hard drive after the CD is recorded.
SAA2514
If the title information of the track being recorded
is stored either in the hard drive or in the CD, the
title is automatically displayed on the screen. For
title acquisition from the hard drive, music
recognition technology and related data are
provided by Gracenote
®.
If a track is not recorded successfully due to
skipping sounds, the
mark is displayed
behind the track number.
The “Music Box
®” hard drive cannot perform
recording under the following conditions.
. There is not enough space in the hard drive
. The number of albums reaches the maximum
of 500. .
The number of tracks reaches the maximum
of 3,000.
Automatic recording:
If the “Automatic Recording” function is turned
to ON, recording starts when a CD is inserted.
(See “Music Box
®settings” (P.4-73).)
Stopping recording:
To stop the recording, select the “Stop REC”
key button by touching the screen or using the
multi-function controller.
If the CD is ejected, the audio system is turned
off or the ignition switch is pushed to the OFF
position, the recording also stops.
Page 227 of 427
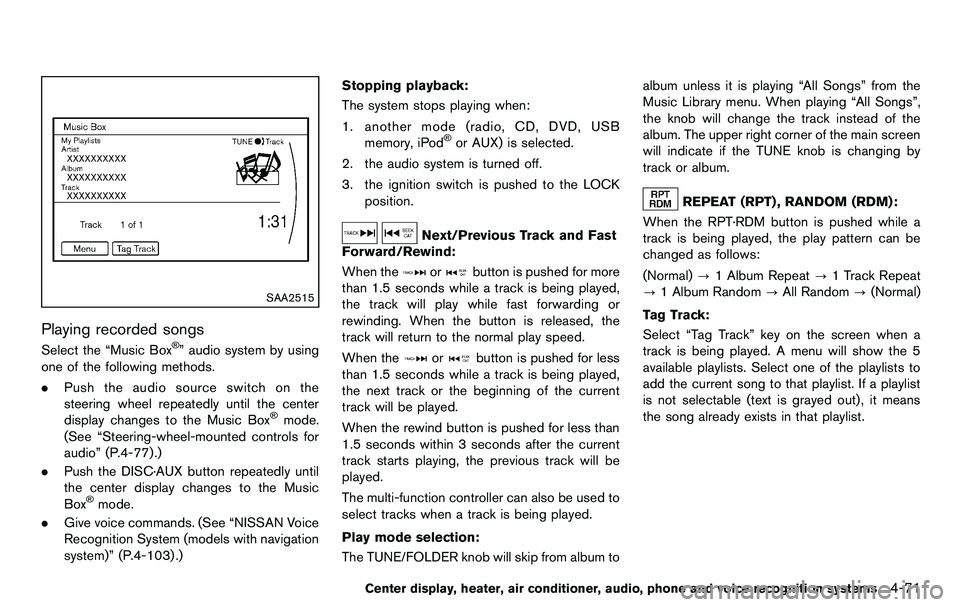
SAA2515
Playing recorded songs
Select the “Music Box®” audio system by using
one of the following methods.
. Push the audio source switch on the
steering wheel repeatedly until the center
display changes to the Music Box
®mode.
(See “Steering-wheel-mounted controls for
audio” (P.4-77).)
. Push the DISC·AUX button repeatedly until
the center display changes to the Music
Box
®mode.
. Give voice commands. (See “NISSAN Voice
Recognition System (models with navigation
system)” (P.4-103) .) Stopping playback:
The system stops playing when:
1. another mode (radio, CD, DVD, USB memory, iPod
®or AUX) is selected.
2. the audio system is turned off.
3. the ignition switch is pushed to the LOCK position.
Next/Previous Track and Fast
Forward/Rewind:
When the
orbutton is pushed for more
than 1.5 seconds while a track is being played,
the track will play while fast forwarding or
rewinding. When the button is released, the
track will return to the normal play speed.
When the
orbutton is pushed for less
than 1.5 seconds while a track is being played,
the next track or the beginning of the current
track will be played.
When the rewind button is pushed for less than
1.5 seconds within 3 seconds after the current
track starts playing, the previous track will be
played.
The multi-function controller can also be used to
select tracks when a track is being played.
Play mode selection:
The TUNE/FOLDER knob will skip from album to album unless it is playing “All Songs” from the
Music Library menu. When playing “All Songs”,
the knob will change the track instead of the
album. The upper right corner of the main screen
will indicate if the TUNE knob is changing by
track or album.
REPEAT (RPT) , RANDOM (RDM):
When the RPT·RDM button is pushed while a
track is being played, the play pattern can be
changed as follows:
(Normal) ?1 Album Repeat ?1 Track Repeat
? 1 Album Random ?All Random ?(Normal)
Tag Track: Select “Tag Track” key on the screen when a
track is being played. A menu will show the 5
available playlists. Select one of the playlists to
add the current song to that playlist. If a playlist
is not selectable (text is grayed out), it means
the song already exists in that playlist.
Center display, heater, air conditioner, audio, phone and voice recognition systems4-71
Page 228 of 427
4-72Center display, heater, air conditioner, audio, phone and voice recognition systems
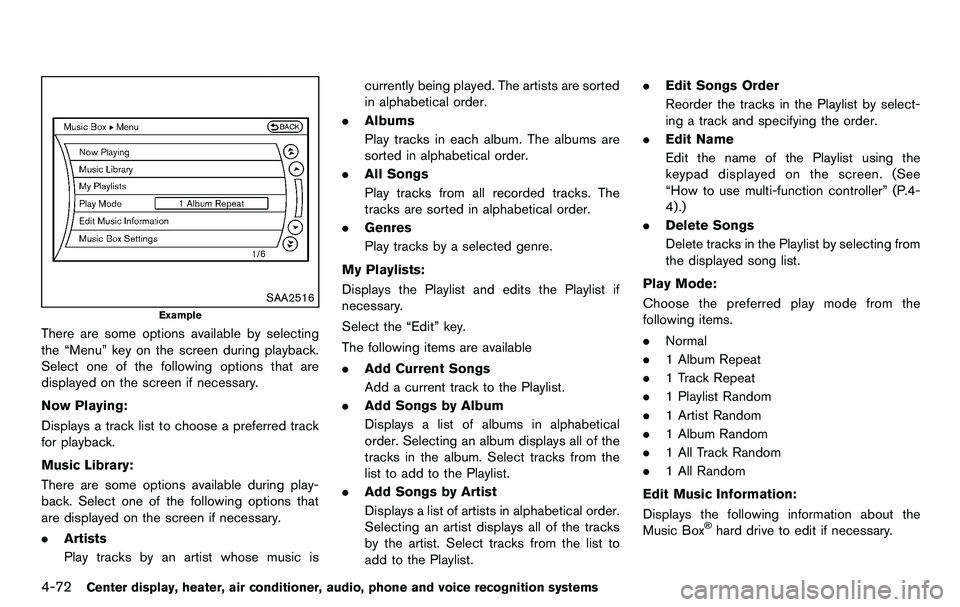
SAA2516
Example
There are some options available by selecting
the “Menu” key on the screen during playback.
Select one of the following options that are
displayed on the screen if necessary.
Now Playing:
Displays a track list to choose a preferred track
for playback.
Music Library:
There are some options available during play-
back. Select one of the following options that
are displayed on the screen if necessary.
.Artists
Play tracks by an artist whose music is currently being played. The artists are sorted
in alphabetical order.
. Albums
Play tracks in each album. The albums are
sorted in alphabetical order.
. All Songs
Play tracks from all recorded tracks. The
tracks are sorted in alphabetical order.
. Genres
Play tracks by a selected genre.
My Playlists:
Displays the Playlist and edits the Playlist if
necessary.
Select the “Edit” key.
The following items are available
. Add Current Songs
Add a current track to the Playlist.
. Add Songs by Album
Displays a list of albums in alphabetical
order. Selecting an album displays all of the
tracks in the album. Select tracks from the
list to add to the Playlist.
. Add Songs by Artist
Displays a list of artists in alphabetical order.
Selecting an artist displays all of the tracks
by the artist. Select tracks from the list to
add to the Playlist. .
Edit Songs Order
Reorder the tracks in the Playlist by select-
ing a track and specifying the order.
. Edit Name
Edit the name of the Playlist using the
keypad displayed on the screen. (See
“How to use multi-function controller” (P.4-
4) .)
. Delete Songs
Delete tracks in the Playlist by selecting from
the displayed song list.
Play Mode:
Choose the preferred play mode from the
following items.
. Normal
. 1 Album Repeat
. 1 Track Repeat
. 1 Playlist Random
. 1 Artist Random
. 1 Album Random
. 1 All Track Random
. 1 All Random
Edit Music Information:
Displays the following information about the
Music Box
®hard drive to edit if necessary.
Page 229 of 427
.Edit Information of Current Song
Edit the “Track”, “Artist” and “Genre” in-
formation of the current track using the
keypad displayed on the screen. (See “How
to use touch screen” (P.4-4) .)
Edit the “Mode” information by selecting
from the list.
. Edit Information by Album
Edit the displayed name and of a selected
album and the track information in the album.
. Update Gracenote from USB Device
Update the in-vehicle Gracenote Database
using a USB memory. Search the title from a
information acquired on the Internet. Visit
www.nissanusa.com/gracenote/ for details.
. Transfer Missing Titles to USB
Transfer the information of an album re-
corded without titles to a USB memory. Visit
www.nissanusa.com/gracenote/ for details.
. Update Gracenote from HDD
Search the title using the database in the
hard drive.
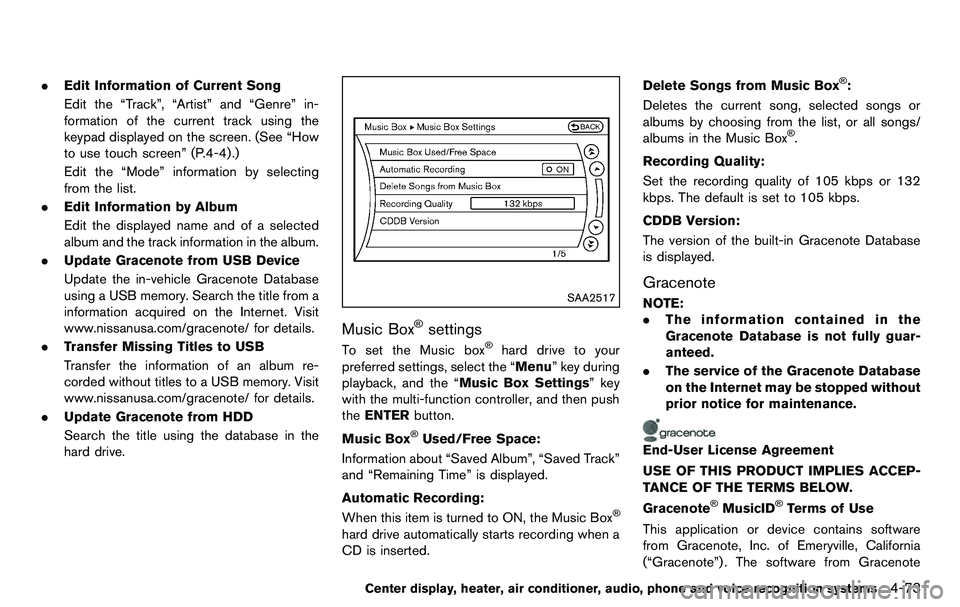
SAA2517
Music Box®settings
To set the Music box®hard drive to your
preferred settings, select the “Menu” key during
playback, and the “Music Box Settings” key
with the multi-function controller, and then push
the ENTER button.
Music Box
®Used/Free Space:
Information about “Saved Album”, “Saved Track”
and “Remaining Time” is displayed.
Automatic Recording:
When this item is turned to ON, the Music Box
®
hard drive automatically starts recording when a
CD is inserted. Delete Songs from Music Box
®:
Deletes the current song, selected songs or
albums by choosing from the list, or all songs/
albums in the Music Box
®.
Recording Quality:
Set the recording quality of 105 kbps or 132
kbps. The default is set to 105 kbps.
CDDB Version:
The version of the built-in Gracenote Database
is displayed.
Gracenote
NOTE:
. The information contained in the
Gracenote Database is not fully guar-
anteed.
. The service of the Gracenote Database
on the Internet may be stopped without
prior notice for maintenance.
End-User License Agreement
USE OF THIS PRODUCT IMPLIES ACCEP-
TANCE OF THE TERMS BELOW.
Gracenote
®MusicID®Terms of Use
This application or device contains software
from Gracenote, Inc. of Emeryville, California
(“Gracenote”) . The software from Gracenote
Center display, heater, air conditioner, audio, phone and voice recognition systems4-73
Page 232 of 427
4-76Center display, heater, air conditioner, audio, phone and voice recognition systems
SAA2496
AUX Menu
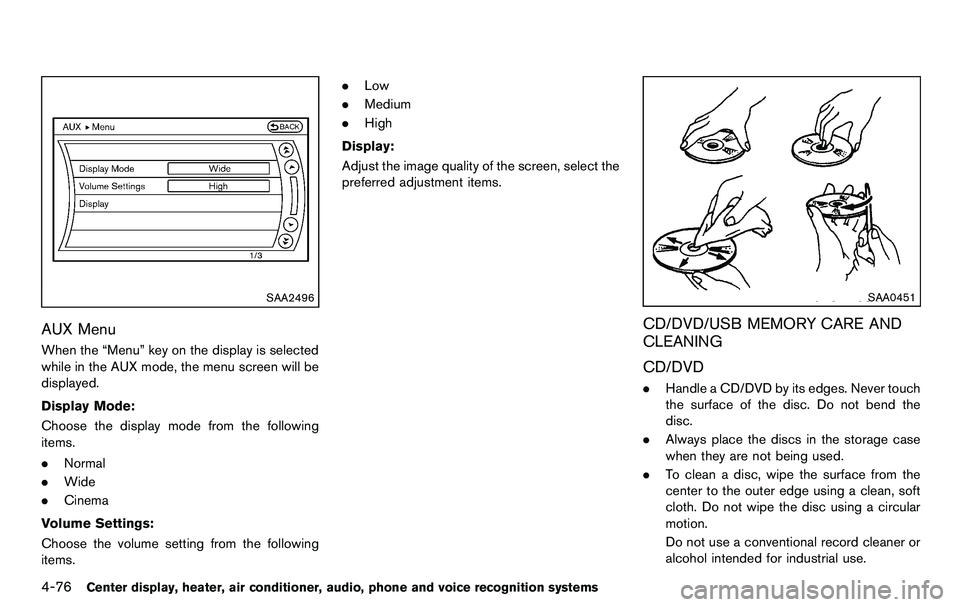
When the “Menu” key on the display is selected
while in the AUX mode, the menu screen will be
displayed.
Display Mode:
Choose the display mode from the following
items.
.Normal
. Wide
. Cinema
Volume Settings:
Choose the volume setting from the following
items. .
Low
. Medium
. High
Display:
Adjust the image quality of the screen, select the
preferred adjustment items.
SAA0451
CD/DVD/USB MEMORY CARE AND
CLEANING
CD/DVD
. Handle a CD/DVD by its edges. Never touch
the surface of the disc. Do not bend the
disc.
. Always place the discs in the storage case
when they are not being used.
. To clean a disc, wipe the surface from the
center to the outer edge using a clean, soft
cloth. Do not wipe the disc using a circular
motion.
Do not use a conventional record cleaner or
alcohol intended for industrial use.
Page 239 of 427
SAA2518
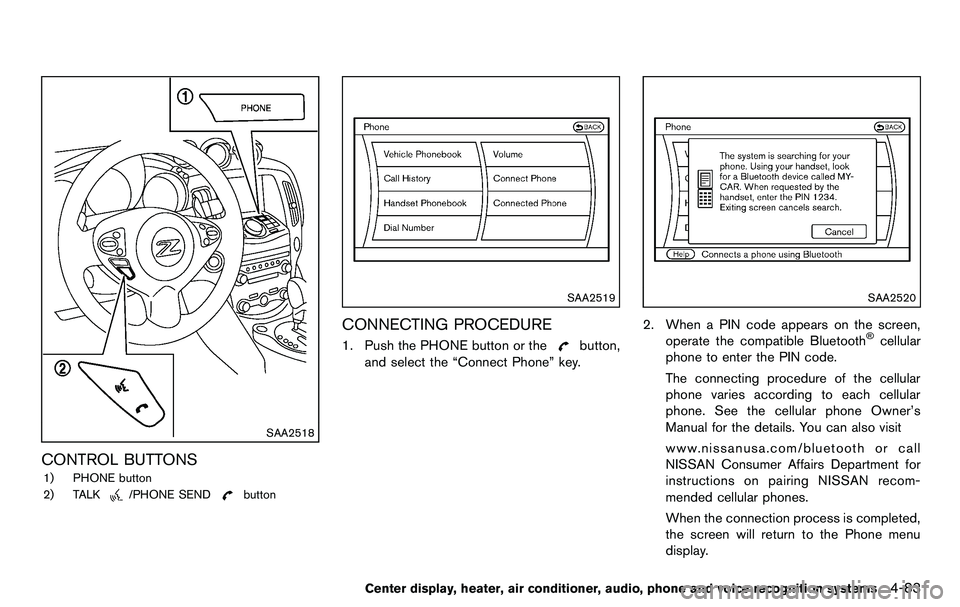
CONTROL BUTTONS
1) PHONE button
2) TALK
/PHONE SENDbutton
SAA2519
CONNECTING PROCEDURE
1. Push the PHONE button or thebutton,
and select the “Connect Phone” key.
SAA2520
2. When a PIN code appears on the screen,
operate the compatible Bluetooth®cellular
phone to enter the PIN code.
The connecting procedure of the cellular
phone varies according to each cellular
phone. See the cellular phone Owner’s
Manual for the details. You can also visit
www.nissanusa.com/bluetooth or call
NISSAN Consumer Affairs Department for
instructions on pairing NISSAN recom-
mended cellular phones.
When the connection process is completed,
the screen will return to the Phone menu
display.
Center display, heater, air conditioner, audio, phone and voice recognition systems4-83
Page 240 of 427
4-84Center display, heater, air conditioner, audio, phone and voice recognition systems
PHONE SELECTION
Up to 5 cellular phones can be registered to the
system. To switch to connect another cellular
phone, push PHONE button and select the
“Connected Phones” key. The registered cellular
phones are shown on the list. If you select a
cellular phone that is different from the one
currently connected, the newly selected phone
will be connected to the system.
VEHICLE PHONEBOOK
This vehicle has two phonebooks available for
hands-free use. Depending on the phone, the
system may automatically download the entire
cell phone’s phonebook into the “Handset
Phonebook”. For the details about downloading
a phonebook, see “Phone setting” (P.4-89) . If a
phonebook does not automatically download,
the vehicle phonebook may be set for up to
1.000 entries. This phonebook allows the
recording of a name to speak while using voice
recognition.
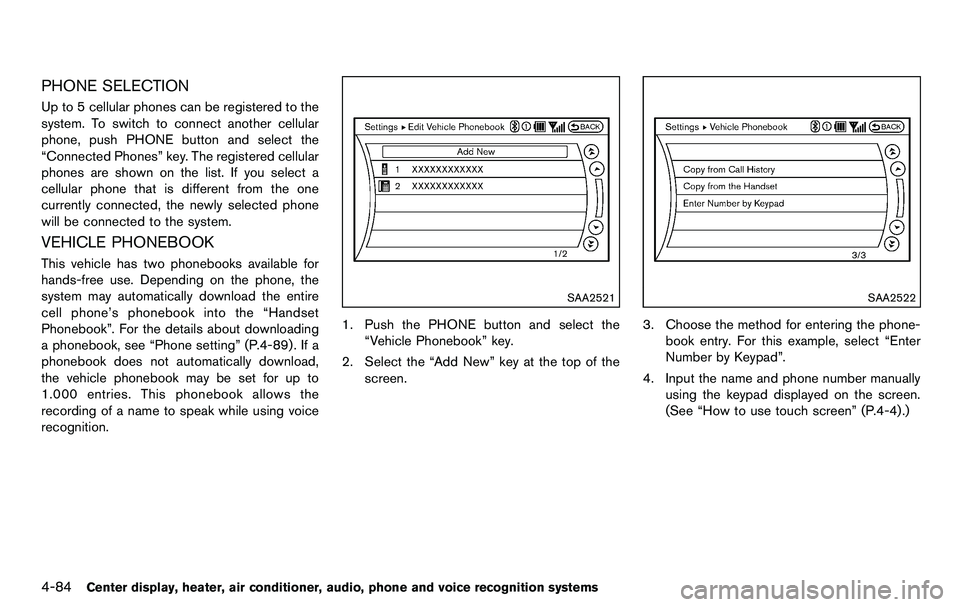
SAA2521
1. Push the PHONE button and select the“Vehicle Phonebook” key.
2. Select the “Add New” key at the top of the screen.
SAA2522
3. Choose the method for entering the phone-
book entry. For this example, select “Enter
Number by Keypad”.
4. Input the name and phone number manually using the keypad displayed on the screen.
(See “How to use touch screen” (P.4-4).)
Page 241 of 427
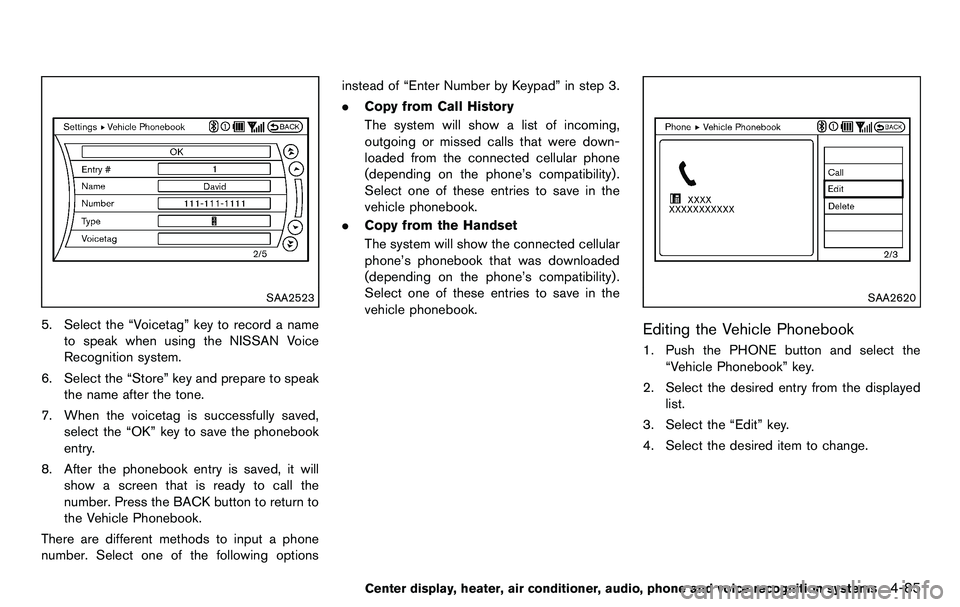
SAA2523
5. Select the “Voicetag” key to record a nameto speak when using the NISSAN Voice
Recognition system.
6. Select the “Store” key and prepare to speak the name after the tone.
7. When the voicetag is successfully saved, select the “OK” key to save the phonebook
entry.
8. After the phonebook entry is saved, it will show a screen that is ready to call the
number. Press the BACK button to return to
the Vehicle Phonebook.
There are different methods to input a phone
number. Select one of the following options instead of “Enter Number by Keypad” in step 3.
.
Copy from Call History
The system will show a list of incoming,
outgoing or missed calls that were down-
loaded from the connected cellular phone
(depending on the phone’s compatibility) .
Select one of these entries to save in the
vehicle phonebook.
. Copy from the Handset
The system will show the connected cellular
phone’s phonebook that was downloaded
(depending on the phone’s compatibility) .
Select one of these entries to save in the
vehicle phonebook.
SAA2620
Editing the Vehicle Phonebook
1. Push the PHONE button and select the
“Vehicle Phonebook” key.
2. Select the desired entry from the displayed list.
3. Select the “Edit” key.
4. Select the desired item to change.
Center display, heater, air conditioner, audio, phone and voice recognition systems4-85