2012 NISSAN 370Z COUPE ad blue
[x] Cancel search: ad bluePage 169 of 427
SAA2486
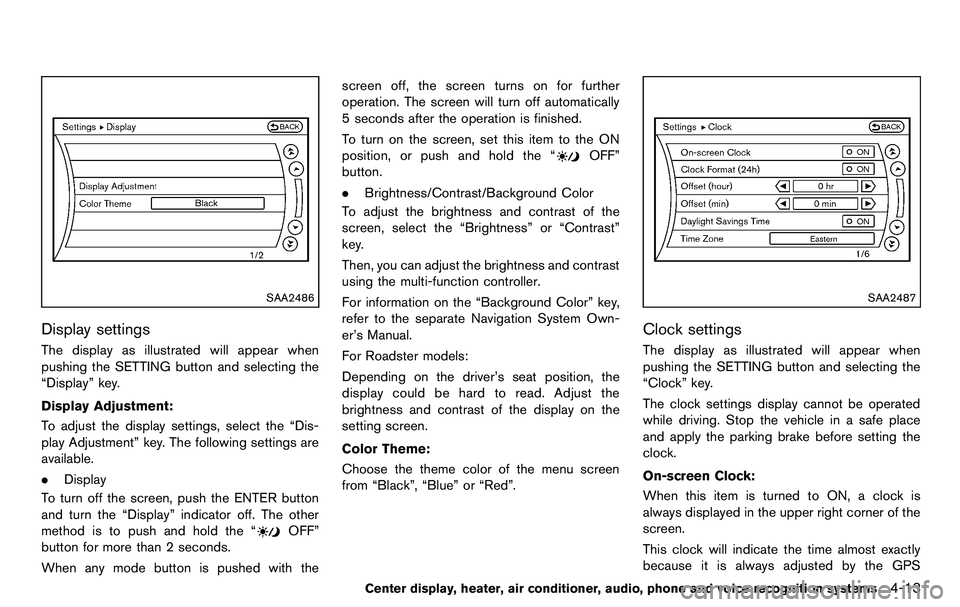
Display settings
The display as illustrated will appear when
pushing the SETTING button and selecting the
“Display” key.
Display Adjustment:
To adjust the display settings, select the “Dis-
play Adjustment” key. The following settings are
available.
.Display
To turn off the screen, push the ENTER button
and turn the “Display” indicator off. The other
method is to push and hold the “
OFF”
button for more than 2 seconds.
When any mode button is pushed with the screen off, the screen turns on for further
operation. The screen will turn off automatically
5 seconds after the operation is finished.
To turn on the screen, set this item to the ON
position, or push and hold the “
OFF”
button.
. Brightness/Contrast/Background Color
To adjust the brightness and contrast of the
screen, select the “Brightness” or “Contrast”
key.
Then, you can adjust the brightness and contrast
using the multi-function controller.
For information on the “Background Color” key,
refer to the separate Navigation System Own-
er’s Manual.
For Roadster models:
Depending on the driver’s seat position, the
display could be hard to read. Adjust the
brightness and contrast of the display on the
setting screen.
Color Theme:
Choose the theme color of the menu screen
from “Black”, “Blue” or “Red”.
SAA2487
Clock settings
The display as illustrated will appear when
pushing the SETTING button and selecting the
“Clock” key.
The clock settings display cannot be operated
while driving. Stop the vehicle in a safe place
and apply the parking brake before setting the
clock.
On-screen Clock:
When this item is turned to ON, a clock is
always displayed in the upper right corner of the
screen.
This clock will indicate the time almost exactly
because it is always adjusted by the GPS
Center display, heater, air conditioner, audio, phone and voice recognition systems4-13
Page 197 of 427
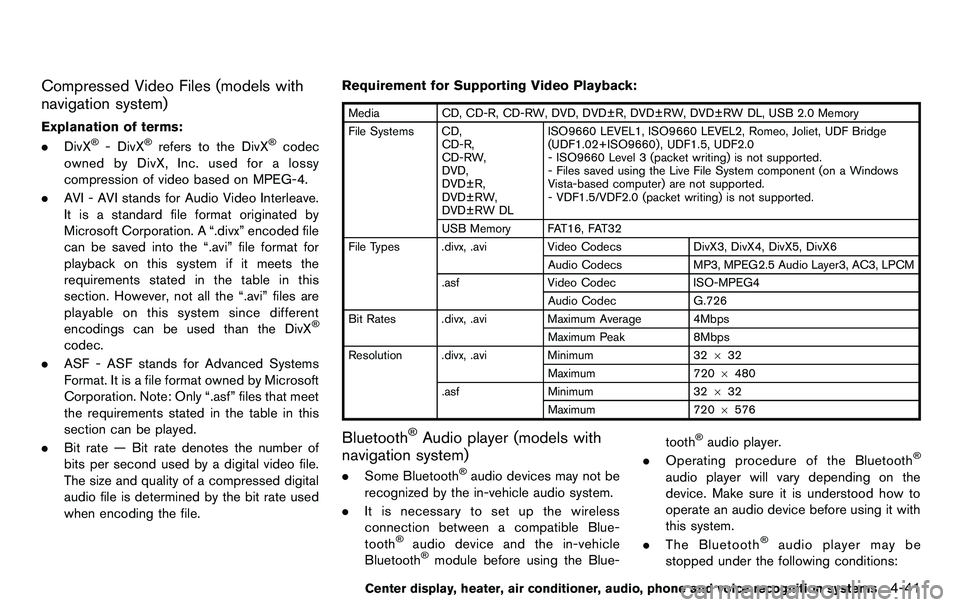
Compressed Video Files (models with
navigation system)
Explanation of terms:
.DivX®- DivX®refers to the DivX®codec
owned by DivX, Inc. used for a lossy
compression of video based on MPEG-4.
. AVI - AVI stands for Audio Video Interleave.
It is a standard file format originated by
Microsoft Corporation. A “.divx” encoded file
can be saved into the “.avi” file format for
playback on this system if it meets the
requirements stated in the table in this
section. However, not all the “.avi” files are
playable on this system since different
encodings can be used than the DivX
®
codec.
. ASF - ASF stands for Advanced Systems
Format. It is a file format owned by Microsoft
Corporation. Note: Only “.asf” files that meet
the requirements stated in the table in this
section can be played.
. Bit rate — Bit rate denotes the number of
bits per second used by a digital video file.
The size and quality of a compressed digital
audio file is determined by the bit rate used
when encoding the file. Requirement for Supporting Video Playback:
Media
CD, CD-R, CD-RW, DVD, DVD±R, DVD±RW, DVD±RW DL, USB 2.0 Memory
File Systems CD, CD-R,
CD-RW,
DVD,
DVD±R,
DVD±RW,
DVD±RW DL ISO9660 LEVEL1, ISO9660 LEVEL2, Romeo, Joliet, UDF Bridge
(UDF1.02+ISO9660) , UDF1.5, UDF2.0
- ISO9660 Level 3 (packet writing) is not supported.
- Files saved using the Live File System component (on a Windows
Vista-based computer) are not supported.
- VDF1.5/VDF2.0 (packet writing) is not supported.
USB Memory FAT16, FAT32
File Types .divx, .avi Video CodecsDivX3, DivX4, DivX5, DivX6
Audio Codecs MP3, MPEG2.5 Audio Layer3, AC3, LPCM
.asf Video Codec ISO-MPEG4
Audio Codec G.726
Bit Rates .divx, .avi Maximum Average 4Mbps
Maximum Peak 8Mbps
Resolution .divx, .avi Minimum32632
Maximum 7206480
.asf Minimum 32632
Maximum 720 6576
Bluetooth®Audio player (models with
navigation system)
. Some Bluetooth®audio devices may not be
recognized by the in-vehicle audio system.
. It is necessary to set up the wireless
connection between a compatible Blue-
tooth
®audio device and the in-vehicle
Bluetooth®module before using the Blue- tooth
®audio player.
. Operating procedure of the Bluetooth®
audio player will vary depending on the
device. Make sure it is understood how to
operate an audio device before using it with
this system.
. The Bluetooth
®audio player may be
stopped under the following conditions:
Center display, heater, air conditioner, audio, phone and voice recognition systems4-41
Page 198 of 427
4-42Center display, heater, air conditioner, audio, phone and voice recognition systems
— Receiving a hands-free call.
— Checking the connection to the hands-free phone.
. Do not place a Bluetooth
®audio device in
an area surrounded by metal or far away
from the in-vehicle Bluetooth
®module to
prevent tone quality degradation and wire-
less connection disruption.
. While an audio device is connected through
a Bluetooth
®wireless connection, the bat-
tery power of the device may discharge
quicker than usual.
. This system supports the Bluetooth
®Audio
Distribution Profile (A2DP, AVRCP).
. Wireles LAN (Wi-Fi) and the Bluetooth
®
functions share the same frequency band
(2.4 GHz) . Using the Bluetooth®and the
wireless LAN functions at the same time may
slow down or disconnect the communica-
tion and cause undesired noise. It is
recommended that you turn off the wireless
LAN (Wi-Fi) when using the Bluetooth
®
functions.
. Bluetooth®is a trademark owned by Blue-
tooth SIG, Inc. and licensed to Clarion Co.,
Ltd.
Music Box®(if so equipped)
Recording:
. Note that data that is lost and not stored to
the hard drive due to system damage,
improper operation or malfunction is not
under warranty.
. Vehicle owners are not permitted to record
music without permission of the owner of
the copyright except for personal use.
. Check if the music is appropriately recorded
to the hard drive after recording when the
compact disc cannot be rerecorded.
. Some music cannot be recorded depending
on the disc condition due to high-speed
recording.
. Jumping sounds may be recorded when a
compact disc is recorded while driving on
rough roads and excessive vibration occurs.
. A mark indicating jumping sounds is dis-
played if jumping sounds are recorded.
. No sounds may be recorded if jumping
sounds occurs or the disc is in poor
condition.
. Tracks that include Serial Copy Manage-
ment System (SCMS) are not recorded.
. If a compact disc is scratched or dirty, it may
not be recorded, jumping sounds may occur
or it may take a long time to record. Automatic title download:
. The title information that is automatically
downloaded may differ from the actual title.
. When newly released compact discs are
recorded, their title information may not be
downloaded.
. The title information in the hard drive can be
updated. (See “Playing recorded songs”
(P.4-71) .)
Page 209 of 427
Turn the VOL control knob to adjust the volume.
Adjusting tone quality and speaker bal-
ance:
To adjust Bass, Treble, Balance and Fade, push
the Audio control knob. When the display shows
the setting you want to change (Bass, Treble,
Balance and Fade) , rotate the Audio control
knob to set the desired setting. For the other
setting methods, see “How to use SETTING
button” (P.4-11).
This vehicle has some sound effect functions as
follows:
.Speed Sensitive Vol.
For more details, see “How to use SETTING
button” (P.4-11).
Switching the display:
Pushing the DISC·AUX button will switch the
displays as follows:
iPod
®/USB ?CD/DVD ?Music Box®(if so
equipped) ?Bluetooth®Audio ?AUX ?
iPod®/USB
FM-AM-SAT radio operation
radio (FM/AM) band select:
Pushing the radio band select button will
change the band as follows:
AM ?FM1 ?FM2 ?AM
radio (SAT) band select:
Pushing the radio band select button will
change the band as follows:
XM1 ?XM2 ?XM3 ?XM1
When the radio band select button is pushed
while the ignition switch is in the ACC or ON
position, the radio will come on at the channel
last played.
The last channel played will also come on when
the ON·OFF button is pushed to ON.
The satellite radio is not available in Alaska,
Hawaii and Guam.
If another audio source is playing when the radio
band select button is turned to ON, the audio
source will automatically be turned off and the
last radio channel played will come on.
When the stereo broadcast signal is weak, the
radio will automatically change from stereo to
monaural reception. TUNE (Tuning):
. For AM and FM radio
Turn the radio TUNE knob for manual tuning.
. For XM Satellite Radio
Turn the radio TUNE knob to seek channels
from all of the categories when any category
is not selected.
SEEK tuning/CATEGORY
(CAT):
. For AM and FM radio
Push the SEEK button
orto tune
from low to high or high to low frequencies
and to stop at the next broadcasting station.
. For XM Satellite Radio
Push the SEEK button
orto tune
to the first channel of the next or previous
category.
During satellite radio reception, the following
notices will be displayed under certain condi-
tions.
. NO SIGNAL (No signal is received while the
SAT tuner is connected.)
. OFF AIR (Broadcasting signed off)
. CHECK ANTENNA (Antenna connection
error)
. LOADING (When the initial setting is
performed)
Center display, heater, air conditioner, audio, phone and voice recognition systems4-53
Page 219 of 427
the “OK” key.
The specified folder/file will be played.
. Display
To adjust the image quality of the screen,
select the preferred adjustment items.
. DRC
DRC (Dynamic Range Compression) auto-
matically adjusts the soundtrack volume
level to maintain a more even sound to the
speakers.
. Audio
Select the preferred language for audio.
. Subtitle
Select the preferred language for subtitle.
. Display Mode
Select the “Normal”, “Wide”, “Cinema” or
“Full” mode.Bluetooth®STREAMING AUDIO (mod-
els with navigation system)
Your NISSAN is equipped with Bluetooth®
Streaming Audio. If you have a compatible
Bluetooth®device with streaming audio (A2DP
profile) , you can set up the wireless connection
between your Bluetooth
®device and the in-
vehicle audio system. This connection allows
you to listen to the audio from the Bluetooth
®
device using your vehicle speakers. It also may
allow basic control of the device for playing and
skipping audio files using the AVRCP Blue-
tooth
®profile. All Bluetooth®Devices do not
have the same level of controls for AVRCP.
Please consult the manual for your Bluetooth
®
Device for more details.
Once your Bluetooth®device is connected to
the in-vehicle audio system, it will automatically
reconnect whenever the device is present in the
vehicle and you select Bluetooth
®Audio from
your audio system. You do not need to manually
reconnect for each usage.
Wireles LAN (Wi-Fi) and the Bluetooth
®func-
tions share the same frequency band (2.4 GHz) .
Using the Bluetooth
®and the wireless LAN
functions at the same time may slow down or
disconnect the communication and cause un-
desired noise. It is recommended that you turn
off the wireless LAN (Wi-Fi) when using the Bluetooth
®functions.
Regulatory information
FCC Regulatory information:
.
CAUTION: To maintain compliance with
FCC’s RF exposure guidelines, use only
the supplied antenna. Unauthorized antenna,
modification, or attachments could damage
the transmitter and may violate FCC regula-
tions.
. Operation is subject to the following two
conditions:
1) This device may not cause interference
and
2) This device must accept any interfer- ence, including interference that may
cause undesired operation of the device
IC Regulatory information:
. Operation is subject to the following two
conditions:
1) This device may not cause interference,
and
2) This device must accept any interfer- ence, including interference that may
cause undesired operation of the device.
. This Class B digital apparatus meets all
requirements of the Canadian Interference-
Causing Equipment Regulations.
Center display, heater, air conditioner, audio, phone and voice recognition systems4-63
Page 220 of 427
4-64Center display, heater, air conditioner, audio, phone and voice recognition systems
Bluetooth trademark:
Bluetooth®is a trademark owned
by Bluetooth SIG, Inc. and li-
censed to Clarion Co., Ltd.
SAA2505
Connecting procedure
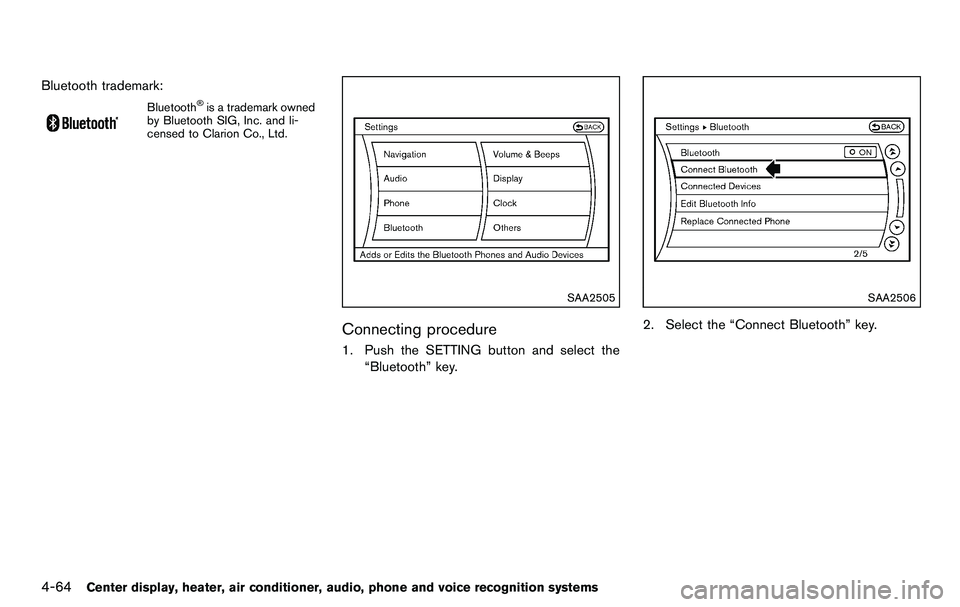
1. Push the SETTING button and select the
“Bluetooth” key.
SAA2506
2. Select the “Connect Bluetooth” key.
Page 221 of 427
SAA2507
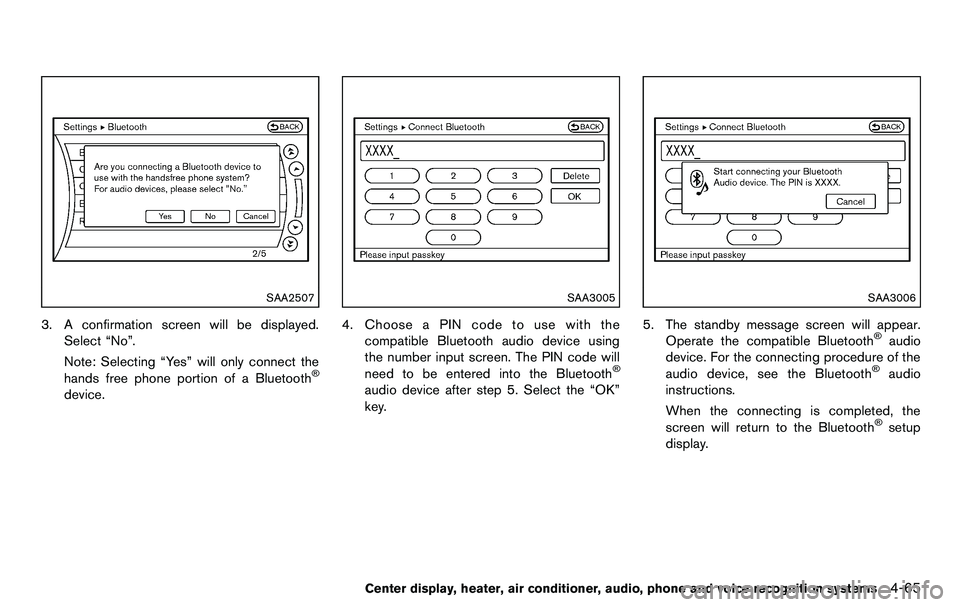
3. A confirmation screen will be displayed.Select “No”.
Note: Selecting “Yes” will only connect the
hands free phone portion of a Bluetooth
®
device.
SAA3005
4. Choose a PIN code to use with thecompatible Bluetooth audio device using
the number input screen. The PIN code will
need to be entered into the Bluetooth
®
audio device after step 5. Select the “OK”
key.
SAA3006
5. The standby message screen will appear.Operate the compatible Bluetooth®audio
device. For the connecting procedure of the
audio device, see the Bluetooth
®audio
instructions.
When the connecting is completed, the
screen will return to the Bluetooth
®setup
display.
Center display, heater, air conditioner, audio, phone and voice recognition systems4-65
Page 222 of 427
4-66Center display, heater, air conditioner, audio, phone and voice recognition systems
SAA2510
Audio main operation
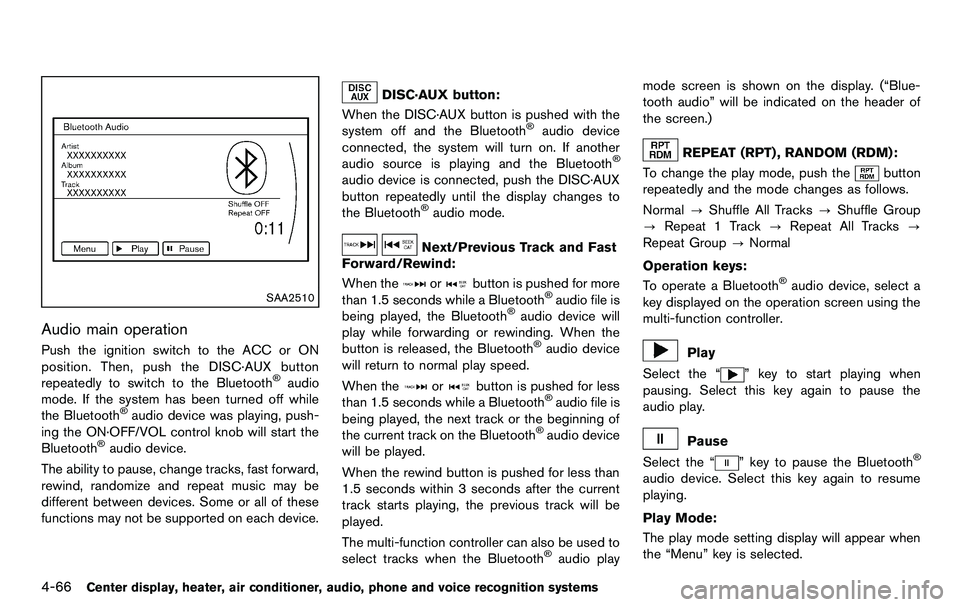
Push the ignition switch to the ACC or ON
position. Then, push the DISC·AUX button
repeatedly to switch to the Bluetooth
®audio
mode. If the system has been turned off while
the Bluetooth
®audio device was playing, push-
ing the ON·OFF/VOL control knob will start the
Bluetooth
®audio device.
The ability to pause, change tracks, fast forward,
rewind, randomize and repeat music may be
different between devices. Some or all of these
functions may not be supported on each device.
DISC·AUX button:
When the DISC·AUX button is pushed with the
system off and the Bluetooth
®audio device
connected, the system will turn on. If another
audio source is playing and the Bluetooth
®
audio device is connected, push the DISC·AUX
button repeatedly until the display changes to
the Bluetooth
®audio mode.
Next/Previous Track and Fast
Forward/Rewind:
When the
orbutton is pushed for more
than 1.5 seconds while a Bluetooth®audio file is
being played, the Bluetooth®audio device will
play while forwarding or rewinding. When the
button is released, the Bluetooth
®audio device
will return to normal play speed.
When the
orbutton is pushed for less
than 1.5 seconds while a Bluetooth®audio file is
being played, the next track or the beginning of
the current track on the Bluetooth
®audio device
will be played.
When the rewind button is pushed for less than
1.5 seconds within 3 seconds after the current
track starts playing, the previous track will be
played.
The multi-function controller can also be used to
select tracks when the Bluetooth
®audio play mode screen is shown on the display. (“Blue-
tooth audio” will be indicated on the header of
the screen.)
REPEAT (RPT) , RANDOM (RDM):
To change the play mode, push the
button
repeatedly and the mode changes as follows.
Normal ?Shuffle All Tracks ?Shuffle Group
? Repeat 1 Track ?Repeat All Tracks ?
Repeat Group ?Normal
Operation keys:
To operate a Bluetooth
®audio device, select a
key displayed on the operation screen using the
multi-function controller.
Play
Select the “
” key to start playing when
pausing. Select this key again to pause the
audio play.
Pause
Select the “
” key to pause the Bluetooth®
audio device. Select this key again to resume
playing.
Play Mode:
The play mode setting display will appear when
the “Menu” key is selected.