2012 NISSAN 370Z COUPE ECO mode
[x] Cancel search: ECO modePage 223 of 427
Choose the preferred play mode from the
following items.
.Shuffle
Choose “Shuffle OFF”, “Shuffle All Tracks”
and “Shuffle Group”.
. Repeat
Choose from “Repeat OFF”, “Repeat 1
Track”, “Repeat All Tracks” and “Repeat
Group”.
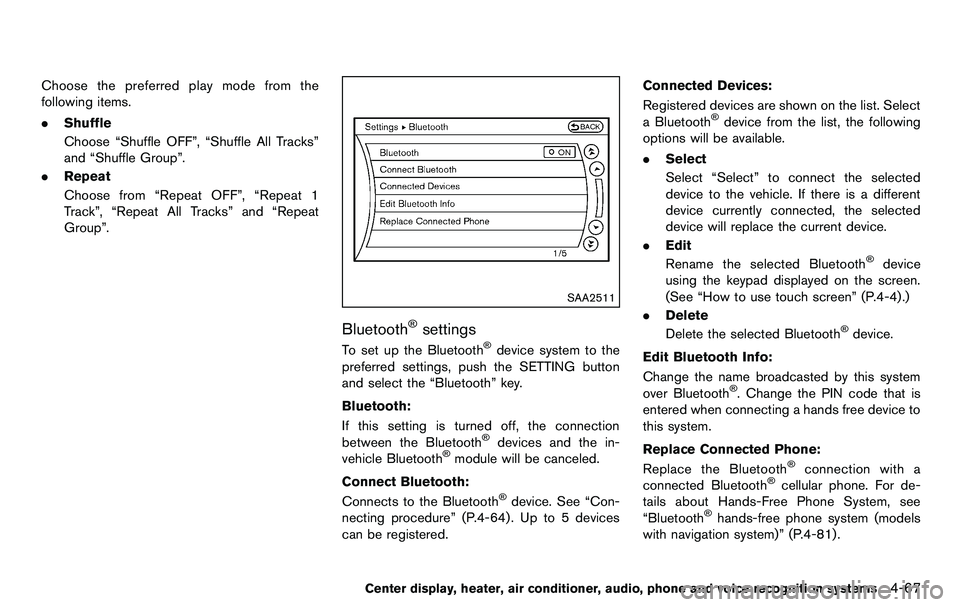
SAA2511
Bluetooth®settings
To set up the Bluetooth®device system to the
preferred settings, push the SETTING button
and select the “Bluetooth” key.
Bluetooth:
If this setting is turned off, the connection
between the Bluetooth
®devices and the in-
vehicle Bluetooth®module will be canceled.
Connect Bluetooth:
Connects to the Bluetooth
®device. See “Con-
necting procedure” (P.4-64) . Up to 5 devices
can be registered. Connected Devices:
Registered devices are shown on the list. Select
a Bluetooth
®device from the list, the following
options will be available.
. Select
Select “Select” to connect the selected
device to the vehicle. If there is a different
device currently connected, the selected
device will replace the current device.
. Edit
Rename the selected Bluetooth
®device
using the keypad displayed on the screen.
(See “How to use touch screen” (P.4-4).)
. Delete
Delete the selected Bluetooth
®device.
Edit Bluetooth Info:
Change the name broadcasted by this system
over Bluetooth
®. Change the PIN code that is
entered when connecting a hands free device to
this system.
Replace Connected Phone:
Replace the Bluetooth
®connection with a
connected Bluetooth®cellular phone. For de-
tails about Hands-Free Phone System, see
“Bluetooth
®hands-free phone system (models
with navigation system)” (P.4-81) .
Center display, heater, air conditioner, audio, phone and voice recognition systems4-67
Page 224 of 427

4-68Center display, heater, air conditioner, audio, phone and voice recognition systems
SAA2512
iPod®PLAYER OPERATION (models
with navigation system)
Connecting iPod
®
Open the console lid and connect the iPod®
cable to the USB connector. If compatible, the
battery of the iPod®is charged while the
connection to the vehicle.
Depending on the version of the iPod
®, the
display on the iPod®shows a NISSAN or
Accessory Attached screen when the connec-
tion is completed. When the iPod
®is connected
to the vehicle, the iPod®music library can only
be operated by the vehicle audio controls.
*iPod
®is a trademark of Apple Inc., registered in the U.S. and other countries.
Compatibility
The following models are available:
.
Fifth generation iPod®(version 1.2.3 or
later)
. iPod Classic
®(version 1.1.1 or later)
. First generation iPod touch®(version 2.0.0
or later)
. Second generation iPod touch
®(version
1.2.3 or later)
. First generation iPod nano
®(version 1.3.1 or
later)
. Second generation iPod nano
®(version
1.1.3 or later)
. Third generation iPod nano
®(version 1.1 or
later)
. Fourth generation iPod nano
®(version 1.0.2
or later)
Make sure that the iPod
®version is updated.
Audio main operation
Push the ignition switch to the ACC or ON
position. Then, push the DISC·AUX button
repeatedly to switch to the iPod
®mode.
If the system has been turned off while the iPod®
was playing, pushing the ON·OFF button will
start the iPod®.
DISC·AUX button:
When the DISC·AUX button is pushed with the
system off and the iPod
®connected, the system
will turn on. If another audio source is playing
and the iPod
®is connected, push the DISC·AUX
button repeatedly until the center display
changes to the iPod
®mode.
Interface:
The interface for iPod
®operation shown on the
vehicle center display is similar to the iPod®
interface. Use the multi-function controller and
the ENTER or BACK button to play the iPod®
with your favorite settings.
The following items can be chosen from the
menu list screen. For further information about
each item, see the iPod
®Owner’s Manual.
. Now Playing
. Playlists
Page 225 of 427
.Artists
. Albums
. Songs
. Podcasts
. Genres
. Composers
. Audiobooks
. Shuffle Songs
The following touch-panel buttons shown on the
screen are also available:
.
: returns to the previous screen.
.
: plays/pauses the music selected.
Next/Previous Track and Fast
Forward/Rewind:
When the
orbutton is pushed for more
than 1.5 seconds while the iPod®is playing, the
iPod®will play while fast forwarding or rewind-
ing. When the button is released, the iPod®will
return to the normal play speed.
When the
orbutton is pushed for less
than 1.5 seconds while the iPod®is playing, the
next track or the beginning of the current track
on the iPod
®will be played.
When the rewind button is pushed for less than
1.5 seconds within 3 seconds after the current
track starts playing, the previous track will be
played. The multi-function controller can also be used to
select tracks when the iPod
®is playing.
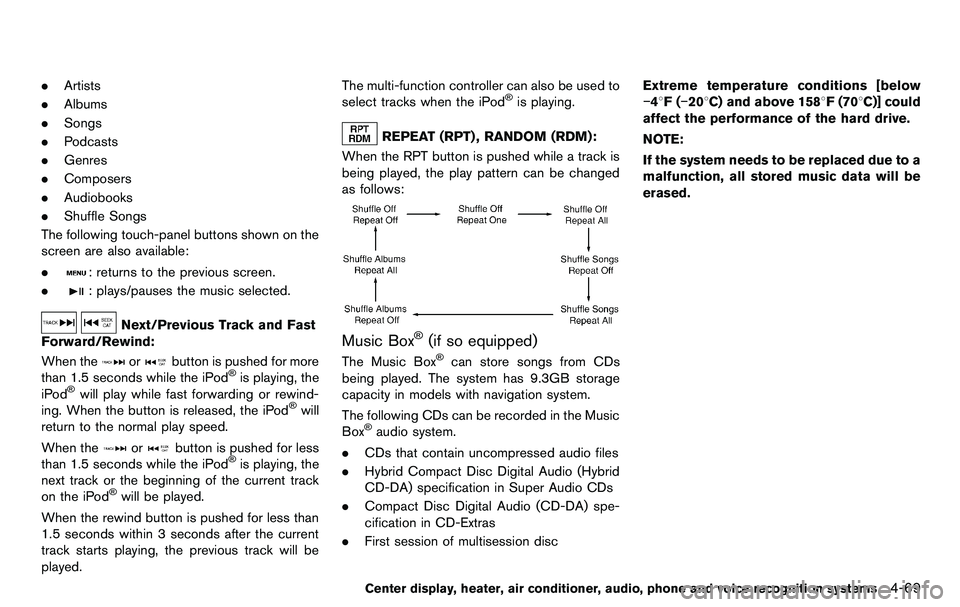
REPEAT (RPT) , RANDOM (RDM):
When the RPT button is pushed while a track is
being played, the play pattern can be changed
as follows:
Music Box®(if so equipped)
The Music Box®can store songs from CDs
being played. The system has 9.3GB storage
capacity in models with navigation system.
The following CDs can be recorded in the Music
Box
®audio system.
. CDs that contain uncompressed audio files
. Hybrid Compact Disc Digital Audio (Hybrid
CD-DA) specification in Super Audio CDs
. Compact Disc Digital Audio (CD-DA) spe-
cification in CD-Extras
. First session of multisession disc Extreme temperature conditions [below
−48F(
−208C) and above 1588F (708C)] could
affect the performance of the hard drive.
NOTE:
If the system needs to be replaced due to a
malfunction, all stored music data will be
erased.
Center display, heater, air conditioner, audio, phone and voice recognition systems4-69
Page 227 of 427
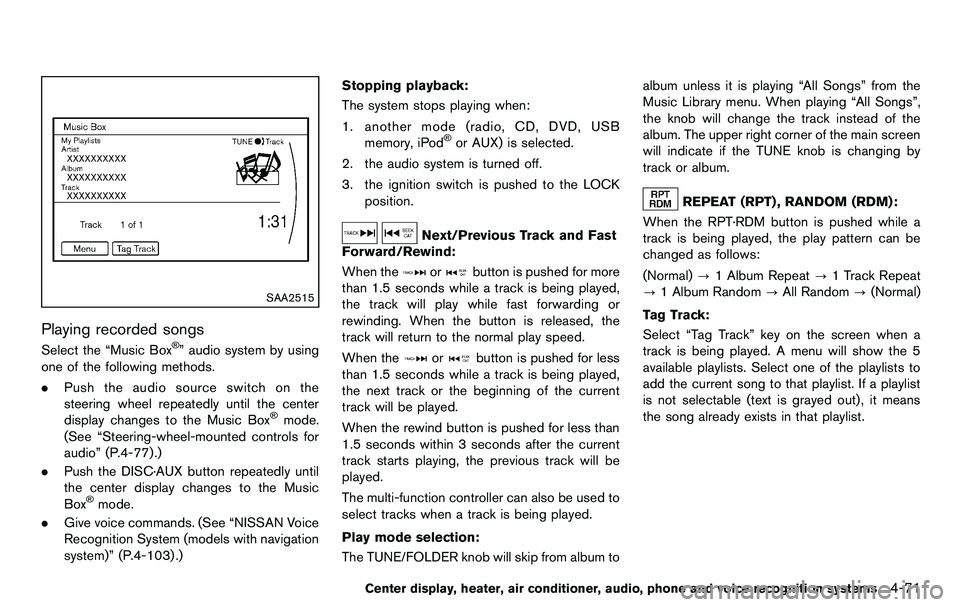
SAA2515
Playing recorded songs
Select the “Music Box®” audio system by using
one of the following methods.
. Push the audio source switch on the
steering wheel repeatedly until the center
display changes to the Music Box
®mode.
(See “Steering-wheel-mounted controls for
audio” (P.4-77).)
. Push the DISC·AUX button repeatedly until
the center display changes to the Music
Box
®mode.
. Give voice commands. (See “NISSAN Voice
Recognition System (models with navigation
system)” (P.4-103) .) Stopping playback:
The system stops playing when:
1. another mode (radio, CD, DVD, USB memory, iPod
®or AUX) is selected.
2. the audio system is turned off.
3. the ignition switch is pushed to the LOCK position.
Next/Previous Track and Fast
Forward/Rewind:
When the
orbutton is pushed for more
than 1.5 seconds while a track is being played,
the track will play while fast forwarding or
rewinding. When the button is released, the
track will return to the normal play speed.
When the
orbutton is pushed for less
than 1.5 seconds while a track is being played,
the next track or the beginning of the current
track will be played.
When the rewind button is pushed for less than
1.5 seconds within 3 seconds after the current
track starts playing, the previous track will be
played.
The multi-function controller can also be used to
select tracks when a track is being played.
Play mode selection:
The TUNE/FOLDER knob will skip from album to album unless it is playing “All Songs” from the
Music Library menu. When playing “All Songs”,
the knob will change the track instead of the
album. The upper right corner of the main screen
will indicate if the TUNE knob is changing by
track or album.
REPEAT (RPT) , RANDOM (RDM):
When the RPT·RDM button is pushed while a
track is being played, the play pattern can be
changed as follows:
(Normal) ?1 Album Repeat ?1 Track Repeat
? 1 Album Random ?All Random ?(Normal)
Tag Track: Select “Tag Track” key on the screen when a
track is being played. A menu will show the 5
available playlists. Select one of the playlists to
add the current song to that playlist. If a playlist
is not selectable (text is grayed out), it means
the song already exists in that playlist.
Center display, heater, air conditioner, audio, phone and voice recognition systems4-71
Page 228 of 427
4-72Center display, heater, air conditioner, audio, phone and voice recognition systems
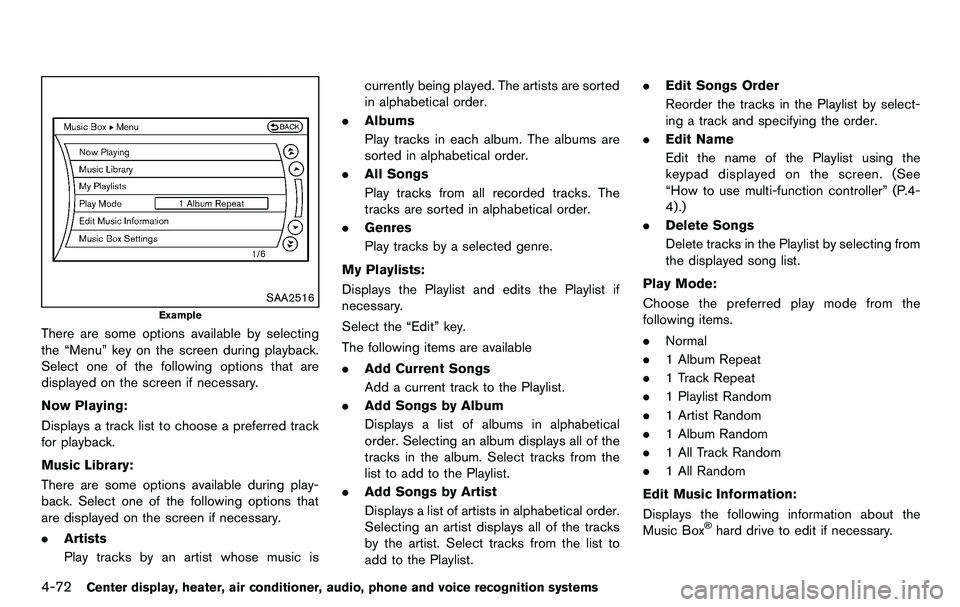
SAA2516
Example
There are some options available by selecting
the “Menu” key on the screen during playback.
Select one of the following options that are
displayed on the screen if necessary.
Now Playing:
Displays a track list to choose a preferred track
for playback.
Music Library:
There are some options available during play-
back. Select one of the following options that
are displayed on the screen if necessary.
.Artists
Play tracks by an artist whose music is currently being played. The artists are sorted
in alphabetical order.
. Albums
Play tracks in each album. The albums are
sorted in alphabetical order.
. All Songs
Play tracks from all recorded tracks. The
tracks are sorted in alphabetical order.
. Genres
Play tracks by a selected genre.
My Playlists:
Displays the Playlist and edits the Playlist if
necessary.
Select the “Edit” key.
The following items are available
. Add Current Songs
Add a current track to the Playlist.
. Add Songs by Album
Displays a list of albums in alphabetical
order. Selecting an album displays all of the
tracks in the album. Select tracks from the
list to add to the Playlist.
. Add Songs by Artist
Displays a list of artists in alphabetical order.
Selecting an artist displays all of the tracks
by the artist. Select tracks from the list to
add to the Playlist. .
Edit Songs Order
Reorder the tracks in the Playlist by select-
ing a track and specifying the order.
. Edit Name
Edit the name of the Playlist using the
keypad displayed on the screen. (See
“How to use multi-function controller” (P.4-
4) .)
. Delete Songs
Delete tracks in the Playlist by selecting from
the displayed song list.
Play Mode:
Choose the preferred play mode from the
following items.
. Normal
. 1 Album Repeat
. 1 Track Repeat
. 1 Playlist Random
. 1 Artist Random
. 1 Album Random
. 1 All Track Random
. 1 All Random
Edit Music Information:
Displays the following information about the
Music Box
®hard drive to edit if necessary.
Page 229 of 427
.Edit Information of Current Song
Edit the “Track”, “Artist” and “Genre” in-
formation of the current track using the
keypad displayed on the screen. (See “How
to use touch screen” (P.4-4) .)
Edit the “Mode” information by selecting
from the list.
. Edit Information by Album
Edit the displayed name and of a selected
album and the track information in the album.
. Update Gracenote from USB Device
Update the in-vehicle Gracenote Database
using a USB memory. Search the title from a
information acquired on the Internet. Visit
www.nissanusa.com/gracenote/ for details.
. Transfer Missing Titles to USB
Transfer the information of an album re-
corded without titles to a USB memory. Visit
www.nissanusa.com/gracenote/ for details.
. Update Gracenote from HDD
Search the title using the database in the
hard drive.
SAA2517
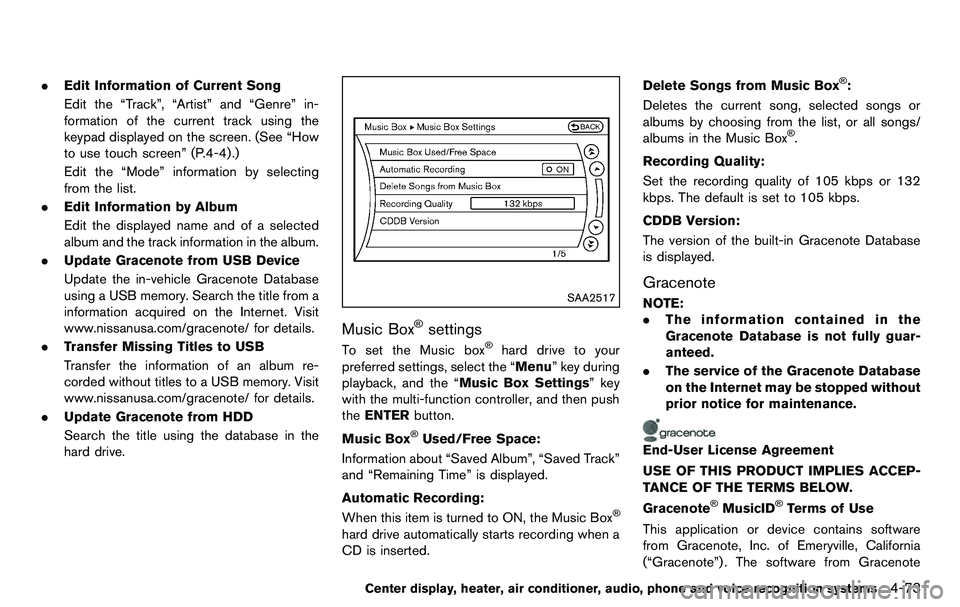
Music Box®settings
To set the Music box®hard drive to your
preferred settings, select the “Menu” key during
playback, and the “Music Box Settings” key
with the multi-function controller, and then push
the ENTER button.
Music Box
®Used/Free Space:
Information about “Saved Album”, “Saved Track”
and “Remaining Time” is displayed.
Automatic Recording:
When this item is turned to ON, the Music Box
®
hard drive automatically starts recording when a
CD is inserted. Delete Songs from Music Box
®:
Deletes the current song, selected songs or
albums by choosing from the list, or all songs/
albums in the Music Box
®.
Recording Quality:
Set the recording quality of 105 kbps or 132
kbps. The default is set to 105 kbps.
CDDB Version:
The version of the built-in Gracenote Database
is displayed.
Gracenote
NOTE:
. The information contained in the
Gracenote Database is not fully guar-
anteed.
. The service of the Gracenote Database
on the Internet may be stopped without
prior notice for maintenance.
End-User License Agreement
USE OF THIS PRODUCT IMPLIES ACCEP-
TANCE OF THE TERMS BELOW.
Gracenote
®MusicID®Terms of Use
This application or device contains software
from Gracenote, Inc. of Emeryville, California
(“Gracenote”) . The software from Gracenote
Center display, heater, air conditioner, audio, phone and voice recognition systems4-73
Page 231 of 427
for U.S. Patent: #6,304,523.
Gracenote and CDDB are registered trade-
marks of Gracenote. The Gracenote logo and
logotype, and the “Powered by Gracenote” logo
are trademarks of Gracenote.
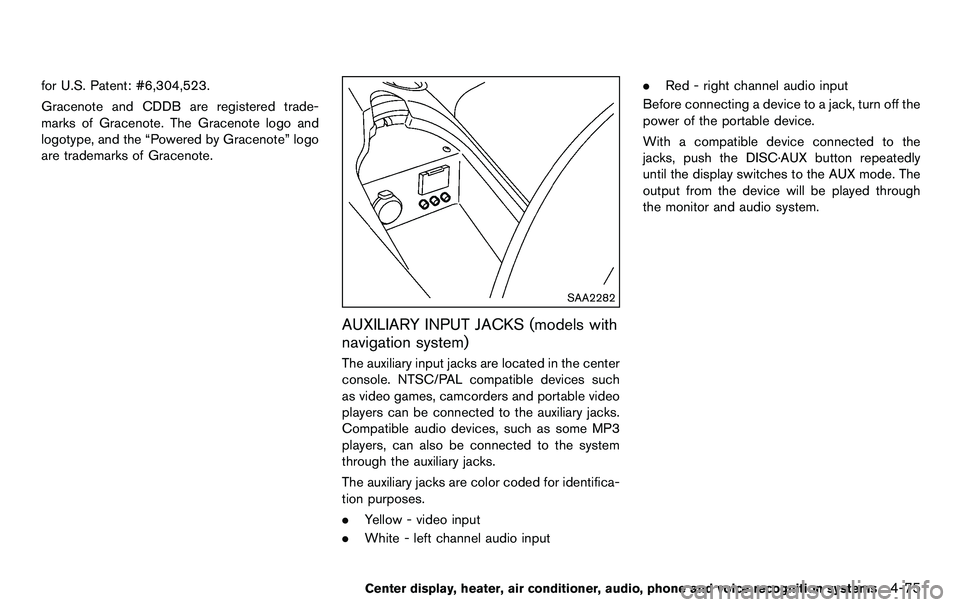
SAA2282
AUXILIARY INPUT JACKS (models with
navigation system)
The auxiliary input jacks are located in the center
console. NTSC/PAL compatible devices such
as video games, camcorders and portable video
players can be connected to the auxiliary jacks.
Compatible audio devices, such as some MP3
players, can also be connected to the system
through the auxiliary jacks.
The auxiliary jacks are color coded for identifica-
tion purposes.
.Yellow - video input
. White - left channel audio input .
Red - right channel audio input
Before connecting a device to a jack, turn off the
power of the portable device.
With a compatible device connected to the
jacks, push the DISC·AUX button repeatedly
until the display switches to the AUX mode. The
output from the device will be played through
the monitor and audio system.
Center display, heater, air conditioner, audio, phone and voice recognition systems4-75
Page 232 of 427
4-76Center display, heater, air conditioner, audio, phone and voice recognition systems
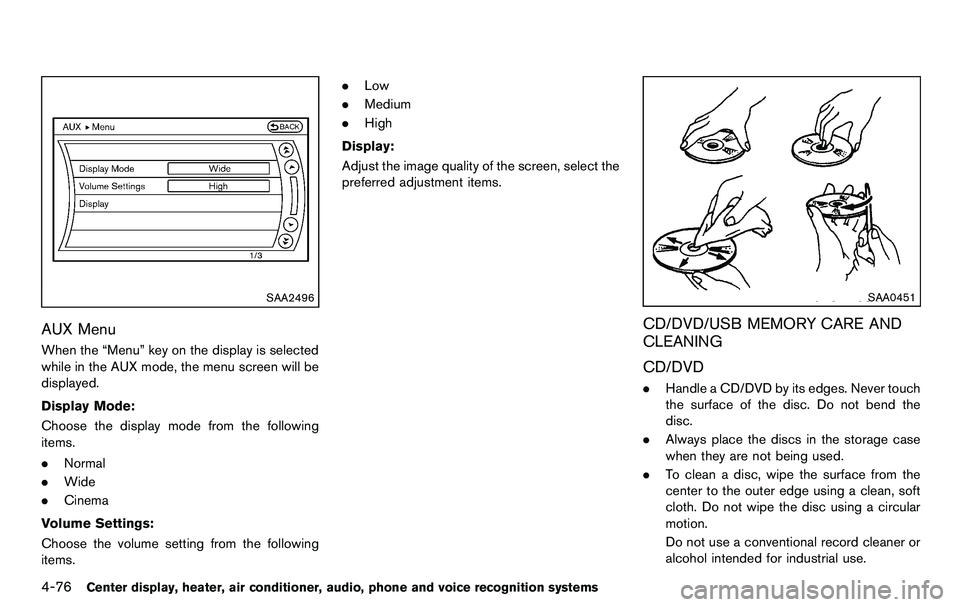
SAA2496
AUX Menu
When the “Menu” key on the display is selected
while in the AUX mode, the menu screen will be
displayed.
Display Mode:
Choose the display mode from the following
items.
.Normal
. Wide
. Cinema
Volume Settings:
Choose the volume setting from the following
items. .
Low
. Medium
. High
Display:
Adjust the image quality of the screen, select the
preferred adjustment items.
SAA0451
CD/DVD/USB MEMORY CARE AND
CLEANING
CD/DVD
. Handle a CD/DVD by its edges. Never touch
the surface of the disc. Do not bend the
disc.
. Always place the discs in the storage case
when they are not being used.
. To clean a disc, wipe the surface from the
center to the outer edge using a clean, soft
cloth. Do not wipe the disc using a circular
motion.
Do not use a conventional record cleaner or
alcohol intended for industrial use.