Page 438 of 618

Comfort controls
5-69
5
To unlock locked channelsThere are two ways to unlock a locked channel. One way is to
unlock a single locked channel of your choice. The other way
is to unlock all locked channels.
To unlock a locked channel, you must enter the lock cancella-
tion code.
1. To unlock a single locked channel of your choice, select
the locked channel that you want to unlock. (If you want
to unlock all locked channels, it doesn’t matter which
locked channel you have selected.)
2. Press the TUNE/SOUND switch (7) for about 2 seconds
or longer to enter the MENU mode. Then select the
LOCK setting mode.
3. In the LOCK setting mode, turn the TUNE/SOUND
switch (7) and select “UNLOCK CH” when you want to
unlock one locked channel of your choice or “UNLOCK
ALL” when you want to unlock all locked channels.
4. When you press the TUNE/SOUND switch (7), the code
entry window will be shown in the display.5. Use the Memory select buttons (10) to enter the code
(1111 to 6666) and then press the TUNE/SOUND switch
(7).
6. If the entered code is correct, “UNLOCKED” will be
shown and the locked channel(s) will be unlocked. The
satellite radio will then return to the LOCK setting mode.
If the entered code is incorrect, a warning sound will be
emitted and “CODE ERROR” will be displayed. The code
entry window will then be shown again.
You can try to enter the code again, no matter how many
times an incorrect code has been entered.
BK0142300US.book 69 ページ 2011年8月7日 日曜日 午前10時44分
Page 439 of 618

5-70 Comfort controls
5
NOTE�The default factory setting for the code is “1111”.
�You can change the code to any number you want with the
“CODE EDIT” function.
�To cancel a code entry, turn the TUNE/SOUND switch (7)
while the code entry window is displayed.
The code entry will be cancelled and then the setting
menu will be switched.
To change the lock cancellation codeYou can change the code for unlocking channel(s) to any num-
ber you want.
1. Press the TUNE/SOUND switch (7) for about 2 seconds
or longer to enter the MENU mode. Then select the
LOCK setting mode.
2. In the LOCK setting mode, turn the TUNE/SOUND
switch (7) and select “CODE EDIT”.
3. When you press the TUNE/SOUND switch (7), the code
entry window will be shown in the display.
4. Use the memory select buttons (10) to enter the current
code and then press the TUNE/SOUND switch (7).
5. If the correct code is entered, the code entry window will
be shown again. Enter your desired code.
If the entered code is incorrect, a warning sound will be
emitted and “CODE ERROR” will be displayed. The code
entry window will then be shown again.
You can try to enter the code again, no matter how many
times an incorrect code has been entered.
6. After you enter the new code, press the TUNE/SOUND
switch (7). The code entry window will be shown again
for confirmation. Enter the new code again and press the
TUNE/SOUND switch (7).
BK0142300US.book 70 ページ 2011年8月7日 日曜日 午前10時44分
Page 440 of 618

Comfort controls
5-71
5
7. “STORED” will be displayed for 2 seconds, the code will
be changed and the satellite radio will return to the LOCK
setting mode.NOTE�The SKIP settings, LOCK settings and lock cancellation
code are stored in memory. Disconnecting the battery
cable will erase these settings.
(The lock cancellation code will reset to the default fac-
tory setting: “1111”).To reset the lock cancellation codeIn case you forget the code, it is possible to reset the code to the
factory setting (1111).
1. With the audio power OFF, press the PWR switch (2) and
the TUNE/SOUND switch (7) at the same time.
The display will show “CODE INITIAL”.
2. Press the TUNE/SOUND switch (7). “YES” will be dis-
played. To reset the code, press the TUNE/SOUND
switch (7) again. “STORED” will be displayed for 2 sec-
onds and the code will be reset.
If you do not want to reset the code, turn the
TUNE/SOUND switch (7) to display “CANCEL” and
then press the TUNE/SOUND switch (7) again.
Text messageYou can change what is shown on the display when the satellite
radio tunes into a channel.
Press the DISP button (4) repeatedly to change to your desired
display mode. The order is: Channel Number + Channel Name
→ Category Name → Artist Name → Song Title → Composer
NameNOTE�Category name can also displayed by pressing the PTY
button (8).
�The display can show up to 12 characters. If there are
more than 12 characters, press the PAGE button (3) to
view the next 12 characters.
BK0142300US.book 71 ページ 2011年8月7日 日曜日 午前10時44分
Page 447 of 618
You can select your desired folder by turning the FOLDER
switch (17).
Folder up
Turn the FOLDER switch (17) clockwise until the desired")
5-78 Comfort controls
5
To select a desired folder (MP3 CDs only)You can select your desired folder by turning the FOLDER
switch (17).
Folder up
Turn the FOLDER switch (17) clockwise until the desired
folder number appears on the display.
Folder down
Turn the FOLDER switch (17) counterclockwise until the
desired folder number appears on the display.
To select a desired trackYou can select your desired track by using the TRACK button
(18).
Track up
Press the side of the TRACK button (18) repeatedly until
the desired track number appears on the display.
When listening to a MP3 CD, keep pressing the button to con-
tinue to move up tracks.
Track down
Press the side of the TRACK button (18) repeatedly until
the desired track number appears on the display.
When listening to a MP3 CD, keep pressing the button to con-
tinue to move down tracks.NOTE�Pressing the side of the TRACK button (18) once dur-
ing the song will cause the player to restart playback from
the beginning of the song.To repeat a trackTo repeat a track
Press the RPT button (8) briefly while the track is playing.
“RPT” will appear on the display. To exit the repeat mode,
press the RPT button again.
To repeat a disc (music CDs only)
While a song is playing, press the RPT button (8) for 2 second
or longer (until you hear a beep). “D-RPT” will appear on the
display. You can listen to the music CD repeatedly. To exit the
repeat mode, briefly press the RPT button again.
BK0142300US.book 78 ページ 2011年8月7日 日曜日 午前10時44分
Page 488 of 618
Comfort controls
5-119
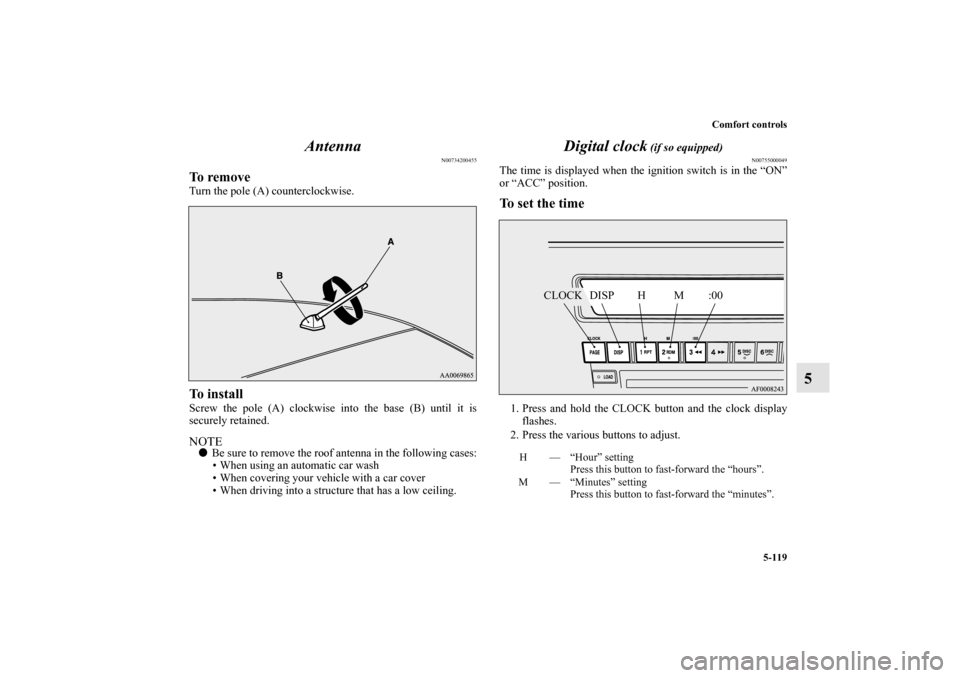
5 Antenna
N00734200455
To removeTurn the pole (A) counterclockwise.To installScrew the pole (A) clockwise into the base (B) until it is
securely retained.NOTE�Be sure to remove the roof antenna in the following cases:
• When using an automatic car wash
• When covering your vehicle with a car cover
• When driving into a structure that has a low ceiling.
Digital clock
(if so equipped)
N00755000049
The time is displayed when the ignition switch is in the “ON”
or “ACC” position.To set the time1. Press and hold the CLOCK button and the clock display
flashes.
2. Press the various buttons to adjust.H — “Hour” setting
Press this button to fast-forward the “hours”.
M — “Minutes” setting
Press this button to fast-forward the “minutes”.
CLOCK DISP H M :00
BK0142300US.book 119 ページ 2011年8月7日 日曜日 午前10時44分
Page 489 of 618

5-120 Comfort controls
5
3. When the time is set, press the DISP button to stop the
clock display from flashing. After time signal setting,
however, the clock display automatically stops flashing.NOTE�Reset the time after the battery terminals are disconnected
and reconnected.
�Seconds do not appear in the clock display, but after
adjusting the “Minutes” setting and time signal setting,
the clock begins to operate from 0 seconds.
General information about your radio
N00733900400
Your vehicle’s radio receives both AM and FM stations.
The quality of your reception is affected by distance, obstacles,
and signal interference.
This radio complies with Part 15 of Federal Communications
Commission (FCC) Rules (for vehicles sold in U.S.A.). Opera-
tion is subject to the following conditions:
�The device may not cause harmful interference.
�This device must accept any interference recieved, includ-
ing interference that may cause undesirable operation.
:00 — Time signal setting
At the same time the button is pressed, the fol-
lowing modifications are made.
10:00 - 10:29 ......Change to 10:00
10:30 - 10:59 ......Change to 11:00
CAUTION
!�Changes or modifications not expressly approved by
the party meeting the above conditions could void
the user’s authority to operate the equipment.
BK0142300US.book 120 ページ 2011年8月7日 日曜日 午前10時44分
Page 490 of 618

Comfort controls
5-121
5
Signal transmissionFM signals do not follow the earth surface nor are they
reflected by the upper atmosphere. For this reason, FM broad-
casts cannot be received over long distances. AM signals fol-
low the earth’s surface and are reflected by the upper
atmosphere. For this reason, AM broadcasts can be received
over longer distances.
Weak reception (fading)Because of the limited range of FM signals and the way FM
waves transmit, you may experience weak or fading FM recep-
tion. When the broadcast is blocked by mountains or similar
obstructions, reception can be disturbed.ReflectionThe reason why one can hear FM but not AM in parking
garages, under bridges etc., is that FM signals, unlike AM sig-
nals, are reflected by solid objects such as buildings, etc.
Because FM signals are easily reflected by buildings, this can
also cause reception disturbances.
The direct signal from the broadcast station reaches the antenna
slightly before the reflected signal. This time difference may
cause some reception disturbance or flutter.
This problem occurs primarily in urban areas.
FM AM
25 to 40 mile radius
(40 to 64 km)100 mile radius
(160 km)
BK0142300US.book 121 ページ 2011年8月7日 日曜日 午前10時44分
Page 494 of 618
For emergencies
6-3
6
2. Position the vehicles close enough together so that the
jumper cables can reach, but be sure the vehicles aren’t
touching each other.
3. You could be injured if the vehicles move. Set the parking
brake firmly on each vehicle. Put an automatic transaxle,
Twin Clutch SST or CVT in “P” (PARK) or a manual
transaxle in “N” (Neutral). Turn the ignition switch to the
“LOCK” position. NOTE�Turn off all lights, heater, and other electrical loads. This
will avoid sparks and help save both batteries. 4. Remove the joint terminal cover (A).
CAUTION
!�Check the other vehicle. It must have a 12-volt bat-
tery. If the other system isn’t 12-volt, both systems
can be damaged.
WA R N I N G
!�Turn the ignition switch to the “LOCK” position on
both vehicles. Make sure that the cables or your
clothes cannot be caught by the fan or drive belt.
Personal injury could result.
BK0142300US.book 3 ページ 2011年8月7日 日曜日 午前10時44分