2012 MINI COUPE ROADSTER CONVERTIBLE transmission
[x] Cancel search: transmissionPage 197 of 283

COMMUNICATIONSOffice
196
Displaying contact pictures
Pictures stored with contacts are stored in the
vehicle when the mobile phone is connected to
the vehicle. The number of pictures transmitted
depends on the mobile phone. The mobile
phone must support this function.
1."Office"
2. "Contacts"
3. Open "Options".
4. "Configure Bluetooth®"
5. "Show images"
The display of all contact pictures is activated or
deactivated.
Deleting contacts
Only contacts that are stored in the vehicle are
deleted. The contacts on the mobile phone
cannot be deleted.
1. "Office"
2. "Contacts"
3. Highlight the contact.
4. "Options"
5. "Delete contact" or "Delete all contacts".
Messages
General information
The displaying of text messages and e-mails
depends on whether the mobile phone supports
transmission to the vehicle. Text messages and
e-mails may not be supported by the service
provider or the function may have to be sepa-
rately activated. After a mobile phone is paired
for the first time, the transmission may take sev-
eral minutes. Messages are only displayed com-
pletely when the vehicle is stopped. Messages
from the auxiliary phone are not transmitted.
Displaying messages
1."Office"
2. "Messages"
Message type
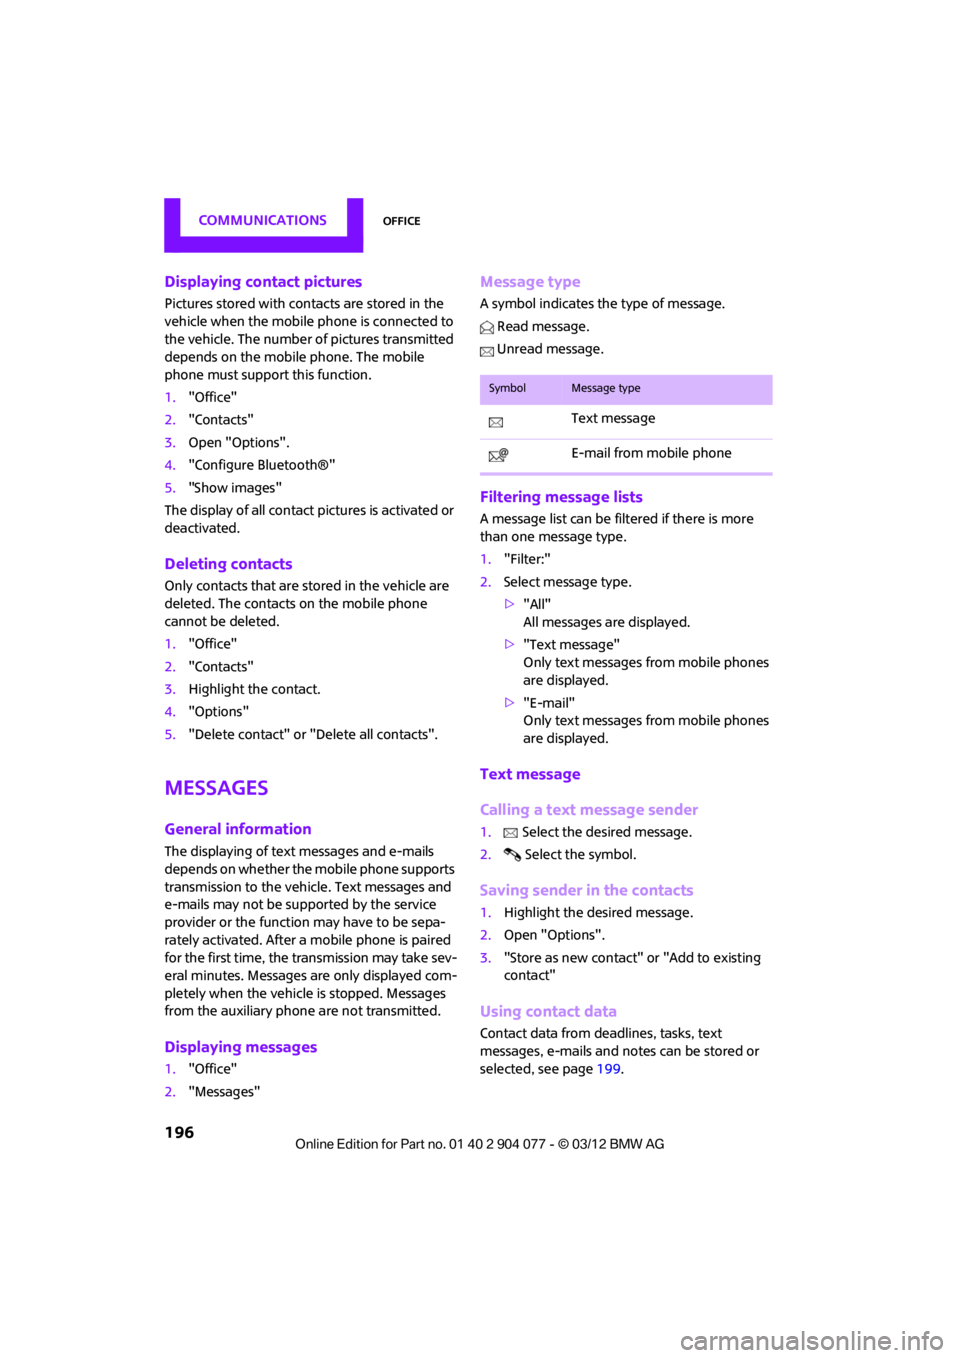
A symbol indicates the type of message.
Read message.
Unread message.
Filtering message lists
A message list can be filtered if there is more
than one message type.
1. "Filter:"
2. Select message type.
>"All"
All messages are displayed.
> "Text message"
Only text messages from mobile phones
are displayed.
> "E-mail"
Only text messages from mobile phones
are displayed.
Text message
Calling a text message sender
1. Select the desired message.
2. Select the symbol.
Saving sender in the contacts
1.Highlight the desired message.
2. Open "Options".
3. "Store as new contact" or "Add to existing
contact"
Using contact data
Contact data from deadlines, tasks, text
messages, e-mails and notes can be stored or
selected, see page 199.
SymbolMessage type
Text message
E-mail from mobile phone
00320051004F004C00510048000300280047004C0057004C005200510003
Page 229 of 283

MOBILITYCare
228
Automatic transmission
Before driving into the car wash, make sure that
the vehicle can roll:
1.Place the remote control, even with Comfort
Access, in the ignition lock.
2. Move the selector lever to position N.
3. Release the parking brake.
4. Switch off the engine.
5. Insert the remote control in the ignition lock
so that the vehicle can roll.
Steam jets/high-pressure washers
When using steam jets or high-pressure
washers, make sure that you maintain
sufficient distance from the vehicle and do not
exceed a maximum temperature of 140 7/
60 6 .
If the distance is too close, the pressure too high,
or the temperature too high, parts of the vehicle
can be damaged, or water can penetrate.
Observe the operating instructions for high-
pressure washers. <
Do not spray sensors, such as the Park Dis-
tance Control, with high-pressure washers
for a long time or at a distance of less than 1 ft/
30 cm. <
Manual washing
Use a great deal of water and, if necessary, car
shampoo when washing your car by hand. Clean
the vehicle with a sponge or a washing brush
applying a slight amount of pressure.
Before cleaning the windshield, deacti-
vate the rain sensor or turn off the ignition
to prevent unintentional wiping. <
Observe local regulations regarding wash-
ing vehicles by hand. <
Headlamps
Do not wipe dry and do not use abrasive or
corrosive cleaning agen ts. Remove dirt and
contamination, such as in sects, by soaking with
shampoo and then washing with plenty of
water.
Do not remove accumulated ice and snow with
an ice scraper; use window deicers instead.
Windows
Clean the outside and inside of the windows and
mirrors with a window cleaner.
Do not clean the mirrors with cleaners
containing quartz. <
Wiper blades
Clean with soapy water and change regularly to
prevent the formation of streaks.
Wax, preservatives and dirt on the win-
dows cause streaks wh en the windshield
wipers are on, and can cause premature wear
of the wiper blades and interfere with the rain
sensor. <
Care of the convertible top
The appearance and service life of the convert-
ible top largely depends on its proper care and
operation.
Please follow these instructions:
>Never attempt to fold and stow the convert-
ible top in the convertible compartment
when the top is wet or frozen. Otherwise,
water stains, mildew, and chafe marks may
occur.
> If water spots occur on the inside headliner
despite precautions, remove them using a
microfiber cloth and interior cleaner.
> If the vehicle is parked in an enclosed area
for a longer period of time, make sure that
there is sufficient ventilation.
> Remove any bird droppings immediately,
since they have corrosive properties which
will corrode the conver tible top and damage
the rubber seals.
00320051004F004C00510048000300280047004C0057004C005200510003
Page 246 of 283

Giving and receiving assistanceMOBILITY
245
Using a tow fitting
The screw-in tow fitting must always be carried
in the car. It can be screwed in at the front or
rear of the MINI.
It is stored in the toolkit in the cargo area
underneath the cover on the right-hand side,
page231.
Use only the tow fitting provided with the
vehicle and screw it all the way in. Use the
tow fitting for towing on paved roads only. Avoid
lateral loading of the tow fitting, e.g. do not lift
the vehicle by the tow fitting. Otherwise, the tow
fitting and the vehicle could be damaged. <
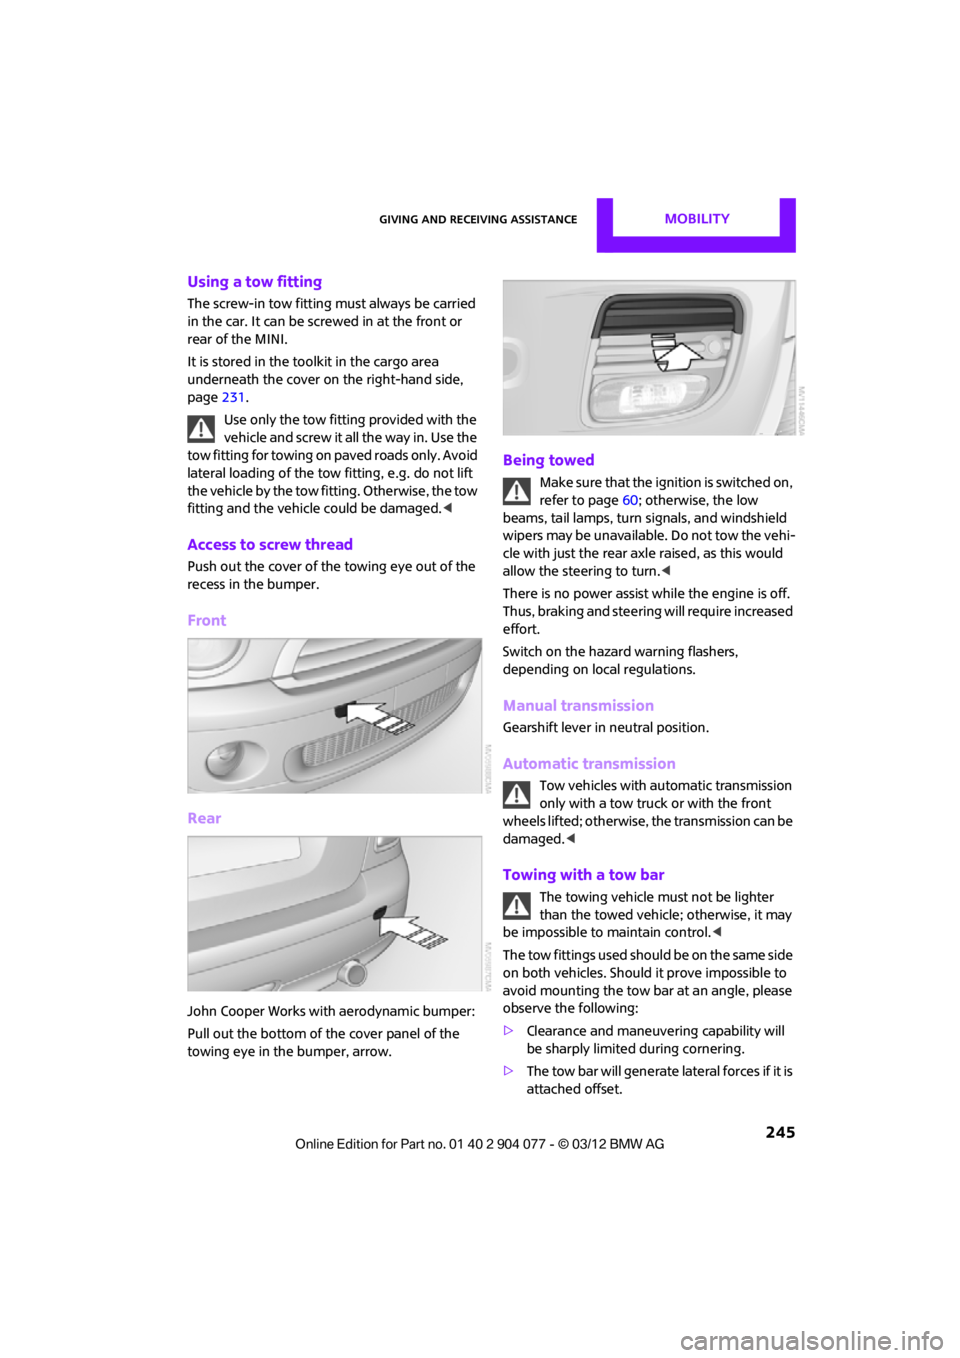
Access to screw thread
Push out the cover of the towing eye out of the
recess in the bumper.
Front
Rear
John Cooper Works with aerodynamic bumper:
Pull out the bottom of the cover panel of the
towing eye in the bumper, arrow.
Being towed
Make sure that the ignition is switched on,
refer to page60; otherwise, the low
beams, tail lamps, turn signals, and windshield
wipers may be unavailable. Do not tow the vehi-
cle with just the rear ax le raised, as this would
allow the steering to turn. <
There is no power assist while the engine is off.
Thus, braking and steering will require increased
effort.
Switch on the hazard warning flashers,
depending on local regulations.
Manual transmission
Gearshift lever in neutral position.
Automatic transmission
Tow vehicles with automatic transmission
only with a tow truck or with the front
wheels lifted; otherwise, the transmission can be
damaged. <
Towing with a tow bar
The towing vehicle must not be lighter
than the towed vehicle; otherwise, it may
be impossible to maintain control. <
The tow fittings used should be on the same side
on both vehicles. Should it prove impossible to
avoid mounting the tow bar at an angle, please
observe the following:
> Clearance and maneuvering capability will
be sharply limited during cornering.
> The tow bar will generate lateral forces if it is
attached offset.
00320051004F004C00510048000300280047004C0057004C005200510003
Page 247 of 283

MOBILITYGiving and receiving assistance
246
Only attach the tow bar to the tow fittings,
as attachment to other vehicle parts can
lead to damage. <
Towing with a tow rope
When starting off in the towing vehicle, make
sure that the tow rope is taut.
To avoid jerking and the associated
stresses on vehicle components when
towing, always use nylon ropes or nylon straps.
Attach the tow rope to the tow fittings only, as
attaching it to other pa rts of the vehicle could
result in damage. <
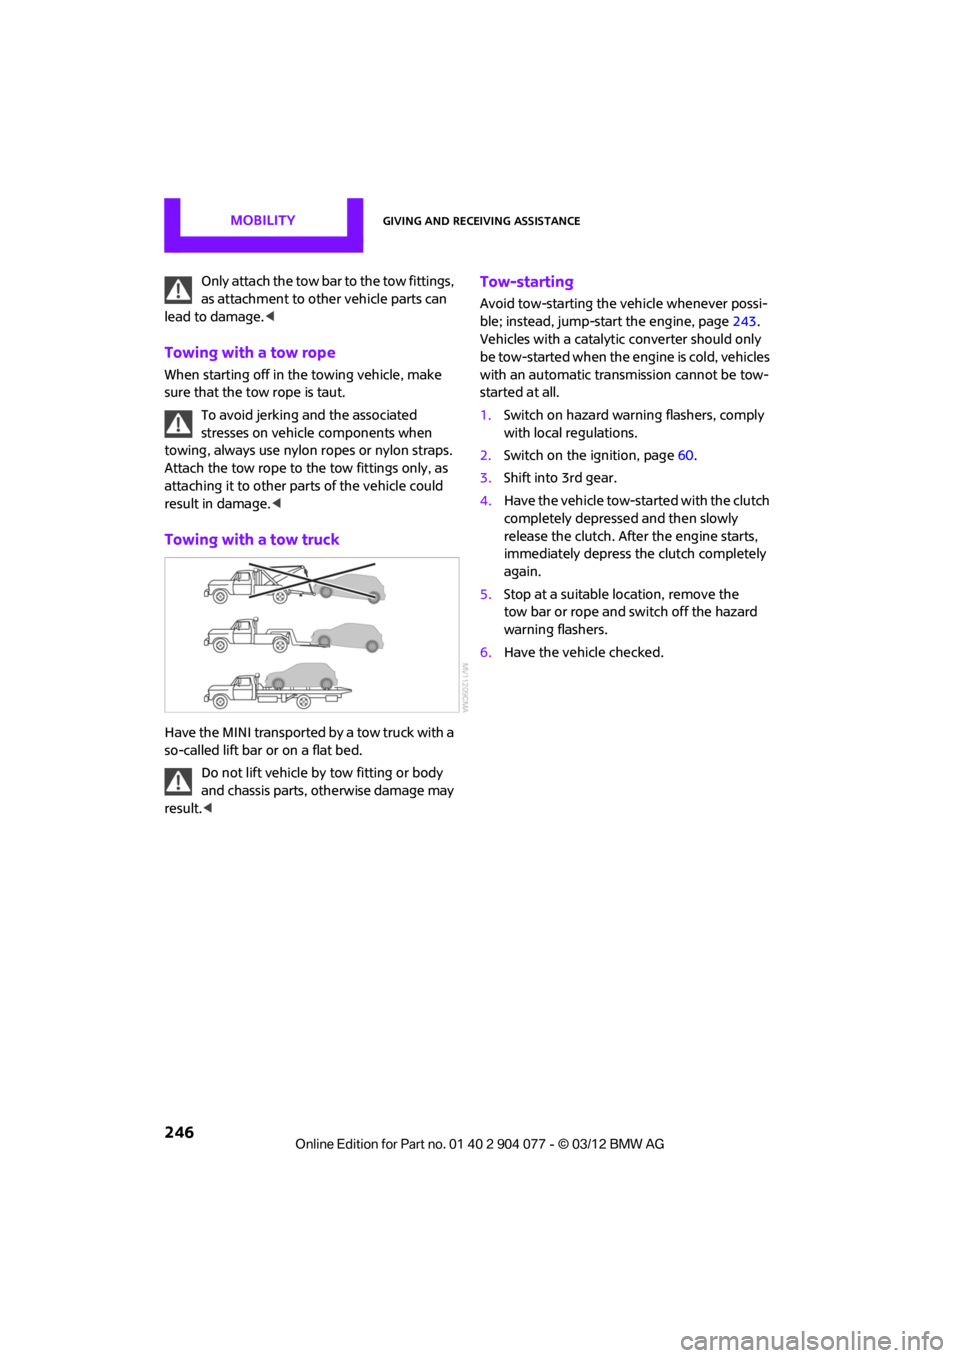
Towing with a tow truck
Have the MINI transported by a tow truck with a
so-called lift bar or on a flat bed.
Do not lift vehicle by tow fitting or body
and chassis parts, otherwise damage may
result. <
Tow-starting
Avoid tow-starting the vehicle whenever possi-
ble; instead, jump-start the engine, page 243.
Vehicles with a catalyti c converter should only
be tow-started when the engine is cold, vehicles
with an automatic transmission cannot be tow-
started at all.
1. Switch on hazard warning flashers, comply
with local regulations.
2. Switch on the ignition, page 60.
3. Shift into 3rd gear.
4. Have the vehicle tow-started with the clutch
completely depressed and then slowly
release the clutch. After the engine starts,
immediately depress the clutch completely
again.
5. Stop at a suitable location, remove the
tow bar or rope and switch off the hazard
warning flashers.
6. Have the vehicle checked.
00320051004F004C00510048000300280047004C0057004C005200510003
Page 258 of 283

Technical dataREFERENCE
257
Weights
Never exceed either the approved axle loads or the gross vehicle weight.
MINI Coupe
CooperCooper SJohn Cooper Works
Curb weight, ready for travel, with all optional extras
>Manual transmission lbs/kg 2,557/1,160 2,679/1,215 2,701/1,225
> Automatic
transmission lbs/kg 2,635/1,195 2,734/1,240 –
Approved gross weight
> Manual transmission lbs/kg 3,175/1,440 3,252/1,475 3,252/1,475
> Automatic
transmission lbs/kg 3,252/1,475 3,307/1,500 –
Approved front axle load
> Manual transmission lbs/kg 1,786/810 1,885/855 1,885/855
> Automatic
transmission lbs/kg 1,863/845 1,940/880 –
Approved rear axle load lb s/kg 1,411/640 1,411/640 1,411/640
Cargo area capacity cu ft/ liters9.9/
280 9.9/
280 9.9/
280
00320051004F004C00510048000300280047004C0057004C005200510003
Page 259 of 283

REFERENCETechnical data
258
MINI Roadster
CooperCooper SJohn Cooper Works
Curb weight, ready for travel, with all optional extras
> Manual transmission lbs/kg 2, 635/1,195 2,745/1,245 2,767/1,255
> Automatic
transmission lbs/kg 2,712/1,230 2,800/1,270 –
Approved gross weight
> Manual transmission lbs/kg 3, 241/1,470 3,329/1,510 3,329/1,510
> Automatic
transmission lbs/kg 3,318/1,505 3,373/1,530 –
Approved front axle load
> Manual transmission lbs/kg 1,786/810 1,896/860 1,896/860
> Automatic
transmission lbs/kg 1,863/845 1,951/885
–
Approved rear axle load lbs/kg 1,488/675 1,466/665 1,488/675
Cargo area capacity cu ft/ liters8.5/
240 8.5/
240 8.5/
240
00320051004F004C00510048000300280047004C0057004C005200510003
Page 260 of 283

Technical dataREFERENCE
259
MINI Convertible
Capacities
CooperCooper SJohn Cooper Works
Curb weight, ready for travel, with all optional extras
>Manual transmission lbs/kg 2,701/1,225 2,811/1,275 2,811/1,275
> Automatic
transmission lbs/kg 2,778/1,260 2,855/1,295 –
Approved gross weight
> Manual transmission lbs/kg 3,560/1,615 3,671/1,665 3,693/1,675
> Automatic
transmission lbs/kg 3,638/1,650 3,737/1,695 –
Approved front axle load
> Manual transmission
> Automatic
transmission lbs/kg 1,863/845 1,951/885 1,962/890
lbs/kg 1,940/880 2,017/915 –
Approved rear axle load lb s/kg 1,786/810 1,786/810 1,797/815
Cargo area capacity cu ft/ liters6.0-23.3/
170-660 6.0-23.3/
170-660 6.0-23.3/
170-660
US gal/US quartsLitersNotes
Fuel tank 13.2/– approx. 50 Fuel grade: page 207
including reserve of 2.1/– approx. 8
Window washer system incl.
headlamp washer system –/4.8 approx. 4.5 For more details: page 67
00320051004F004C00510048000300280047004C0057004C005200510003
Page 269 of 283

268
REFERENCEEverything from A to Z
Everything from A to Z
Index
A
ABS Antilock Brake System83
Accessories, see Vehicle equipment 4
Acknowledgment signals for
locking/unlocking vehicle 30
Activated-charcoa l filter for
automatic climate
control 105
Adaptive Light Control 97
Adding engine oil 223
Additives
– coolant 224
– engine oil 223
Address, entering 132
Address for navigation
– entering 126,132
Adjusting temperature inside the car, refer to Air
conditioner 102
Adjusting temperature inside the car, refer to Automatic
climate control 103
Adjusting the tone during audio operation, refer to
Tone control 147
Airbags 93
– sitting safely 50
– warning lamp 94
Air conditioner 101
Air conditioning mode
– air conditioner 102
– automatic climate control 103
– ventilation 106
Air distribution
– automatic 104
– individual 103
– manual 103 Air flow rate
102,104
– air conditioning system 102
– automatic climate
control 104
– heating, ventilation 102
Airing, refer to Ventilation106
Air outlets, refer to Air vents 101
Air pressure, checking, refer to
Tire inflation pressure 209
Air recirculation, refer to Recirculated-air
mode 102,104
Air supply
– air conditioner 102
– automatic climate control 103
– ventilation 106
Air vents 101
AKI, refer to Fuel grade 207
Alarm system 34
All-season tires, refer to Winter
tire
s220
Always Open Timer 72
AM, wa
veband 149
Ambient air, refer to
Recirculated-air
mode 102,104
Ambient lighting 100
Antenna, care 227
Antifreeze
– coolant 224
– washer fluid 67
Antilock Brake System ABS 83
Anti-theft alarm system, refer
to Alarm system 34
Anti-theft system 29
Approved axle loads, refer to
Weights 257 Approved engine oils
223
Approved gross vehicle weight, refer to Weights257
Armrest, refer to Center armrest 108
Arrival time
– computer 73
– route guidance 135
Ashtray 109
Assistant systems, refer to
– Dynamic Stability Control DSC 83
Audio 146
– controls 146
– switching on/off 146
– tone control 147
– volume 147
Audio device, external 108
Automatic
– air distribution 104
– air flow rate 104
– cruise control 68
– headlamp control 96
Automatic climate control 101
– automatic air distribution 104
Automatic rear spoiler 85
Automatic transmission with Steptronic 62
– Interlock 63
– overriding selector lever lock 64
– Shiftlock 63
– sport program 64
AUTO program for automatic
climate control 104
Auxiliary phone 182
AUX-In, refer to External audio
device 108
AUX-In connection 159
00320051004F004C00510048000300280047004C0057004C005200510003