2012 MERCEDES-BENZ SLS AMG ROADSTER rims
[x] Cancel search: rimsPage 39 of 288
GWARNING
The SRS self-check has detected a
malfunction if the 6 SRS indicator lamp:
R does not light up at all
R does not go out after approximately four
seconds after the engine is started
R comes on after the engine was started or
while driving.
For your safety, Mercedes-Benz strongly
recommends that you have the system
checked as soon as possible at an authorized
Mercedes-Benz Center. SRS may otherwise
fail to activate when it is needed in the event
of an accident, which could lead to serious or
fatal injuries. SRS might also be activated
unexpectedly and unnecessarily, which could
also result in injury.
In addition, work carried out improperly on
SRS may render SRS inoperative or cause
unintended air bag deployment. Work on the
SRS system should only be carried out by
qualified specialist personnel. Consult an
authorized Mercedes-Benz Center.
If it is necessary to modify an air bag system
to accommodate a person with disabilities,
contact an authorized Mercedes-Benz Center
for details. USA only: for further information
contact our Customer Assistance center at
1-800-FOR-MERCedes (1-800-367-6372).
Safety guidelines for seat belts,
Emergency Tensioning Devices (ETDs)
and air bags
GWARNING
R Damaged seat belts or seat belts that have
been subjected to stress in an accident
must be replaced. Their anchoring points
must also be checked. Only use seat belts
installed or supplied by an authorized
Mercedes-Benz Center.
R Air bags and pyrotechnic Emergency
Tensioning Devices (ETDs) contain
perchlorate material, which may require
special handling and regard for the
environment. Check your national disposal
guidelines. California residents, see
www.dtsc.ca.gov/HazardousWaste/
Perchlorate/index.cfm .
R Air bags and ETDs are designed to function
on a one-time-only basis. An air bag or ETD
that has deployed must be replaced.
R Do not pass seat belts over sharp edges.
They could tear.
R Do not make any modification that could
change the effectiveness of the seat belts.
R Do not bleach or dye seat belts as this may
severely weaken them. In a crash they may
not be able to provide adequate protection.
R No modifications of any kind may be made
to any components or wiring of the SRS.
R Do not change or remove any component
or part of the SRS.
R Do not install additional trim material, seat
covers, badges, etc. over the steering
wheel hub, front-passenger front air bag
cover, outer sides of the seat backrests,
door trim panels, or door frame trims.
R Do not install additional electrical/
electronic equipment on or near SRS
components and wiring.
R Keep area between air bags and occupants
free of objects (e.g. packages, purses,
umbrellas, etc.).
R Air bag system components will be hot after
an air bag has inflated. Do not touch them.
R Never place your feet on the instrument
panel, dashboard, or on the seat. Always
keep both feet on the floor in front of the
seat.
R Improper repair work on the SRS creates a
risk of rendering the SRS inoperative or
causing unintended air bag deployment.
Work on the SRS must therefore only be
performed by qualified technicians.
Contact an authorized Mercedes-Benz
Center.
R For your protection and the protection of
others, when scrapping the air bag unit or
ETD, our safety instructions must beOccupant safety37SafetyZ
Page 226 of 288
SmartKey to position 2. Make sure that you
then leave the SmartKey in position 2. You
may otherwise damage the vehicle, the
transmission or the car wash.
Check the transmission position in the
instrument cluster.
! Use the E-SELECT lever to shift the
transmission to N before switching the
engine off. If you open the driver's or front-
passenger door, the transmission remains
in this position for up to 30 minutes if the
SmartKey is in the ignition, even if the
engine is switched off. If you do not shift
the transmission to N using the E-SELECT
lever beforehand, it shifts automatically to
parking position P and locks the wheels if
the driver's or front-passenger door is
opened and the engine is switched off. This
may damage the vehicle, the transmission
or the car wash.
Observe the information on maneuvering
( Y page 129).
! Before driving into an automatic car wash,
make sure that it is suitable for the
dimensions of the vehicle. In particular,
make sure that:
R there is enough ground clearance
between the vehicle underbody and the
guide rails of the automatic car wash.
R the clearance width of the automatic car
wash is sufficient, particularly the width
of the guide rails.
R you enter the automatic car wash
straight and in the center of the guide
rails in order to avoid damaging the tires
or wheel rims.
Fold in the exterior mirrors before the
vehicle is washed. The exterior mirrors
could otherwise be damaged.
! Make sure that:R
the side windows are fully closed.
R the ventilation/heating is switched off
(the OFF button has been pressed/the
airflow control is set to position 0).
R that the windshield wiper switch is in
position 0.
Otherwise, the vehicle might be damaged.
! In portal car washes, the windshield
wipers may be moved up the windshield by
the cleaning brushes when the ignition is
switched off.
Set the Start/Stop button to key position
2 to reset the windshield wipers to their
original position.
! Vehicles with a matte finish:
Do not use wash programs with a hot wax
treatment under any circumstances.
After using an automatic car wash, wipe off
wax and drying agents from the windshield
and the wiper blades. This will prevent smears
and reduce wiping noises caused by residue
on the windshield.
Power washersGWARNING
Using power washers with circular-jet nozzles
(dirt grinders) may cause damage to the
vehicle, in particular to the tires.
Using damaged tires results in an increased
risk of accident. A sudden loss of tire pressure
while you are driving may cause you to lose
control of your vehicle, cause an accident and
injure yourself and others.
! Maintain a minimum distance of
11.8 in (30 cm) between the vehicle and the
power washer nozzle. Information about
the correct distance is available from the
equipment manufacturer.
Move the power washer nozzle around
when cleaning your vehicle.
224CareMaintenance and care
Page 248 of 288
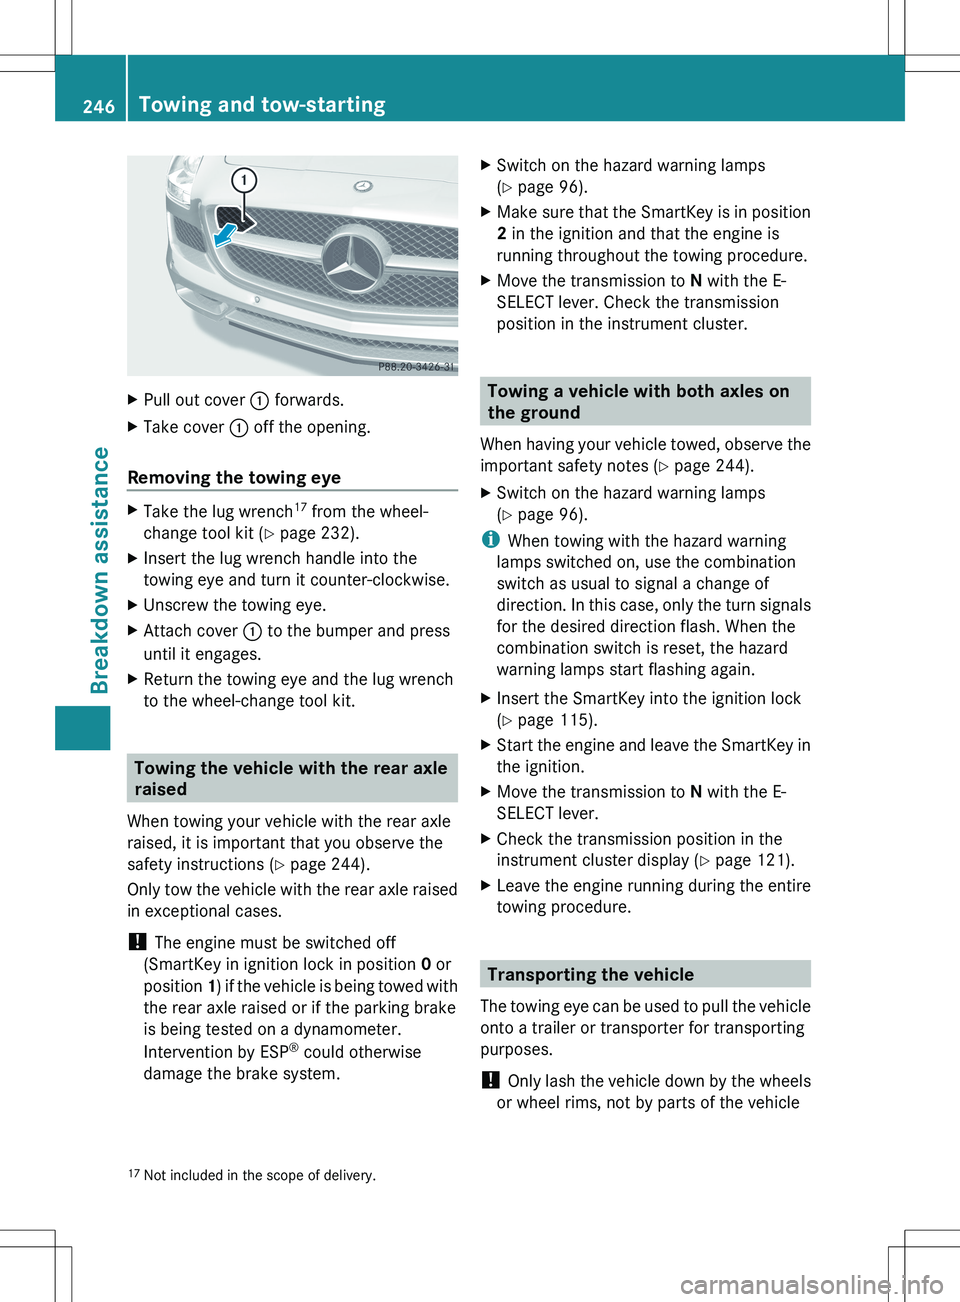
XPull out cover : forwards.XTake cover : off the opening.
Removing the towing eye
XTake the lug wrench 17
from the wheel-
change tool kit ( Y page 232).XInsert the lug wrench handle into the
towing eye and turn it counter-clockwise.XUnscrew the towing eye.XAttach cover : to the bumper and press
until it engages.XReturn the towing eye and the lug wrench
to the wheel-change tool kit.
Towing the vehicle with the rear axle
raised
When towing your vehicle with the rear axle
raised, it is important that you observe the
safety instructions ( Y page 244).
Only tow the vehicle with the rear axle raised
in exceptional cases.
! The engine must be switched off
(SmartKey in ignition lock in position 0 or
position 1) if the vehicle is being towed with
the rear axle raised or if the parking brake
is being tested on a dynamometer.
Intervention by ESP ®
could otherwise
damage the brake system.
XSwitch on the hazard warning lamps
( Y page 96).XMake sure that the SmartKey is in position
2 in the ignition and that the engine is
running throughout the towing procedure.XMove the transmission to N with the E-
SELECT lever. Check the transmission
position in the instrument cluster.
Towing a vehicle with both axles on
the ground
When having your vehicle towed, observe the
important safety notes ( Y page 244).
XSwitch on the hazard warning lamps
( Y page 96).
i
When towing with the hazard warning
lamps switched on, use the combination
switch as usual to signal a change of
direction. In this case, only the turn signals
for the desired direction flash. When the
combination switch is reset, the hazard
warning lamps start flashing again.
XInsert the SmartKey into the ignition lock
( Y page 115).XStart the engine and leave the SmartKey in
the ignition.XMove the transmission to N with the E-
SELECT lever.XCheck the transmission position in the
instrument cluster display ( Y page 121).XLeave the engine running during the entire
towing procedure.
Transporting the vehicle
The towing eye can be used to pull the vehicle
onto a trailer or transporter for transporting
purposes.
! Only lash the vehicle down by the wheels
or wheel rims, not by parts of the vehicle
17 Not included in the scope of delivery.246Towing and tow-startingBreakdown assistance
Page 252 of 288
Useful information
i This Operator's Manual describes all
models and all standard and optional
equipment of your vehicle available at the
time of publication of the Operator's
Manual. Country-specific differences are
possible. Please note that your vehicle may
not be equipped with all features
described. This also applies to safety-
related systems and functions.
i Please read the information on qualified
specialist workshops ( Y page 21).
Important safety notes
Consult an authorized Mercedes-Benz Center
if you require information on approved and
recommended tires and wheels for summer
and winter operation. Advice on purchasing
and caring for tires is also available there.
GWARNING
Replace rims or tires with the same
designation, manufacturer and type as shown
on the original part. For further information
contact an authorized Mercedes-Benz Center.
If incorrectly sized rims and tires are
mounted, the wheel brakes or suspension
components can be damaged. Also, the
operating clearance of the wheels and the
tires may no longer be correct.
GWARNING
Worn, old tires can cause accidents. If the tire
tread is worn to minimum tread depth, or if
the tires have sustained damage, replace
them.
When replacing rims, only use genuine
Mercedes-Benz wheel bolts specified for the
particular rim type. Failure to do so can result
in the bolts loosening and possibly an
accident.
Retreaded tires are not tested or
recommended by Mercedes-Benz, since
previous damage cannot always be
recognized on retreads. The operating safety
of the vehicle cannot be assured when such
tires are used.GWARNING
If you feel a sudden significant vibration or
ride disturbance, or you suspect that possible
damage to your vehicle has occurred, you
should turn on the hazard warning flashers,
carefully slow down, and drive with caution to
an area which is a safe distance from the road.
Inspect the tires and the vehicle underbody
for possible damage. If the vehicle appears
unsafe, have the vehicle towed to the nearest
authorized Mercedes-Benz Center or tire
dealer for repairs.
GWARNING
Do not drive with a flat tire. A flat tire affects
the ability to steer or brake the vehicle. You
might lose control of the vehicle. Continued
driving with a flat tire or driving at high speed
with a flat tire will cause excessive heat build-
up and possibly a fire.
i Further information about tires and
wheels can be obtained from any
authorized Mercedes-Benz Center.
Operation
Notes on driving
R If the vehicle is heavily laden, check the tire
pressures and correct them if necessary.
R When parking your vehicle, make sure that
the tires do not get deformed by the curb
or other obstacles. If it is necessary to drive
over curbs, speed humps or similar
elevations, try to do so slowly and at an
obtuse angle. Otherwise, the tires,
particularly the sidewalls, can get
damaged.
250OperationTires and wheels
Page 268 of 288
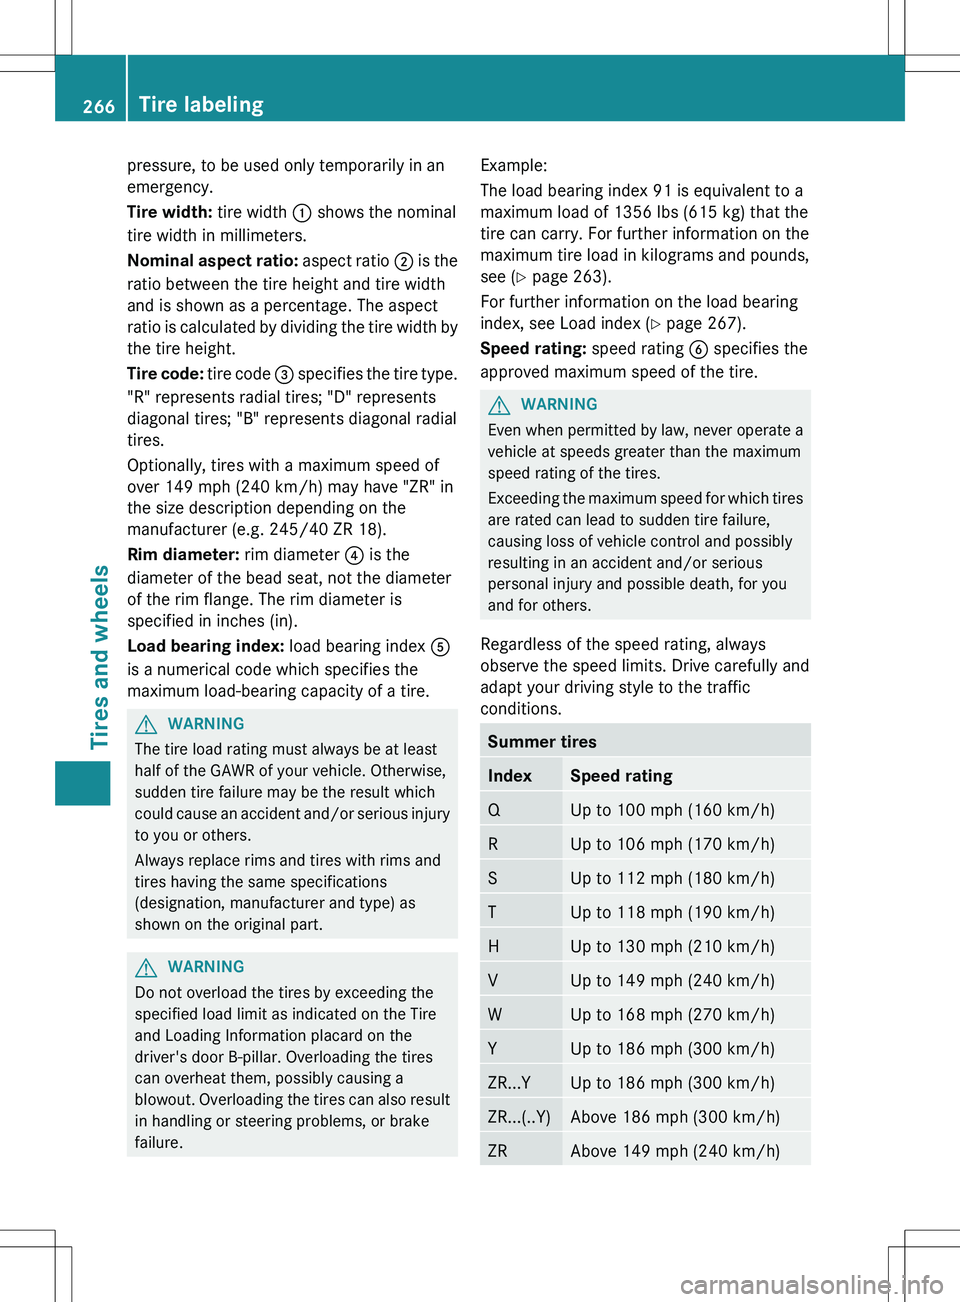
pressure, to be used only temporarily in an
emergency.
Tire width: tire width : shows the nominal
tire width in millimeters.
Nominal aspect ratio: aspect ratio ; is the
ratio between the tire height and tire width
and is shown as a percentage. The aspect
ratio is calculated by dividing the tire width by
the tire height.
Tire code: tire code = specifies the tire type.
"R" represents radial tires; "D" represents
diagonal tires; "B" represents diagonal radial
tires.
Optionally, tires with a maximum speed of
over 149 mph (240 km/h) may have "ZR" in
the size description depending on the
manufacturer (e.g. 245/40 ZR 18).
Rim diameter: rim diameter ? is the
diameter of the bead seat, not the diameter
of the rim flange. The rim diameter is
specified in inches (in).
Load bearing index: load bearing index A
is a numerical code which specifies the
maximum load-bearing capacity of a tire.GWARNING
The tire load rating must always be at least
half of the GAWR of your vehicle. Otherwise,
sudden tire failure may be the result which
could cause an accident and/or serious injury
to you or others.
Always replace rims and tires with rims and
tires having the same specifications
(designation, manufacturer and type) as
shown on the original part.
GWARNING
Do not overload the tires by exceeding the
specified load limit as indicated on the Tire
and Loading Information placard on the
driver's door B-pillar. Overloading the tires
can overheat them, possibly causing a
blowout. Overloading the tires can also result
in handling or steering problems, or brake
failure.
Example:
The load bearing index 91 is equivalent to a
maximum load of 1356 lbs (615 kg) that the
tire can carry. For further information on the
maximum tire load in kilograms and pounds,
see ( Y page 263).
For further information on the load bearing
index, see Load index ( Y page 267).
Speed rating: speed rating B specifies the
approved maximum speed of the tire.GWARNING
Even when permitted by law, never operate a
vehicle at speeds greater than the maximum
speed rating of the tires.
Exceeding the maximum speed for which tires
are rated can lead to sudden tire failure,
causing loss of vehicle control and possibly
resulting in an accident and/or serious
personal injury and possible death, for you
and for others.
Regardless of the speed rating, always
observe the speed limits. Drive carefully and
adapt your driving style to the traffic
conditions.
Summer tiresIndexSpeed ratingQUp to 100 mph (160 km/h)RUp to 106 mph (170 km/h)SUp to 112 mph (180 km/h)TUp to 118 mph (190 km/h)HUp to 130 mph (210 km/h)VUp to 149 mph (240 km/h)WUp to 168 mph (270 km/h)YUp to 186 mph (300 km/h)ZR...YUp to 186 mph (300 km/h)ZR...(..Y)Above 186 mph (300 km/h)ZRAbove 149 mph (240 km/h)266Tire labelingTires and wheels
Page 273 of 288
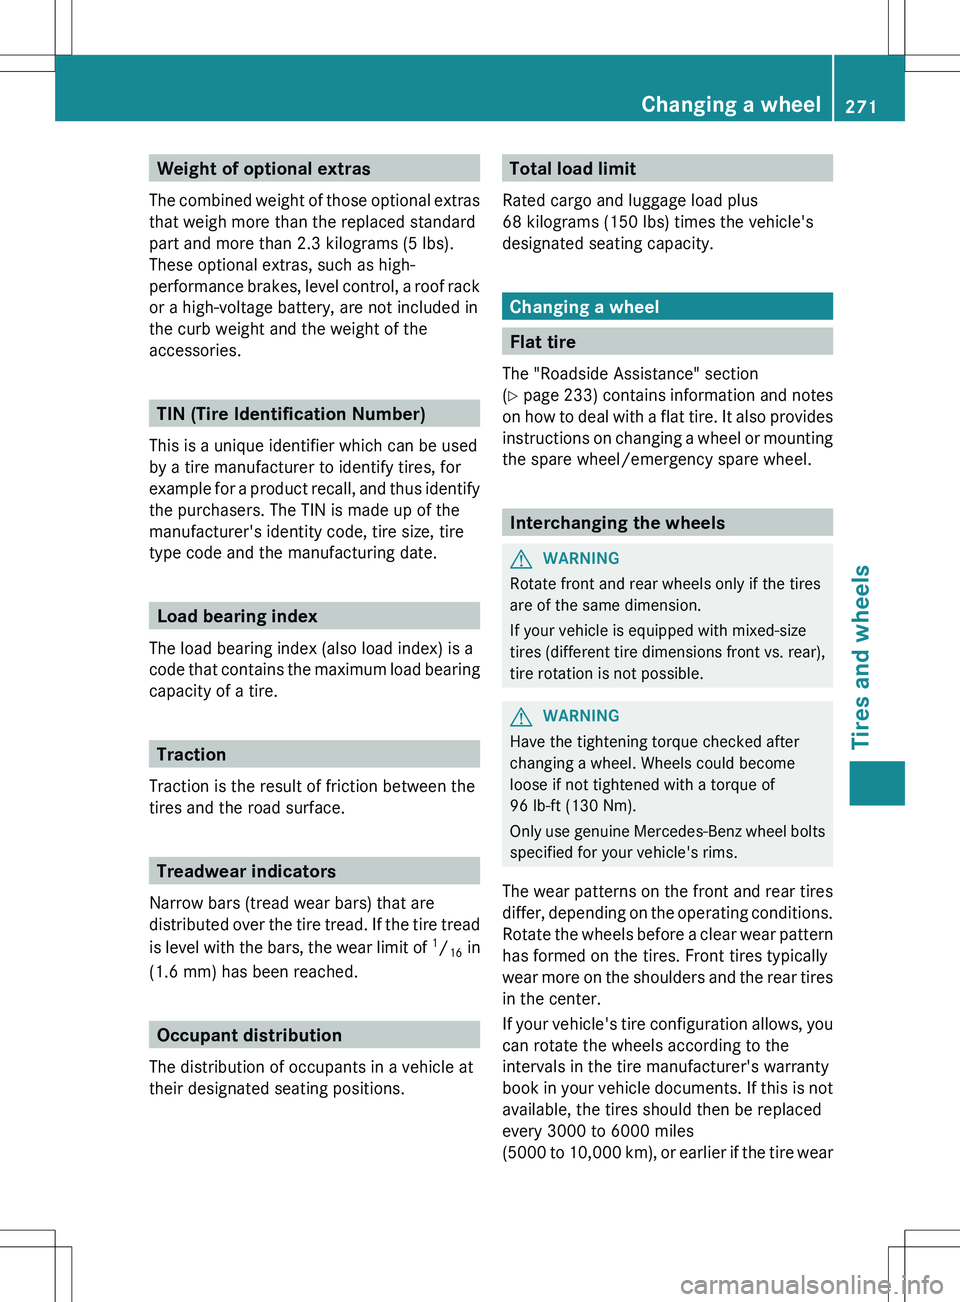
Weight of optional extras
The combined weight of those optional extras
that weigh more than the replaced standard
part and more than 2.3 kilograms (5 lbs).
These optional extras, such as high-
performance brakes, level control, a roof rack
or a high-voltage battery, are not included in
the curb weight and the weight of the
accessories.
TIN (Tire Identification Number)
This is a unique identifier which can be used
by a tire manufacturer to identify tires, for
example for a product recall, and thus identify
the purchasers. The TIN is made up of the
manufacturer's identity code, tire size, tire
type code and the manufacturing date.
Load bearing index
The load bearing index (also load index) is a
code that contains the maximum load bearing
capacity of a tire.
Traction
Traction is the result of friction between the
tires and the road surface.
Treadwear indicators
Narrow bars (tread wear bars) that are
distributed over the tire tread. If the tire tread
is level with the bars, the wear limit of 1
/ 16 in
(1.6 mm) has been reached.
Occupant distribution
The distribution of occupants in a vehicle at
their designated seating positions.
Total load limit
Rated cargo and luggage load plus
68 kilograms (150 lbs) times the vehicle's
designated seating capacity.
Changing a wheel
Flat tire
The "Roadside Assistance" section
( Y page 233) contains information and notes
on how to deal with a flat tire. It also provides
instructions on changing a wheel or mounting
the spare wheel/emergency spare wheel.
Interchanging the wheels
GWARNING
Rotate front and rear wheels only if the tires
are of the same dimension.
If your vehicle is equipped with mixed-size
tires (different tire dimensions front vs. rear),
tire rotation is not possible.
GWARNING
Have the tightening torque checked after
changing a wheel. Wheels could become
loose if not tightened with a torque of
96 lb-ft (130 Nm).
Only use genuine Mercedes-Benz wheel bolts
specified for your vehicle's rims.
The wear patterns on the front and rear tires
differ, depending on the operating conditions.
Rotate the wheels before a clear wear pattern
has formed on the tires. Front tires typically
wear more on the shoulders and the rear tires
in the center.
If your vehicle's tire configuration allows, you
can rotate the wheels according to the
intervals in the tire manufacturer's warranty
book in your vehicle documents. If this is not
available, the tires should then be replaced
every 3000 to 6000 miles
( 5000 to 10,000 km), or earlier if the tire wear
Changing a wheel271Tires and wheelsZ
Page 275 of 288
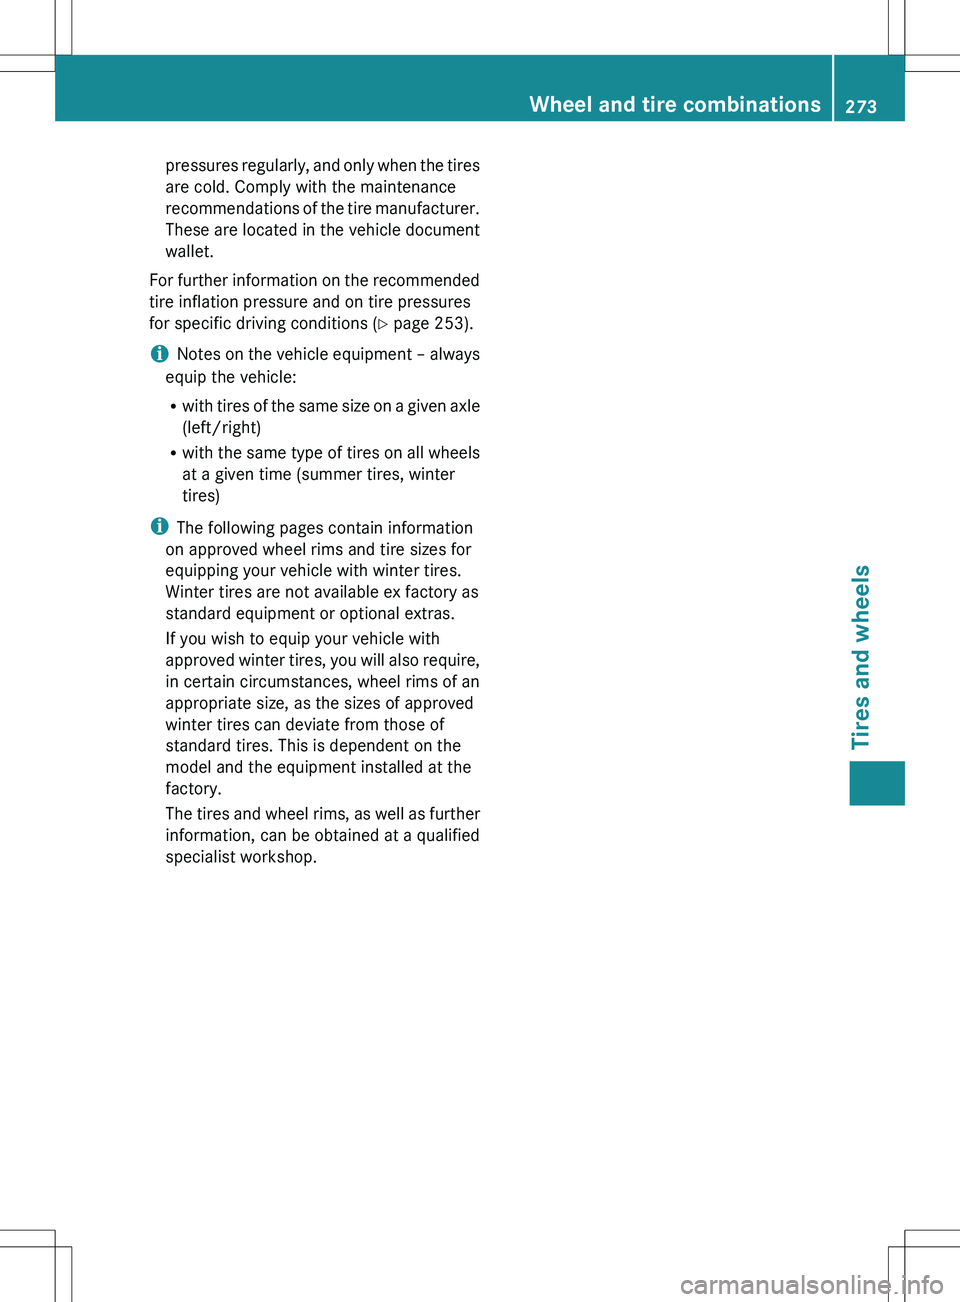
pressures regularly, and only when the tires
are cold. Comply with the maintenance
recommendations of the tire manufacturer.
These are located in the vehicle document
wallet.
For further information on the recommended
tire inflation pressure and on tire pressures
for specific driving conditions ( Y page 253).
i Notes on the vehicle equipment – always
equip the vehicle:
R with tires of the same size on a given axle
(left/right)
R with the same type of tires on all wheels
at a given time (summer tires, winter
tires)
i The following pages contain information
on approved wheel rims and tire sizes for
equipping your vehicle with winter tires.
Winter tires are not available ex factory as
standard equipment or optional extras.
If you wish to equip your vehicle with
approved winter tires, you will also require,
in certain circumstances, wheel rims of an
appropriate size, as the sizes of approved
winter tires can deviate from those of
standard tires. This is dependent on the
model and the equipment installed at the
factory.
The tires and wheel rims, as well as further
information, can be obtained at a qualified
specialist workshop.Wheel and tire combinations273Tires and wheelsZ