2012 MERCEDES-BENZ SLK55AMG ECO mode
[x] Cancel search: ECO modePage 70 of 334

Useful information
i This Operator's Manual describes all
models and all standard and optional
equipment of your vehicle available at the
time of publication of the Operator's
Manual. Country-specific differences are
possible. Please note that your vehicle may
not be equipped with all features
described. This also applies to safety-
related systems and functions.
i Please read the information on qualified
specialist workshops (Y page 23).SmartKey
Important safety notes
G
WARNING
When leaving the vehicle, always remove the
SmartKey from the ignition lock. Always take
the SmartKey with you and lock the vehicle.
Do not leave children unsupervised in the
vehicle, even if they are secured in a child
restraint system, and do not give them access
to an unlocked vehicle. Achild's unsupervised
access to a vehicle could result in an accident
and/or serious personal injury. They could:
R injure themselves on vehicle parts
R be seriously or fatally injured by extreme
heat or cold
R injure themselves or have an accident with
vehicle equipment that may still be in
operation even after the SmartKey has
been removed from the ignition, such as the
seat adjustment, steering wheel
adjustment or memory function.
If children open a door, they could cause
severe or even fatal injury to other persons; if
they get out of the vehicle, they could injure
themselves when doing so or be seriously or
even fatally injured by any passing traffic.
Do not expose the child restraint system to
direct sunlight. The child restraint system's
metal parts, for example, could become very hot, and a child could be burned on these
parts.
G
WARNING
If a key ring is too heavy or too large, the
weight acting on the key could cause it to turn
in the ignition lock or catch on the steering
wheel. This could cause the engine to be
switched off suddenly. You may lose control
of the vehicle and cause an accident. Do not
attach any heavy or large key rings to the key
that is inserted in the ignition. General notes
If you cannot lock or unlock the vehicle with
the SmartKey, either the battery in the
SmartKey is discharged, the SmartKey is
faulty or the starter battery is discharged.
X Check the battery in the SmartKey and
replace it if necessary (Y page 71).
X Unlock the driver's door using the
mechanical key (Y page 76).
X Lock the vehicle using the mechanical key
(Y page 76).
X Have the starter battery and the battery
contacts checked at a qualified specialist
workshop.
If the SmartKey is faulty, contact Roadside
Assistance or a qualified specialist workshop. SmartKey functions
The SmartKey centrally locks/unlocks:
R the doors
R the trunk lid
R the glove box
R the stowage compartment in the center
console
R the fuel filler flap 68
SmartKeyOpening/closing
Page 102 of 334
incident light fro
mheadlamps strikes the
sensor in the rear-view mirror.
The mirrors do not go into anti-glare mode if
reverse gear is engaged or the interior lighting
is switched on. Parking position for the exterior
mirror on the front-passenger side
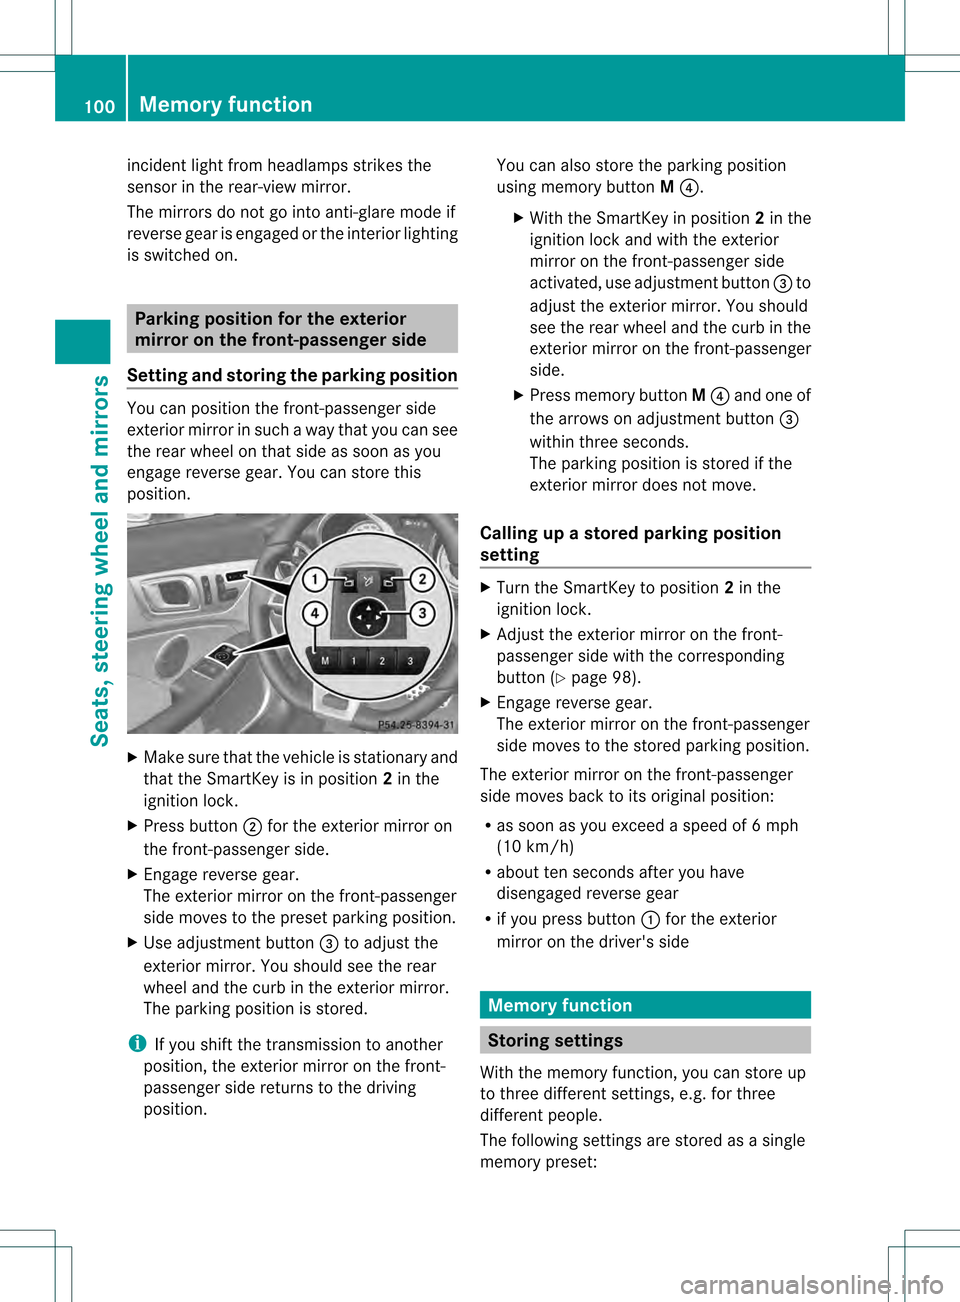
Setting and storing the parking position You can position the front-passenger side
exterior mirror in such a way that you can see
the rear wheel on that side as soon as you
engage reverse gear. You can store this
position. X
Make sure that the vehicle is stationary and
that the SmartKey is in position 2in the
ignition lock.
X Press button 0003for the exterior mirror on
the front-passenger side.
X Engage reverse gear.
The exterior mirror on the front-passenger
side moves to the preset parking position.
X Use adjustment button 0023to adjust the
exterior mirror .You should see the rear
wheel and the curb in the exterior mirror.
The parking position is stored.
i If you shift the transmission to another
position, the exterior mirror on the front-
passenger side returns to the driving
position. You can also store the parking position
using memory button
M0022.
X With the SmartKey in position 2in the
ignition lock and with the exterior
mirror on the front-passenger side
activated, use adjustmen tbutton 0023to
adjust the exterio rmirror. You should
see the rear wheel and the curb in the
exterior mirror on the front-passenger
side.
X Press memory button M0022 and one of
the arrows on adjustment button 0023
within three seconds.
The parking position is stored if the
exterior mirror does not move.
Calling up a stored parking position
setting X
Turn the SmartKey to position 2in the
ignition lock.
X Adjust the exterior mirror on the front-
passenger side with the corresponding
button (Y page 98).
X Engage reverse gear.
The exterior mirror on the front-passenger
side moves to the stored parking position.
The exterior mirror on the front-passenger
side moves back to its original position:
R as soon as you exceed a speed of 6mph
(10 km/h)
R about ten seconds after you have
disengaged reverse gear
R if you press button 0002for the exterior
mirror on the driver's side Memory function
Storing settings
With the memory function, you can store up
to three different settings, e.g. for three
differen tpeople.
The following settings are stored as a single
memory preset: 100
Memory functionSeats, steering wheel and mirrors
Page 106 of 334

Useful information
i This Operator's Manual describes all
models and all standard and optional
equipment of your vehicle available at the
time of publication of the Operator's
Manual. Country-specific differences are
possible. Please note that your vehicle may
not be equipped with all features
described. This also applies to safety-
related systems and functions.
i Please read the information on qualified
specialist workshops (Y page 23).Exterior lighting
Important safety notes
For reasons of safety, Mercedes-Benz
recommends that you drive with the lights
switched on even during the daytime. In some
countries, operation of the headlamps varies
due to legal requirements and self-imposed
obligations. Information about driving abroad
To convert to symmetrical low beam
when driving abroad: switch the headlamps
to symmetrical low beam in countries in
which traffic drives on the opposite side of the
road from the country where the vehicle is
registered. This prevents glare to oncoming
traffic. Symmetrical lights do not illuminate
as large an area of the edge of the road.
Vehicles with Bi-Xenon headlamps
(Intelligent Light System) Conversion to symmetrical low beam
Switch the headlamps to symmetrical low
beam in countries in which traffic drives on
the opposite side of the road from the country
where the vehicle is registered. This prevents
glare to oncoming traffic. Symmetrical lights do not illuminate as large an area of the edge
of the road.
Have the headlamps converted at a qualified
specialist workshop as close to the border as
possible before driving in these countries.
Conversion to asymmetrical low beam
after returning
Have the headlamps converted back to
asymmetrical low beam at
aqualified
specialist workshop as soo naspossible after
crossing the border and returning to the
original country.
Vehicles with halogen headlamps Switching the headlamps to symmetrical low
beam is not required in countries in which
traffic drives on the opposite side of the road
from the country where the vehicle is
registered. Legal requirements are fulfilled
even without switching. Light switch
Operation Depending on the date of manufacture of your
vehicle, the
0008or0005 symbol for the
automatic headlamp mode/daytime running
lamps is located on the light switch. Illustration: light switch with the
0005symbol for
the automatic headlamp mode/daytime running
lamps
0005000D Left-hand standing lamps
0006000F Right-hand standing lamps 104
Exterior lightingLights and windshiel
dwipers
Page 118 of 334
Useful information
i This Operator's Manual describes all
models and all standard and optional
equipment of your vehicle available at the
time of publication of the Operator's
Manual. Country-specific differences are
possible. Please note that your vehicle may
not be equipped with all features
described. This also applies to safety-
related systems and functions.
i Please read the information on qualified
specialist workshops (Y page 23).Overview of climate control systems
Important safety notes
G
WARNING
Severe conditions (e.g. strong air pollution)
may require replacement of the filter before
its scheduled replacement interval. Aclogged
filter will reduce the air volume to the interior
and the windows could fog up, impairing
visibility and endangering you and others.
Have a blocked filter replaced at a Mercedes-
Ben zCenter as soon as possible. G
WARNING
Follow the recommended settings for heating
and cooling given on the following pages.
Otherwise, the windows could fog up,
impairing visibility and endangering you and
others.
The air-conditioning system/automatic
climate control controls the temperature and
the humidity of the vehicle interior and filters
undesirable substances from the air.
The air-conditioning system/automatic
climate control is only operational when the
engine is running. 7
The system only works
optimally when the side windows and the roof
are closed. i
Ventilate the vehicle for a brief period
during warm weather. This will speed up the
cooling process and the desired vehicle
interior temperature will be reached more
quickly.
i The integrated filter can filter out most
particles of dust and completely filters out
pollen. Aclogged filter reduces the amount
of air supplied to the vehicle interior .For
this reason, you should always observe the
interval for replacing the filter, which is
specified in the Maintenance Booklet .As it
depends on environmental conditions, e.g.
heavy air pollution, the interval may be
shorter than stated in the Maintenance
Booklet.
7 The residual heat function can only be activated/deactivated when the ignition is switched off. 116
Overview of climate control systemsClimate control
Page 120 of 334
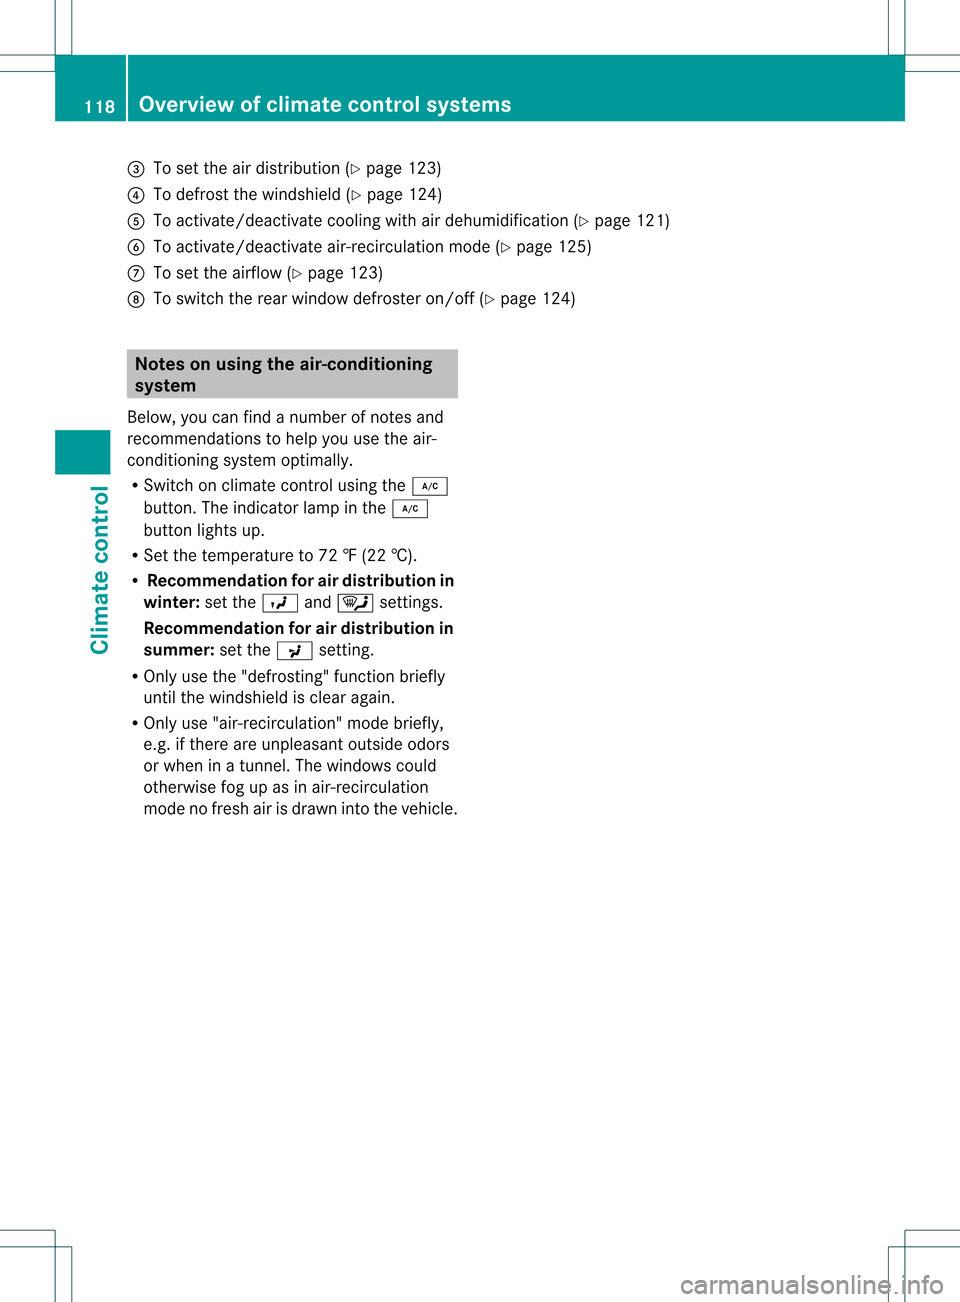
0023
To set the air distribution (Y page 123)
0022 To defrost the windshield (Y page 124)
0020 To activate/deactivate cooling with air dehumidification (Y page 121)
0021 To activate/deactivate air-recirculation mode (Y page 125)
0014 To set the airflow (Y page 123)
0015 To switch the rear window defroster on/of f(Ypage 124) Notes on using the air-conditioning
system
Below, you can find a number of notes and
recommendations to help you use the air-
conditioning system optimally.
R Switch on climate control using the 0006
button. The indicator lamp in the 0006
button lights up.
R Set the temperature to 72 ‡ (22 †).
R Recommendation for air distribution in
winter: set the0018and0007 settings.
Recommendation for air distribution in
summer: set the0019setting.
R Only use the "defrosting" function briefly
until the windshield is clear again.
R Only use "air-recirculation" mode briefly,
e.g. if there are unpleasant outside odors
or when in a tunnel. The windows could
otherwise fog up as in air-recirculation
mode no fresh air is drawn into the vehicle. 118
Overview of climate control systemsClimate control
Page 122 of 334
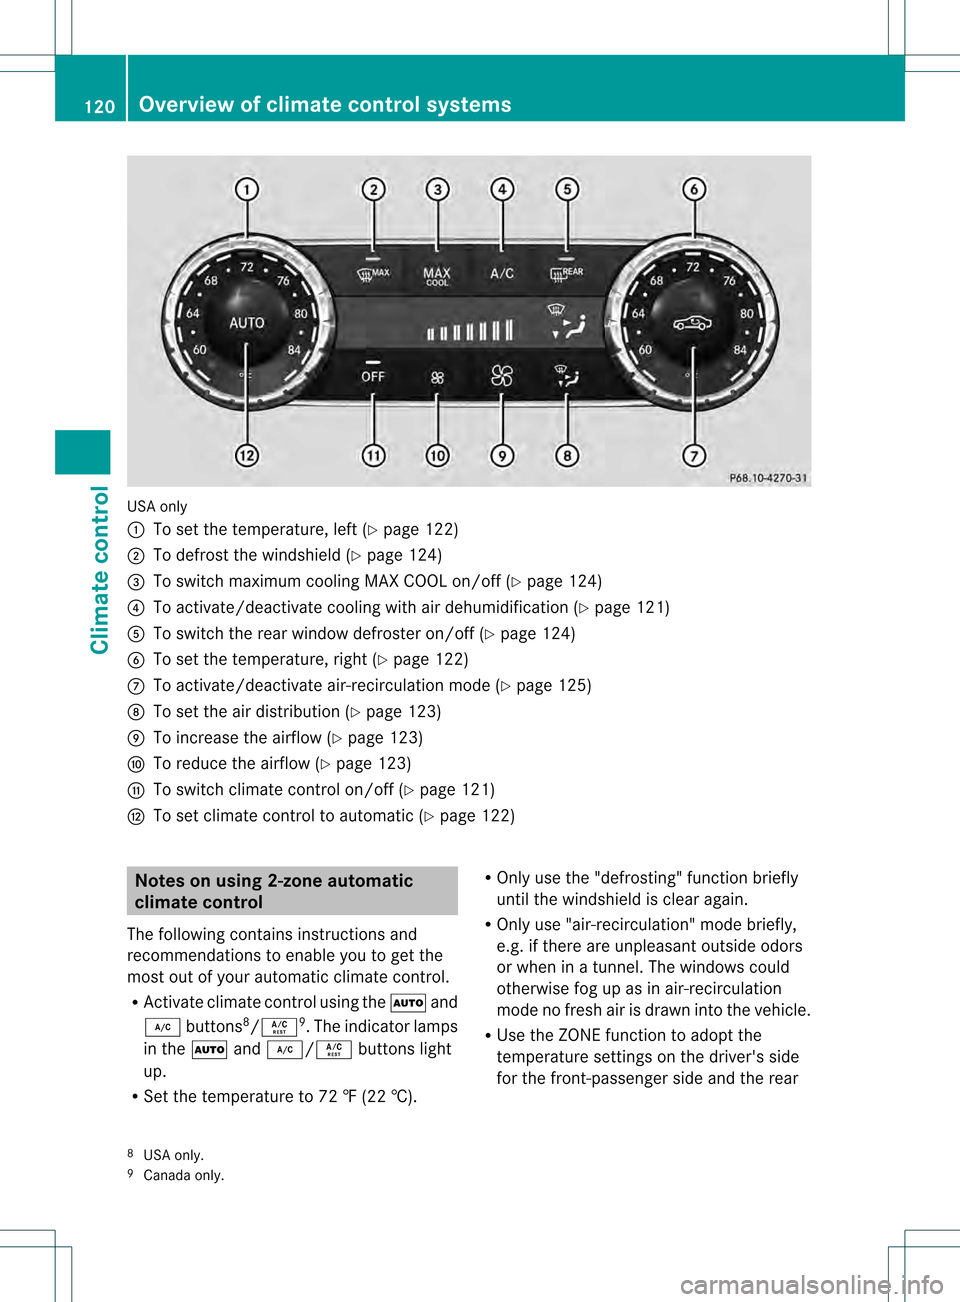
USA only
0002
To set the temperature, left (Y page 122)
0003 To defrost the windshield (Y page 124)
0023 To switch maximum cooling MAX COOL on/off (Y page 124)
0022 To activate/deactivate cooling with air dehumidification (Y page 121)
0020 To switch the rear window defroster on/off (Y page 124)
0021 To set the temperature, right (Y page 122)
0014 To activate/deactivate air-recirculation mode (Y page 125)
0015 To set the air distribution (Y page 123)
0016 To increase the airflow (Y page 123)
0017 To reduce the airflow (Y page 123)
0018 To switch climate control on/off (Y page 121)
0019 To set climate control to automatic (Y page 122)Notes on using 2-zone automatic
climate control
The following contains instructions and
recommendations to enable you to get the
most out of your automatic climate control.
R Activate climate control using the 0005and
0006 buttons 8
/0004 9
.T he indicator lamps
in the 0005and0006/0004 buttons light
up.
R Set the temperature to 72 ‡ (22 †). R
Only use the "defrosting" function briefly
until the windshield is clear again.
R Only use "air-recirculation" mode briefly,
e.g. if there are unpleasant outside odors
or when in a tunnel. The windows could
otherwise fog up as in air-recirculation
mode no fresh air is drawn into the vehicle.
R Use the ZONE function to adopt the
temperature settings on the driver's side
for the front-passenger side and the rear
8 USA only.
9 Canada only. 120
Overview of climate control systemsClimate control
Page 135 of 334
Do not ru
nthe engine in confined areas (such
as a garage) which are not properly ventilated.
If you think that exhaust gas fumes are
entering the vehicle while driving, have the
cause determined and corrected
immediately. If you must drive under these
conditions, drive only with at least one
window fully open at all times.
! Do not depress the accelerator pedal
when starting the engine.
General information i
AMG vehicles: the exhaust flap of the
exhaust system will be checked after every
cold start. Aresulting noise can be heard
during this process.
i During a cold start, the engine runs at
higher speeds to enable the catalytic
converter to reach its operating
temperature. The sound of the engine may
change during this time.
Manual transmission X
Depress the brake pedal and keep it
depressed.
X Fully depress the clutch pedal.
X Shift to neutral N.
i You can only start the engine when the
clutch pedal is fully depressed.
Automatic transmission X
Shift the transmission to position P.
The transmission position display in the
multifunction display shows P.
i You can also start the engine when the
transmission is in position N.
Starting procedure with the SmartKey i
To start the engine using the SmartKey
instead of KEYLESS-GO, pull the Start/
Stop button out of the ignition lock. X
Turn the SmartKey to position 3in the
ignition lock (Y page 131)and release it as
soo nas the engine is running.
Using KEYLESS-GO to startt he engine G
WARNING
As long as the SmartKey is in you rvehicle, the
vehicle can be started. Therefore, never leave
children unattended in the vehicle, as they
could otherwise accidentally start the engine.
When leaving the vehicle, always take the
SmartKey with you and lock the vehicle. Do
not leave children unattended in the vehicle,
or with access to an unlocked vehicle. A
child's unsupervised access to a vehicle could
result in an acciden tand/o rserious personal
injury.
i The Start/Stop button can be used to
start the vehicle manually without inserting
the SmartKey into the ignition lock. The
Start/Stop button must be inserted into
the ignition lock and the SmartKey must be
in the vehicle. This mode for starting the
engine operates independently of the ECO
start/stop automatic engine start function.
X Depress the brake pedal and keep it
depressed.
X Press the Start/Stop button (Y page 131)
once.
The engine starts. Pulling away
Manual transmission X
Depress the brake pedal and keep it
depressed.
X Fully depress the clutch pedal.
X Shift to either first gear or reverse gear R.
X Release the electric parking brake
(Y page 150). Driving
133Driving and parking Z
Page 148 of 334

Problems with the transmission
Problem Possible causes/consequences and
0001 Solutions
The transmission has
problems shifting gear. The transmission is losing oil.
X
Have the transmission checked at a qualified specialist
workshop immediately. The acceleration ability
is deteriorating.
The transmission no
longer changes gear. The transmission is in emergency mode.
It is only possible to shift into
secondgear and reverse gear.
X Stop the vehicle.
X Shift the transmission to position P.
X Switch off the engine.
X Wait at least 10seconds before restarting the engine.
X Shift the transmission to position Dor R.
If D is selected, the transmission shifts into secondgear; ifRis
selected, the transmission shifts into reverse gear.
X Have the transmission checked at a qualified specialist
workshop immediately. Releasing the parking lock manually
In the event of an electrical malfunction, it is
possible to release the selector lever lock
manually to move it out of position P, e.g. if
you wish to tow the vehicle away. !
Do not use any sharp-edged objects to
remove the selector lever gaiter from the
center console. This could damage the
selector lever gaiter. X
Apply the electric parking brake.
X Press the frame of selector level gaiter 0002
together somewhat on the side edge at the
back and hold with one hand 0003.
X With the other hand, pry off the frame of
selector level gaiter 0002with a flat, blunt
object (e.g. a screwdriver wrapped in cloth)
at rear edge 0023, pulling it up and out at the
same time.
X Press release buttons 0022down and
simultaneously move the selector lever out
of position P.
The selector lever can now be moved freely
until it is returned to position P. Refueling
Important safety notes
G
WARNING
Gasoline is highly flammable and poisonous.
It burns violently and can cause serious
personal injury. 146
RefuelingDriving and parking