2012 MERCEDES-BENZ SLK350 four wheel drive
[x] Cancel search: four wheel drivePage 97 of 334

Adjusting the head restraints
X
To raise/lower: push the head restraint
upwards or pull it down into the desired
position. Adjusting the four-way lumbar
support
You can adjust the contour of the seat
backrests individually to provide optimum
support for your back. 0002
To raise the backrest contour
0003 To soften the backrest contour
0023 To lower the backrest contour
0022 To harden the backrest contour Switching the sea
theating on/off
Switching on/off G
WARNING
Repeatedly setting the seat heating to level
3 may result in excessiv eseat temperatures. The health of passengers that have limited
temperature sensitivity or a limited ability to
react to excessively high temperatures may
be affected or they may even suffer burn-like
injuries. Therefore, do not use seat heating
level
3repeatedly.
The three red indicator lamps in the button
indicate the heating level you have selected.
i If the battery voltage is too low, the seat
heating may switch off. Driver's and front-passenger seat
The system automatically switches down
from level
3to level 2after approximately five
minutes.
The system automatically switches down
from level 2to level 1after approximately ten
minutes.
The system automatically switches off
approximately 20 minutes after it is set to
level 1.
X Make sure that the SmartKey is in position
1 or 2in the ignition lock.
X To switch on: press button0002repeatedly
until the desired heating level is set.
X To switch off: press button0002repeatedly
until all the indicator lamps go out. Seats
95Seats, steering wheel and mirrors Z
Page 144 of 334

Kickdown
Use kickdown for maximum acceleration.
X
Vehicles for USA (excep tAMG
vehicles): fully depress the accelerator
pedal.
The transmission shifts to a lower gear
depending on the engine speed.
X Vehicles for Canada and AMG vehicles:
depress the accelerator pedal beyond the
pressure point.
The transmission shifts to a lower gear
depending on the engine speed.
Working on the vehicle G
WARNING
When working on the vehicle, engage the
electronic parking brake and shift the
automatic transmission into park position P.
Otherwise the vehicle could roll away which
could resul tinanaccident and/or serious
personal injury. Program selecto
rbutton
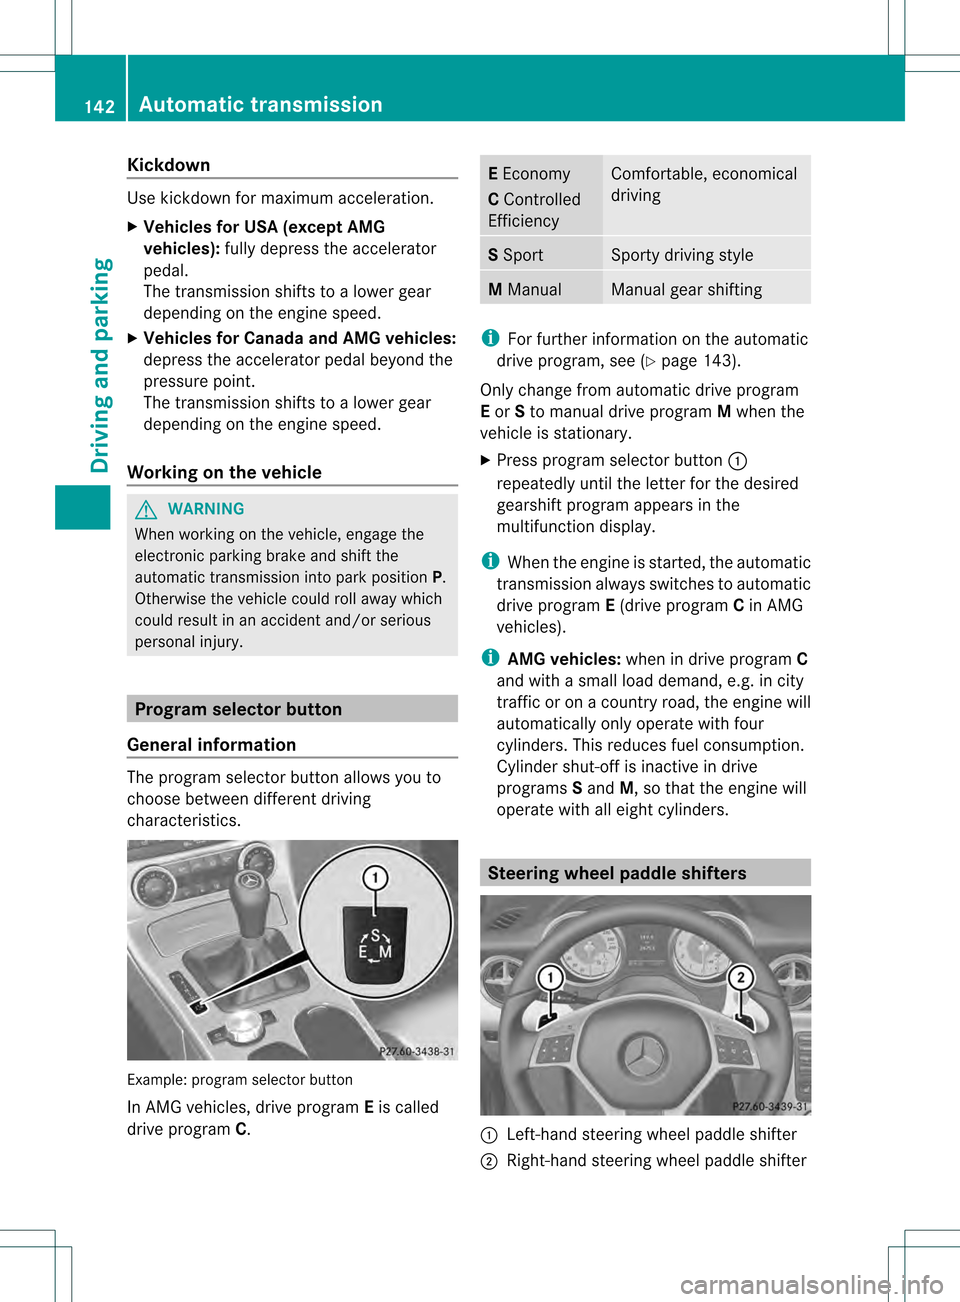
General information The progra
mselecto rbutton allows you to
choose between different driving
characteristics. Example: program selector button
In AMG vehicles, drive program
Eis called
drive program C. E
Economy
C Controlled
Efficiency Comfortable, economical
driving
S
Sport Sporty driving style
M
Manual Manual gear shifting
i
For further information on the automatic
drive program, see (Y page 143).
Only change from automatic drive program
E or Sto manual drive program Mwhen the
vehicle is stationary.
X Press program selector button 0002
repeatedly until the lette rfor the desired
gearshift program appears in the
multifunction display.
i When the engine is started, the automatic
transmission always switches to automatic
drive program E(drive program Cin AMG
vehicles).
i AMG vehicles: when in drive program C
and with a small load demand, e.g. in city
traffic or on a country road, the engine will
automatically only operate with four
cylinders. This reduces fuel consumption.
Cylinder shut-of fis inactive in drive
programs Sand M, so that the engine will
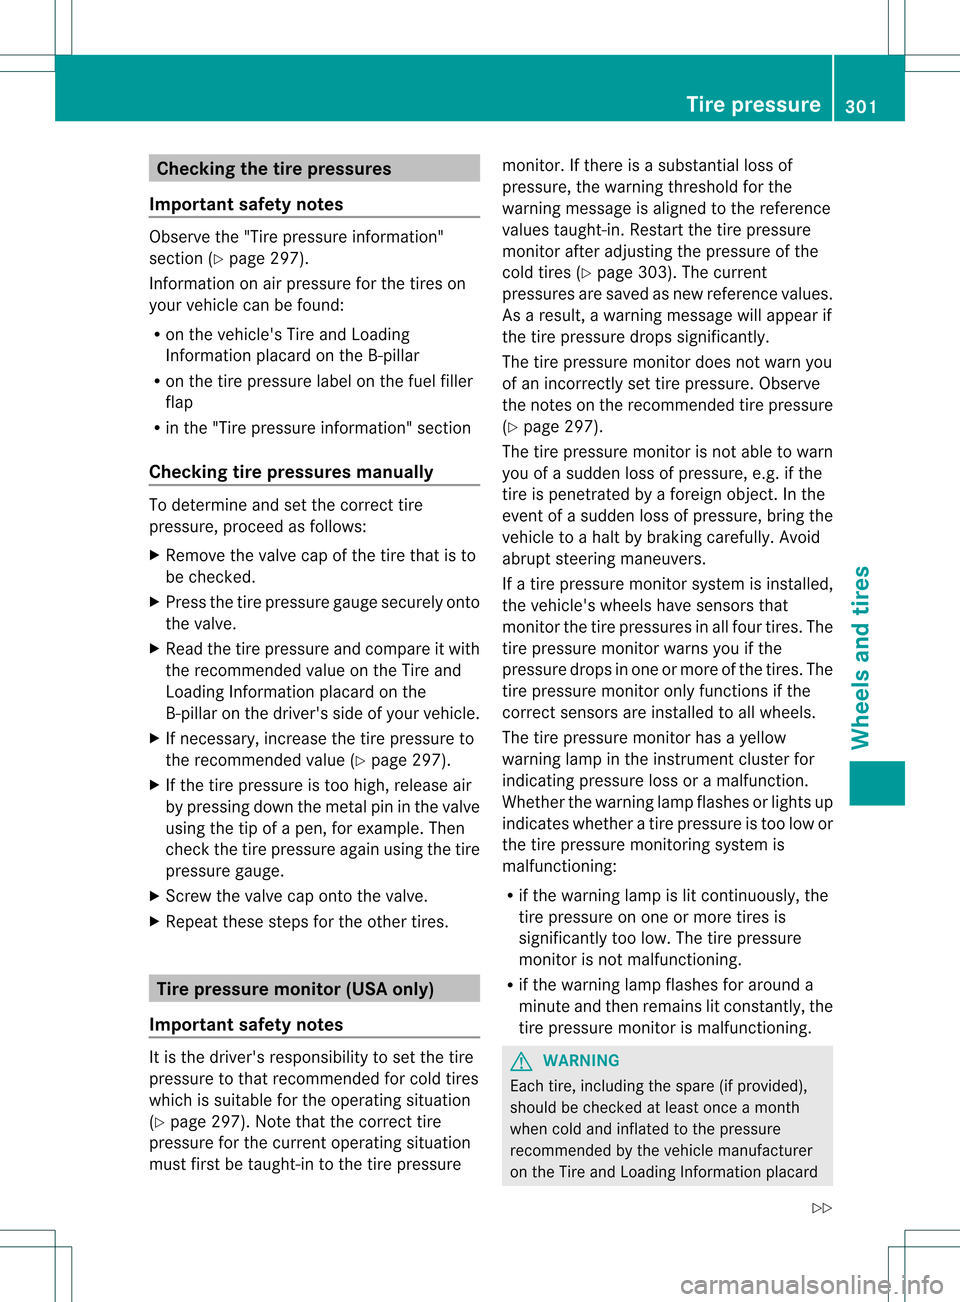
operate with all eight cylinders. Steering wheel paddle shifters
0002
Left-hand steering wheel paddle shifter
0003 Right-hand steering wheel paddle shifter 142
Automatic transmissionDriving and parking
Page 303 of 334

Checking the tire pressures
Important safety notes Observe the "Tire pressure information"
sectio n(Ypage 297).
Information on air pressure for the tires on
your vehicle can be found:
R on the vehicle's Tire and Loading
Information placard on the B-pillar
R on the tire pressure label on the fuel filler
flap
R in the "Tire pressure information" section
Checking tire pressures manually To determine and set the correct tire
pressure, proceed as follows:
X Remove the valve cap of the tire that is to
be checked.
X Press the tire pressure gauge securely onto
the valve.
X Read the tire pressure and compare it with
the recommended value on the Tire and
Loading Information placard on the
B-pillar on the driver's side of your vehicle.
X If necessary, increase the tire pressure to
the recommended value (Y page 297).
X If the tire pressure is too high, release air
by pressing down the metal pin in the valve
using the tip of a pen, for example. Then
chec kthe tire pressure again using the tire
pressure gauge.
X Screw the valve cap onto the valve.
X Repeatt hese steps for the other tires. Tire pressure monitor (USA only)
Important safety notes It is the driver's responsibility to set the tire
pressure to that recommended for cold tires
which is suitable for the operating situation
(Y page 297). Note that the correct tire
pressure for the current operating situation
must first be taught-in to the tire pressure monitor. If there is a substantial loss of
pressure, the warning threshold for the
warning message is aligned to the reference
values taught-in. Restart the tire pressure
monitor after adjusting the pressure of the
cold tires (Y page 303). The current
pressures are saved as new reference values.
As a result, a warning message will appearif
the tire pressure drops significantly.
The tire pressure monitor does not warn you
of an incorrectly set tire pressure. Observe
the notes on the recommended tire pressure
(Y page 297).
The tire pressure monitor is not able to warn
you of a sudden loss of pressure, e.g .ifthe
tire is penetrated by a foreign object. In the
event of a sudden loss of pressure, bring the
vehicle to a halt by braking carefully. Avoid
abrupt steering maneuvers.
If a tire pressure monitor system is installed,
the vehicle's wheels have sensors that
monitor the tire pressures in all four tires. The
tire pressure monitor warns you if the
pressure drops in one or more of the tires. The
tire pressure monitor only functions if the
correct sensors are installed to all wheels.
The tire pressure monitor has a yellow
warning lamp in the instrument cluster for
indicating pressure loss or amalfunction.
Whether the warning lamp flashes or lights up
indicates whether a tire pressure is too low or
the tire pressure monitoring system is
malfunctioning:
R if the warning lamp is lit continuously, the
tire pressure on one or more tires is
significantly too low. The tire pressure
monitor is not malfunctioning.
R if the warning lamp flashes for around a
minute and then remains lit constantly, the
tire pressure monito ris malfunctioning. G
WARNING
Each tire, including the spare (if provided),
should be checked at least once a month
when cold and inflated to the pressure
recommended by the vehicle manufacturer
on the Tire and Loading Information placard Tire pressure
301Wheels and tires
Z
Page 305 of 334

Checking tire pressure electronically
X
Make sure that the SmartKey is in
position 2(Ypage 131) in the ignition lock.
X Press the 0002or0005 button on the
steering wheel to selec tthe Service menu.
X Press the 0003or0004 button to select
Tire Pressure .
X Press the 000Cbutton.
The current tire pressure for each wheel will
be displayed in the multifunction display.
If the vehicle has been parked for longer than
20minutes, the Tire pressure will be displayed after driving a few
minutes message appears.
After a teach-in period, the tire pressure
monitor automatically recognizes new wheels
or new sensors. As long as a clear allocation
of the tire pressure values to the individual
wheels is not possible, the Tire PressureMonitor Active display message is shown
instead of the tire pressure display. The tire
pressures are already being monitored.
i If a spare wheel/emergency spare wheel
is mounted, the system may continue to
show the tire pressure of the wheel that has
been removed for a few minutes. If this
occurs, note that the value displayed for
the position where the spare tire is
mounted is not the same as the spare
wheel/emergency spare wheel's current
tire pressure.
Tire pressure monitor warning
messages If the tire pressure monitor detects a
significant pressure loss on one or more tires,
a warning message is shown in the
multifunction display. Awarning tone also
sounds and the tire pressure warning lamp
lights up in the instrumen tcluster.
Each tire that is affected by a significant loss
of pressure is highlighted with a color. If the
Correct tire pressure message
appears in the multifunction display:
X Check the tire pressure on all four wheels
and correct it if necessary.
i If the wheel positions on the vehicle are
interchanged, the tire pressures may be
displayed for the wrong positions for a
shor ttime. This is rectified after a few
minutes of driving, and the tire pressures
are displayed for the correc tpositions.
Restarting the tire pressure monitor When you restart the tire pressure monitor,
all existing warning messages are deleted and
the warning lamps go out. The monitor uses
the currently set tire pressures as the
reference values for monitoring. In most
cases, the tire pressure monitoring system
recognizes the new reference values
automatically.
However, you can also define reference
values manually as described here:
X
Set the tire pressure to the value
recommended for the corresponding
driving situation on the vehicle's Tire and
Loading Information placard on the driver's
side B-pillar(Y page 297).
Additional tire pressure values for driving
at high speeds or with heavy loads can be
found in the tire pressure table on the
inside of the fuel filler flap.
X Make sure that the tire pressure is correct
on all four wheels.
X Make sure that the SmartKey is in position
2 in the ignition lock.
X Press the 0002or0005 button on the
steering wheel to select the Service menu.
X Press the 0003or0004 button to select
Tire Pressure .
X Press the 000Cbutton.
The multifunction display shows the
current tire pressure of the individual tires
or the Tire pressure will be Tire pressure
303Wheels and tires Z
Page 310 of 334

i
The actual values for tires are vehicle-
specific and may deviate from the values in
the illustration.
Where applicable, the tire grading
information can be found on the tire sidewall
between the tread shoulder and maximum
tire width.
For example: Tread wear Traction Temperature
200 AA A
All passenger car tires must conform to the
statutory safety requirements in addition to
these grades.
Tread wear
The tread wear grade is acomparative rating
based on the wear rate of the tire when tested
under controlled conditions on a specified
U.S. government course. For example, a tire
graded 150 would wear one and one-half
times as well on the government course as a
tire graded 100.
The relative performance of tires depends
upon the actual conditions of their use,
however, and may depart significantly from
the norm, due to variations in driving habits,
service practices and differences in road
characteristics and climate conditions. Traction
G
WARNING
The traction grade assigned to this tire is
based on straight-ahead braking traction
tests, and does not include acceleration,
cornering, hydroplaning, or peak traction
characteristics.
The traction grades, from highest to lowest,
are AA, A, B, and C. Those grades represent
the tire's ability to stop on a wet surface as
measured under controlled conditions on specified government test surfaces of asphalt
and concrete.
Atire marked C may have poor
traction performance.
The safe speed on a wet, snow covered or icy
road is always lower than on dry road
surfaces.
You should pay special attention to road
conditions when temperatures are around
the freezing point.
Mercedes-Benz recommends a minimum
tread depth of 000Ain(4 mm) for all four winter
tires (Y page 296) to maintai nnormal driving
characteristics in winter. Winter tires can
reduce the braking distance on snow-covered
surfaces in comparison with summer tires.
Stopping distance, however, is still
considerably greater than when the road is
not covered with ice or snow. Take
appropriate care when driving.
! Avoid wheelspin. This can lead to damage
to the drive train. Temperature
G
WARNING
The temperature grade for this tire is
established for a tire that is properly inflated
and not overloaded. Excessive speed,
underinflation, or excessive loading, either
separately or in combination, can cause
excessive heat build-up and possible tire
failure.
The temperature grades are A(the highest),
B, and C. These represent the tire's
resistance to the generatio nofheat and its
ability to dissipate heat when tested under
controlled conditions on a specified indoor
laboratory test wheel. Sustained high
temperature can cause the material of the tire
to degenerate and reduce tire life, and
excessive temperature can lead to sudden
tire failure. The grade Ccorresponds to a level
of performance which all passenger car tires
must meet under the Federal Motor Vehicle
Safety Standard No. 109. Grades B and A 308
Uniform Tire Quality Grading StandardsWheels and tires