2012 MERCEDES-BENZ SLK350 ESP
[x] Cancel search: ESPPage 80 of 334
X
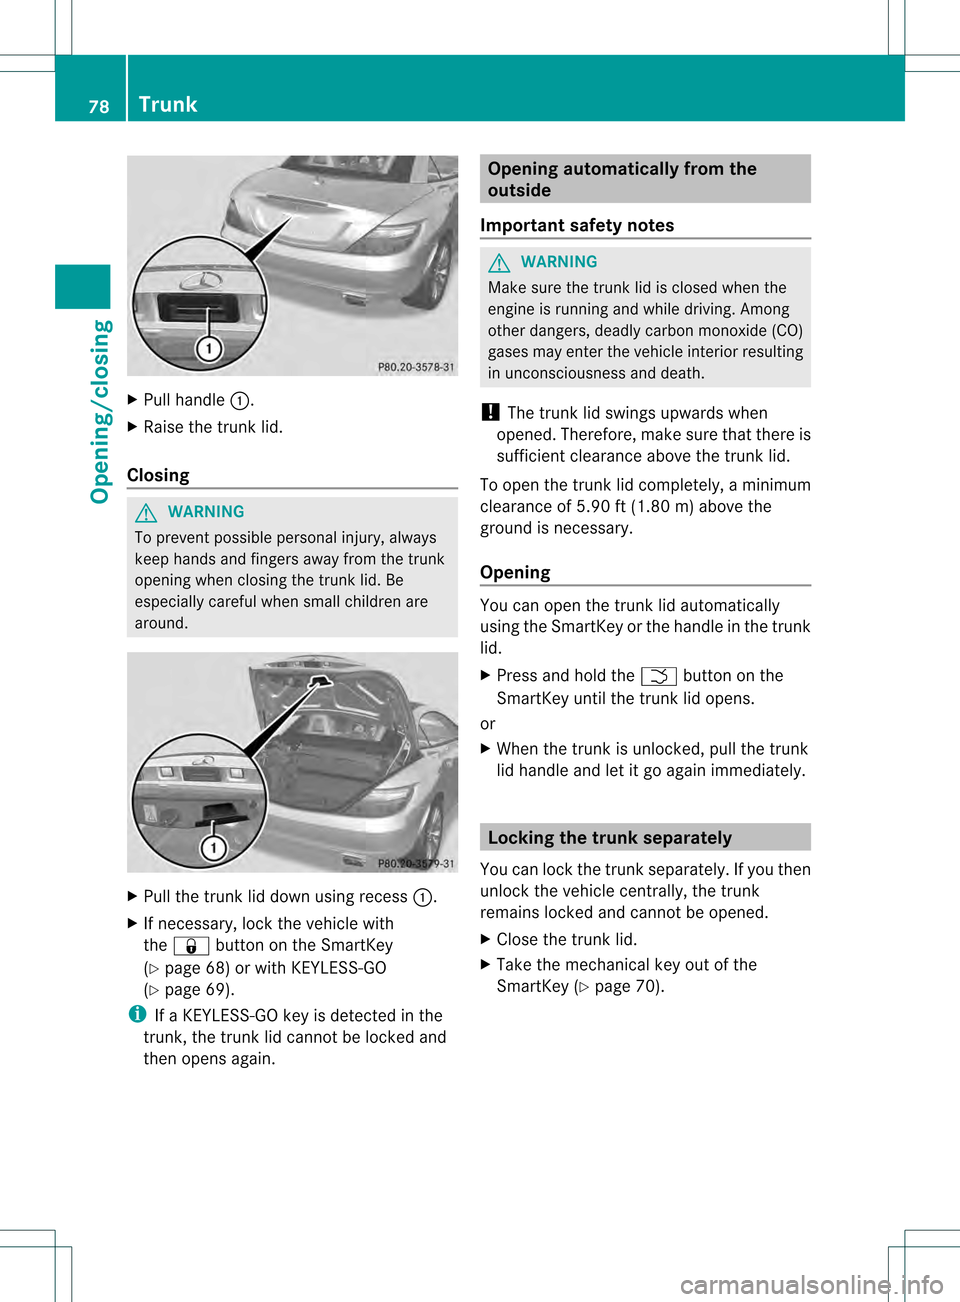
Pull handle 0002.
X Raise the trunkl id.
Closing G
WARNING
To prevent possible personal injury, always
keep hands and fingers away fro mthe trunk
opening when closing the trunk lid. Be
especially careful when small children are
around. X
Pull the trunk lid down using recess 0002.
X If necessary, lock the vehicle with
the 000F button on the SmartKey
(Y page 68) or with KEYLESS-GO
(Y page 69).
i If a KEYLESS-GO key is detected in the
trunk, the trunk lid cannot be locked and
then opens again. Opening automatically from the
outside
Important safety notes G
WARNING
Make sure the trunk lid is closed when the
engine is running and while driving. Among
other dangers, deadly carbon monoxide (CO)
gases may enter the vehicle interior resulting
in unconsciousness and death.
! The trunk lid swings upwards when
opened. Therefore, make sure that there is
sufficient clearance above the trunk lid.
To open the trunk lid completely, a minimum
clearance of 5.90 ft (1.80 m) above the
ground is necessary.
Opening You can open the trunk lid automatically
using the SmartKey or the handle in the trunk
lid.
X
Press and hold the 0006button on the
SmartKey until the trunk lid opens.
or
X When the trunk is unlocked, pull the trunk
lid handle and let it go again immediately. Locking the trunk separately
You can lock the trunk separately.Ify ou then
unlock the vehicle centrally, the trunk
remains locked and cannot be opened.
X Close the trunk lid.
X Take the mechanical key out of the
SmartKey (Y page 70).78
TrunkOpening/closing
Page 82 of 334
Side windows
Important safety notes
G
WARNING
When opening or closing the door windows,
make sure that there is no danger of anyone
being harmed by the opening/closing
procedure.
The front door windows are equipped with
automatic operation and the anti-entrapment
feature. If in automatic mode a front door
window encounters an obstruction that
blocks its path, the anti-entrapment feature
will stop the door window and open it slightly.
The door windows operate differently when
the switch is pulled.S ee the "Problems with
door windows" section for more details.
The closing of the door windows can be
immediately halted by releasing the switch or,
if the switch was pulled past the resistance
point and released, by pressing or pulling the
respective switch.
If a door window encounters an obstruction
that blocks its path in a circumstance where
you are closing the windows by pressing and
holding 000Fbutton on the SmartKey or by
pressing and holding the lock button (vehicles
with KEYLESS-GO) on an outside door handle,
the anti-entrapment feature will not operate. Opening and closing the side
windows in the front
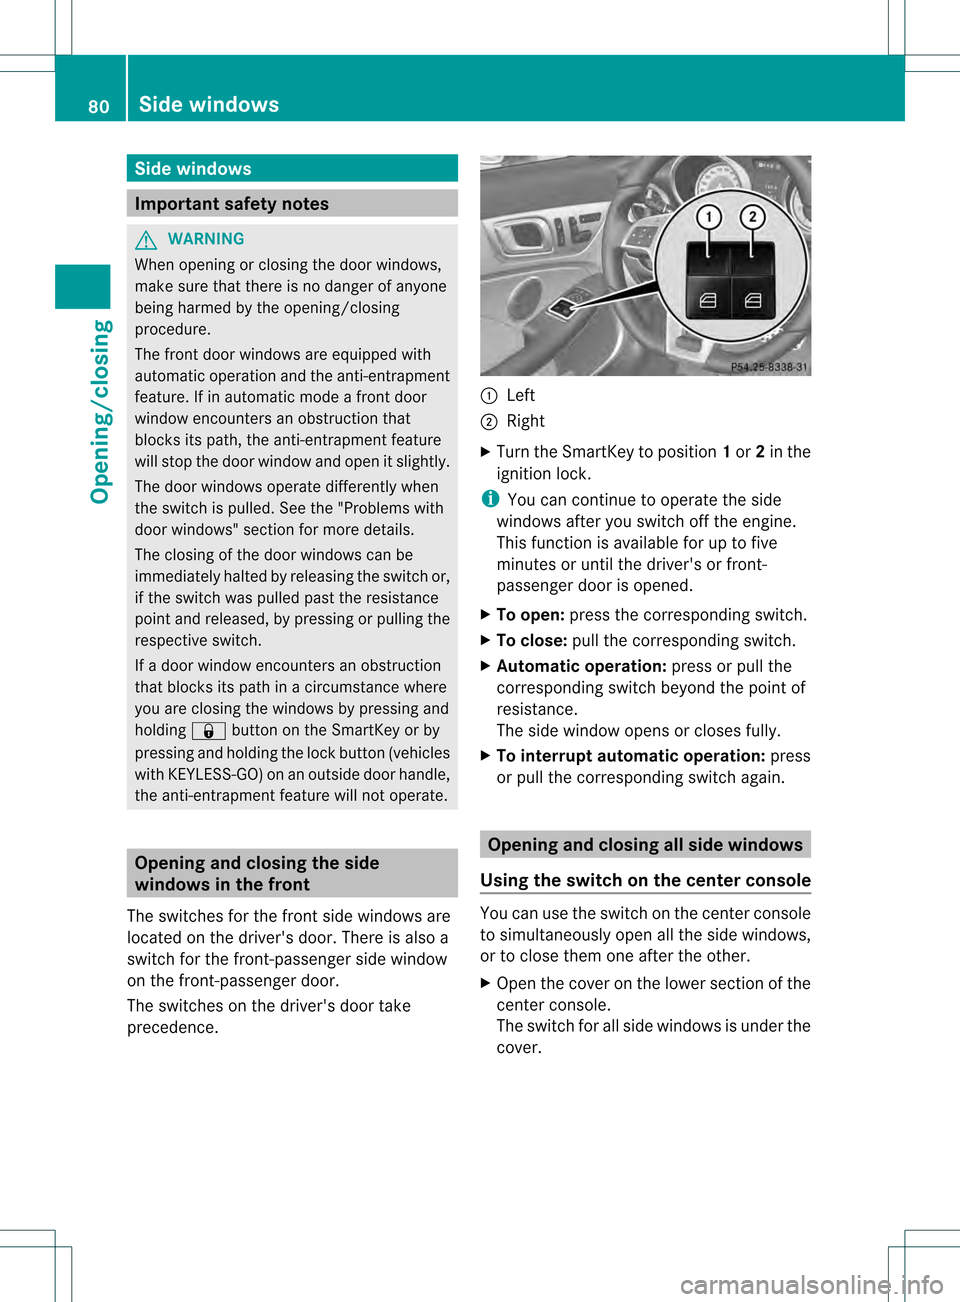
The switches for the fron tside windows are
located on the driver's door. There is also a
switch for the front-passenger side window
on the front-passenger door.
The switches on the driver's door take
precedence. 0002
Left
0003 Right
X Turn the SmartKey to position 1or 2in the
ignition lock.
i You can continue to operate the side
windows after you switch off the engine.
This function is available for up to five
minutes or until the driver's or front-
passenger door is opened.
X To open: press the corresponding switch.
X To close: pull the corresponding switch.
X Automatic operation: press or pull the
corresponding switch beyond the point of
resistance.
The side window opens or closes fully.
X To interrupt automatic operation: press
or pull the corresponding switch again. Opening and closing all side windows
Using the switch on the center console You can use the switch on the center console
to simultaneously open all the side windows,
or to close them one after the other.
X Open the cover on the lower section of the
center console.
The switch for all side windows is under the
cover. 80
Side windowsOpening/closing
Page 84 of 334
X
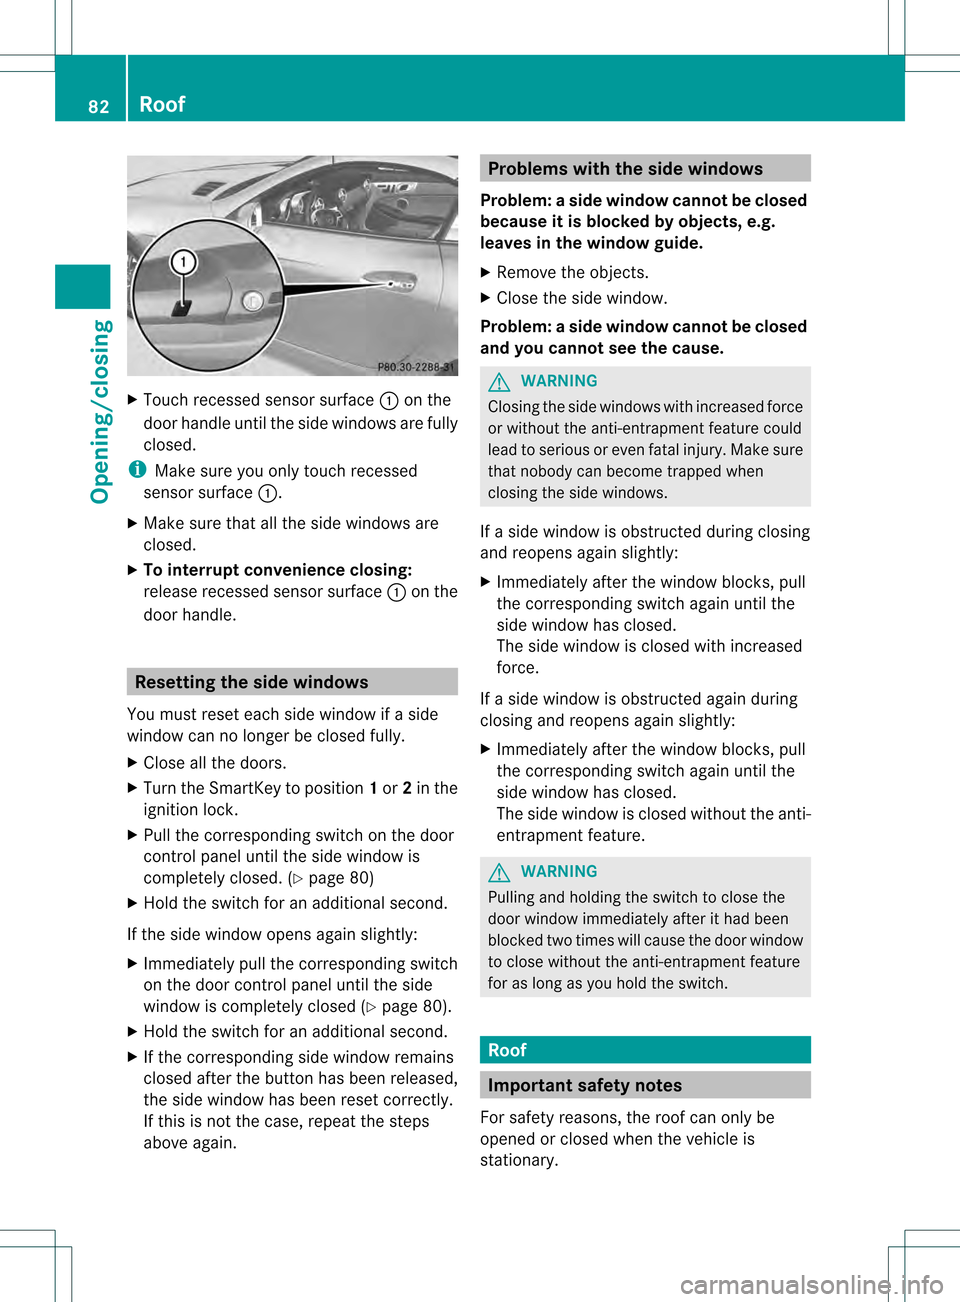
Touch recessed sensor surface 0002on the
door handle until the side windows are fully
closed.
i Make sure you only touch recessed
sensor surface 0002.
X Make sure that all the side windows are
closed.
X To interrupt convenience closing:
release recessed sensor surface 0002on the
door handle. Resetting the side windows
You must reset each side window if a side
window can no longer be closed fully.
X Close all the doors.
X Turn the SmartKey to position 1or 2in the
ignition lock.
X Pull the corresponding switch on the door
control panel until the side window is
completely closed. (Y page 80)
X Hold the switch for an additional second.
If the side window opens again slightly:
X Immediately pull the corresponding switch
on the door control panel until the side
window is completely closed (Y page 80).
X Hold the switch for an additional second.
X If the corresponding side window remains
closed after the button has been released,
the side window has been reset correctly.
If this is not the case, repeat the steps
above again. Problems with the side windows
Problem: aside window cannot be closed
because it is blocked by objects, e.g.
leaves in the window guide.
X Remove the objects.
X Close the side window.
Problem :aside window cannot be closed
and you cannot see the cause. G
WARNING
Closing the side windows with increased force
or without the anti-entrapment feature could
lead to serious or even fatal injury. Make sure
that nobody can become trapped when
closing the side windows.
If a side window is obstructed during closing
and reopens again slightly:
X Immediately afte rthe window blocks, pull
the corresponding switch again until the
side window has closed.
The side window is closed with increased
force.
If a side window is obstructed again during
closing and reopens again slightly:
X Immediately after the window blocks, pull
the corresponding switch again until the
side window has closed.
The side window is closed without the anti-
entrapment feature. G
WARNING
Pulling and holding the switch to close the
door window immediately after it had been
blocked two times will cause the door window
to close without the anti-entrapment feature
for as long as you hold the switch. Roof
Important safety notes
For safety reasons, the roof can only be
opened or closed when the vehicle is
stationary. 82
RoofOpening/closing
Page 89 of 334

Installing and removing th
ewind screen Preparing for installation
Preparing for installation from the left side of the
vehicle (example)
0002 Wind screen
0003 Locked latch
0023 Unlocked latch
X The following conditions must be fulfilled
for installation:
R unlocking buttons Rand Lpoint in the
direction of travel.
R latch 0023facing you is unlocked.
R latch 0003facing away from you is locked.
X To unlock the latch: press unlocking
button Ror Lon the locked latch.
X To lock th elatch: push the unlocked latch
upwards by hand until it engages.
Installing
X Stop the vehicle, paying attention to road
and traffic conditions.
X Take the wind screen out of the trunk. Installatio
nfrom the left side of the vehicle
(example)
X Prepare for installation (Y page 87).
X Hold wind screen 0002at an angle and slide
it with locked latch 0003in the direction of
arrow 0022into the bracket of the opposite
roll bar.
X Press wind screen 0002on the side of the
vehicle facing you downwards in the
directio nofarrow0020until it engages.
Make sure that studs 0021and latch 0023fit
into the respective brackets.
X Check whethe rwind screen 0002is fully
inserted into all four brackets and is sitting
securely.
X If this is not the case, remove wind
screen 0002again and repeat the steps
above.
Removing
X Stop the vehicle, paying attention to road
and traffic conditions. Removing fro
mthe left side of the vehicle
(example) Roof
87Opening/closing Z
Page 90 of 334

X
Press unlocking button L0002.Meanwhile,
pull wind screen 0003on the side of the
vehicle facing you upwards and tilt it. Removing from the left side of the vehicle
(example)
X
Pull wind screen 0003out of the bracket of
the opposite roll bar in the direction of the
arrow.
X Secure wind screen 0003to the trun kfloor by
the rubber strips (Y page 244).AIRGUIDE
General notes AIRGUIDE offers protection from the wind
when driving with the roof down.
G
WARNING
You could lose control of the vehicle and
injure yourself or others if you operate
AIRGUIDE while driving.
Only fold the AIRGUIDE discs out or in when
the vehicle is stationary.
! AIRGUID Ecan only be positioned
correctly by folding it in or out. AIRGUIDE
canno tbe dismantled. Do not try to remove
AIRGUIDE from its anchorage. Otherwise,
you could damage AIRGUID Eorthe vehicle.
AIRGUIDE can be folded out or back in from
the driver's side or passenger side.
Perform operations involving AIRGUIDE
preferably on the side facing away from
traffic, after you have stopped the vehicle, paying attention to road and traffic
conditions.
Operating AIRGUIDE X
Stop the vehicle, paying attention to road
and traffic conditions. Example: folding out from the left side of the
vehicle
X To fold out AIRGUIDE: turn disk0002
towards the center in the direction of the
arrow as far as it will go.
X Repeatt he process with disk 0003.
X To fold in AIRGUIDE: turn disks0002
and 0003respectively back to the stop behind
the roll bar.
i Disks 0002and 0003can be used
independently of one another, for example
if you are driving without a front passenger. MAGIC SKY CONTROL
General notes MAGIC SKY CONTROL is a glass roof, the
transparency of which can be changed by
applying electrical voltage.
MAGIC SKY CONTROL can be switched
between darkened and transparent states.
i
MAGIC SKY CONTROL darkens
automatically when you turn the SmartKey
to position 0in the ignition lock or remove
the SmartKey. 88
RoofOpening/closing
Page 100 of 334

G
WARNING
Let the system complete the adjustment
procedure before setting the vehicle in
motion. All steering wheel adjustment must
be completed before setting the vehicle in
motion. Driving off with the steering wheel
still adjusting could cause the drive rto lose
control of the vehicle.
Position of the steering wheel when the
EASY-ENTRY/EXIT featur eis active The steering wheel swings upwards when
you:
R
remove the SmartKey from the ignition lock
R open the driver's door and KEYLESS-GO is
in position 1
R open the driver's door and the SmartKey is
in position 0or 1in the ignition lock
i The steering wheel only moves upwards if
it has not already reached the upper end
stop.
Position of the steering wheel for
driving The steering wheel is moved to the last
selected position when:
R
the driver's door is closed.
R you insert the SmartKey into the ignition
lock.
or
R you press the Start/Stop button once on
vehicles with KEYLESS-GO.
When you close the driver's door with the
ignition switched on, the steering wheel is
also automatically moved to the previously
set position.
The last position of the steering wheel is
stored after each manual setting or when you
store the setting with the memory function
(Y page 100). Crash-responsive EASY-EXIT feature If the crash-responsive EASY-EXIT feature is
triggered in an accident, the steering column
will move upwards when the driver's door is
opened. This occurs irrespective of the
position of the SmartKey in the ignition lock.
This makes it easier to exit the vehicle and
rescue the occupants.
The crash-responsive EASY-EXIT feature is
only operational after an accident if the EASY-
EXIT/ENTRY feature is activated in the on-
board computer. Mirrors
Rear-view mirror
Rear-view mirror (manual anti-glare) X
Anti-glare mode: flick anti-glare lever 0002
forwards or back. Exterior mirrors
Adjusting the exterior mirrors G
WARNING
Exercise care when using the passenger-side
exterior rear view mirror. The mirror surface
is convex (outwardly curved surface for a
wider field of view). Objects in mirror are
closer than they appear. Check your interior
rear view mirror and glance over your
shoulder before changing lanes. 98
MirrorsSeats, steering wheel and mirrors
Page 102 of 334
incident light fro
mheadlamps strikes the
sensor in the rear-view mirror.
The mirrors do not go into anti-glare mode if
reverse gear is engaged or the interior lighting
is switched on. Parking position for the exterior
mirror on the front-passenger side
Setting and storing the parking position You can position the front-passenger side
exterior mirror in such a way that you can see
the rear wheel on that side as soon as you
engage reverse gear. You can store this
position. X
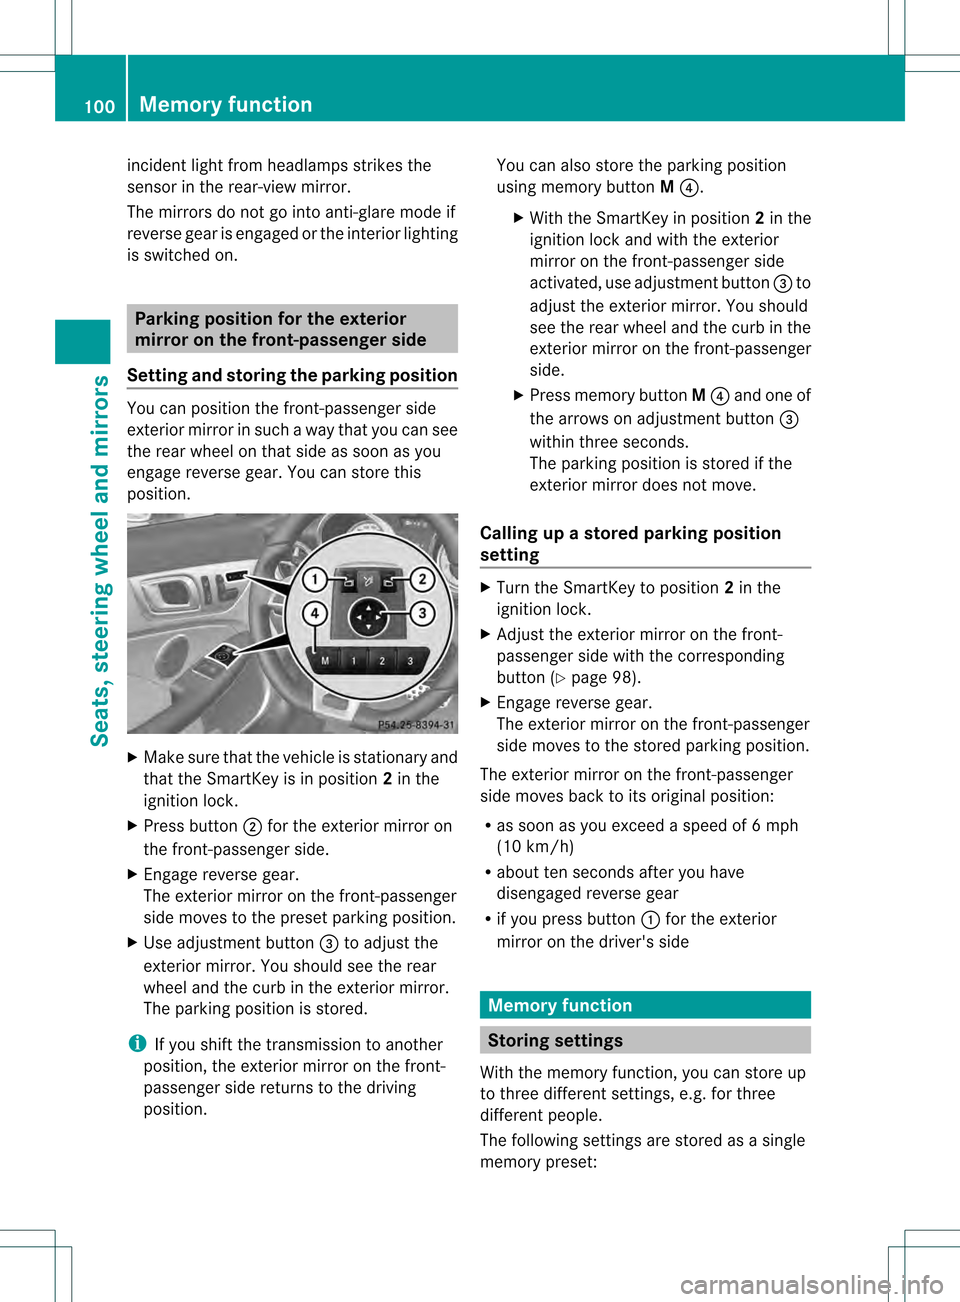
Make sure that the vehicle is stationary and
that the SmartKey is in position 2in the
ignition lock.
X Press button 0003for the exterior mirror on
the front-passenger side.
X Engage reverse gear.
The exterior mirror on the front-passenger
side moves to the preset parking position.
X Use adjustment button 0023to adjust the
exterior mirror .You should see the rear
wheel and the curb in the exterior mirror.
The parking position is stored.
i If you shift the transmission to another
position, the exterior mirror on the front-
passenger side returns to the driving
position. You can also store the parking position
using memory button
M0022.
X With the SmartKey in position 2in the
ignition lock and with the exterior
mirror on the front-passenger side
activated, use adjustmen tbutton 0023to
adjust the exterio rmirror. You should
see the rear wheel and the curb in the
exterior mirror on the front-passenger
side.
X Press memory button M0022 and one of
the arrows on adjustment button 0023
within three seconds.
The parking position is stored if the
exterior mirror does not move.
Calling up a stored parking position
setting X
Turn the SmartKey to position 2in the
ignition lock.
X Adjust the exterior mirror on the front-
passenger side with the corresponding
button (Y page 98).
X Engage reverse gear.
The exterior mirror on the front-passenger
side moves to the stored parking position.
The exterior mirror on the front-passenger
side moves back to its original position:
R as soon as you exceed a speed of 6mph
(10 km/h)
R about ten seconds after you have
disengaged reverse gear
R if you press button 0002for the exterior
mirror on the driver's side Memory function
Storing settings
With the memory function, you can store up
to three different settings, e.g. for three
differen tpeople.
The following settings are stored as a single
memory preset: 100
Memory functionSeats, steering wheel and mirrors
Page 108 of 334
X
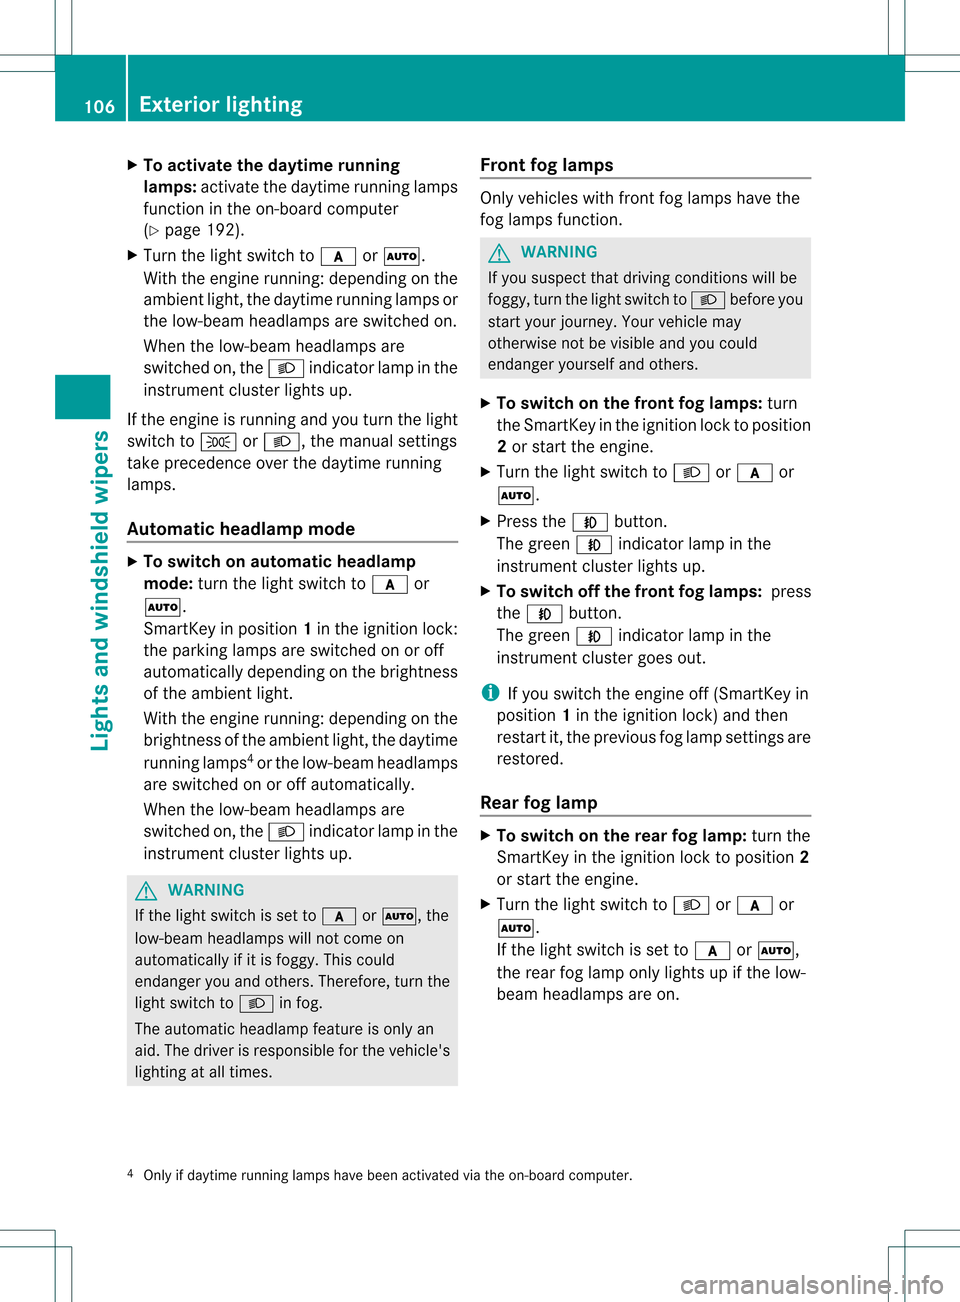
To activate the daytime running
lamps: activate the daytime running lamps
function in the on-board computer
(Y page 192).
X Turn the light switch to 0008or0005.
With the engine running :depending on the
ambient light, the daytime running lamps or
the low-beam headlamps are switched on.
When the low-beam headlamps are
switched on, the 0009indicator lamp in the
instrument cluster lights up.
If the engine is running and you turn the light
switch to 0011or0009, the manual settings
take precedence over the daytime running
lamps.
Automatic headlamp mode X
To switch on automatic headlamp
mode: turn the light switch to 0008or
0005.
SmartKey in position 1in the ignition lock:
the parking lamps are switched on or off
automatically depending on the brightness
of the ambient light.
With the engine running: depending on the
brightness of the ambient light, the daytime
running lamps 4
or the low-beam headlamps
are switched on or off automatically.
When the low-beam headlamps are
switched on, the 0009indicator lamp in the
instrument cluster lights up. G
WARNING
If the light switch is set to 0008or0005, the
low-beam headlamps will not come on
automatically if it is foggy. This could
endanger you and others. Therefore, turn the
light switch to 0009in fog.
The automatic headlamp feature is only an
aid. The driver is responsible for the vehicle's
lighting at all times. Front fog lamps Only vehicles with fron
tfog lamps have the
fog lamps function. G
WARNING
If you suspect that driving conditions will be
foggy, turn the light switch to 0009before you
start your journey. Your vehicle may
otherwise not be visible and you could
endanger yourself and others.
X To switch on the front fog lamps: turn
the SmartKey in the ignition lock to position
2 or start the engine.
X Turn the light switch to 0009or0008 or
0005.
X Press the 000Abutton.
The green 000Aindicator lamp in the
instrument cluster lights up.
X To switch off the front fog lamps: press
the 000A button.
The green 000Aindicator lamp in the
instrument cluster goes out.
i If you switch the engine off (SmartKey in
position 1in the ignition lock) and then
restart it, the previous fog lamp settings are
restored.
Rear fog lamp X
To switch on the rear fog lamp: turn the
SmartKey in the ignition lock to position 2
or start the engine.
X Turn the light switch to 0009or0008 or
0005.
If the light switch is set to 0008or0005,
the rear fog lamp only lights up if the low-
beam headlamps are on.
4 Only if daytime running lamps have been activated via the on-board computer. 106
Exterior lightingLights and windshiel
dwipers