2012 MERCEDES-BENZ SLK ROADSTER warning light
[x] Cancel search: warning lightPage 81 of 321
X
Pull the corresponding switch on the door
control panel until the side window is com-
pletely closed. (Y page 76).
X Hold the switch for an additional second.
If the side window opens again slightly:
X Immediately pull the corresponding switch
on the door control panel until the side win-
dow is completely closed (Y page 76).
X Hold the switch for an additional second.
X If the corresponding side window remains
closed after the button has been released,
the side window has been reset correctly.
If this is not the case, repeat the steps
above again. Problems with the side windows
Problem: aside window cannot be closed
because it is blocked by objects, e.g.
leaves in the window guide.
X Remove the objects.
X Close the side window.
Problem :aside window cannot be closed
and you cannot see the cause. G
WARNING
Closing the side windows with increased force
or without the anti-entrapment feature could
lead to serious or even fatal injury. Make sure
that nobody can become trapped when clos-
ing the side windows.
If a side window is obstructed during closing
and reopens again slightly:
X Immediately afte rthe window blocks, pull
the corresponding switch again until the
side window has closed.
The side window is closed with increased
force. If a side window is obstructed again during
closing and reopens again slightly:
X
Immediately after the window blocks, pull
the corresponding switch again until the
side window has closed.
The side window is closed without the anti-
entrapment feature. Roof
Important safety notes
For safety reasons, the roof can only be
opened or closed when the vehicle is station-
ary. G
WARNING
Always open or close the roof fully before
driving.
If the roof does not open or close fully, the
roof hydraulic system is depressurised and
the roof is lowered:
R after about seven minutes if the ignition is
switched on
R after about
15 seconds if the ignition is switched off
Aw arning tone sounds shortly beforehand.
The K symbol and Vario-roof lower‐ ing message appear in the multifunction dis-
play.
Lock the roof again before driving on. Other-
wise, the unlocked roo fcould open during the
journey and cause you to lose control of your
vehicle. You and/or other persons could be
injured as a result. G
WARNING
Closing the roof manually is a complex, tech-
nically challenging procedure. Attempting to
manually close the roof may cause damage to
the roof and/or injury.
For this reason, the manual closing process
should only be carried out at a qualified spe-
cialist workshop. 78
RoofOpening and closing
Page 94 of 321
temperature sensitivity or a limited ability to
react to excessively high temperatures may
be affected or the ymay even suffer burn-like
injuries .Therefore, do not use seat heating
level 3repeatedly.
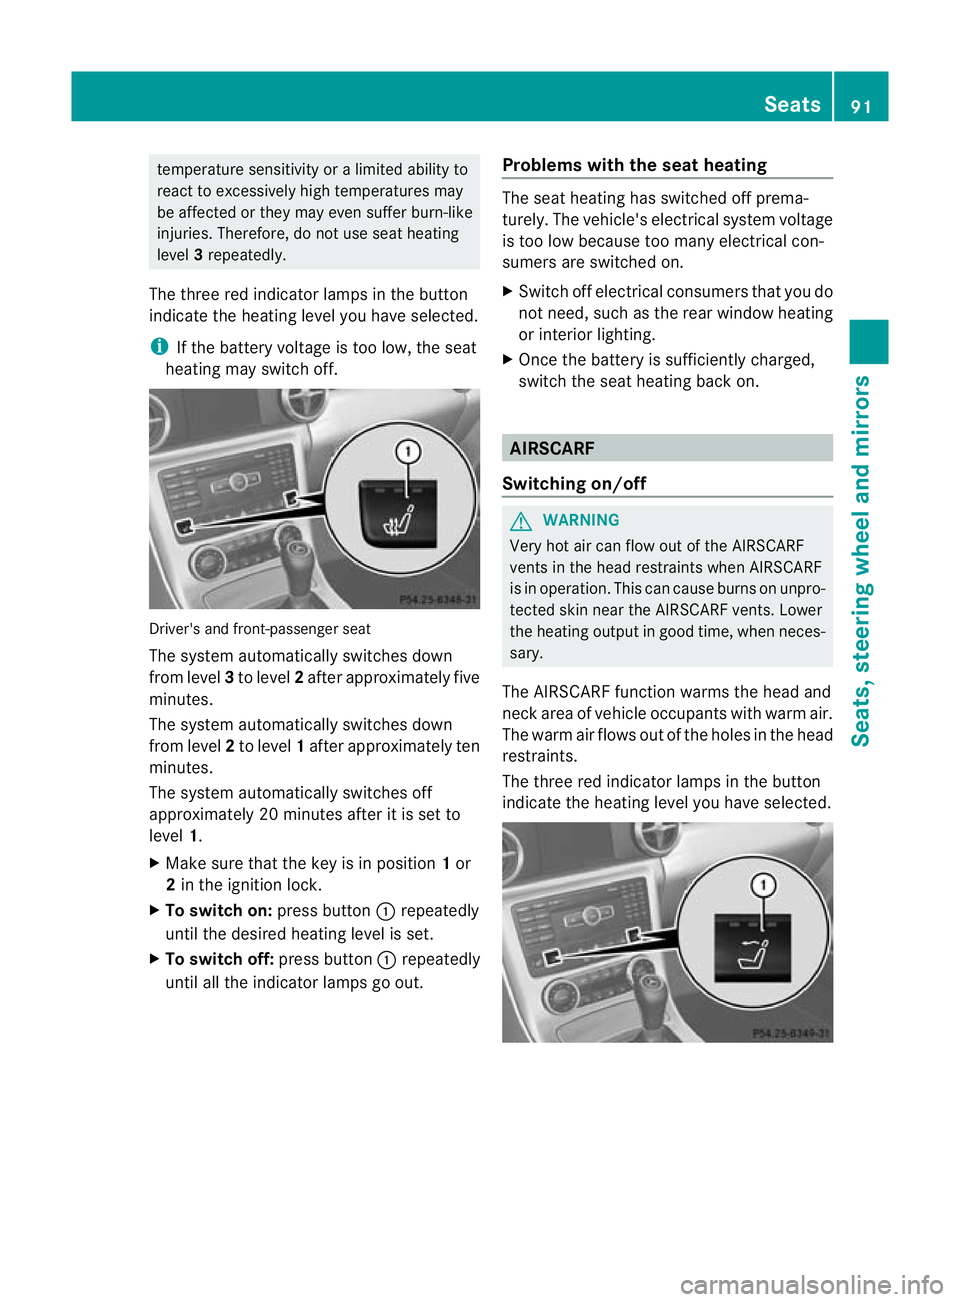
The three red indicator lamps in the button
indicate the heating level you have selected.
i If the battery voltage is too low, the seat
heating may switch off. Driver's and front-passenger seat
The system automatically switches down
from level
3to level 2after approximately five
minutes.
The system automatically switches down
from level 2to level 1after approximately ten
minutes.
The system automatically switches off
approximately 20 minutes after it is set to
level 1.
X Make sure that the key is in position 1or
2 in the ignition lock.
X To switch on: press button:repeatedly
until the desired heating level is set.
X To switch off: press button:repeatedly
until all the indicator lamps go out. Problems with the seat heating The seat heating has switched off prema-
turely. The vehicle's electrical system voltage
is too low because too many electrical con-
sumers are switched on.
X
Switch off electrical consumers that you do
not need, such as the rear window heating
or interior lighting.
X Once the battery is sufficiently charged,
switch the seat heating back on. AIRSCARF
Switching on/off G
WARNING
Very hot air can flow out of the AIRSCARF
vents in the head restraints when AIRSCARF
is in operation. This can cause burns on unpro-
tected skin near the AIRSCARF vents. Lower
the heating output in good time, when neces-
sary.
The AIRSCARF function warms the head and
neck area of vehicle occupants with warm air.
The warm air flows out of the holes in the head
restraints.
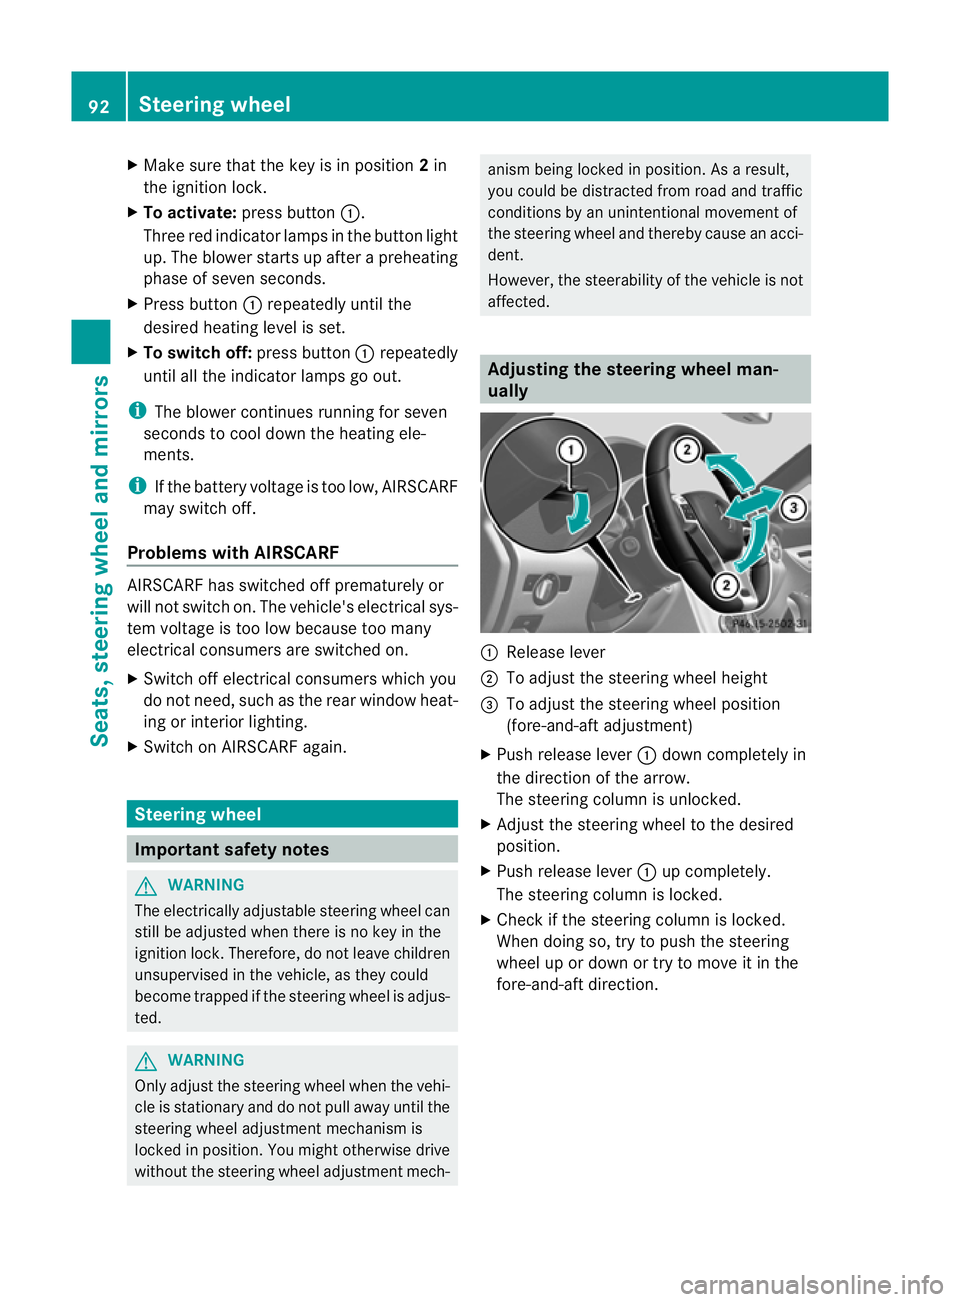
The three red indicator lamps in the button
indicate the heating level you have selected. Seats
91Seats, steering wheel and mirrors Z
Page 95 of 321
X
Make sure that the key is in position 2in
the ignition lock.
X To activate: press button :.
Three red indicator lamps in the button light
up. The blower starts up after a preheating
phase of seven seconds.
X Press button :repeatedly until the
desired heating level is set.
X To switch off: press button:repeatedly
until all the indicator lamps go out.
i The blower continues running for seven
seconds to cool down the heating ele-
ments.
i If the battery voltage is too low, AIRSCARF
may switch off.
Problems with AIRSCARF AIRSCARF has switched off prematurely or
will not switch on. The vehicle's electrical sys-
tem voltage is too low because too many
electrical consumers are switched on.
X Switch off electrical consumers which you
do not need, such as the rear window heat-
ing or interior lighting.
X Switch on AIRSCARF again. Steering wheel
Important safety notes
G
WARNING
The electrically adjustable steering wheel can
still be adjusted when there is no key in the
ignition lock. Therefore, do not leave children
unsupervised in the vehicle, as they could
become trapped if the steering wheel is adjus-
ted. G
WARNING
Only adjust the steering wheel when the vehi-
cle is stationary and do not pull away until the
steering wheel adjustment mechanism is
locked in position. You might otherwise drive
without the steering wheel adjustment mech- anism being locked in position. As a result,
you could be distracted from road and traffic
conditions by an unintentional movement of
the steering wheel and thereby cause an acci-
dent.
However, the steerability of the vehicle is not
affected.
Adjusting the steering wheel man-
ually
:
Release lever
; To adjust the steering wheel height
= To adjust the steering wheel position
(fore-and-aft adjustment)
X Push release lever :down completely in
the direction of the arrow.
The steering column is unlocked.
X Adjust the steering wheel to the desired
position.
X Push release lever :up completely.
The steering column is locked.
X Check if the steering column is locked.
When doing so, try to push the steering
wheel up or down or try to move it in the
fore-and-aft direction. 92
Steering wheelSeats, steering wheel and mirrors
Page 98 of 321
Setting the exterior mirrors
If the battery has been disconnected or com-
pletely discharged, the exterior mirrors must
be reset. The exterior mirrors will otherwise
not fold in when you select the "Fold in mir-
rors when locking" function in the on-board
computer (Y page 195).
X Make sure that the key is in position 1in
the ignition lock.
X Briefly press button :.
Folding the exterior mirrors in or out
automatically If the "Fold in mirrors when locking" function
is activated in the on-board computer
(Y page 195):
R the exterior mirrors fold in automatically as
soon as you lock the vehicle from the out-
side.
R the exterior mirrors fold out again automat-
ically as soon as you unlock the vehicle and
then open the driver's or front-passenger
door.
i If the exterior mirrors have been folded in
manually, they do not fold out.
Exterior mirror out of position If an exterior mirror has been pushed out of
position, proceed as follows:
X
Vehicles without electrically folding
exterior mirrors: move the exterior mirror
into the correctp osition manually.
X Vehicles with electrically folding exte-
rior mirrors: press the mirror-folding but-
ton (Y page 94) repeatedly until you hear
the mirror engage in position.
The mirror housing is engaged again and
you can adjust the exterior mirrors as usual
(Y page 94). Automatic anti-dazzle mirrors
G
WARNING
If incident light from headlamps is prevented
from striking the sensor in the rear-view mir-
ror, for instance, by luggage piled too high in
the vehicle, the mirror's automatic anti-dazzle
function will not operate.
Incident light could then blind you. This may
distract you from the traffic conditions and,
as a result, you may cause an accident.
The rear-view mirror and the exterior mirror
on the driver's side automatically go into anti-
dazzle mode if the ignition is switched on and
incident light from headlamps strikes the sen-
sor in the rear-view mirror.
The mirrors do not go into anti-dazzle mode if
reverse gear is engaged or the interior lighting
is switched on. Parking position for the exterior mir-
ror on the front-passenger side
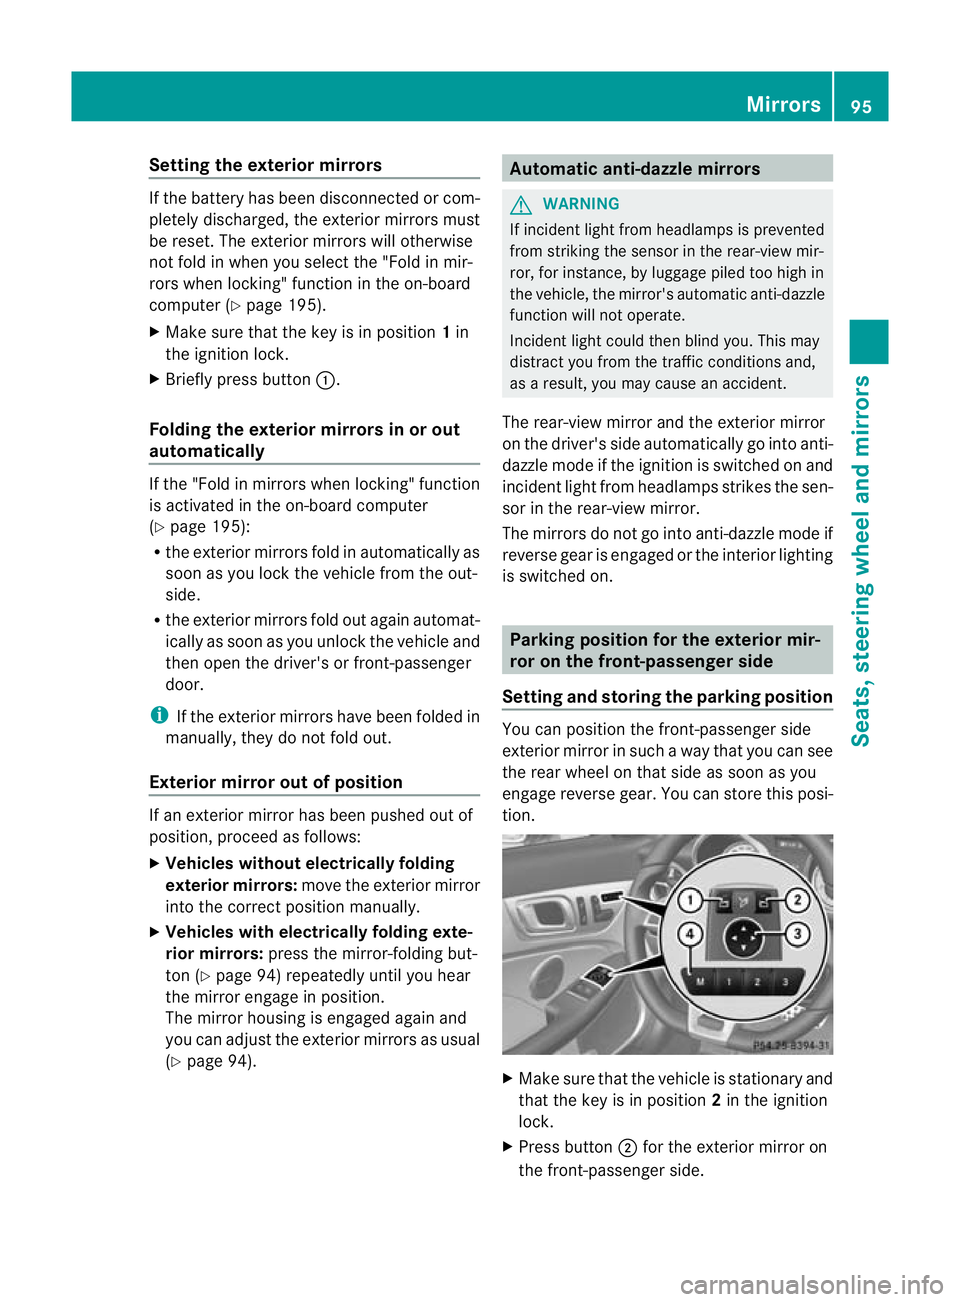
Setting and storing the parking position You can position the front-passenger side
exterior mirror in such a way that you can see
the rear wheel on that side as soon as you
engage reverse gear. You can store this posi-
tion.
X
Make sure that the vehicle is stationary and
that the key is in position 2in the ignition
lock.
X Press button ;for the exterior mirror on
the front-passenger side. Mirrors
95Seats, steering wheel and mirrors Z
Page 104 of 321
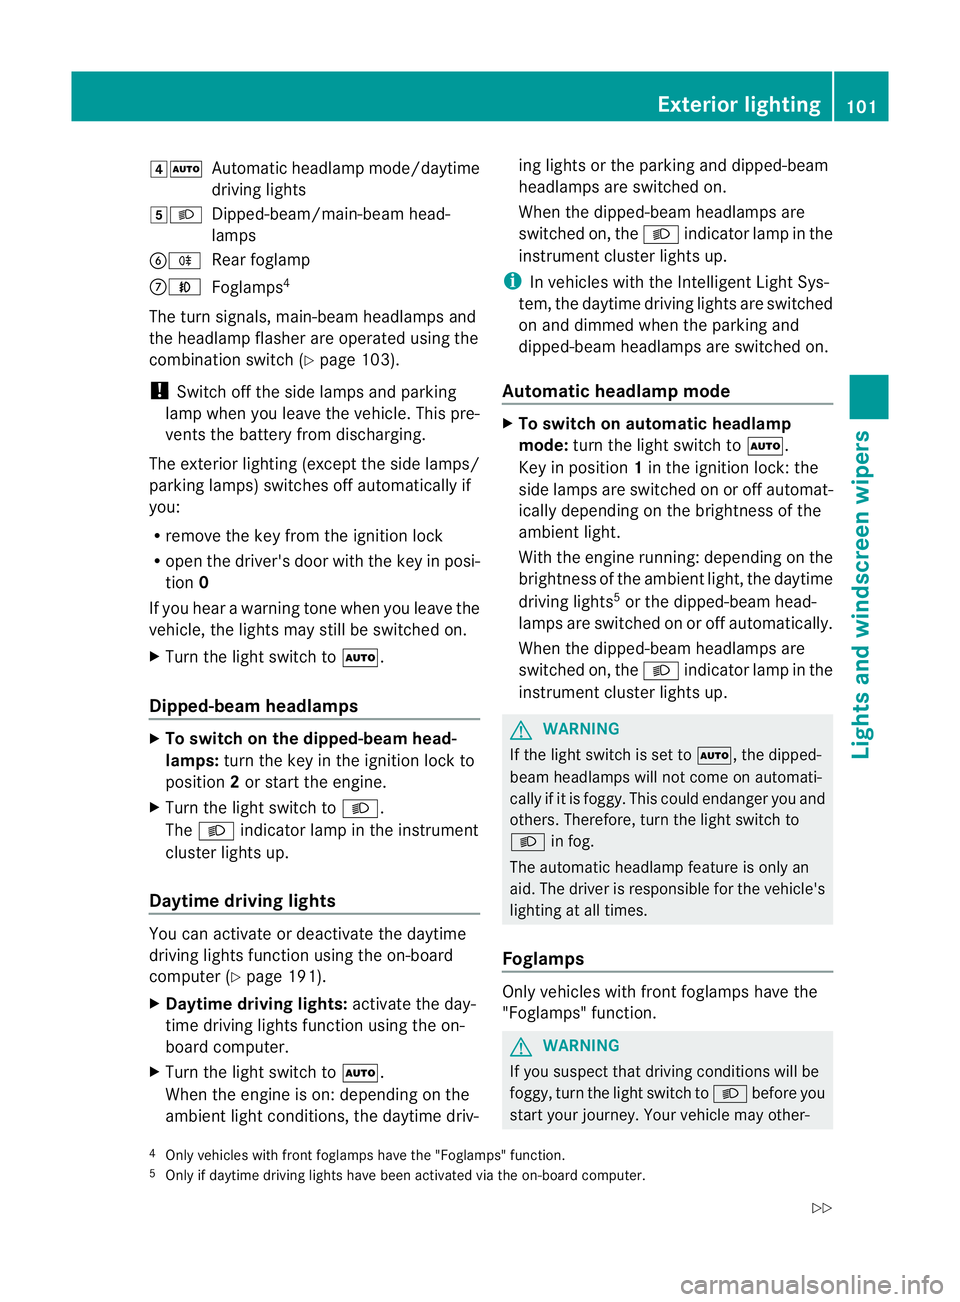
4Ã
Automatic headlamp mode/daytime
driving lights
5L Dipped-beam/main-bea mhead-
lamps
BR Rear foglamp
CN Foglamps 4
The turn signals, main-beam headlamps and
the headlamp flasher are operated using the
combination switch (Y page 103).
! Switch off the side lamps and parking
lamp when you leave the vehicle. This pre-
vents the battery from discharging.
The exterior lighting (except the side lamps/
parking lamps) switches off automatically if
you:
R remove the key from the ignition lock
R open the driver's door with the key in posi-
tion 0
If you hear a warning tone when you leave the
vehicle, the lights may still be switched on.
X Turn the light switch to Ã.
Dipped-beam headlamps X
To switch on the dipped-beam head-
lamps: turn the key in the ignition lock to
position 2or start the engine.
X Turn the light switch to L.
The L indicator lamp in the instrument
cluster lights up.
Daytime driving lights You can activate or deactivate the daytime
driving lights function using the on-board
computer (Y page 191).
X Daytime driving lights: activate the day-
time driving lights function using the on-
board computer.
X Turn the light switch to Ã.
When the engine is on: depending on the
ambient light conditions, the daytime driv- ing lights or the parking and dipped-beam
headlamps are switched on.
When the dipped-beam headlamps are
switched on, the
Lindicator lamp in the
instrument cluster lights up.
i In vehicles with the Intelligent Light Sys-
tem, the daytime driving lights are switched
on and dimmed when the parking and
dipped-beam headlamps are switched on.
Automatic headlamp mode X
To switch on automatic headlamp
mode: turn the light switch to Ã.
Key in position 1in the ignition lock: the
side lamps are switched on or off automat-
ically depending on the brightness of the
ambient light.
With the engine running: depending on the
brightness of the ambient light, the daytime
driving lights 5
or the dipped-beam head-
lamps are switched on or off automatically.
When the dipped-beam headlamps are
switched on, the Lindicator lamp in the
instrument cluster lights up. G
WARNING
If the light switch is set to Ã, the dipped-
beam headlamps will not come on automati-
cally if it is foggy. This could endanger you and
others. Therefore, turn the light switch to
L in fog.
The automatic headlamp feature is only an
aid. The driver is responsible for the vehicle's
lighting at all times.
Foglamps Only vehicles with fron
tfoglamps have the
"Foglamps" function. G
WARNING
If you suspect that driving conditions will be
foggy, turn the light switch to Lbefore you
start your journey. Your vehicle may other-
4 Only vehicles with front foglamps have the "Foglamps" function.
5 Only if daytime driving lights have been activated via the on-board computer. Exterior lighting
101Lights and windscreen wipers
Z
Page 106 of 321
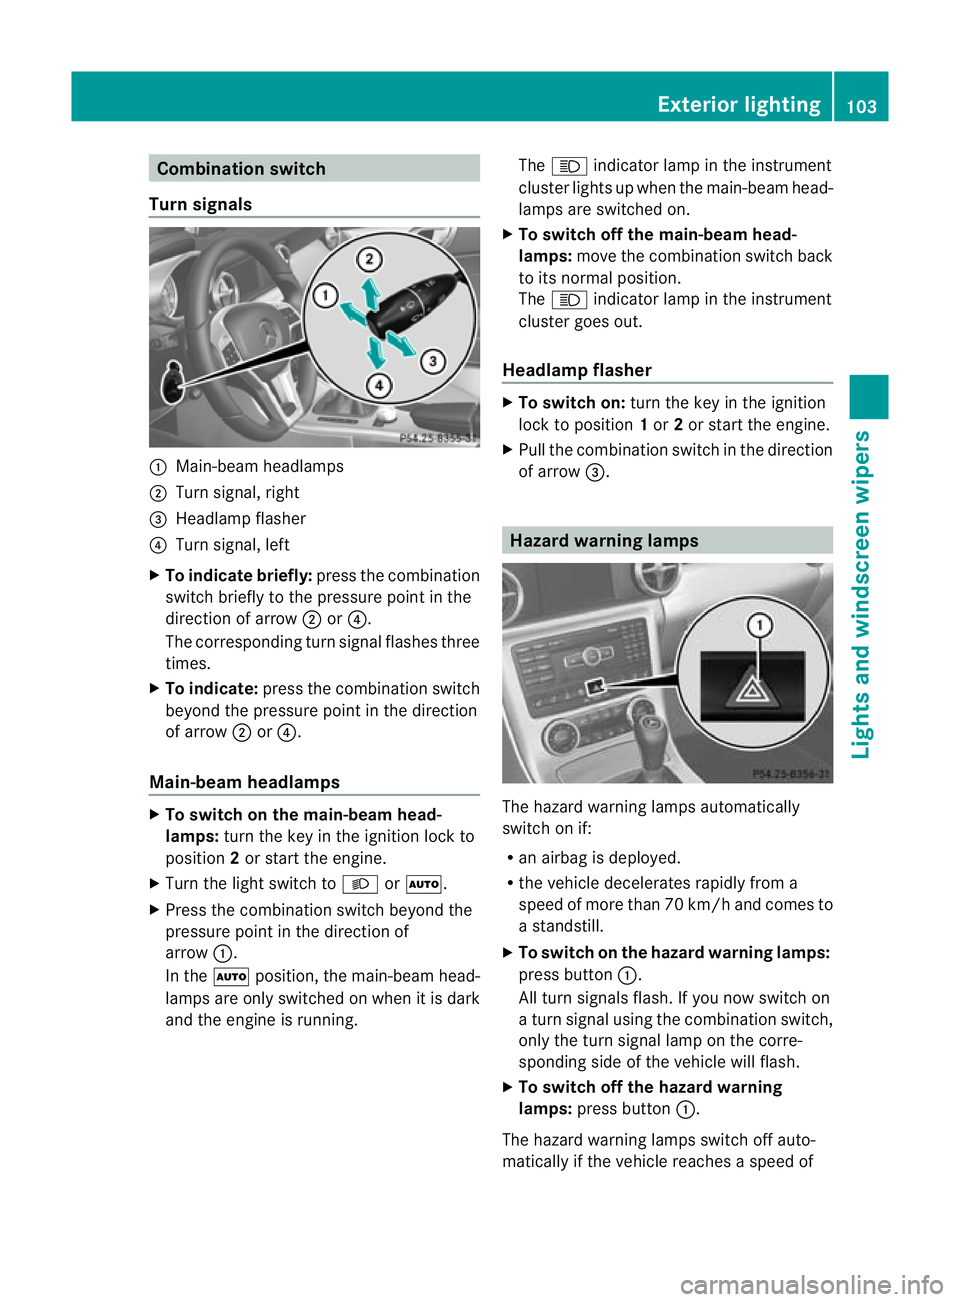
Combination switch
Turn signals :
Main-beam headlamps
; Turn signal, right
= Headlamp flasher
? Turn signal, left
X To indicate briefly: press the combination
switch briefly to the pressure poin tinthe
direction of arrow ;or?.
The corresponding turn signal flashes three
times.
X To indicate: press the combination switch
beyond the pressure point in the direction
of arrow ;or?.
Main-beam headlamps X
To switch on the main-beam head-
lamps: turn the key in the ignition lock to
position 2or start the engine.
X Turn the light switch to LorÃ.
X Press the combination switch beyond the
pressure point in the direction of
arrow :.
In the Ãposition, the main-beam head-
lamps are only switched on when it is dark
and the engine is running. The
K indicator lamp in the instrument
cluster lights up when the main-beam head-
lamps are switched on.
X To switch off the main-beam head-
lamps: move the combination switch back
to its normal position.
The K indicator lamp in the instrument
cluster goes out.
Headlamp flasher X
To switch on: turn the key in the ignition
lock to position 1or 2or start the engine.
X Pull the combination switch in the direction
of arrow =. Hazard warning lamps
The hazard warning lamps automatically
switch on if:
R
an airbag is deployed.
R the vehicle decelerates rapidly from a
speed of more than 70 km/h and comes to
a standstill.
X To switch on the hazard warning lamps:
press button :.
All turn signals flash. If you now switch on
a turn signal using the combination switch,
only the turn signal lamp on the corre-
sponding side of the vehicle will flash.
X To switch off the hazard warning
lamps: press button :.
The hazard warning lamps switch off auto-
matically if the vehicle reaches a speed of Exterior lighting
103Lights and windscreen wipers Z
Page 107 of 321
over 10 km/h again after a full brake appli-
cation.
i
The hazard warning lamps still operate if
the ignition is switched off. Intelligent Light System
Important notes The Intelligent Light System is a system that
adjusts the headlamps automatically to suit
the prevailing driving and weather conditions.
It offers advanced functions for improved illu-
mination of the road surface, e.g. depending
on the vehicle speed or weather conditions.
The system includes the active light function,
cornering light function, motorway mode and
extended range foglamps. The system is only
active when it is dark.
You can activate or deactivate the "Intelligent
Light System" using the on-board computer
(Y page 191).
Active light function The active light function is a system that
moves the headlamps according to the steer-
ing movements of the front wheels. In this
way, relevant areas remain illuminated while
driving. This allows you to recognise pedes-
trians, cyclists and animals.
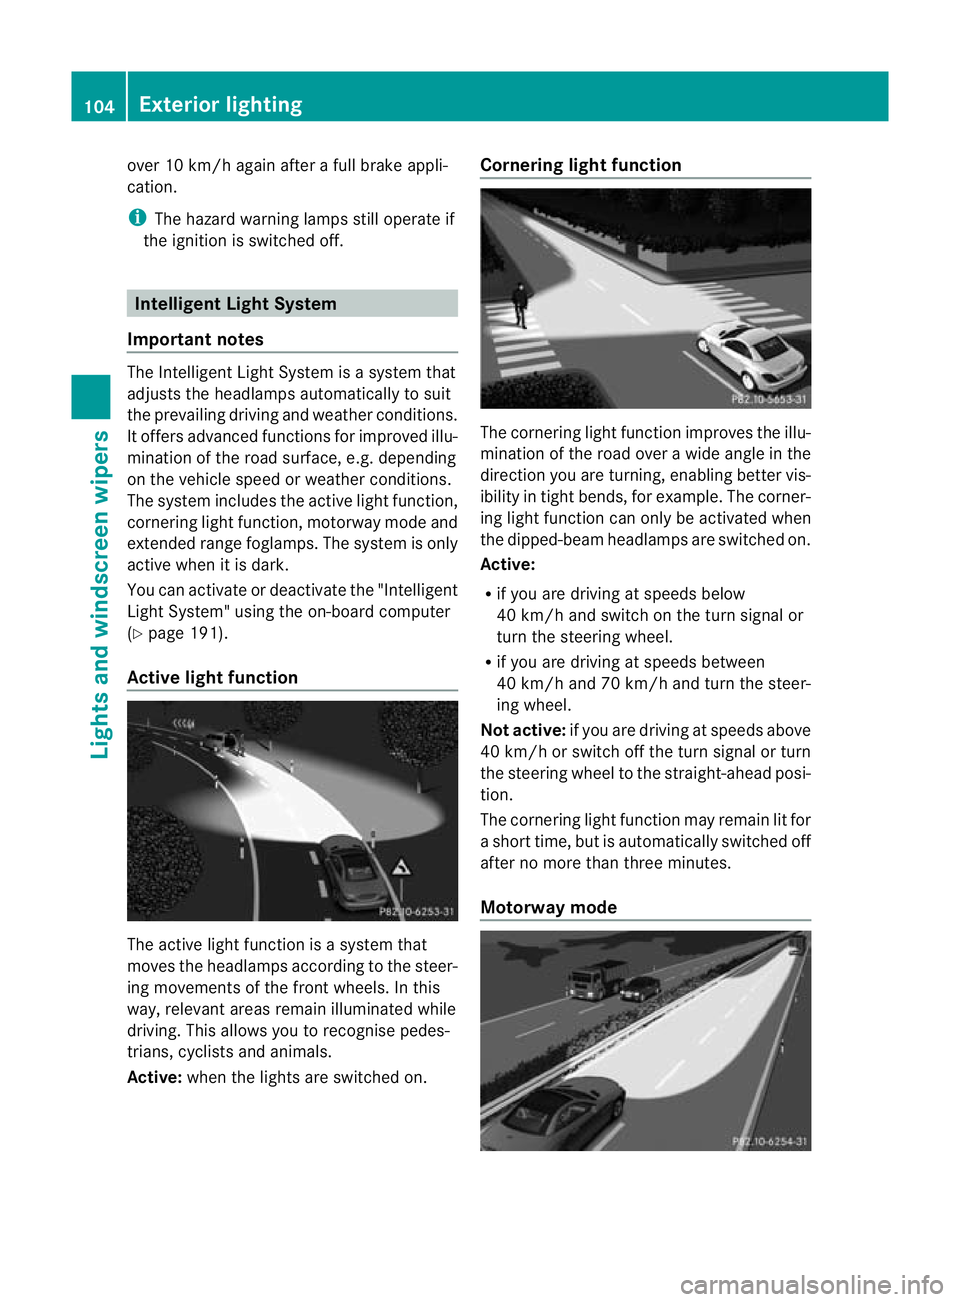
Active: when the lights are switched on. Cornering light function
The cornering light function improves the illu-
mination of the road over a wide angle in the
direction you are turning, enabling better vis-
ibility in tight bends, for example. The corner-
ing light function can only be activated when
the dipped-beam headlamps are switched on.
Active:
R
if you are driving at speeds below
40 km/h and switch on the turn signal or
turn the steering wheel.
R if you are driving at speeds between
40 km/h and 70 km/h and turn the steer-
ing wheel.
Not active: if you are driving at speeds above
40 km/h or switch off the turn signal or turn
the steering wheel to the straight-ahead posi-
tion.
The cornering light function may remain lit for
a short time, but is automatically switched off
after no more than three minutes.
Motorway mode 104
Exterior lightingLights and windscreen wipers
Page 109 of 321
The interior lighting automatically switches
on if you:
R unlock the vehicle
R open a door
R remove the key from the ignition lock
The interior light is activated for a short while
when the key is removed from the ignition
lock. You can activat ethis delayed switch-off
using the on-board computer (Y page 193).
Manual interior lighting control X
To switch the interior lighting on/off:
press the cbutton.
X To switch the reading lamps on/off:
press the pbutton. Crash-responsive emergency lighting
The interior lighting is activated automatically
if the vehicle is involved in an accident.
X To switch off the crash-responsive
emergency lighting: press the hazard
warning lamp button.
or
X Lock and then unlock the vehicle using the
key. Replacing bulbs
Important safety notes
Xenon bulbs G
DANGER
Xenon bulbs are under high voltage. If you
touch the electrical contacts of a xenon bulb,
you could suffer an electric shock and be seri-
ously or even fatally injured. For this reason,
do not remove the cover of xenon bulbs.
Do not change the xenon bulbs yourself, but
have them replaced at a qualified workshop.
If your vehicle is equipped with xenon bulbs,
you can recognise this by the following: the cone of light from the xenon bulbs moves
from the top to the bottom and back again
when you start the engine. For this to be
observed, the lights must be switched on
before starting the engine.
Bulbs and lamps are an important aspect of
vehicle safety. You must therefore make sure
that these function correctly at all times.
Have the headlamp setting checked regularly.
Other bulbs
There are bulbs other than the xenon bulbs
that you cannot replace. Replace only the
bulbs listed (Y
page 107). Have the bulbs that
you cannot replace yourself changed at a
qualified specialist workshop.
If you require assistance changing bulbs, con-
sult a qualified specialist workshop.
Do not touch the glass tube of new bulbs with
your bare hands. Even minor contamination
can burn into the glass surface and reduce
the service life of the bulbs. Always use a lint-
free cloth or only touch the base of the bulb
when fitting.
Only use bulbs of the correct type.
If the new bulb still does not light up, consult
a qualified specialist workshop.
Bulbs and lamps are an important aspect of
vehicle safety. You must therefore make sure
that these function correctly at all times.
Have the headlamp setting checked regularly. G
WARNING
Bulbs and lamps can be very hot. You should
therefore allow them to cool down before you
change them. Otherwise, you could be burned
if you touch them.
Keep bulbs out of the reach of children. Oth-
erwise, they could damage the bulbs, for
example, and injure themselves.
Never use a bulb which has been dropped.
Such a bulb may break or even explode and
injure you.
Halogen bulbs are pressurised and can
explode when you change them, particularly
if they are very hot. You should therefore wear 106
Replacing bulbsLights and windscreen wipers