2012 MERCEDES-BENZ S-CLASS SEDAN towing
[x] Cancel search: towingPage 450 of 536
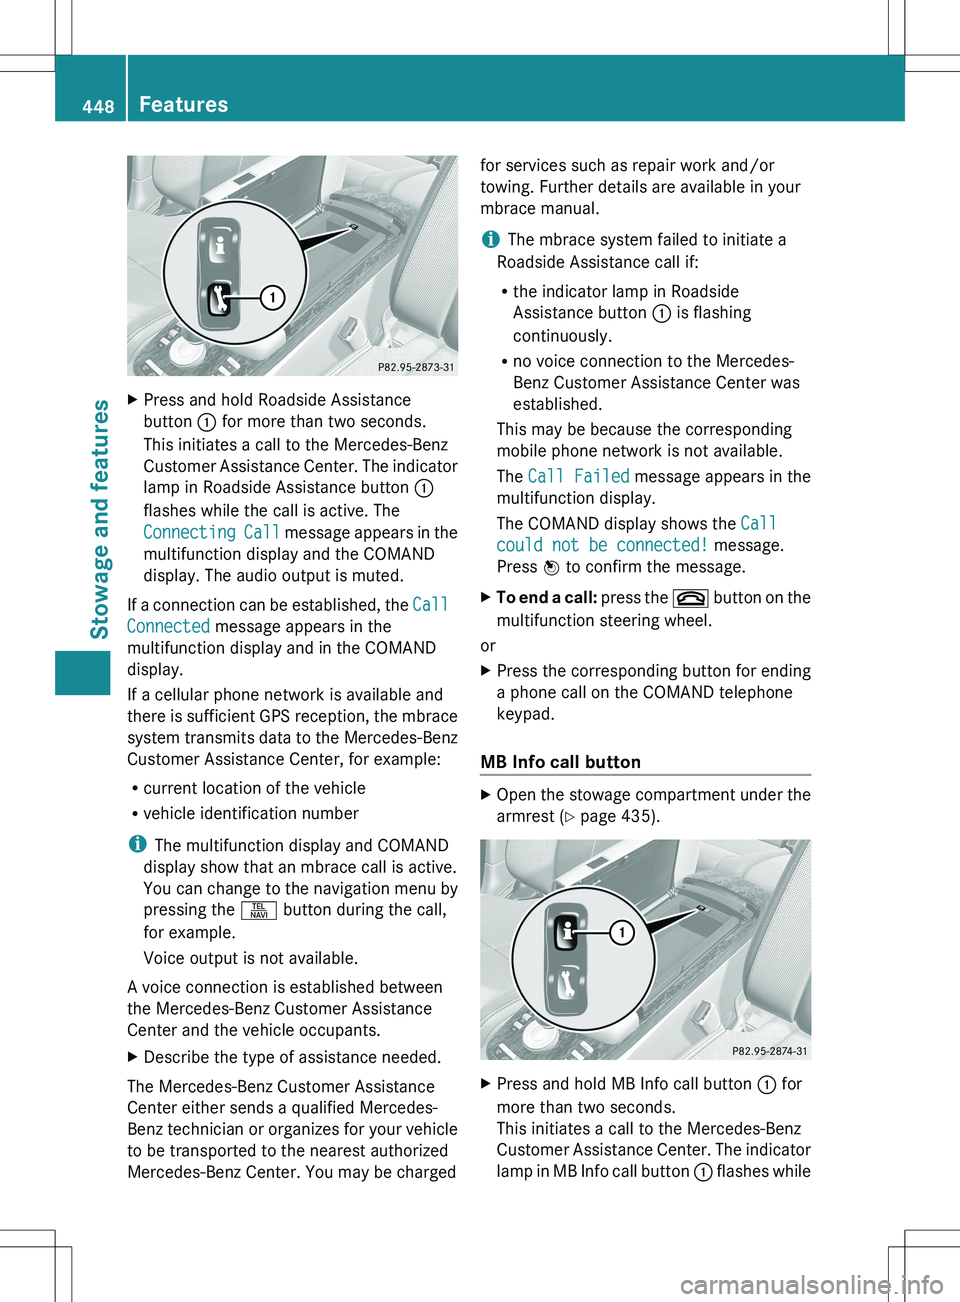
XPress and hold Roadside Assistance
button : for more than two seconds.
This initiates a call to the Mercedes-Benz
Customer Assistance Center. The indicator
lamp in Roadside Assistance button :
flashes while the call is active. The
Connecting Call message appears in the
multifunction display and the COMAND
display. The audio output is muted.
If a connection can be established, the Call
Connected message appears in the
multifunction display and in the COMAND
display.
If a cellular phone network is available and
there is sufficient GPS reception, the mbrace
system transmits data to the Mercedes-Benz
Customer Assistance Center, for example:
R current location of the vehicle
R vehicle identification number
i The multifunction display and COMAND
display show that an mbrace call is active.
You can change to the navigation menu by
pressing the S button during the call,
for example.
Voice output is not available.
A voice connection is established between
the Mercedes-Benz Customer Assistance
Center and the vehicle occupants.
XDescribe the type of assistance needed.
The Mercedes-Benz Customer Assistance
Center either sends a qualified Mercedes-
Benz technician or organizes for your vehicle
to be transported to the nearest authorized
Mercedes-Benz Center. You may be charged
for services such as repair work and/or
towing. Further details are available in your
mbrace manual.
i The mbrace system failed to initiate a
Roadside Assistance call if:
R the indicator lamp in Roadside
Assistance button : is flashing
continuously.
R no voice connection to the Mercedes-
Benz Customer Assistance Center was
established.
This may be because the corresponding
mobile phone network is not available.
The Call Failed message appears in the
multifunction display.
The COMAND display shows the Call
could not be connected! message.
Press W to confirm the message.XTo end a call: press the ~ button on the
multifunction steering wheel.
or
XPress the corresponding button for ending
a phone call on the COMAND telephone
keypad.
MB Info call button
XOpen the stowage compartment under the
armrest ( Y page 435).XPress and hold MB Info call button : for
more than two seconds.
This initiates a call to the Mercedes-Benz
Customer Assistance Center. The indicator
lamp in MB Info call button : flashes while448FeaturesStowage and features
Page 468 of 536

otherwise lead to increased wear and
damage to the major assemblies or the
vehicle.
Driving abroad
An extensive Mercedes-Benz Service network
is also available in other countries. You can
obtain further information from any
authorized Mercedes-Benz Center.
Care
Notes on care
Regular care of your vehicle is a condition for
retaining the quality in the long term.
Use care products and cleaning agents
recommended and approved by Mercedes-
Benz.
GWARNING
Many cleaning products can be hazardous.
Some are poisonous, others are flammable.
Always follow the instructions on the
particular container. Always open your
vehicle's doors or windows when cleaning the
inside.
Never use fluids or solvents that are not
designed for cleaning your vehicle.
Always lock away cleaning products and keep
them out of reach of children.
! For cleaning your vehicle, do not use any
of the following:
R dry, rough or hard cloths
R abrasive cleaning agents
R solvents
R cleaning agents containing solvents
Do not scrub.
Do not touch the surfaces or protective
films with hard objects, e.g. a ring or ice
scraper. You could otherwise scratch or
damage the surfaces and protective film.
HEnvironmental note
Dispose of empty packaging and cleaning
cloths in an environmentally responsible
manner.
! Do not park the vehicle for an extended
period straight after cleaning it, particularly
after having cleaned the wheels with wheel
cleaner. Wheel cleaners could cause
increased corrosion of the brake discs and
brake pads/linings. For this reason, you
should drive for a few minutes after
cleaning. Braking heats the brake discs and
the brake pads/linings, thus drying them.
The vehicle can then be parked.
Exterior care
Automatic car wash
GWARNING
Braking efficiency is reduced after washing
the vehicle. This could cause an accident. For
this reason, you must drive particularly
carefully after washing the vehicle until the
brakes have dried.
You can wash the vehicle in an automatic car
wash from the very start.
! Never clean your vehicle in a Touchless
Automatic Car Wash as these use special
cleaning agents. These cleaning agents can
damage the paintwork or plastic parts.
If the vehicle is very dirty, pre-wash it before
cleaning it in an automatic car wash.
! In car washes with a towing mechanism,
make sure that the automatic transmission
is in transmission position N, otherwise the
vehicle could be damaged.
R Vehicles with a SmartKey:
Do not remove the SmartKey from the
ignition lock. Do not open the driver's
door or front-passenger door when the
engine is switched off. Otherwise, the
automatic transmission selects park
466CareMaintenance and care
Page 475 of 536
Useful information ............................474
Where will I find...? ...........................474
Flat tire .............................................. 475
Battery ............................................... 480
Jump-starting .................................... 483
Towing and tow-starting ..................485
Fuses .................................................. 487473Breakdown assistance
Page 487 of 536
Towing and tow-starting
Important safety notes
GWARNING
Hybrid vehicles: be sure to read the "HYBRID"
supplement. Otherwise, you could fail to
recognize dangers.
GWARNING
If you tow the vehicle, you must use a rigid
towing bar if:
R the engine is not running.
R there is a brake system malfunction.
R there is a malfunction in the power supply
or the vehicle's electrical system.
The power assistance for the steering and the
brake force booster do not work when the
engine is not running. You will need more
force to steer and brake, you may have to
depress the brake pedal with maximum force.
Before towing away, make sure that the
steering can be moved and is not locked.
If you tow or tow-start another vehicle, its
weight must not exceed the maximum
permissible gross vehicle weight of your
vehicle.
GWARNING
The vehicle is braked when the HOLD function
or DISTRONIC PLUS is activated. Therefore,
deactivate HOLD and DISTRONIC PLUS if the
vehicle is to be towed.
It is better to have the vehicle transported
than to have it towed.
! The vehicle can be towed a maximum of
30 miles (50km). The towing speed of
30 mph (50 km/h) must not be exceeded.
If the vehicle has to be towed more than
30 miles ( 50km), the entire vehicle must be
raised and transported.
! Make sure that the electric parking brake
is released. If the electric parking brake is
faulty, visit a qualified specialist workshop.
! Only secure the tow rope or tow bar at the
towing eyes. Otherwise, the vehicle could
be damaged.
! Do not use the towing eye for recovery,
as this could damage the vehicle. If in
doubt, recover the vehicle with a crane.
! When towing, pull away slowly and
smoothly. If the tractive power is too high,
the vehicles could be damaged.
! Do not tow with sling-type equipment.
This could damage the vehicle.
! When towing vehicles with KEYLESS-GO,
use the key instead of the Start/Stop
button. Otherwise, the automatic
transmission may shift to position P when
the driver's or front-passenger door are
opened, which could lead to damage to the
transmission.
The automatic transmission must be in
position N when the vehicle is being towed.
The battery must be connected and charged.
Otherwise, you:
R cannot turn the SmartKey to position 2 in
the ignition lock
R cannot shift the automatic transmission to
position N
i Before the vehicle is towed, switch off the
automatic locking feature ( Y page 269).
You could otherwise be locked out when
pushing or towing the vehicle.
Installing/removing the towing eye
Installing the towing eye
XRemove the towing eye from the vehicle
tool kit ( Y page 474).GWARNING
The exhaust tail pipe may be hot. You could
burn yourself if you touch the tail pipe. Be
particularly careful when removing the rear
cover.
Towing and tow-starting485Breakdown assistanceZ
Page 488 of 536
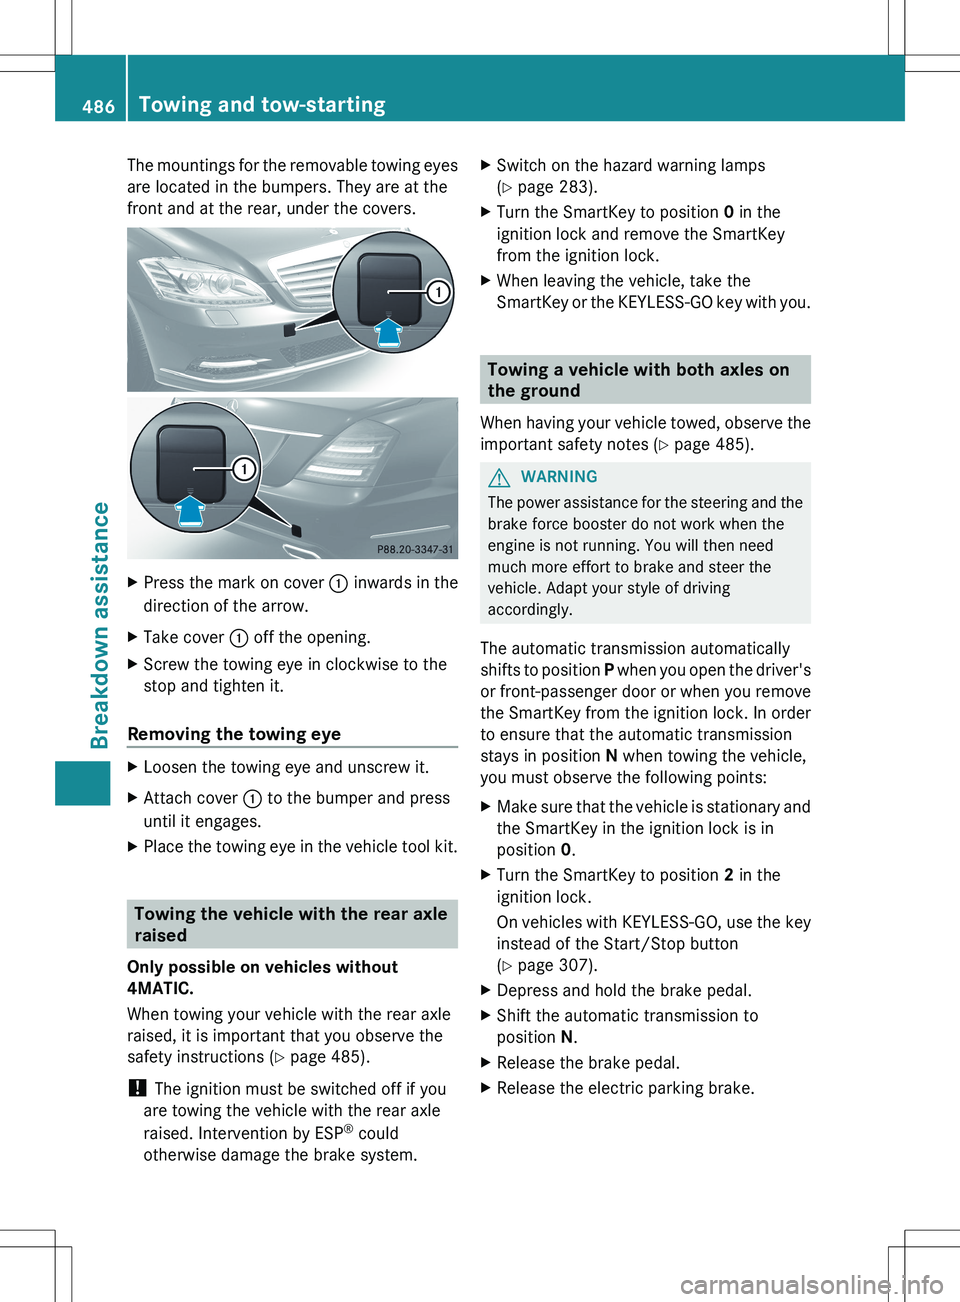
The mountings for the removable towing eyes
are located in the bumpers. They are at the
front and at the rear, under the covers.XPress the mark on cover : inwards in the
direction of the arrow.XTake cover : off the opening.XScrew the towing eye in clockwise to the
stop and tighten it.
Removing the towing eye
XLoosen the towing eye and unscrew it.XAttach cover : to the bumper and press
until it engages.XPlace the towing eye in the vehicle tool kit.
Towing the vehicle with the rear axle
raised
Only possible on vehicles without
4MATIC.
When towing your vehicle with the rear axle
raised, it is important that you observe the
safety instructions ( Y page 485).
! The ignition must be switched off if you
are towing the vehicle with the rear axle
raised. Intervention by ESP ®
could
otherwise damage the brake system.
XSwitch on the hazard warning lamps
( Y page 283).XTurn the SmartKey to position 0 in the
ignition lock and remove the SmartKey
from the ignition lock.XWhen leaving the vehicle, take the
SmartKey or the KEYLESS-GO key with you.
Towing a vehicle with both axles on
the ground
When having your vehicle towed, observe the
important safety notes ( Y page 485).
GWARNING
The power assistance for the steering and the
brake force booster do not work when the
engine is not running. You will then need
much more effort to brake and steer the
vehicle. Adapt your style of driving
accordingly.
The automatic transmission automatically
shifts to position P when you open the driver's
or front-passenger door or when you remove
the SmartKey from the ignition lock. In order
to ensure that the automatic transmission
stays in position N when towing the vehicle,
you must observe the following points:
XMake sure that the vehicle is stationary and
the SmartKey in the ignition lock is in
position 0.XTurn the SmartKey to position 2 in the
ignition lock.
On vehicles with KEYLESS-GO, use the key
instead of the Start/Stop button
( Y page 307).XDepress and hold the brake pedal.XShift the automatic transmission to
position N.XRelease the brake pedal.XRelease the electric parking brake.486Towing and tow-startingBreakdown assistance
Page 489 of 536

XSwitch on the hazard warning lamps
( Y page 283).XLeave the SmartKey in position 2 in the
ignition lock.
i When towing with the hazard warning
lamps switched on, use the combination
switch as usual to signal a change of
direction. In this case, only the turn signals
for the desired direction flash. When the
combination switch is reset, the hazard
warning lamps start flashing again.
Transporting the vehicle
The towing eye can be used to pull the vehicle
onto a trailer or transporter for transporting
purposes.
XTurn the SmartKey to position 2 in the
ignition lock.XShift the automatic transmission to
position N.
As soon as the vehicle is loaded:
XPrevent the vehicle from rolling away by
applying the electric parking brake.XShift the automatic transmission to
position P.XTurn the SmartKey to position 0 in the
ignition lock and remove the SmartKey
from the ignition lock.XSecure the vehicle.
! Only lash the vehicle down by the wheels
or wheel rims, not by parts of the vehicle
such as axle or steering components.
Otherwise, the vehicle could be damaged.
Notes for 4MATIC vehicles
! Vehicles with 4MATIC must not be towed
with either the front or the rear axle raised,
as doing so will damage the transmission.
If the vehicle has transmission damage or
damage to the front or rear axle, have it
transported on a transporter or trailer.
In the event of damage to the electrical
system
If the battery is defective, the automatic
transmission will be locked in position P. To
shift the automatic transmission to position
N , you must provide power to the vehicle's
electrical system in the same way as when
jump-starting ( Y page 483).
Have the vehicle transported on a transporter
or trailer.
Tow-starting (emergency starting)
! Vehicles with automatic transmission
must not be started by tow-starting. This
could otherwise damage the transmission.
For further information on "Jump-starting"
see ( Y page 483).
Fuses
Important safety notes
GWARNING
Only use fuses that have been approved for
Mercedes-Benz vehicles and that have the
correct fuse rating for the systems
concerned. Do not attempt to repair or bridge
faulty fuses. Using fuses that have not been
approved or attempting to repair or bridge
faulty fuses could cause the fuse to be
overloaded and result in a fire. Have the cause
traced and rectified at a qualified specialist
workshop.
The fuses in your vehicle serve to close down
faulty circuits. If a fuse blows, all the
components on the circuit and their functions
stop operating.
Blown fuses must be replaced with fuses of
the same rating, which you can recognize by
the color and value. The fuse ratings are listed
in the fuse allocation chart.
If a newly inserted fuse also blows, have the
cause traced and rectified at a qualified
Fuses487Breakdown assistanceZ
Page 506 of 536
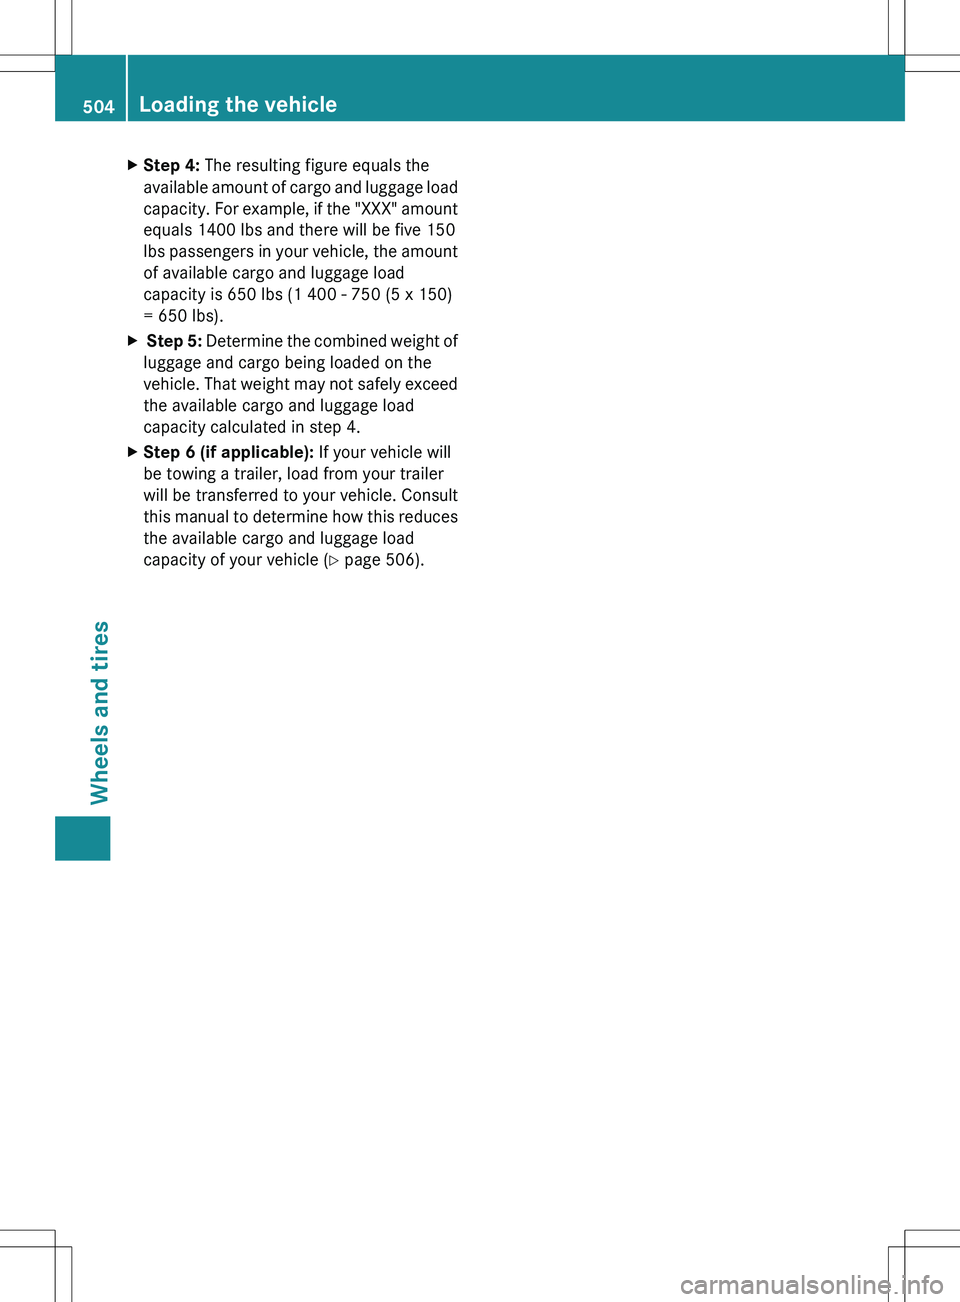
XStep 4: The resulting figure equals the
available amount of cargo and luggage load
capacity. For example, if the "XXX" amount
equals 1400 lbs and there will be five 150
lbs passengers in your vehicle, the amount
of available cargo and luggage load
capacity is 650 lbs (1 400 - 750 (5 x 150)
= 650 lbs).X Step 5: Determine the combined weight of
luggage and cargo being loaded on the
vehicle. That weight may not safely exceed
the available cargo and luggage load
capacity calculated in step 4.XStep 6 (if applicable): If your vehicle will
be towing a trailer, load from your trailer
will be transferred to your vehicle. Consult
this manual to determine how this reduces
the available cargo and luggage load
capacity of your vehicle ( Y page 506).504Loading the vehicleWheels and tires
Page 508 of 536
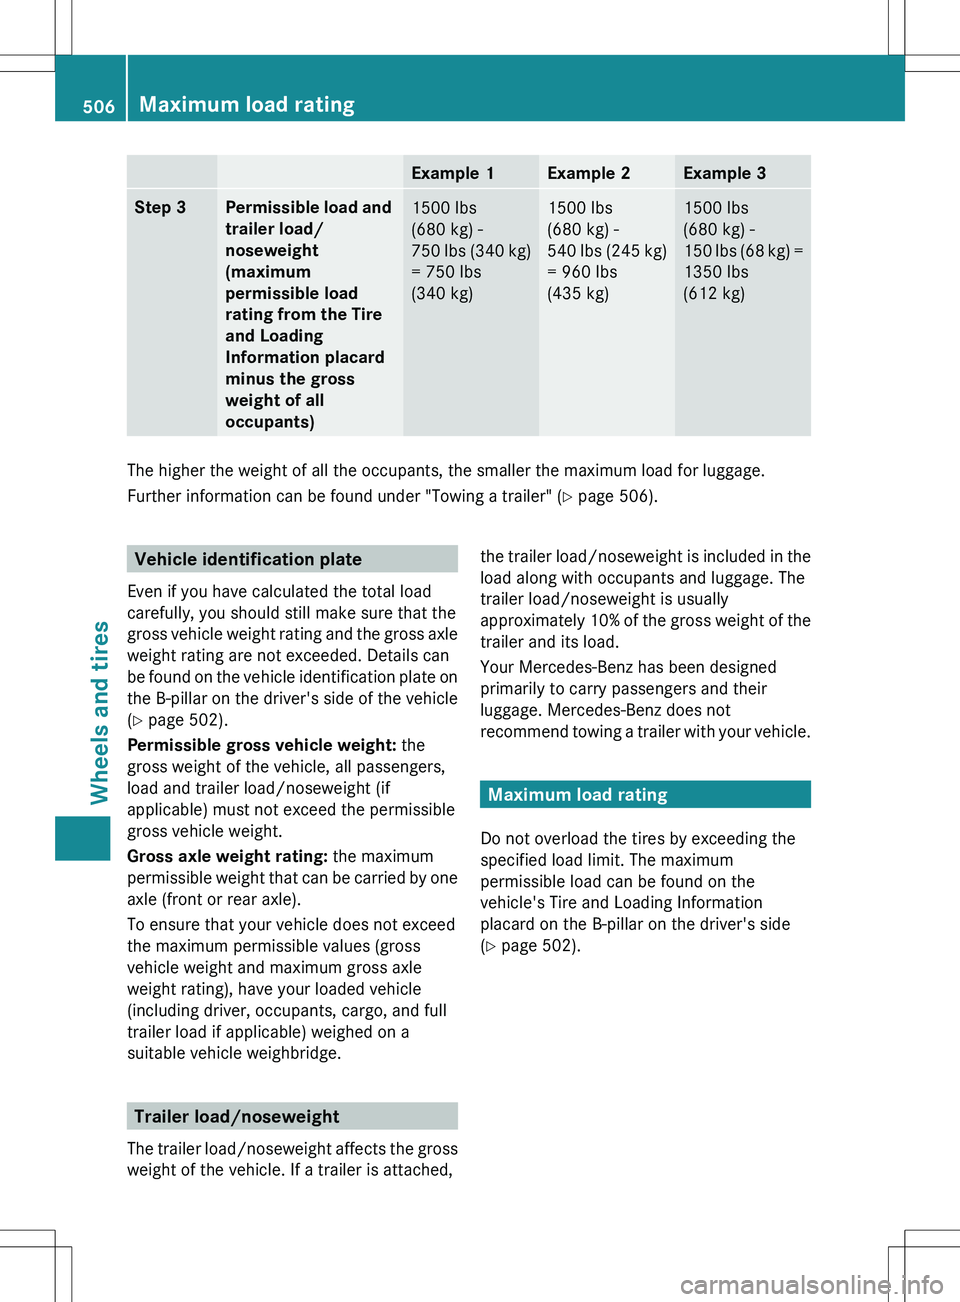
Example 1Example 2Example 3Step 3Permissible load and
trailer load/
noseweight
(maximum
permissible load
rating from the Tire
and Loading
Information placard
minus the gross
weight of all
occupants)1500 lbs
(680 kg) -
750 lbs (340 kg)
= 750 lbs
(340 kg)1500 lbs
(680 kg) -
540 lbs (245 kg)
= 960 lbs
(435 kg)1500 lbs
(680 kg) -
150 lbs (68 kg) =
1350 lbs
(612 kg)
The higher the weight of all the occupants, the smaller the maximum load for luggage.
Further information can be found under "Towing a trailer" ( Y page 506).
Vehicle identification plate
Even if you have calculated the total load
carefully, you should still make sure that the
gross vehicle weight rating and the gross axle
weight rating are not exceeded. Details can
be found on the vehicle identification plate on
the B-pillar on the driver's side of the vehicle
( Y page 502).
Permissible gross vehicle weight: the
gross weight of the vehicle, all passengers,
load and trailer load/noseweight (if
applicable) must not exceed the permissible
gross vehicle weight.
Gross axle weight rating: the maximum
permissible weight that can be carried by one
axle (front or rear axle).
To ensure that your vehicle does not exceed
the maximum permissible values (gross
vehicle weight and maximum gross axle
weight rating), have your loaded vehicle
(including driver, occupants, cargo, and full
trailer load if applicable) weighed on a
suitable vehicle weighbridge.
Trailer load/noseweight
The trailer load/noseweight affects the gross
weight of the vehicle. If a trailer is attached,
the trailer load/noseweight is included in the
load along with occupants and luggage. The
trailer load/noseweight is usually
approximately 10% of the gross weight of the
trailer and its load.
Your Mercedes-Benz has been designed
primarily to carry passengers and their
luggage. Mercedes-Benz does not
recommend towing a trailer with your vehicle.
Maximum load rating
Do not overload the tires by exceeding the
specified load limit. The maximum
permissible load can be found on the
vehicle's Tire and Loading Information
placard on the B-pillar on the driver's side
( Y page 502).
506Maximum load ratingWheels and tires