2012 MERCEDES-BENZ R-Class radio
[x] Cancel search: radioPage 30 of 210

X
Press the$ functionbutton .
The radio display appears. Youwillhear the
last station playedonthe last waveband.
X Select Sound using
the:=;
button sand press the9button toconf irm.
You cannow setthe treble andbass orthe
balance andfader forradio mode.
Adju sting treble andbass X
Select Treble or
Bass in
the sound menu
using the:=; buttonson the
remot econt roland press the9button to
conf irm.
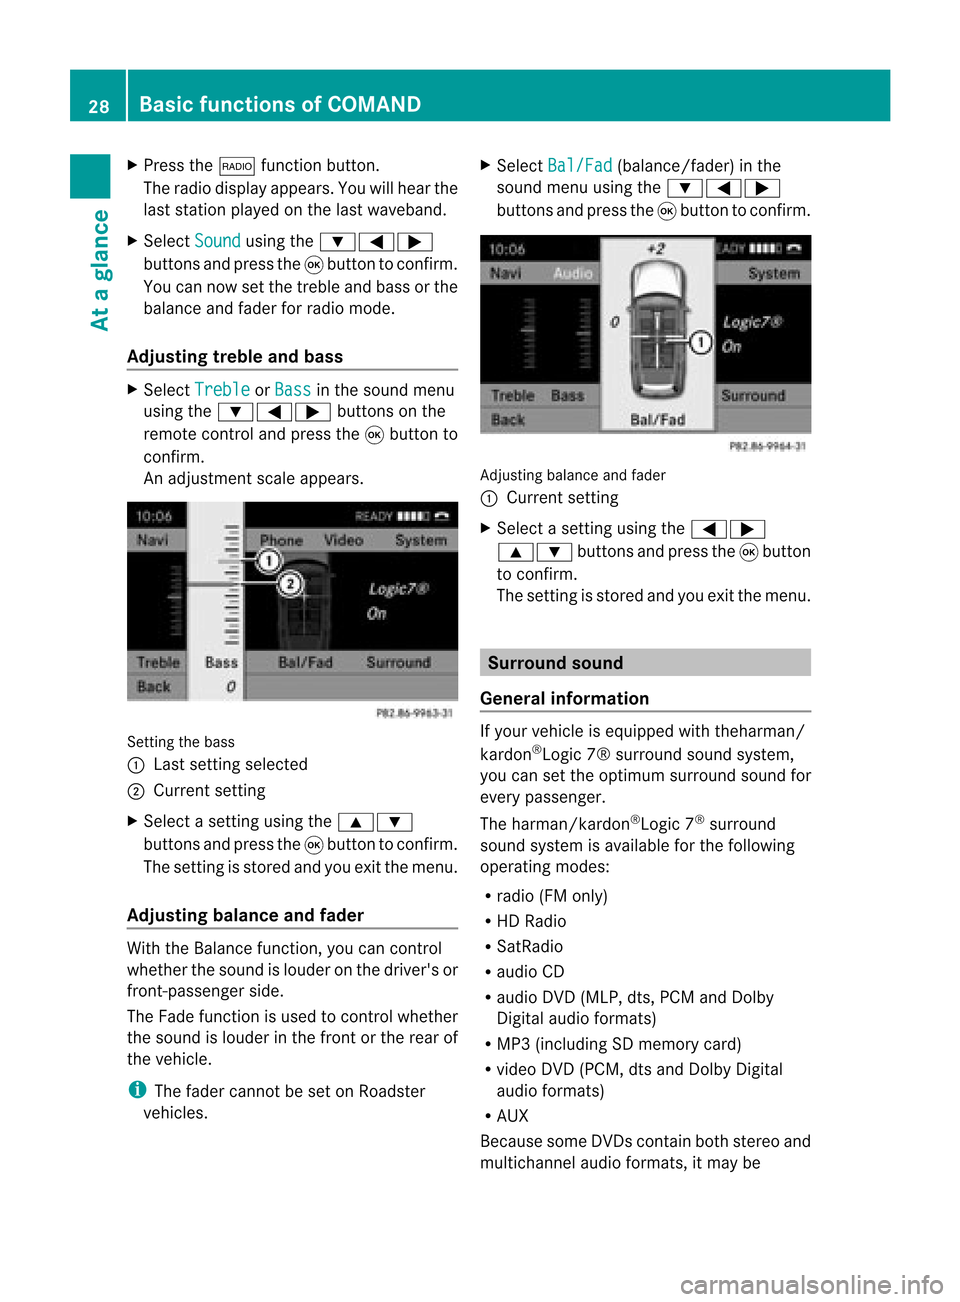
An adjustmen tscal eap pea rs. Setting
thebass
: Lastsett ing select ed
; Current setting
X Select asett ingusing the9:
button sand press the9button tocon firm.
The settingisstor edand youexit themenu.
Adju sting balance andfader With
theBalance function,you can control
whether thesound islouder onthe driver's or
fron t-passenger side.
The Fade function isused tocon trol whether
the sound islouder inthe fron torthe rear of
the vehicle.
i The fader cannot beset onRoadster
vehicles. X
Select Bal/Fad (bala
nce/ fader) inthe
sound menuusingthe:=;
buttons andpress the9button toconfirm . Adjustin
gbalance andfader
: Current setting
X Select asettin gusing the=;
9: buttonsandpress the9button
to confirm .
The settin gis stored andyouexit themenu. Surr
ound sound
General informat ion If
your vehicle isequipp edwith theharman/
kardon ®
Logic 7®surround soundsystem,
you can setthe optimum surround soundfor
every passenger.
The harman/kardon ®
Logic 7®
surround
sound system isavaila bleforthe following
operating modes:
R radio (FMonly)
R HD Radi o
R SatRadio
R audi oCD
R audi oDVD (MLP, dts,PCM andDolby
Digital audioformats)
R MP3 (including SDmemory card)
R video DVD(PCM, dtsand Dolby Digital
audi oformats)
R AUX
Because someDVDscont ainboth stereo and
multichannel audioformats, itmay be 28
Basic
functions ofCOMANDAt aglance
Page 31 of 210

nece
ssaryto set the audio form at
(Y page 135) .
i The Logic7 ®
On fu
nctio ncrea tesa
su rrou ndsou ndexp erience foreve ry
pa sse nge rwhen playing, forexample,
stereo recordings. Itenables optimum
play back ofmusic andfilms onCD, audio
DVD orvideo DVDwithmultichannel audio
formats, suchasMLP, dtsorDolby Digital.
This results insound characterist icslike
those intendedbythe sound engineer
when theoriginal wasrecorded.
i Ifyou select Logic7 ®
Off ,
all permissible
formats areplay edasstored onthe
medium. Duetothe design ofthe
passenger compartmen t,an optimum
audi oexperience cannotbeguaranteed for
all passengers.
i Discs which support theaudi oformats
ment ioned havethefollowing logos: Dolby
Digital dts
MLP Switching
surround sound on/off Example:
switching onsurround soundfor
radio mode
X Press the$ functionbutton.
The radio displa yappea rs.You willhear the
last station playedon the last waveba nd.
X Select Sound using
the:=;
buttons andpress the9button toconfirm .
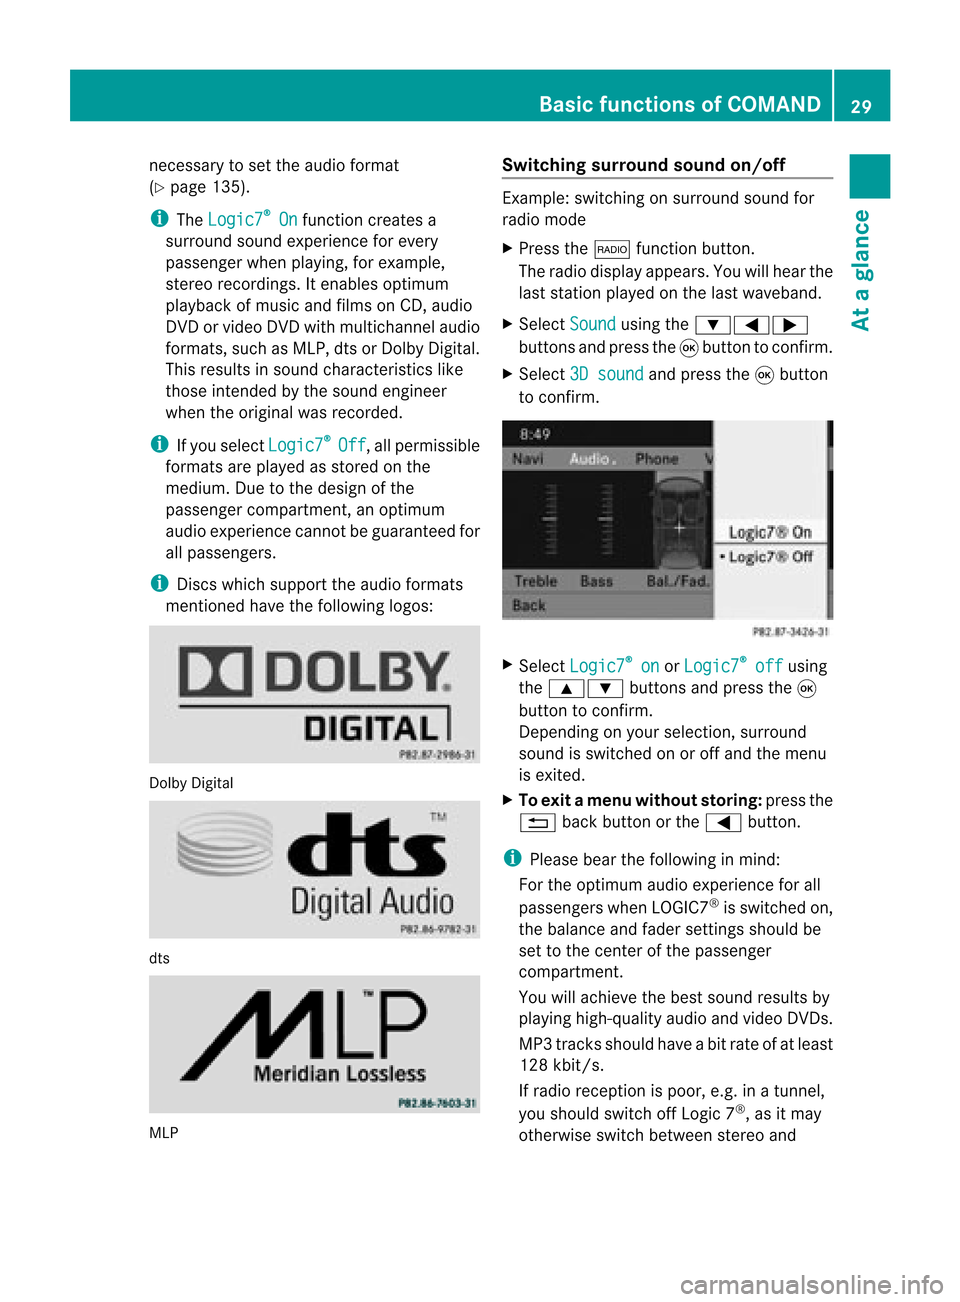
X Select 3Dsound and
press the9button
to confirm . X
Select Logic7 ®
on or
Logic7 ®
off using
the 9: buttonsandpress the9
button toconfirm .
Depending onyour selection, surround
sound isswitched onoroff and themenu
is exited.
X To exit amenu with outstor ing:pres sth e
% backbuttonorthe= button.
i Please bearthefollo wing inmin d:
For theopt imum audioexperien cefor all
passen gerswhen LOGIC7®
is swit chedon,
th ebalanc eand fader settings should be
set tothecen terofthepassen ger
com partmen t.
You willachie vethebest soundresult sby
playing high-quality audioandvideo DVDs.
MP3 track sshould haveabitrat eof at least
128 kbit/s.
If radio receptio nispoor, e.g.inatunnel,
you should switchoffLogic 7®
,as itmay
otherwise switchbetween stereoand Basic
functions ofCOMAND
29Ataglanc e Z
Page 40 of 210

Tex
tread ersettin gs Se
ttin gthe read -alou dspe ed
X Pre ssthe W button.
X Sel ect Settings us
ing
the :=; buttons andpressthe
9 button toconfi rm.
X Sel ect TextRea der Speed and
pressthe
9 button toconfi rm.
Al ist appears. The#dot indic ates the
curr entsetting.
X Selec tasetting usingthe9:
buttons andpress the9button toconfirm. Voice
Control System settings General
notes
This function isavail able ifCOMAND features
an integrated harddisk.
To protect theintegrated harddisk, COMAND
deactivates itat very high temperatures and
at extreme altitudes. TheVoice Control
System willthen betemporarily unavailable. Opening/
closingthe help window
X Press theW button.
X Select Settings using
the :=; buttonsandpress the
9 button toconfirm.
X Select Voice Control and
press the9
button toconfirm.
X Select Helpwindow and
press the9
button toconfirm.
You have switched thehelp window on
O oroff ª.
i The help window provides information in
addition tothe audi bleinstruct ionsduring
individua lizationaswell aslater, when you
are using voicecontrol. <001F000E0004000900160009000400150001000C0009001D000100140009000F
000EB
Introduction Using
individua lization,youcan fine tune the
Voice Control System toyour ownvoice and
thus improve voicerecognition. Thismeans
that other users' voices willnotberecognized
as easil y,and therefore thisfunction canbe
deactivated (Ypage 39).
Individual izationcomprises twoparts and
takes approximately 5minut es.Itcon sistsof
tr ainin gthe syst emtorec ogn izeacer tain
numb erofdigit sequen cesand voice
com mand s.
Sta rting new indiv idualiz ation In
dividualiz ationcanonly bestart ed when the
vehic leisstation ary.Before start ing, switc h
off alldevic esorfunc tionswhich could
int erf ere, such asthe radio orthe navig ation
syst em. After start ing the sessio n,the syst em
guides youthrough thetrainin gwith spoken
inst ruct ions .
X Press theW button.
X Selec tSett ings using
the :=; buttons and press the
9 butt ontocon firm .
X Selec tVoic eCont rol and
press the9
butt ontocon firm .
X Selec tStar tnew individualization and
press the9butt ontocon firm .
You willsee and hear aprom pt,askin g
whet heryou would likefurther inform ation .
X Selec tYes or
No and
press the9butt on
to con firm .
If you selec tNo ,
the firstpart of
indiv idualizat ionbegin s.You willbeasked
whet heryou would liketotrain digit sor
voic ecom mand s.
If you selec tYes ,
you willsee and hear
inf orm ation onthe indiv idualizat ion 38
Voice
ControlSyst emsett ingsSyst emsett ings
Page 75 of 210

shows
thecompass headingtothe actual
destination.
The route ishighlig htedblue, starting from
the last recognized streetthevehicle wason
before itleft themap.
As soon asthe vehicle isback onaroad
known tothe system, routeguidance
cont inues inthe usua lway .
Route guidance fromanoff-map
location toad esti nation If
th eveh icle posit ionisouts idethearea
cov ered bythedigit almap, then theveh icle
is in an off-map locat ion.COMAND isalso
able toguide youtoadestination evenfrom
an off-map location.
At the start ofthe route guidance,youwillsee
the Off Mapped Road message,
anarrow
and thedistance tothe destination. Thearrow
shows thecompass headingtothe road left
last.
The route ishighli ghted bluestarting atthe
nearest roadknown tothe system.
As soon asthe vehicle isback onaroad
known tothe system, routeguidance
cont inues inthe usua lway .
Off-road duringrouteguidance Due
toroadworks, forexample, theremaybe
differences betweenthedata onthe digital
map andtheactual course ofthe road.
In such cases, thesystem willtemporarily be
unable tolocate thevehicle position onthe
digital mapandthus considers thevehicle to
be inan off-road position.
In the displa y,you willsee theOff Mapped Road message,
anarrow andthedistance to
the destination. Thearrow shows the
compass headingtothe last road youwere
driving on.
As soon asthe system canassign thevehicle
position tothe map again,route guidance
cont inues inthe usua lway . Tra
ffic report s Condition
s
i The satellite radioreception described
below requires optionally available satellite
radio equipment aswell asasubscription
to SIRIUS XMSatellite RadioTraffic
Message Service.Furtherdetailson
satellite radioareavail able inthe "Satellite
radio" chapter (Ypage 121).
COMAND canreceive trafficreports via
satellite radioandincorporate theminthe
navigation system.Trafficreports andmap
icons canthen beshown inthe COMAND
displa y. Real-time
traffic report son the map
COMAND canshow certain trafficincidents
on the map. Theincidents areshown onthe
map atascale from1/16 mito20 mi.
X Press UorT repeatedly untilthe
desired mapscale hasbeen set. 1
Icon displa yfor the section ofroute
affected
2 Icon forincident onroute
3 Current position anddirection oftravel
4 Icon delimi tingtheaffected sectionofthe
route
5 Map scale Tr
affic report s
73Navigat ion Z
Page 91 of 210

X
Sel ect Positi on in
the navi gation menu
ba ru sing the:=; buttonsand
press the9button toconfirm.
X Select Compass and
press the9button to
confirm.
Depending onthe previous status,you
switch theoption onO oroff ª. Example
display:compass
: Current direction oftravel
; Current heightaboveaverage sealevel
(rounded tothe nearest 50m)
= Current vehicleposition: longitude
coordinates
? Number ofGPS satellites currentlybeing
used
A Current vehicleposition: latitude
coordinates
B Currently setsteering angleofthe front
wheels
i Todispla ycurrent height;,thesystem
must beable toreceive atleast four
satellites. SteeringangleBcan bea
maximum of35° inboth directions. Updat
ingthe digital map
Introduction The
digital mapsgenerated bythe map
software becomeoutdated inthe same way
as conven tionalroadmaps. Optimal route
guida ncecanonly beprovided by
the navigation systeminconj unction withthe
most up-to-date mapsoftware. Information
aboutnew version sof the digital
map canbeobtained fromanauthoriz ed
Mercedes- BenzCenter .You canhave the
digital mapupdated therewith aDVD ,or you
can update ityourself.
i The update process cantake along time
(over anhour), depending onthe size ofthe
map software. Duringthis time, youwill
only beable toswitch onradio mode and
to accept incomingcalls. Theupdate willbe
complet edmore quickly ifthe vehicle is
stat ionary.
If you carry outtheupdate withtheengin e
switch edoff and thestart erbatter yhas
insuffic ientpower, COMAND may
automatic allyswitch offduring theprocess
in order toprotec tthe batter y.Ifthis
occ urs, restartthe update withtheengin e
runn ing. G
WARN
ING
Never runtheengin ein an enclos edspace.
The exhaust fumescontain poisonous carbon
monox ide.Inhaling exhaustfumesis
hazardous toyour health andcanlead toloss
of con sciousnes sand death.
Upda tingprocess X
Inser tthe DVD (Ypage 127).
The update begins. COMAND checks
whether thedigital maponthe DVD is
compat iblewith thenavigation systemand
system software.
If this isthe case andtheDVD 'smap data
has notalready beeninstalled, COMAND
start supdating thedigital map.
If the map data hasalready beeninstalled,
the display showsversion dataanda
message tothis effec t.
X To confirm themessage: pressthe9
button .
X Eject the DVD .
While theupdate isrunn ing,youwillsee a
message tothis effec tand apro gressbar.The Addi
tional settin gs
89Navigation Z
Page 117 of 210

COMAN
Dfea tures ........ .......... ........... 116
Ra dio mod e........ .......... .................. .... 116
HD Radio <0023002300230023002300230023002300230023002300230023002300230023
0023002300230023002300230023002300230023002300230023002300230023
002300230023002300230023002300230023002300230023> 120
Sat ellite radio<0023002300230023002300230023002300230023002300230023002300230023
0023002300230023002300230023002300230023002300230023002300230023
0023002300230023> 121
Audio CD/DVD andMP3 mode ........ 126
MUSIC REGISTER<0023002300230023002300230023002300230023002300230023002300230023
00230023002300230023002300230023002300230023002300230023> 137
Media Interfacemode <0023002300230023002300230023002300230023002300230023002300230023
002300230023002300230023> 141
Audio AUXmode <0023002300230023002300230023002300230023002300230023002300230023
002300230023002300230023002300230023002300230023002300230023> 147 115Audio
Page 118 of 210

COMAN
Dfea tures
Thes eOper atingIn st ruc tions desc ribeall
st andar dand optionalequipm enta vail able
for you rCOMAND systematthe time of
purcha se.Cou ntry-specifi cdeviation sare
possible. Pleasenotethat your COMAND
system maynotbeequipped withallthe
features described. Rad
iomode General
information
i Portable electronicdevices inthe vehicle
may seriously impairradiorecept ion. Switching
onrad iomode
Opt ion 1 X
Press the$ function button .
The radio display appears.
Rad iomode: youwillhear thelast station
played onthe last waveband.
i Repeatedly pressingthe$ function
button switchesthrough thewavebands in
the order FM,AM, WB(Ypage 117)and
SatRadio. Pressingthe button againtakes
you back toFM radio mode.
Opt ion 2 X
Select Audio in
the main functionbarusing
the 9=; buttonsand press the
9 button tocon firm.
If radio mode wasthelast mode selected,
it will now beactive.
If anoth eraudio mode isswitch edon, you
can now switch toradio mode inthe audio
menu.
X Select Audio using
the9 button and
press the9button tocon firm.
The audio menu appears. :
Main function bar
; Current audiooperatin gmode
= Audio menu
X Select Radio (radio
mode) usingthe
9: buttonsand press the9button
to con firm. Radio
display
: Display window withstationselect ion
; Preset position ofthe select edstat ion
= Name ofthe select edstat ion
? Frequenc yof the select edstat ion
A Sound settings
B Waveband submenu(FM,AM,WB)
C Todisplay radiotext(FM and AMdigita l
only )
D Memo ryfuncti ons
E Radio functi ons 116
Radio
modeAudio
Page 119 of 210

Switching
wavebands
Option 1 You
canswitch theradio between theFM, AM
and WBwaveband.
X Press the$ functionbutton repeatedly
until thedesired waveband isselected.
Option 2 X
Press :tohighlight thesubmenu.
X To selec tawaveband: press the; or
= button repeatedlyuntil thecurrently
sel ected waveba ndishig hlighted (FM ,
AM ,
or WB ).
X Press 9.
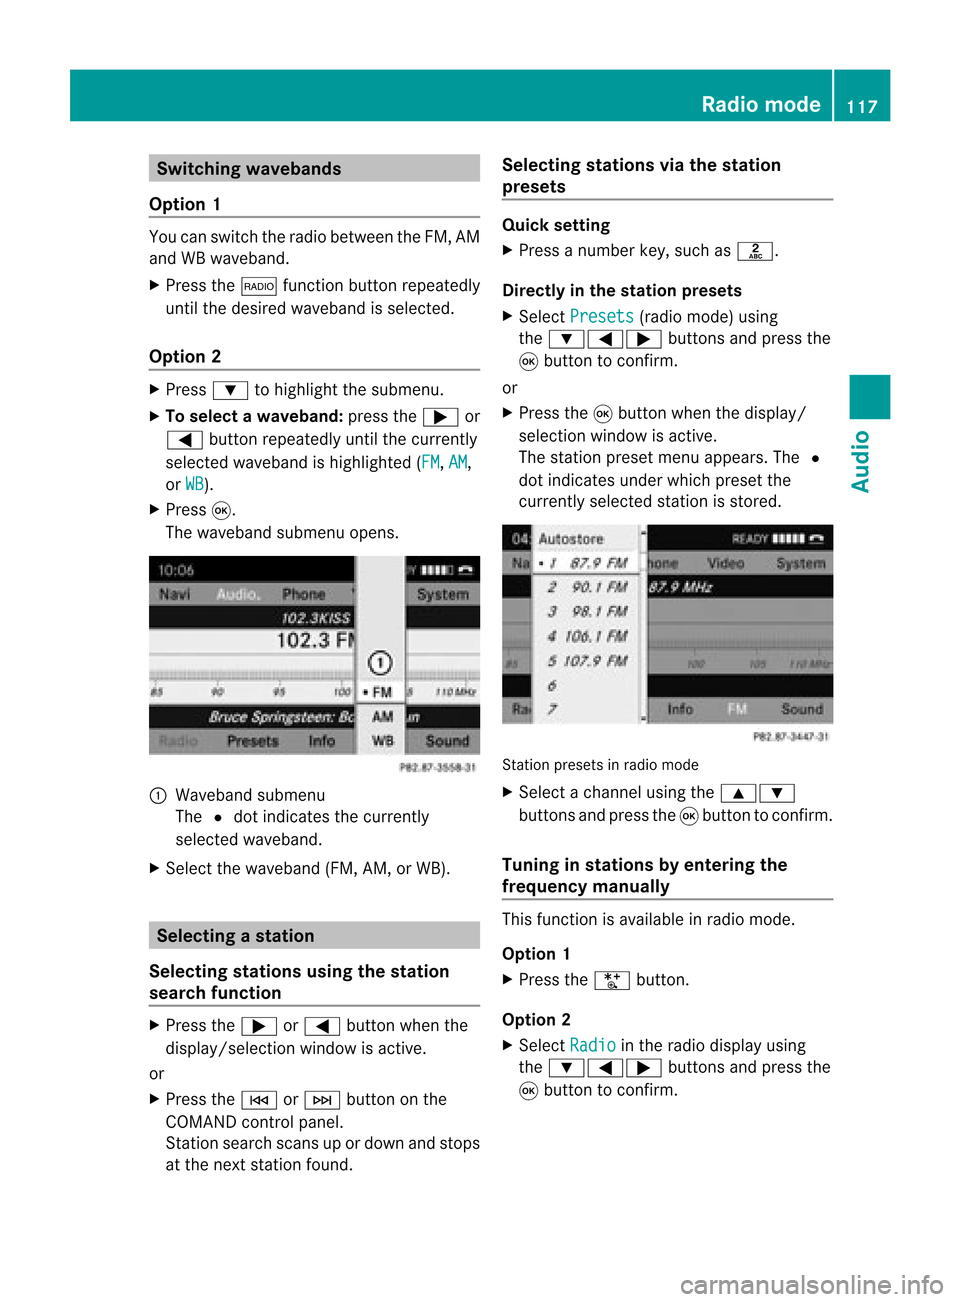
The waveba ndsub menu opens. 1
Wave band submenu
The #dot indicates thecurrently
sel ected waveba nd.
X Sele ctthe waveba nd(FM, AM,orWB). Sel
ecting astatio n
Se lecti ng stati onsusi ng the stati on
se arc hfuncti on X
Press the; or= button whenthe
disp lay/se lectio nwindow isact ive.
or
X Press theE orF buttononthe
COMA NDcontrol panel.
St ation searchscan sup ordown andstops
at the nextst ation found. Selecting
stations viathesta tion
pr esets Quick
setting
X Press anumb erkey, such asl.
Direct lyin thesta tion presets
X Selec tPres ets (radio
mode) using
the :=; buttons and press the
9 butt ontocon firm .
or
X Press the9butt onwhen thedisplay/
selec tionwindow isact ive.
The station presetmenu appears. The#
dot indicat esunder which preset the
curren tlyselect edstat ionisstor ed. St
ation preset sin radio mode
X Select achann elusing the9:
button sand press the9button tocon firm.
Tuning instat ions byentering the
freq uency manually This
function isavailable inradio mode.
Opt ion 1
X Press theU button .
Opt ion 2
X Select Radio in
the radio display using
the :=; buttonsand press the
9 button tocon firm. Rad
iomod e
117Audio