2012 MERCEDES-BENZ GLK SUV low beam
[x] Cancel search: low beamPage 10 of 381

Bulbs
see Changing bulbs C
Calling up a fault see Display messages
Car
see Vehicle
Care
Automatic car wash .......................318
Carpets .......................................... 323
Display ........................................... 322
Exterior lighting ............................. 320
Gear or selector lever ....................322
High-pressure cleaner .................... 318
Interior ........................................... 322
Matt paintwork .............................. 319
Notes ............................................. 317
Paint .............................................. 319
Plastic trim .................................... 322
Reversing camera ..........................321
Roof lining ...................................... 323
Seat belt ........................................ 323
Seat cover ..................................... 323
Sensors ......................................... 321
Steering wheel ............................... 322
Tail pipes ....................................... 321
Trim pieces .................................... 323
Washing by hand ........................... 318
Wheels ........................................... 319
Windows ........................................ 320
Wiper blades .................................. 320
Wooden trim .................................. 323
Car wash (care) ................................. 318
CD player/CD changer (12-button
multifunction steering wheel) .......... 233
Central locking Automatic locking (on-board com-
puter) ............................................. 241
Locking/unlocking (key) ..................76
Centre console
Lower section .................................. 38
Upper section .................................. 37
Changing bulbs
Cornering light function .................121
Dipped-beam headlamps ...............120
Important safety notes ..................118Main-beam headlamps ................... 120
Overview of bulb type
s.................. 119
Parking lamps (front) .....................120
Reversing lamps ............................ 121
Standing lamps .............................. 120
Turn signals (front) ......................... 120
Turn signals (rear) ..........................121
Child-proof locks
Important safety notes ....................64
Rear doors ....................................... 64
Children
In the vehicle ................................... 54
Restraint systems ............................ 54
Child seat
Automatic recognition .....................56
ISOFIX .............................................. 57
On the front-passenger sea t............ 55
Problem (malfunction) .....................60
Recommendations ...........................62
Suitable positions ............................ 60
Top Tether ....................................... 58
Cigarette lighter ................................ 307
Cleaning Mirror turn signal ........................... 320
Trailer tow hitch ............................. 321
Climate control
Auxiliary heating/ventilation .......... 137
Controlling automatically ...............132
Convenience opening/closing
(air-recirculation mode )................. 136
Cooling with air dehumidification ..131
Demisting the windows .................. 134
Demisting the windscreen .............134
Important safety notes ..................128
Indicator lamp ................................ 132
Information on using
THERMOTRONIC automatic cli-
mate control .................................. 131
Notes on using THERMATIC auto-
matic climate control .....................129
Overview of systems ......................128
Problems with cooling with air
dehumidification ............................ 132
Problem with the rear window
heating .......................................... 135
Rear control panel .........................130
Setting the air distribution .............133
Setting the airflow .........................134 Index
7
Page 35 of 381
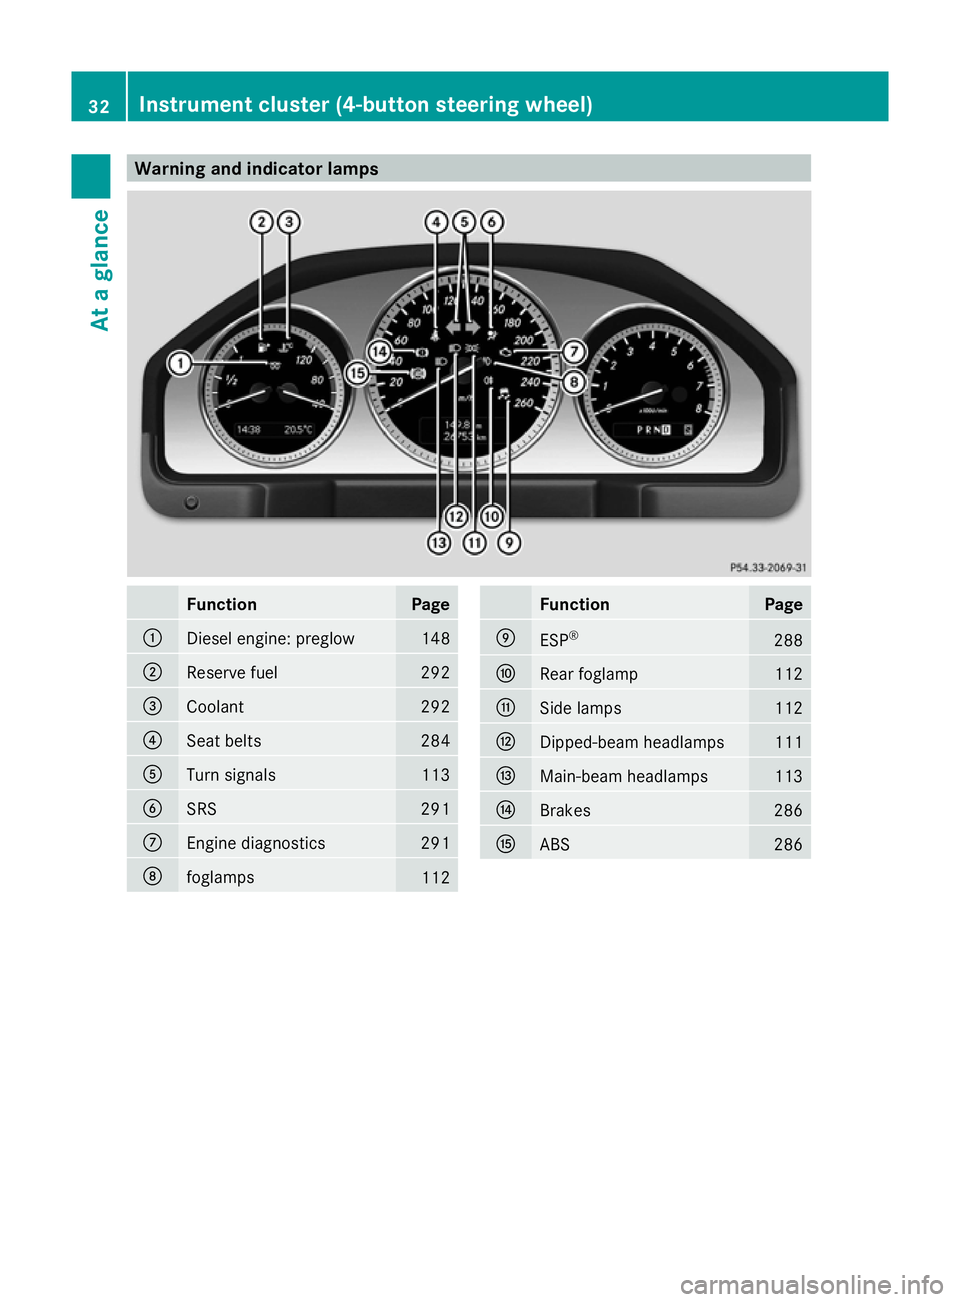
Warning and indicator lamps
Function Page
:
Diesel engine: preglow 148
;
Reserve fuel 292
=
Coolant 292
?
Seat belts 284
A
Turn signals 113
B
SRS 291
C
Engine diagnostics 291
D
foglamps
112 Function Page
E
ESP
® 288
F
Rear foglamp 112
G
Side lamps 112
H
Dipped-beam headlamps 111
I
Main-beam headlamps 113
J
Brakes 286
K
ABS 28632
Instrument cluster (4-button steering wheel)At a glance
Page 37 of 381

Warning and indicator lamps
Function Page
:
÷
ESP® 288
;
·
Distance warning 294
=
å
ESP®
OFF 288
?
J
Brakes 286
A
#!
Turn signals 113
B
!
ABS 286
C
6
SRS 291
D
;
Engine diagnostics 291
E
ü
Seat belt 284 Function Page
F
%
Diesel engine: pre-
glow 148
G
?
Coolant 292
H
K
Main-beam headlamp 113
I
L
Dipped-beam head-
lamps 111
J
T
Side lamps 112
K
R
Rear foglamp 112
L
N
Front foglamps 112
M
8
Reserve fuel 29234
Instrument cluster (12-button steering wheel)At a glance
Page 115 of 381
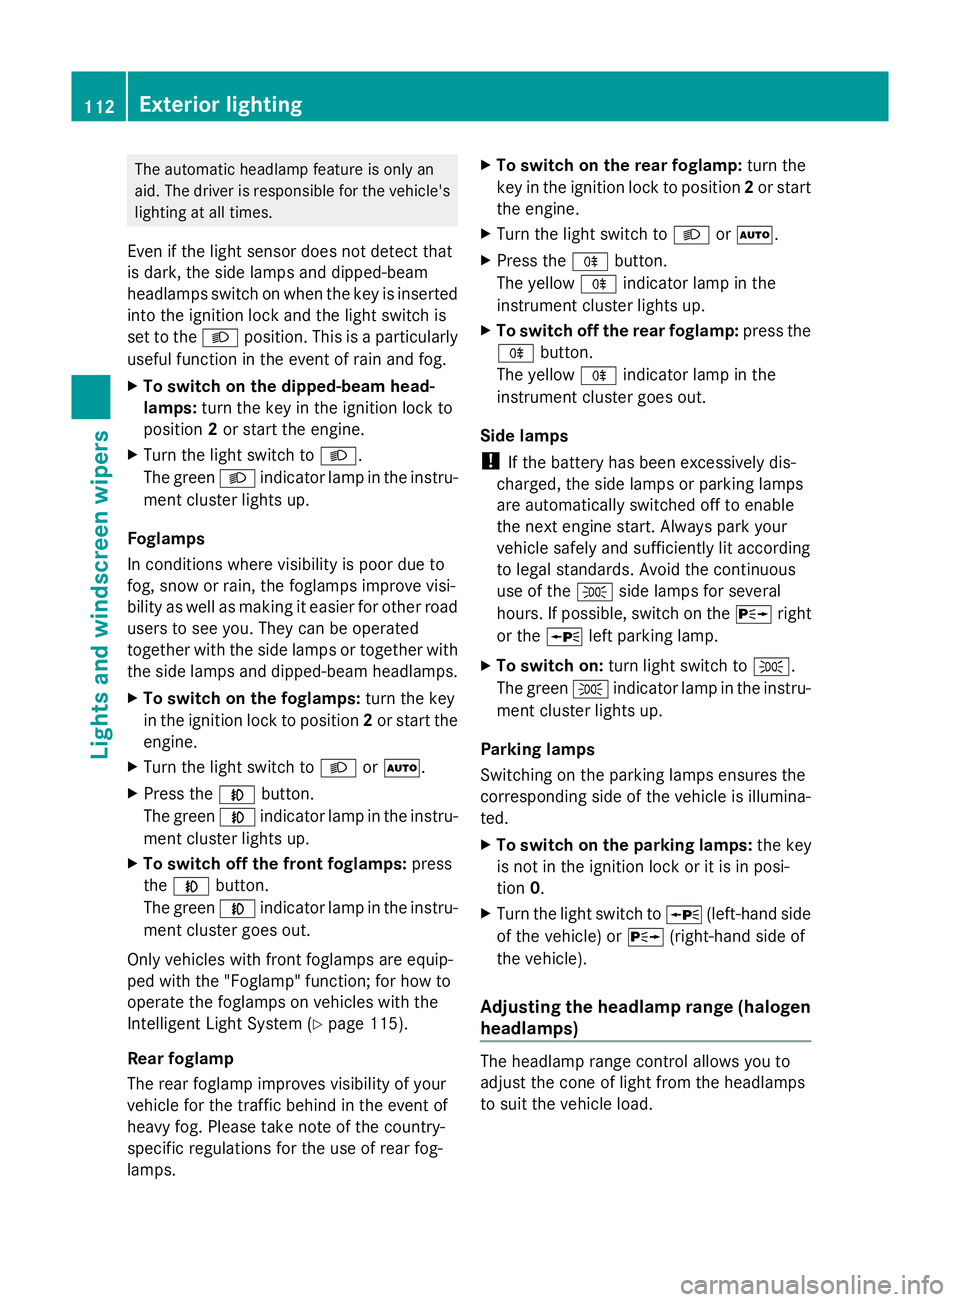
The automatic headlamp feature is only an
aid. The driver is responsible for the vehicle's
lighting at all times.
Even if the light sensor does not detect that
is dark, the side lamps and dipped-beam
headlamps switch on when the key is inserted
into the ignition lock and the light switch is
set to the Lposition. This is a particularly
useful function in the event of rain and fog.
X To switch on the dipped-beam head-
lamps: turn the key in the ignition lock to
position 2or start the engine.
X Turn the light switch to L.
The green Lindicator lamp in the instru-
ment cluster lights up.
Foglamps
In conditions where visibility is poor due to
fog, snow or rain, the foglamps improve visi-
bility as well as making it easier for other road
users to see you. They can be operated
together with the side lamps or together with
the side lamps and dipped-beam headlamps.
X To switch on the foglamps: turn the key
in the ignition lock to position 2or start the
engine.
X Turn the light switch to LorÃ.
X Press the Nbutton.
The green Nindicator lamp in the instru-
ment cluster lights up.
X To switch off the front foglamps: press
the N button.
The green Nindicator lamp in the instru-
ment cluster goes out.
Only vehicles with front foglamps are equip-
ped with the "Foglamp" function; for how to
operate the foglamps on vehicles with the
Intelligent Light System (Y page 115).
Rear foglamp
The rear foglamp improves visibility of your
vehicle for the traffic behind in the event of
heavy fog. Please take note of the country-
specific regulations for the use of rear fog-
lamps. X
To switch on the rear foglamp: turn the
key in the ignition lock to position 2or start
the engine.
X Turn the light switch to LorÃ.
X Press the Rbutton.
The yellow Rindicator lamp in the
instrument cluster lights up.
X To switch off the rear foglamp: press the
R button.
The yellow Rindicator lamp in the
instrument cluster goes out.
Side lamps
! If the battery has been excessively dis-
charged, the side lamps or parking lamps
are automatically switched off to enable
the next engine start. Always park your
vehicle safely and sufficiently lit according
to legal standards. Avoid the continuous
use of the Tside lamps for several
hours. If possible, switch on the Xright
or the Wleft parking lamp.
X To switch on: turn light switch to T.
The green Tindicator lamp in the instru-
ment cluster lights up.
Parking lamps
Switching on the parking lamps ensures the
corresponding side of the vehicle is illumina-
ted.
X To switch on the parking lamps: the key
is not in the ignition lock or it is in posi-
tion 0.
X Turn the light switch to W(left-hand side
of the vehicle) or X(right-hand side of
the vehicle).
Adjusting the headlamp range (halogen
headlamps) The headlamp range control allows you to
adjust the cone of light from the headlamps
to suit the vehicle load.112
Exterior lightingLights and windscreen wipers
Page 118 of 381
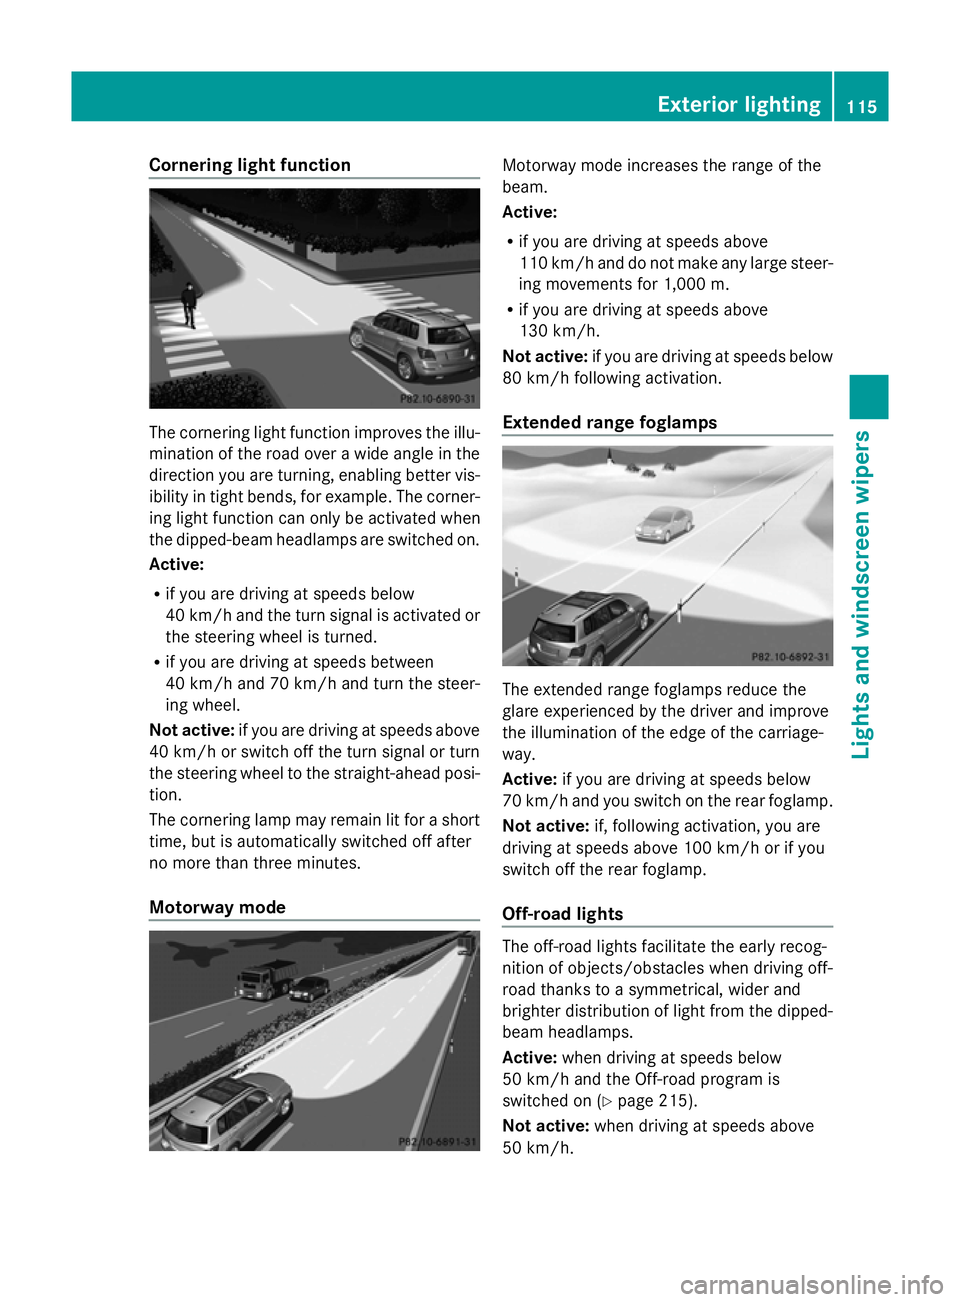
Cornering light function
The cornering light function improves the illu-
mination of the road over a wide angle in the
direction you are turning, enabling better vis-
ibility in tight bends, for example. The corner-
ing light function can only be activated when
the dipped-beam headlamps are switched on.
Active:
R if you are driving at speeds below
40 km/h and the turn signal is activated or
the steering wheel is turned.
R if you are driving at speeds between
40 km/h and 70 km/h and turn the steer-
ing wheel.
Not active: if you are driving at speeds above
40 km/h or switch off the turn signal or turn
the steering wheel to the straight-ahead posi-
tion.
The cornering lamp may remain lit for a short
time, but is automatically switched off after
no more than three minutes.
Motorway mode Motorway mode increases the range of the
beam.
Active:
R
if you are driving at speeds above
110 km/h and do not make any large steer-
ing movements for 1,000 m.
R if you are driving at speeds above
130 km/h.
Not active: if you are driving at speeds below
80 km/h following activation.
Extended range foglamps The extended range foglamps reduce the
glare experienced by the driver and improve
the illumination of the edge of the carriage-
way.
Active:
if you are driving at speeds below
70 km/h and you switch on the rear foglamp.
Not active: if, following activation, you are
driving at speeds above 100 km/h or if you
switch off the rear foglamp.
Off-road lights The off-road lights facilitate the early recog-
nition of objects/obstacles when driving off-
road thanks to a symmetrical, wider and
brighter distribution of light from the dipped-
beam headlamps.
Active: when driving at speeds below
50 km/h and the Off-road program is
switched on (Y page 215).
Not active: when driving at speeds above
50 km/h. Exterior lighting
115Lights and windscreen wipers Z
Page 119 of 381
When the Off-road-Lights are switched on,
the active light function is deactivated and
the headlamp range adjustment is set to the
static mode. Adaptive Highbeam Assist
G
WARNING
Adaptive Highbeam Assist is only an aid
designed to assist driving. The driver is
responsible for adjusting the vehicle's lighting
to the prevailing light, vision and traffic con-
ditions.
The system may be impaired or deactivated:
R if there is poor visibility, e.g. due to snow,
rain, fog or spray
R if the area of the windscreen around the
optical sensor is dirty, misted up or covered
up, e.g. by a sticker
The system may not recognise the following
road users:
R road users that have no lighting, e.g. pedes-
trians
R road users that have poor lighting, e.g.
cyclists
R road users whose lighting is not clearly visi-
ble, e.g. road users behind a crash barrier
R on rare occasions: road users that have
lights that may be recognised too late or not
at all
The automatic main-beam headlamps will not
be deactivated, or they may be activated
despite road users travelling in front of or
approaching the vehicle.
Thus, you could cause an accident and injure
yourself and others. Always observe traffic
conditions and, if necessary, dip the lights
manually.
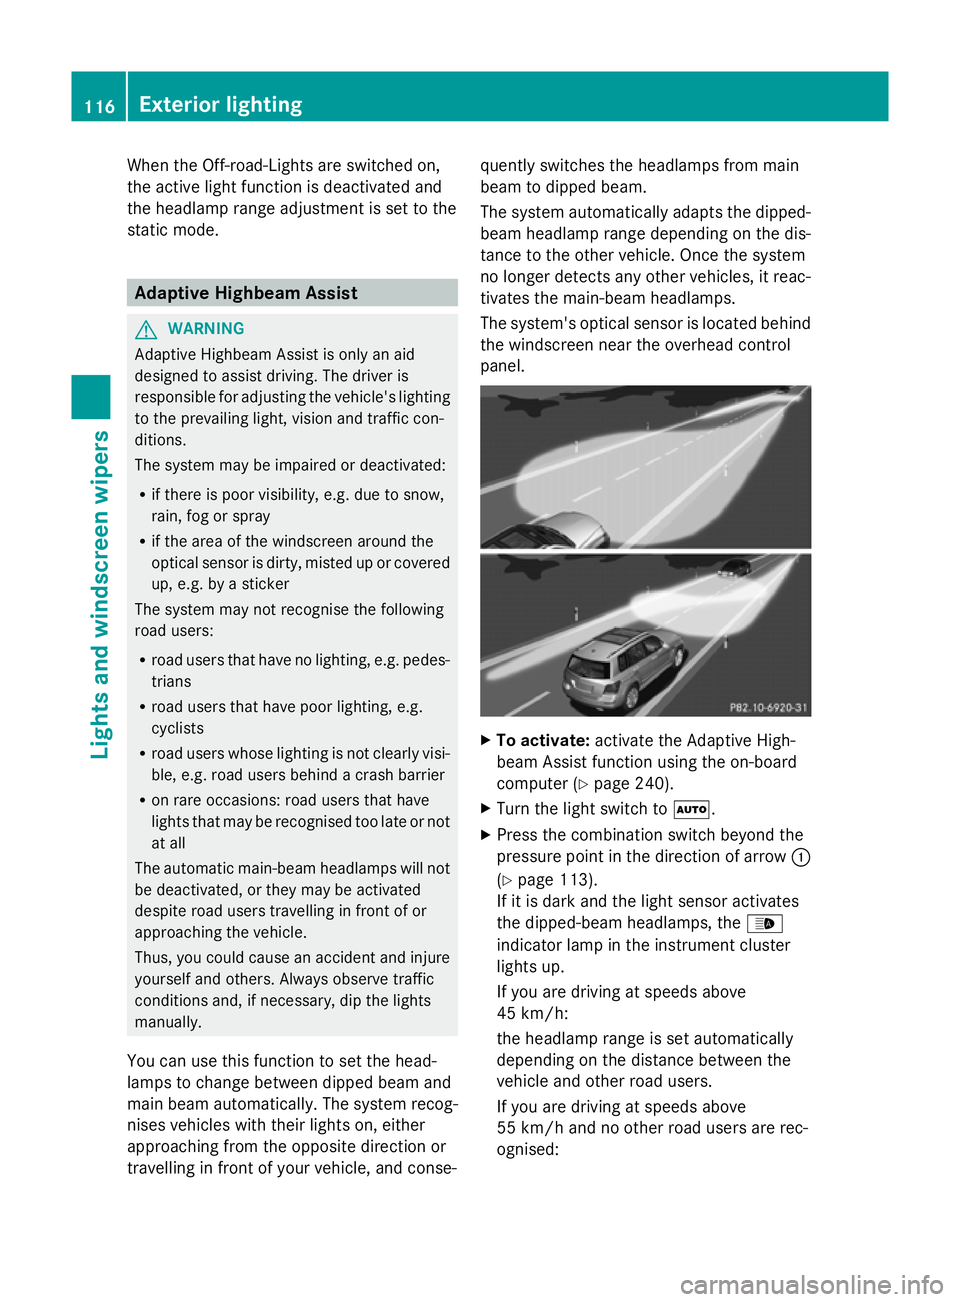
You can use this function to set the head-
lamps to change between dipped beam and
main beam automatically. The system recog-
nises vehicles with their lights on, either
approaching from the opposite direction or
travelling in front of your vehicle, and conse- quently switches the headlamps from main
beam to dipped beam.
The system automatically adapts the dipped-
beam headlamp range depending on the dis-
tance to the other vehicle. Once the system
no longer detects any other vehicles, it reac-
tivates the main-beam headlamps.
The system's optical sensor is located behind
the windscreen near the overhead control
panel. X
To activate: activate the Adaptive High-
beam Assist function using the on-board
computer (Y page 240).
X Turn the light switch to Ã.
X Press the combination switch beyond the
pressure point in the direction of arrow :
(Y page 113).
If it is dark and the light sensor activates
the dipped-beam headlamps, the _
indicator lamp in the instrument cluster
lights up.
If you are driving at speeds above
45 km/h:
the headlamp range is set automatically
depending on the distance between the
vehicle and other road users.
If you are driving at speeds above
55 km/h and no other road users are rec-
ognised: 116
Exterior lightingLights and windscreen wipers
Page 120 of 381
the main-beam headlamps are switched on
automatically. The
Kindicator lamp in
the instrument cluster also lights up.
If you are driving at speeds below
45 km/h or other road users are recog-
nised or the roads are adequately lit:
the main-beam headlamps are switched off
automatically. The Kindicator lamp in
the instrument cluster goes out. The _
indicator lamp in the instrument cluster
stays on.
X To deactivate: move the combination
switch back to its normal position.
The _ indicator lamp in the instrument
cluster goes out. Headlamps misted up on the inside
The headlamps may mist up on the inside if
there is high atmospheric humidity.
X Switch on the lights and drive off.
The level of moisture diminishes, depend-
ing on the length of the journey and the
weather conditions (humidity and temper-
ature).
If the level of moisture does not diminish:
X Have the headlamps checked at a qualified
specialist workshop. Interior lighting
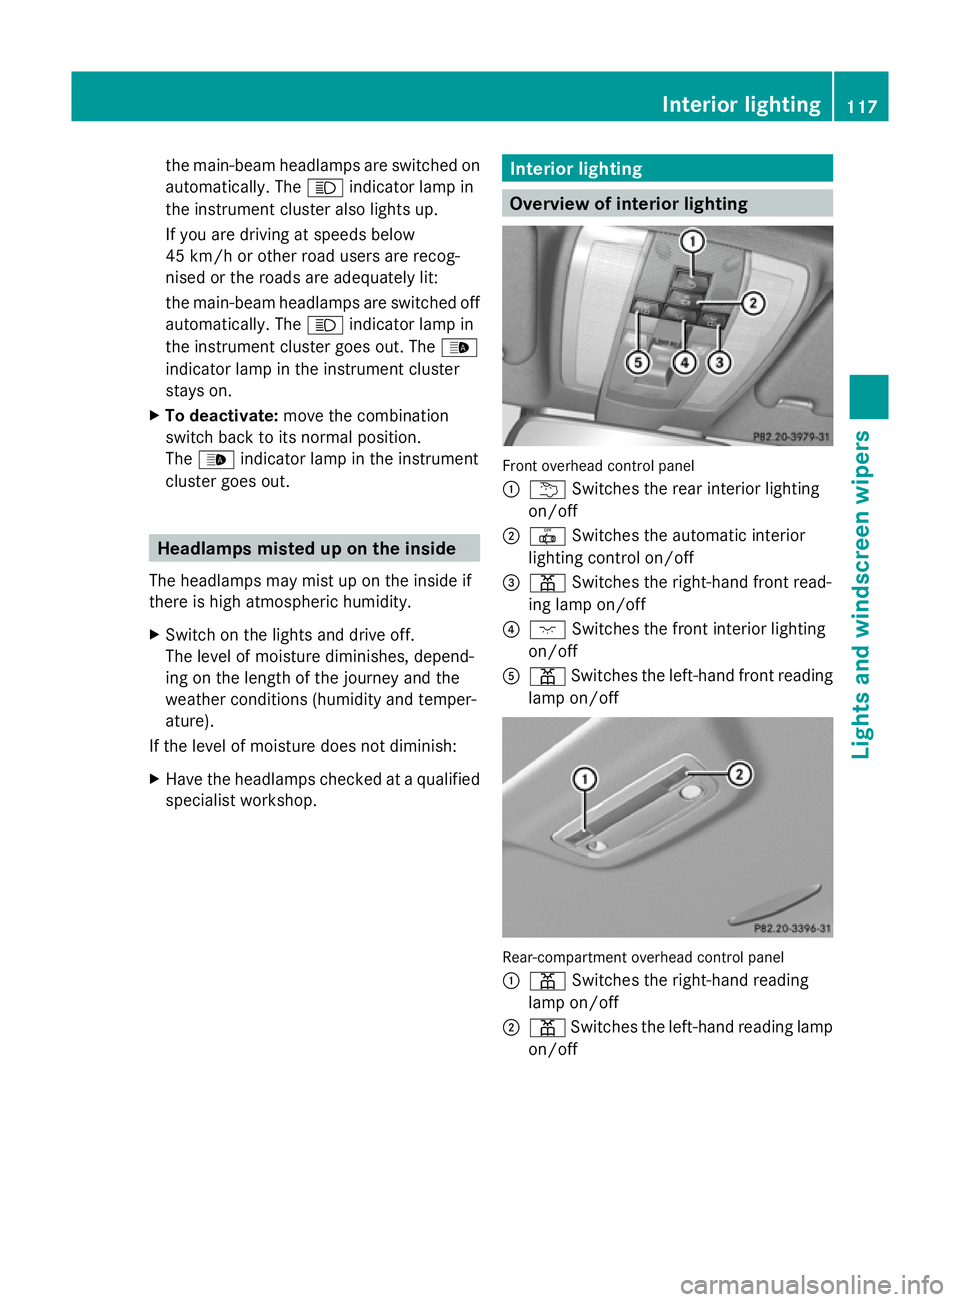
Overview of interior lighting
Front overhead control panel
:
u Switches the rear interior lighting
on/off
; | Switches the automatic interior
lighting control on/off
= p Switches the right-hand front read-
ing lamp on/off
? c Switches the front interior lighting
on/off
A p Switches the left-hand front reading
lamp on/off Rear-compartment overhead control panel
:
p Switches the right-hand reading
lamp on/off
; p Switches the left-hand reading lamp
on/off Interior lighting
117Lights andwindscreen wipers Z
Page 122 of 381
Keep bulbs out of the reach of children. Oth-
erwise, they could damage the bulbs, for
example, and injure themselves.
Never use a bulb which has been dropped.
Such a bulb may break or even explode and
injure you.
Halogen bulbs are pressurised and can
explode when you change them, particularly
if they are very hot. You should therefore wear
eye protection and gloves when you are
changing them.
There are bulbs other than the xenon bulbs
that you cannot replace. Replace only the
bulbs listed (Y page 119). Have the bulbs that
you cannot replace yourself changed at a
qualified specialist workshop.
If you require assistance changing bulbs, con-
sult a qualified specialist workshop.
Do not touch the glass tube of new bulbs with
your bare hands. Even minor contamination
can burn into the glass surface and reduce
the service life of the bulbs. Always use a lint-
free cloth or only touch the base of the bulb
when fitting.
Only use bulbs of the correct type.
If the new bulb still does not light up, consult
a qualified specialist workshop.
Bulbs and lamps are an important aspect of
vehicle safety. You must therefore make sure
that these function correctly at all times.
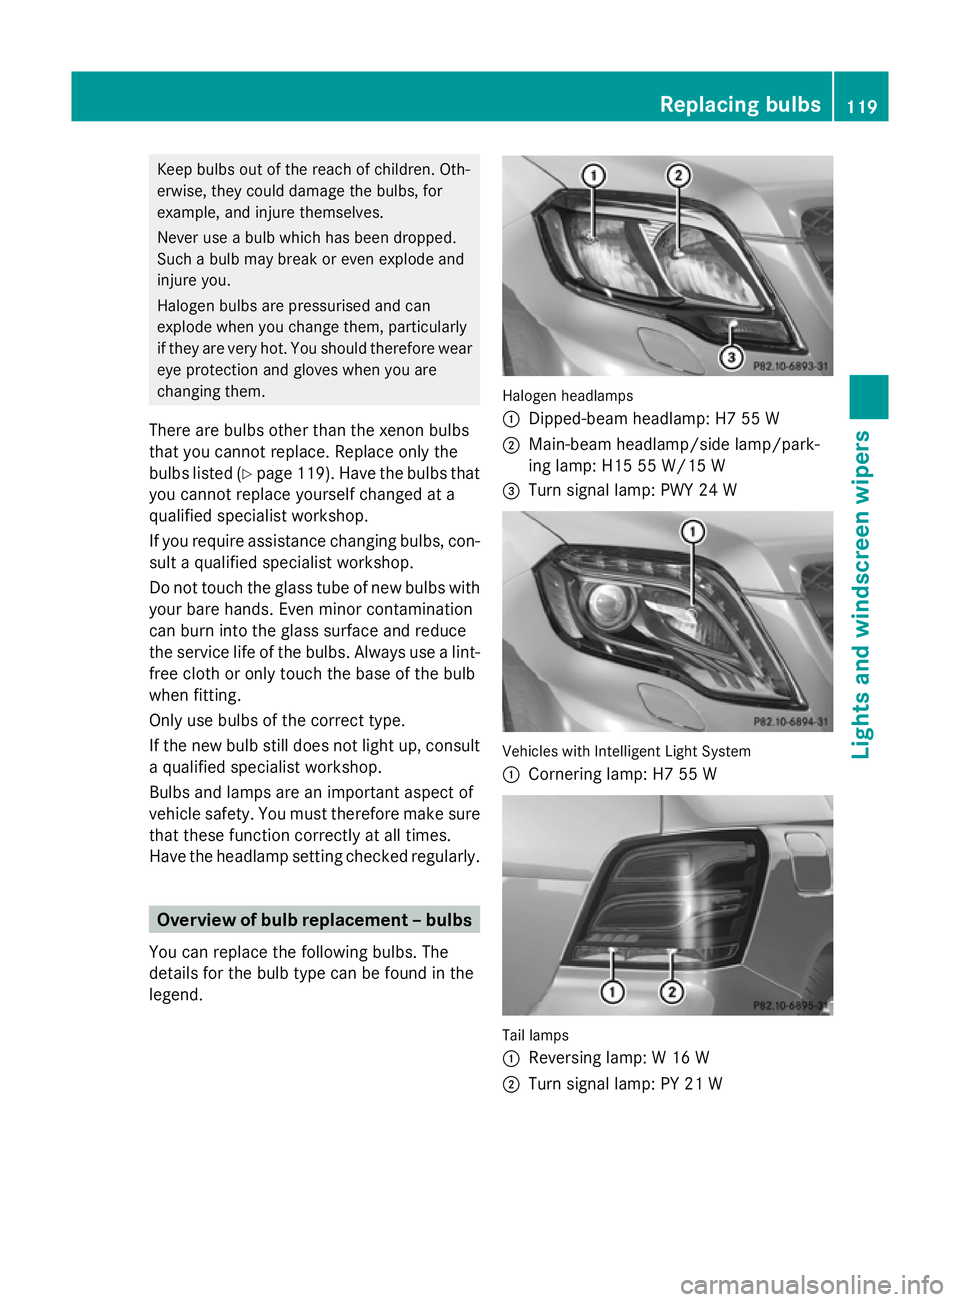
Have the headlamp setting checked regularly. Overview of bulb replacement – bulbs
You can replace the following bulbs. The
details for the bulb type can be found in the
legend. Halogen headlamps
:
Dipped-beam headlamp: H7 55 W
; Main-beam headlamp/side lamp/park-
ing lamp: H15 55 W/15 W
= Turn signal lamp: PWY 24 W Vehicles with Intelligent Light System
:
Cornering lamp: H7 55 W Tail lamps
:
Reversing lamp: W 16 W
; Turn signal lamp: PY 21 W Replacing bulbs
119Lights and windscreen wipers Z