2012 MERCEDES-BENZ GLK SUV light
[x] Cancel search: lightPage 214 of 381
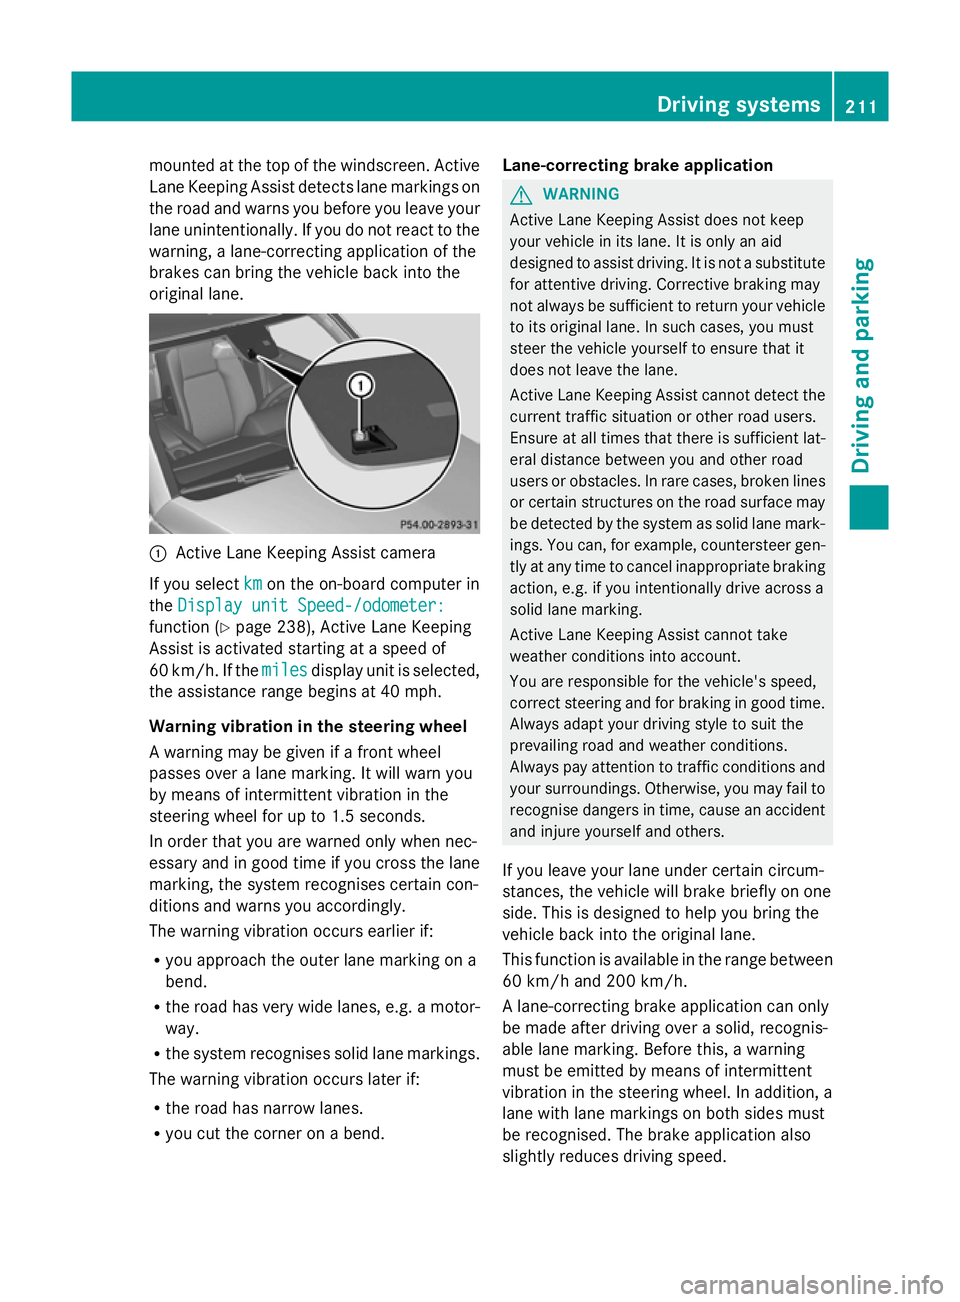
mounted at the top of the windscreen. Active
Lane Keeping Assist detects lane markings on
the road and warns you before you leave your
lane unintentionally. If you do not react to the
warning, a lane-correcting application of the
brakes can bring the vehicle back into the
original lane. :
Active Lane Keeping Assist camera
If you select km kmon the on-board computer in
the Display unit Speed-/odometer:
Display unit Speed-/odometer:
function ( Ypage 238), Active Lane Keeping
Assist is activated starting at a speed of
60 km/h. If the miles
miles display unit is selected,
the assistance range begins at 40 mph.
Warning vibration in the steering wheel
A warning may be given if a front wheel
passes over a lane marking. It will warn you
by means of intermittent vibration in the
steering wheel for up to 1.5 seconds.
In order that you are warned only when nec-
essary and in good time if you cross the lane
marking, the system recognises certain con-
ditions and warns you accordingly.
The warning vibration occurs earlier if:
R you approach the outer lane marking on a
bend.
R the road has very wide lanes, e.g. a motor-
way.
R the system recognises solid lane markings.
The warning vibration occurs later if:
R the road has narrow lanes.
R you cut the corner on a bend. Lane-correcting brake application G
WARNING
Active Lane Keeping Assist does not keep
your vehicle in its lane. It is only an aid
designed to assist driving. It is not a substitute
for attentive driving. Corrective braking may
not always be sufficient to return your vehicle
to its original lane. In such cases, you must
steer the vehicle yourself to ensure that it
does not leave the lane.
Active Lane Keeping Assist cannot detect the
current traffic situation or other road users.
Ensure at all times that there is sufficient lat-
eral distance between you and other road
users or obstacles. In rare cases, broken lines
or certain structures on the road surface may
be detected by the system as solid lane mark-
ings. You can, for example, countersteer gen-
tly at any time to cancel inappropriate braking
action, e.g. if you intentionally drive across a
solid lane marking.
Active Lane Keeping Assist cannot take
weather conditions into account.
You are responsible for the vehicle's speed,
correct steering and for braking in good time.
Always adapt your driving style to suit the
prevailing road and weather conditions.
Always pay attention to traffic conditions and
your surroundings. Otherwise, you may fail to
recognise dangers in time, cause an accident
and injure yourself and others.
If you leave your lane under certain circum-
stances, the vehicle will brake briefly on one
side. This is designed to help you bring the
vehicle back into the original lane.
This function is available in the range between
60 km/h and 200 km/h.
A lane-correcting brake application can only
be made after driving over a solid, recognis-
able lane marking. Before this, a warning
must be emitted by means of intermittent
vibration in the steering wheel. In addition, a
lane with lane markings on both sides must
be recognised. The brake application also
slightly reduces driving speed. Driving systems
211Driving and parking Z
Page 215 of 381
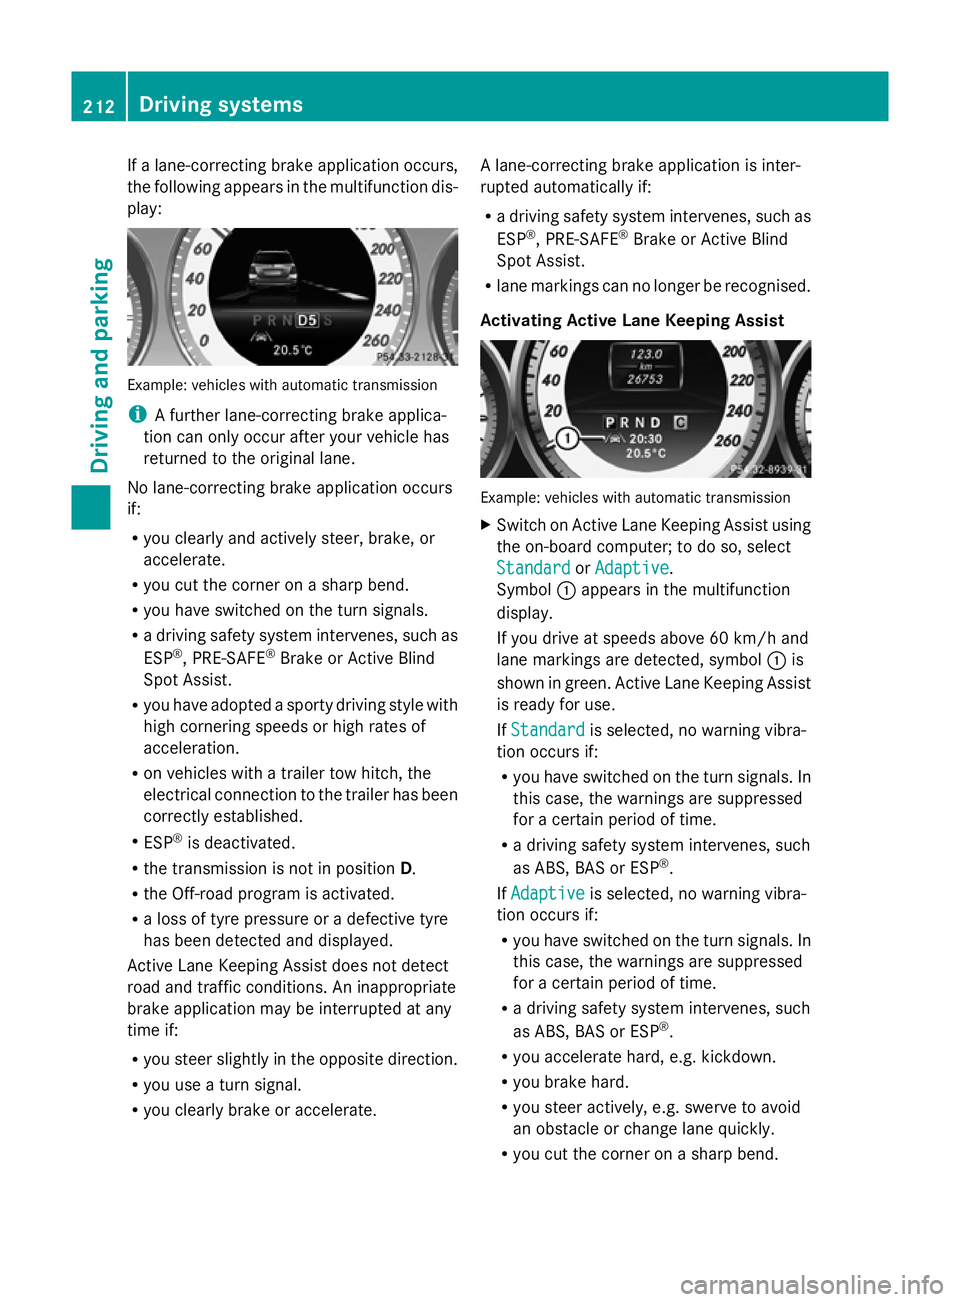
If a lane-correcting brake application occurs,
the following appears in the multifunction dis-
play: Example: vehicles with automatic transmission
i
A further lane-correcting brake applica-
tion can only occur after your vehicle has
returned to the original lane.
No lane-correcting brake application occurs
if:
R you clearly and actively steer, brake, or
accelerate.
R you cut the corner on a sharp bend.
R you have switched on the turn signals.
R a driving safety system intervenes, such as
ESP ®
, PRE-SAFE ®
Brake or Active Blind
Spot Assist.
R you have adopted a sporty driving style with
high cornering speeds or high rates of
acceleration.
R on vehicles with a trailer tow hitch, the
electrical connection to the trailer has been
correctly established.
R ESP ®
is deactivated.
R the transmission is not in position D.
R the Off-road program is activated.
R a loss of tyre pressure or a defective tyre
has been detected and displayed.
Active Lane Keeping Assist does not detect
road and traffic conditions. An inappropriate
brake application may be interrupted at any
time if:
R you steer slightly in the opposite direction.
R you use a turn signal.
R you clearly brake or accelerate. A lane-correcting brake application is inter-
rupted automatically if:
R
a driving safety system intervenes, such as
ESP ®
, PRE-SAFE ®
Brake or Active Blind
Spot Assist.
R lane markings can no longer be recognised.
Activating Active Lane Keeping Assist Example: vehicles with automatic transmission
X
Switch on Active Lane Keeping Assist using
the on-board computer; to do so, select
Standard
Standard orAdaptive Adaptive .
Symbol :appears in the multifunction
display.
If you drive at speeds above 60 km/h and
lane markings are detected, symbol :is
shown in green. Active Lane Keeping Assist
is ready for use.
If Standard Standard is selected, no warning vibra-
tion occurs if:
R you have switched on the turn signals. In
this case, the warnings are suppressed
for a certain period of time.
R a driving safety system intervenes, such
as ABS, BAS or ESP ®
.
If Adaptive Adaptive is selected, no warning vibra-
tion occurs if:
R you have switched on the turn signals. In
this case, the warnings are suppressed
for a certain period of time.
R a driving safety system intervenes, such
as ABS, BAS or ESP ®
.
R you accelerate hard, e.g. kickdown.
R you brake hard.
R you steer actively, e.g. swerve to avoid
an obstacle or change lane quickly.
R you cut the corner on a sharp bend. 212
Driving systemsDriving and parking
Page 216 of 381
Towing a trailer
If you attach a trailer, make sure that you have
correctly established the electrical connec-
tion. This can be accomplished by checking
the trailer lighting.
Off-road driving systems
4MATIC (permanent all-wheel drive)
G
WARNING
4MATIC cannot reduce the risk of an accident
if you drive too fast.
If a drive wheel spins due to insufficient grip:
R only depress the accelerator pedal as far as
necessary when pulling away.
R accelerate less when driving.
R adapt your driving style to suit road and
traffic conditions.
! Never tow the vehicle with one axle
raised. This may damage the transfer case.
Damage of this sort is not covered by the
Mercedes-Benz implied warranty. All
wheels must remain either on the ground
or be fully raised. Observe the instructions
for towing the vehicle with all wheels in full
contact with the ground.
4MATIC ensures that all four wheels are per-
manently driven. Together with ESP ®
and
ETS, it improves the traction of your vehicle
whenever a drive wheel spins due to insuffi-
cient grip.
i In wintry driving conditions, the maximum
effect of 4MATIC can only be achieved if
you use winter tyres (M+S tyres), with snow
chains if necessary.
! When testing the parking brake, operate
the vehicle only briefly (for a maximum of
ten seconds) on a brake test dynamometer.
When doing this, turn the key to position
0 or 1in the ignition. Failure to do this can
cause damage to the drive train or the
brake system. !
A function or performance test should
only be carried out on a twin-axle dyna-
mometer. Before you operate the vehicle
on such a dynamometer, please consult a
qualified workshop. You could otherwise
damage the drive train or the brake system.
For information about "Driving off-road", see
(Y page 170). DSR (Downhill Speed Regulation)
Important safety notes i
DSR (Downhill Speed Regulation) is only
available for vehicles with the Off-Road
Engineering package.
DSR is an aid to assist you when driving down-
hill. It keeps the speed of travel at the speed
selected on the on-board computer. The
steeper the downhill gradient, the greater the
DSR braking effect on the vehicle. When driv-
ing on flat stretches of road or on an uphill
gradient, the DSR braking effect is minimal or
non-existent. G
WARNING
DSR is only an aid designed to assist you when
driving downhill. You are responsible for keep-
ing control of the vehicle and for assessing
whether the downhill gradient can be man-
aged.
When activating DSR the vehicle may brake
suddenly due to DSR intervening. This is
dependent on the downhill gradient and the
difference between the current speed and the
speed set. DSR may not always be able to
keep to the set speed, depending on road sur-
face and tyre conditions. You could lose con-
trol of the vehicle and cause an accident.
Select a set speed suitable for the prevailing
conditions and when necessary, apply the
brakes manually.
DSR controls the vehicle’s speed when it is
activated and the transmission is in position
D, Ror N. By accelerating or braking, you can Off-road driving systems
213Driving and parking Z
Page 217 of 381
always drive at a higher or a lower speed than
that set on the on-board computer. G
WARNING
If you depress the accelerator pedal with DSR
activated, then the set speed can be excee-
ded. Drive downhill with special care and
always keep in mind that DSR brakes the vehi-
cle as soon as you remove your foot from the
accelerator pedal. The vehicle may brake sud-
denly due to DSR intervening, depending on
the downhill gradient and the difference
between the current speed and the set speed.
You could lose control of the vehicle and
cause an accident.
For information about driving off-road, see
(Y page 170).
Activating/deactivating DSR Activating
You can only activate DSR when driving at
speeds below 30 km/h.
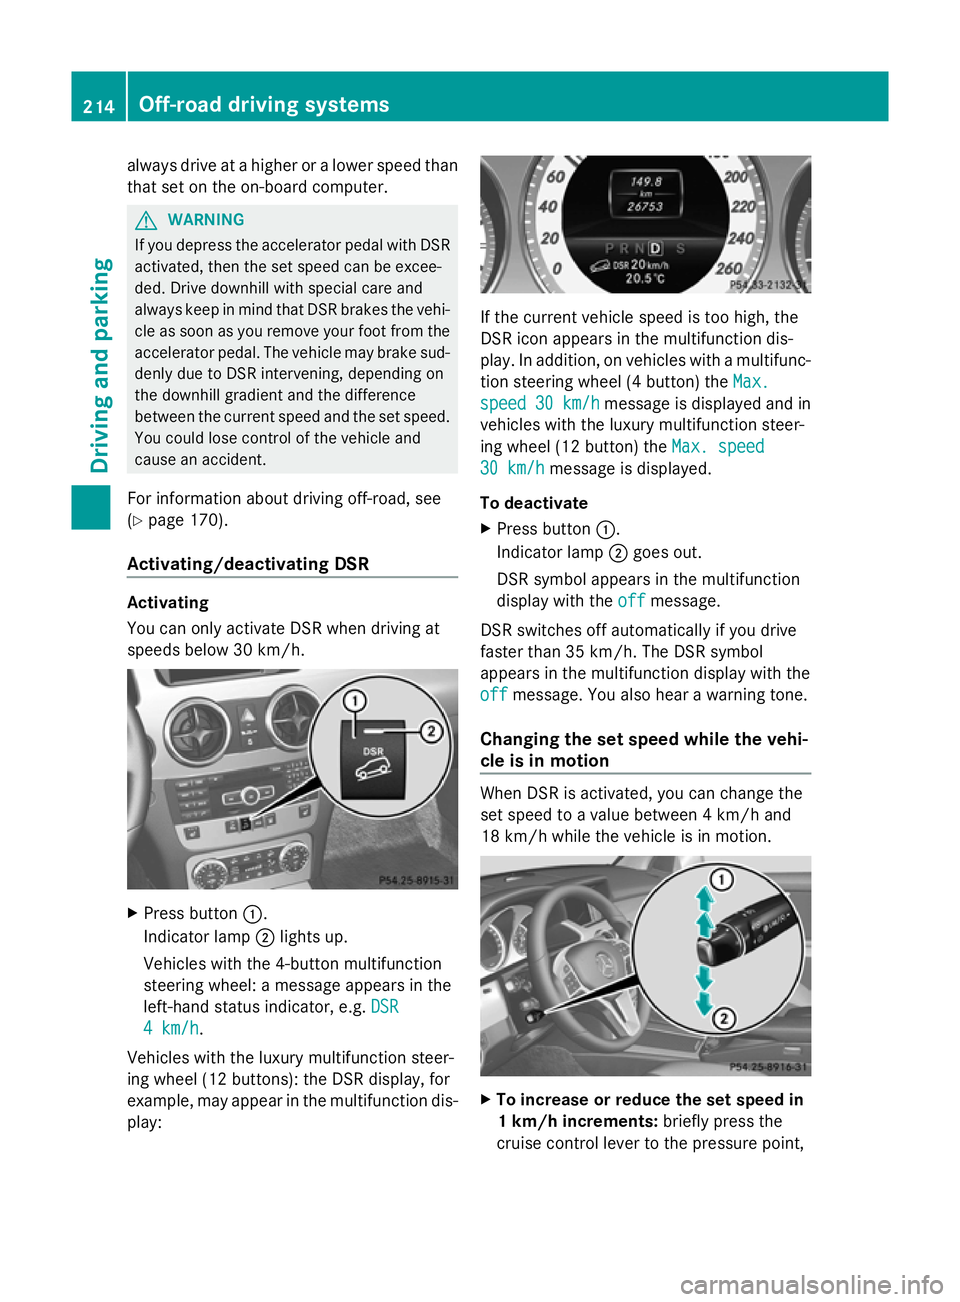
X
Press button :.
Indicator lamp ;lights up.
Vehicles with the 4-button multifunction
steering wheel: a message appears in the
left-hand status indicator, e.g. DSR DSR
4 km/h
4 km/h.
Vehicles with the luxury multifunction steer-
ing wheel (12 buttons): the DSR display, for
example, may appear in the multifunction dis-
play: If the current vehicle speed is too high, the
DSR icon appears in the multifunction dis-
play. In addition, on vehicles with a multifunc-
tion steering wheel (4 button) the
Max. Max.
speed
speed 30 km/h
30 km/h message is displayed and in
vehicles with the luxury multifunction steer-
ing wheel (12 button) the Max. speed Max. speed
30 km/h
30 km/h message is displayed.
To deactivate
X Press button :.
Indicator lamp ;goes out.
DSR symbol appears in the multifunction
display with the off offmessage.
DSR switches off automatically if you drive
faster than 35 km/h. The DSR symbol
appears in the multifunction display with the
off off message. You also hear a warning tone.
Changing the set speed while the vehi-
cle is in motion When DSR is activated, you can change the
set speed to a value between 4 km/h and
18 km/h while the vehicle is in motion.
X
To increase or reduce the set speed in
1 km/h increments: briefly press the
cruise control lever to the pressure point, 214
Off-road driving systemsDriving and parking
Page 218 of 381
up
: for a higher or down ;for a lower
set speed.
On vehicles with a 4-button multifunction
steering wheel, the set value appears in the
left-hand status indicator. On vehicles with
a luxury multifunction steering wheel (12
buttons), the set value appears in the mul-
tifunction display.
X To increase or reduce the set speed by
2 km/h increments: briefly press the
cruise control lever beyond the pressure
point up :for a higher or down ;for a
lower set speed.
On vehicles with a 4-button multifunction
steering wheel, the set value appears in the
left-hand status indicator. On vehicles with
a luxury multifunction steering wheel (12
buttons), the set value appears in the mul-
tifunction display. Off-road drive program
i The off-road drive program is only availa-
ble on vehicles with the Off-Road Engineer-
ing package.
The off-road drive program assists you in driv-
ing off-road. The engine’s performance char-
acteristics and the gearshifting characteris-
tics of the automatic transmission are adap-
ted for this purpose. ABS, ESP ®
and ETS pro-
grams especially adapted to off-road driving
are also activated.
Do not use the off-road drive program on
roads that are snow-covered or icy or if you
have fitted your vehicle with snow chains.
For information about driving off-road, see
(Y page 170). X
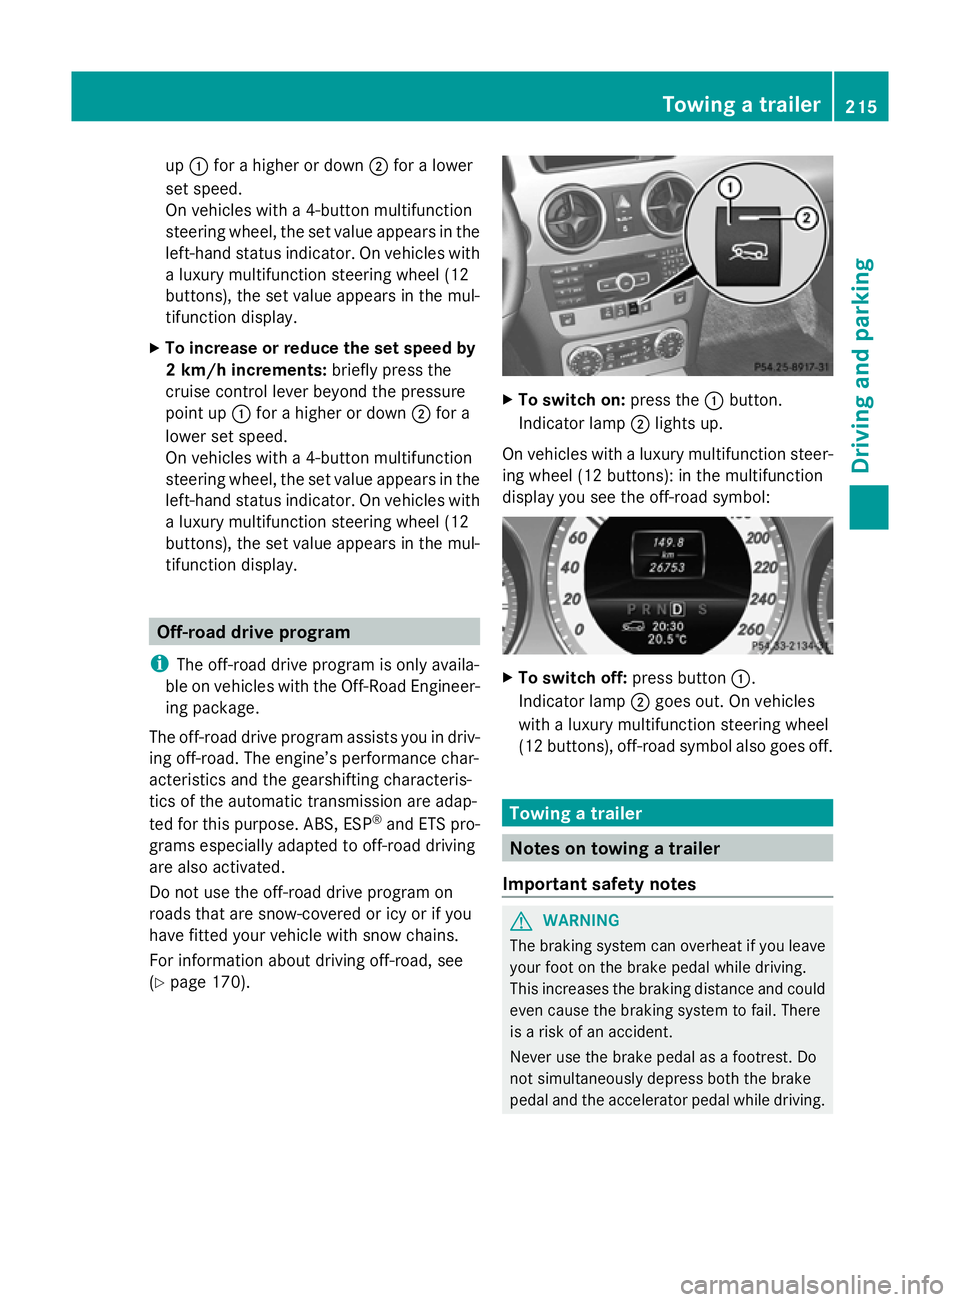
To switch on: press the:button.
Indicator lamp ;lights up.
On vehicles with a luxury multifunction steer-
ing wheel (12 buttons): in the multifunction
display you see the off-road symbol: X
To switch off: press button:.
Indicator lamp ;goes out. On vehicles
with a luxury multifunction steering wheel
(12 buttons), off-road symbol also goes off. Towing a trailer
Notes on towing a trailer
Important safety notes G
WARNING
The braking system can overheat if you leave
your foot on the brake pedal while driving.
This increases the braking distance and could
even cause the braking system to fail. There
is a risk of an accident.
Never use the brake pedal as a footrest. Do
not simultaneously depress both the brake
pedal and the accelerator pedal while driving. Towing a trailer
215Driving and parking Z
Page 223 of 381
Coupling up a trailer
G
WARNING
If you uncouple a trailer with an engaged over-
run brake, you could trap your hand between
the vehicle and the trailer drawbar. This poses
a risk of injury.
Do not uncouple a trailer with an engaged
overrun brake.
X Make sure that the transmission is in posi-
tion P.
X Engage the parking brake.
X Position the trailer level behind the vehicle.
X Couple up the trailer.
X Establish the electric connection between
the vehicle and the trailer.
X Check that the trailer lighting system is
working. Uncoupling a trailer
G
WARNING
Vehicles with level control:
If you disconnect the trailer cable, the vehicle
is lowered. This can cause you or others to
become trapped between the vehicle body
and tyres, or underneath the vehicle. This
poses a risk of injury.
Make sure that no-one is in the immediate
vicinity of the wheel arch or underneath the
vehicle when disconnecting the trailer cable.
! Do not disconnect a trailer with an
engaged overrun brake. Otherwise, your
vehicle could be damaged by the rebound-
ing of the overrun brake.
X Make sure that the transmission is in posi-
tion P.
X Engage the parking brake.
X Secure the trailer against rolling away.
X Remove the trailer cable and decouple the
trailer. Removing the ball coupling
X Pull the protective cap off the lock in the
handwheel.
X Use the key to unlock the lock in the hand-
wheel.
X Hold the ball coupling. Pull the handwheel
away from the ball coupling and turn it
clockwise until it engages.
The green area on the ball coupling is
aligned with the red mark on the hand-
wheel.
X Pull the ball coupling downwards to
remove.
X Clean the ball coupling if it is dirty.
Information on cleaning and care of the trailer
tow hitch can be found under (Y page 321). Storing the ball coupling
G
WARNING
Never transport an unsecured ball coupling in
the interior of the vehicle.
Otherwise, vehicle occupants could be
injured by the ball coupling being thrown if
you:
R brake sharply
R change direction suddenly
R have an accident
X Open the stowage well under the luggage
compartment floor.
X Remove the cover from the ball coupling
recess.
X Remove the protective cap from the ball
coupling recess.
X Press the protective cap into the ball cou-
pling recess until it engages.
X Make sure that the protective cap is firmly
in place.
X Store the ball coupling with the key inser-
ted in the ball coupling recess. 220
Towing a trailerDriving and parking
Page 227 of 381
Useful information
i This Owner's Manual describes all mod-
els, series and optional equipment for your
vehicle that were available at the time of
going to press. National variations are pos-
sible. Note that your vehicle may not be
equipped with all of the functions descri-
bed. This is also the case for systems and
functions relevant to safety.
i Read the information on qualified special-
ist workshops: (Y page 27). Important safety notes
G
WARNING
Only use the on-board computer when road
and traffic conditions permit. You would oth-
erwise be distracted and unable to concen-
trate properly on driving, and could cause an
accident. G
WARNING
No messages will be displayed if either the
instrument cluster or the multifunction dis-
play is inoperative.
As a result, you will not be able to see infor-
mation about your driving conditions, such as
speed, outside temperature, warning and indi-
cator lamps, display messages or system fail-
ures. Driving characteristics may be impaired.
Adjust your driving style and vehicle speed
accordingly.
Contact a qualified specialist workshop
immediately. G
WARNING
The on-board computer only records and dis-
plays malfunctions and warnings from certain
systems. For this reason, you should always
make sure that your vehicle is safe to use. You
could otherwise cause an accident by driving
an unsafe vehicle. G
WARNING
The operating safety of your vehicle could be
impaired if maintenance work is carried out
incorrectly. This could cause you to lose con-
trol of your vehicle and cause an accident.
Moreover, the safety systems may no longer
be able to protect you or others as they are
designed to do.
Always have service work carried out at a
qualified specialist workshop.
Illustration of the instrument cluster
R 4-button multifunction steering wheel, see
(Y page 31)
R 12-button multifunction steering wheel,
see (Y page 33) Displays and operation (4-button mul-
tifunction steering wheel)
Instrument cluster lighting
The lighting in the instrument cluster, in the
displays and the controls in the vehicle inte-
rior can be adjusted using the brightness con-
trol knob.
The brightness control knob is located on the
bottom left of the instrument cluster
(Y page 33).
X Turn the brightness control knob clockwise
or anti-clockwise.
If the light switch is set to Ã,Tor
L, the brightness is dependent upon
the brightness of the ambient light.
i The light sensor in the instrument cluster
automatically controls the brightness of
the multifunction display.
In daylight, the displays in the instrument
cluster are not illuminated. Coolant temperature gauge
The coolant temperature gauge is in the
instrument cluster on the left-hand side. 224
Displays and operation (4-button multifunction steering wheel)On-board computer and displays
Page 228 of 381
Under normal operating conditions and with
the specified coolant level, the coolant tem-
perature may rise to 120 †.
At high outside temperatures and when driv-
ing uphill, the coolant temperature may rise
to the end of the scale. Rev counter
The red band in the rev counter indicates the
engine's overrevving range.
! Do not drive in the overrevving range.
Doing so will damage the engine.
The fuel supply is interrupted to protect the
engine when the red band is reached. Outside temperature display
The outside temperature display is in the
instrument cluster (Y page 31).G
WARNING
At temperatures just above freezing point, the
street may be icy, especially in wooded areas
or on bridges. If you do not adapt your driving
style to the conditions, the vehicle could skid.
For this reason, adapt your driving style and
speed to the weather conditions.
Changes in the outside temperature are dis-
played after a short delay. Operating the on-board computer
The on-board computer is activated as soon
as you turn the key to position 1in the ignition
lock. You can use the on-board computer to
call up information relating to your vehicle
and to make and adjust settings.
i You can have certain functions set at a
qualified specialist workshop, e.g. a
Mercedes-Benz Service Centre. Examples:
R
automatic door locking
R speed limit for winter tyres
You can obtain information about this at
any Mercedes-Benz Service Centre.
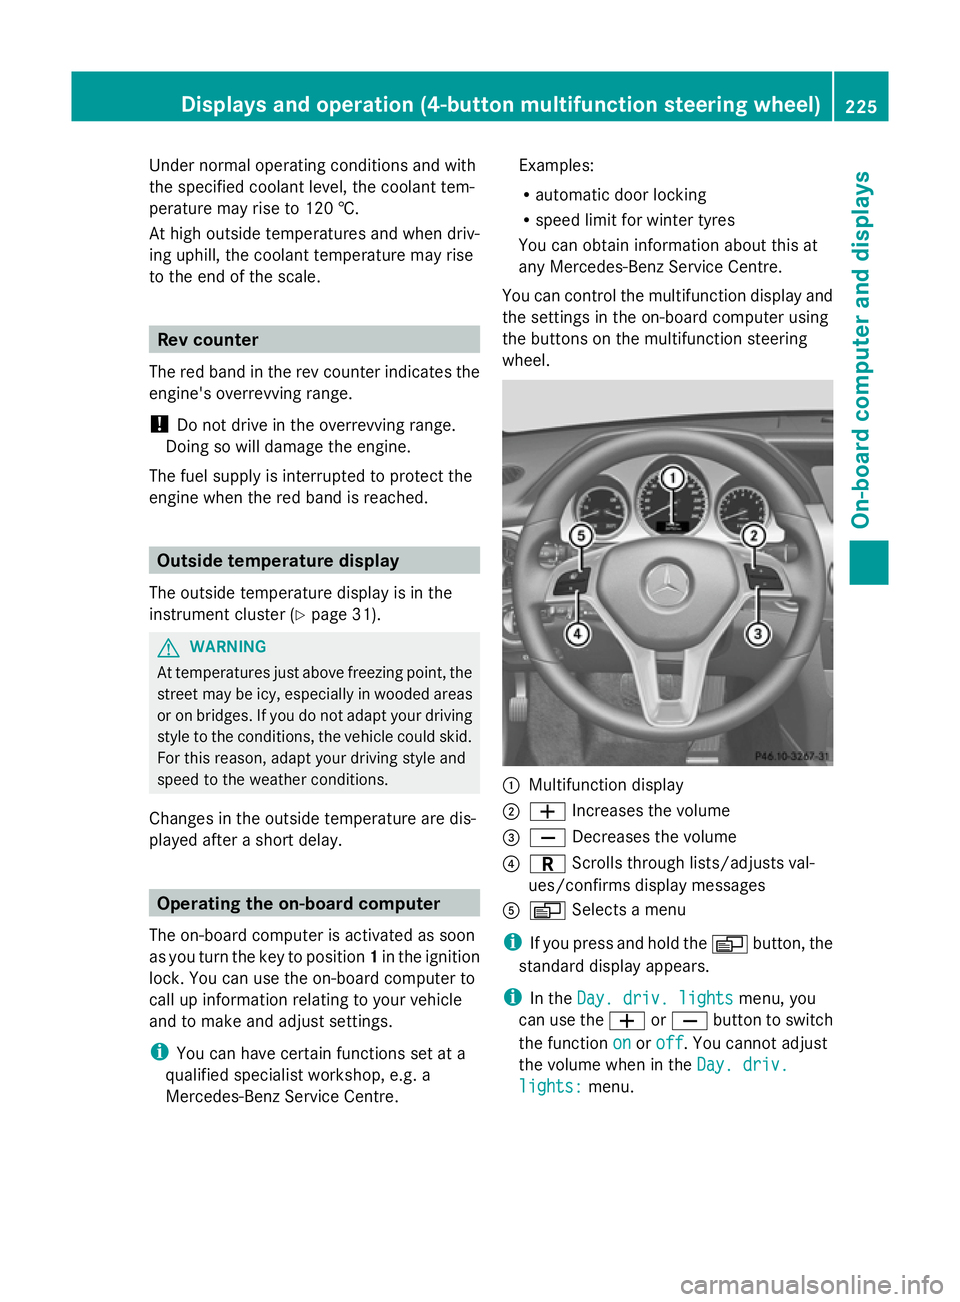
You can control the multifunction display and
the settings in the on-board computer using
the buttons on the multifunction steering
wheel. :
Multifunction display
; W Increases the volume
= X Decreases the volume
? C Scrolls through lists/adjusts val-
ues/confirms display messages
A V Selects a menu
i If you press and hold the Vbutton, the
standard display appears.
i In the Day. driv. lights Day. driv. lights menu, you
can use the WorX button to switch
the function on
onoroff
off. You cannot adjust
the volume when in the Day. driv.
Day. driv.
lights:
lights: menu. Displays and operation (4-button multifunction steering wheel)
225On-board computer and displays Z