2012 MERCEDES-BENZ GL low beam
[x] Cancel search: low beamPage 126 of 384
GDANGER
Xenon bulbs carry a high voltage. You could
get an electric shock and be seriously or even
fatally injured if you touch the electric
contacts on Xenon bulbs. Therefore, never
remove the cover from Xenon bulbs.
Do not change Xenon bulbs yourself, but have
them replaced at a qualified specialist
workshop which has the necessary specialist
knowledge and tools to carry out the work
required.
Mercedes-Benz recommends that you use an
authorized Mercedes-Benz Center for this
purpose. In particular, work relevant to safety
or on safety-related systems must be carried
out at a qualified specialist workshop.
Bulbs and lamps are an important aspect of
vehicle safety. You must therefore make sure
that these function correctly at all times.
Have the headlamp setting checked regularly.
Other bulbs
There are bulbs other than the Xenon bulbs
that you cannot replace. Replace only the
bulbs listed (Y page 124). Have the bulbs that
you cannot replace yourself changed at a
qualified specialist workshop.
Mercedes-Benz recommends that you use an
authorized Mercedes-Benz Center for this
purpose. In particular, work relevant to safety
or on safety-related systems must be carried
out at a qualified specialist workshop.
If you require assistance changing bulbs,
consult a qualified specialist workshop.
Do not touch the glass tube of new bulbs with
your bare hands. Even minor contamination
can burn into the glass surface and reduce
the service life of the bulbs. Always use a lint-
free cloth or only touch the base of the bulb
when installing.
Only use bulbs of the correct type.
If the new bulb still does not light up, consult
a qualified specialist workshop.
Bulbs and lamps are an important aspect of
vehicle safety. You must therefore make sure
that these function correctly at all times.
Have the headlamp setting checked regularly.GWARNING
Bulbs and lamps can be very hot. You should
therefore allow them to cool down before you
change them. Otherwise, you could be burned
if you touch them.
Keep bulbs out of the reach of children.
Otherwise, they could damage the bulbs, for
example, and injure themselves.
Never use a bulb which has been dropped.
Such a bulb may break or even explode and
injure you.
Halogen bulbs are pressurized and can
explode when you change them, particularly
if they are very hot. You should therefore wear
eye protection and gloves when you are
changing them.
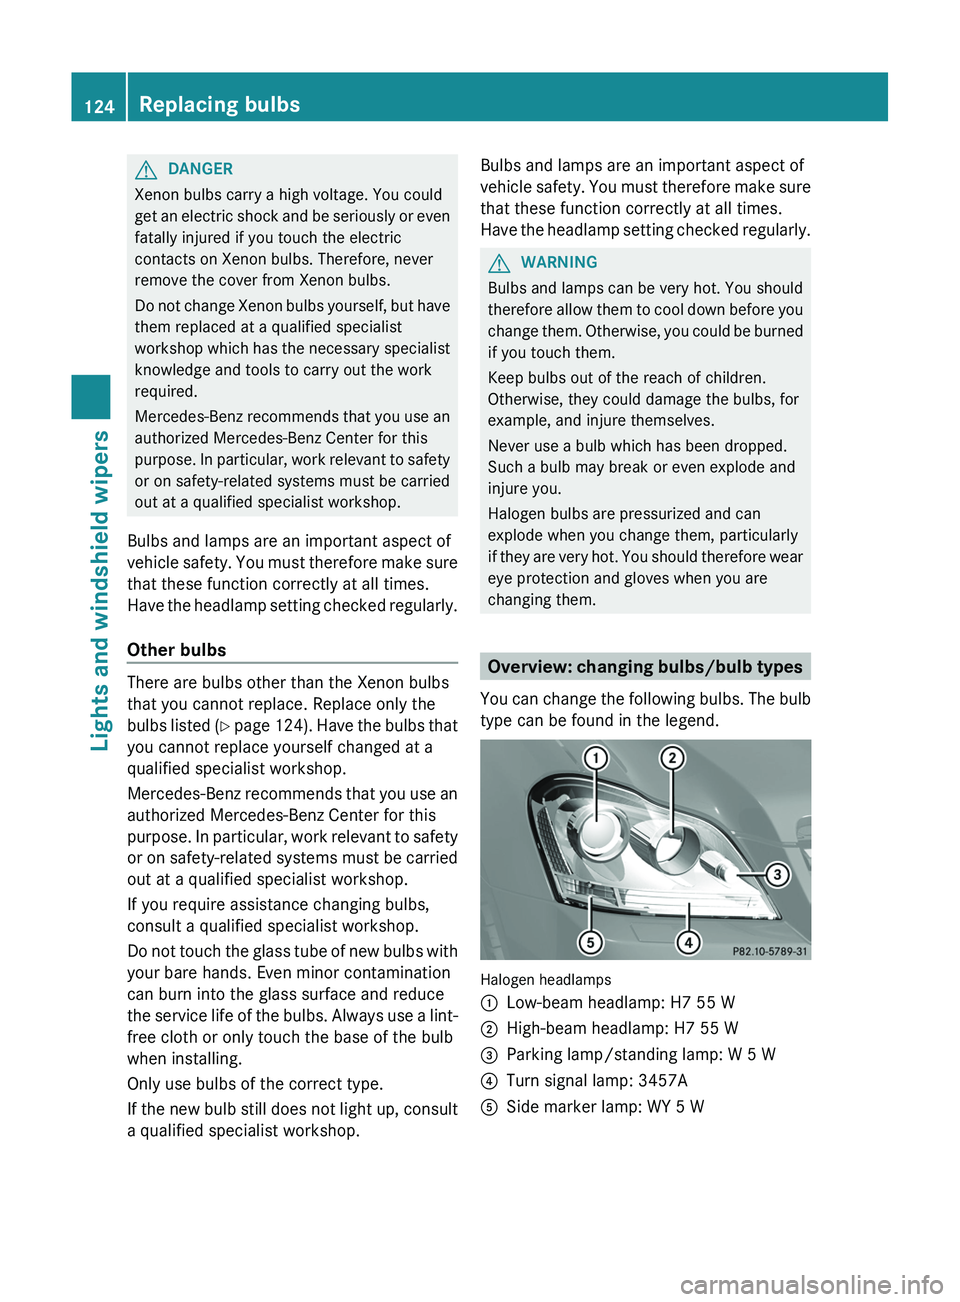
Overview: changing bulbs/bulb types
You can change the following bulbs. The bulb
type can be found in the legend.
Halogen headlamps
:Low-beam headlamp: H7 55 W;High-beam headlamp: H7 55 W=Parking lamp/standing lamp: W 5 W?Turn signal lamp: 3457AASide marker lamp: WY 5 W124Replacing bulbsLights and windshield wipers
Page 127 of 384
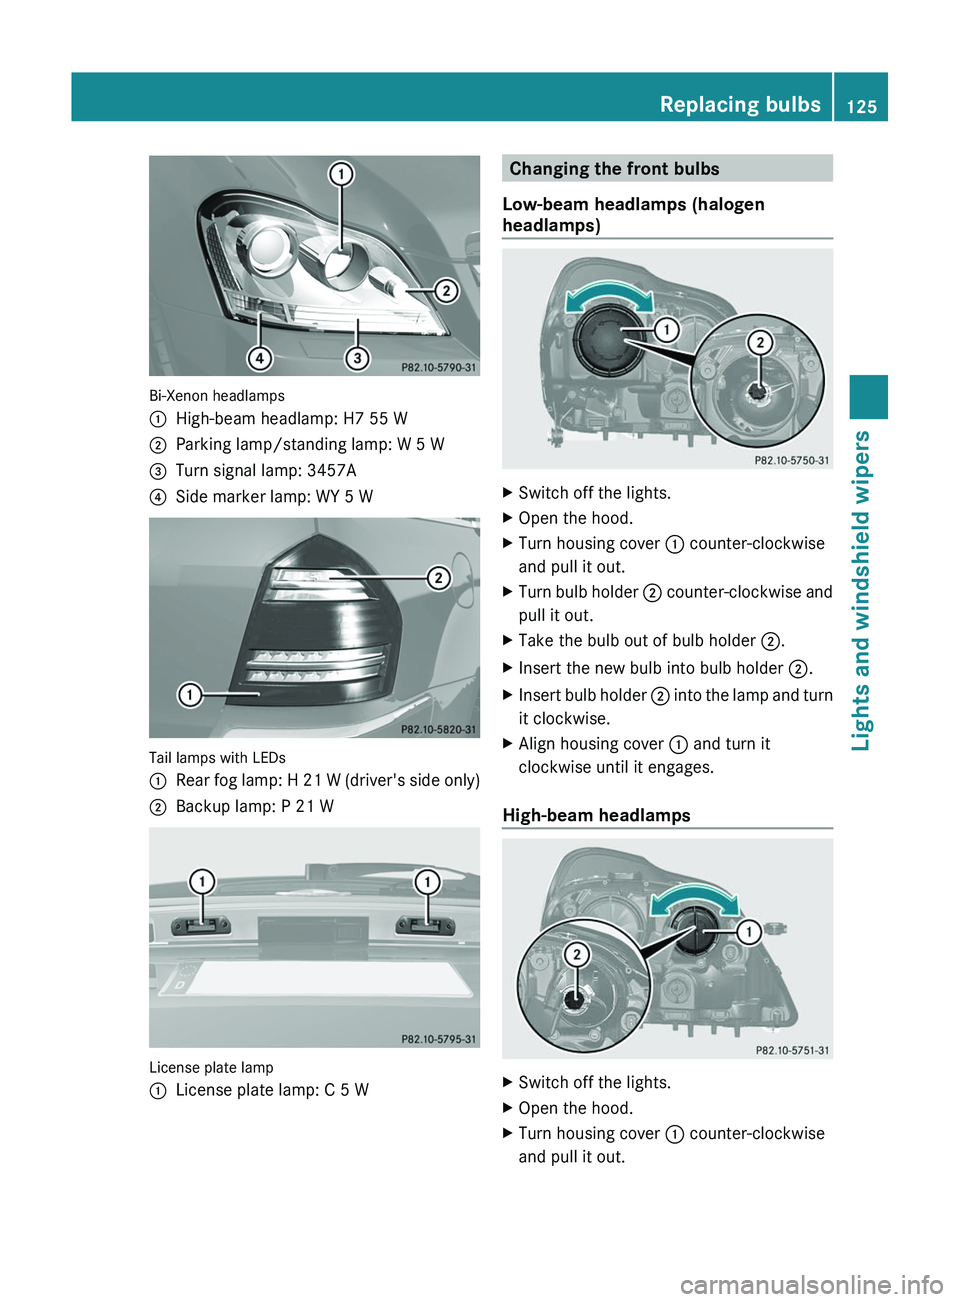
Bi-Xenon headlamps
:High-beam headlamp: H7 55 W;Parking lamp/standing lamp: W 5 W=Turn signal lamp: 3457A?Side marker lamp: WY 5 W
Tail lamps with LEDs
:Rear fog lamp: H 21 W (driver's side only);Backup lamp: P 21 W
License plate lamp
:License plate lamp: C 5 WChanging the front bulbs
Low-beam headlamps (halogen
headlamps)XSwitch off the lights.XOpen the hood.XTurn housing cover : counter-clockwise
and pull it out.XTurn bulb holder ; counter-clockwise and
pull it out.XTake the bulb out of bulb holder ;.XInsert the new bulb into bulb holder ;.XInsert bulb holder ; into the lamp and turn
it clockwise.XAlign housing cover : and turn it
clockwise until it engages.
High-beam headlamps
XSwitch off the lights.XOpen the hood.XTurn housing cover : counter-clockwise
and pull it out.Replacing bulbs125Lights and windshield wipersZ
Page 130 of 384
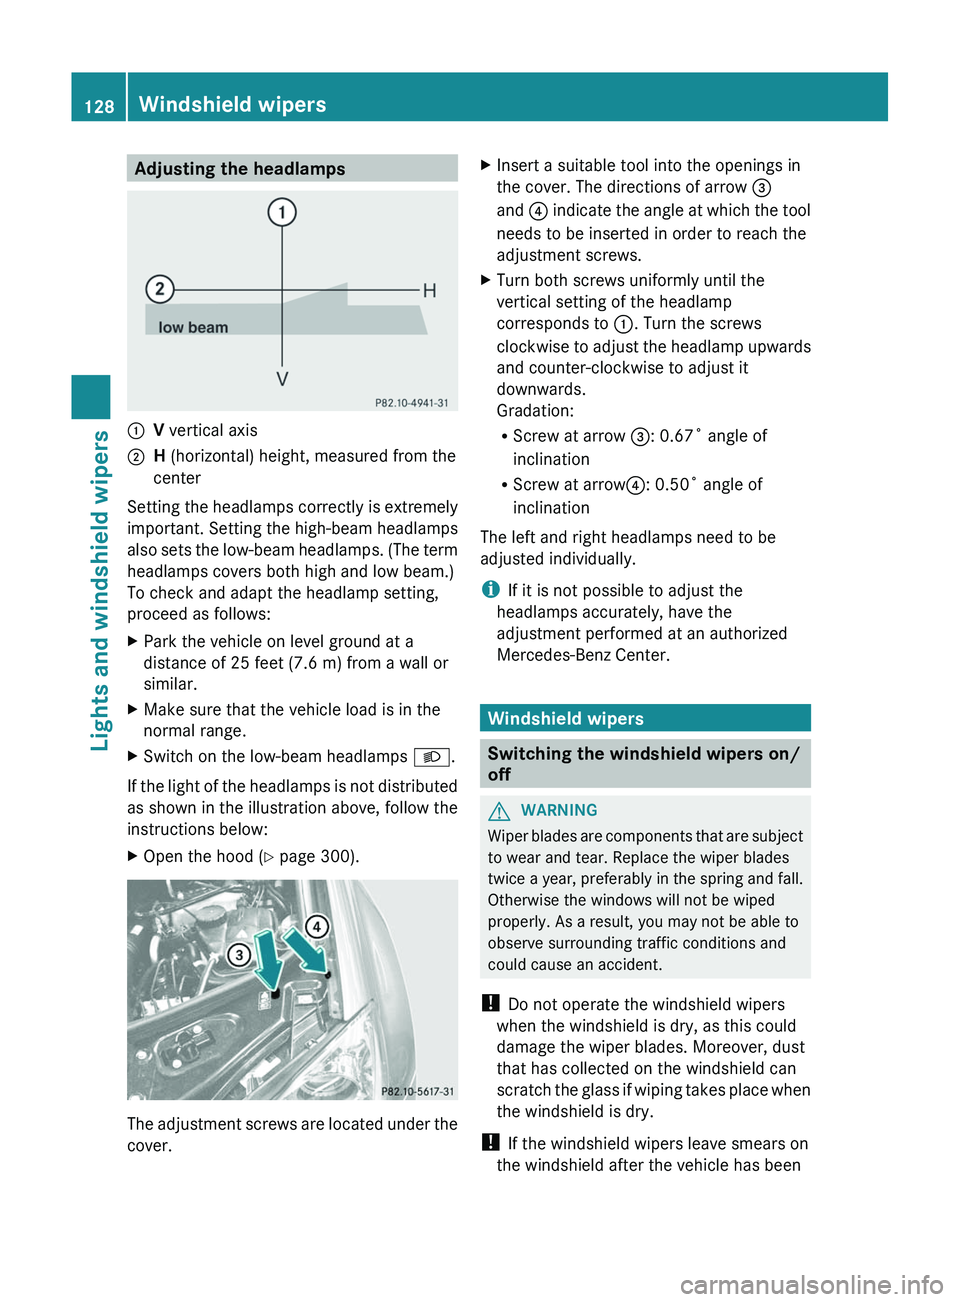
Adjusting the headlamps:V vertical axis;H (horizontal) height, measured from the
center
Setting the headlamps correctly is extremely
important. Setting the high-beam headlamps
also sets the low-beam headlamps. (The term
headlamps covers both high and low beam.)
To check and adapt the headlamp setting,
proceed as follows:
XPark the vehicle on level ground at a
distance of 25 feet (7.6 m) from a wall or
similar.XMake sure that the vehicle load is in the
normal range.XSwitch on the low-beam headlamps L.
If the light of the headlamps is not distributed
as shown in the illustration above, follow the
instructions below:
XOpen the hood ( Y page 300).
The adjustment screws are located under the
cover.
XInsert a suitable tool into the openings in
the cover. The directions of arrow =
and ? indicate the angle at which the tool
needs to be inserted in order to reach the
adjustment screws.XTurn both screws uniformly until the
vertical setting of the headlamp
corresponds to :. Turn the screws
clockwise to adjust the headlamp upwards
and counter-clockwise to adjust it
downwards.
Gradation:
R Screw at arrow =: 0.67˚ angle of
inclination
R Screw at arrow ?: 0.50˚ angle of
inclination
The left and right headlamps need to be
adjusted individually.
i If it is not possible to adjust the
headlamps accurately, have the
adjustment performed at an authorized
Mercedes-Benz Center.
Windshield wipers
Switching the windshield wipers on/
off
GWARNING
Wiper blades are components that are subject
to wear and tear. Replace the wiper blades
twice a year, preferably in the spring and fall.
Otherwise the windows will not be wiped
properly. As a result, you may not be able to
observe surrounding traffic conditions and
could cause an accident.
! Do not operate the windshield wipers
when the windshield is dry, as this could
damage the wiper blades. Moreover, dust
that has collected on the windshield can
scratch the glass if wiping takes place when
the windshield is dry.
! If the windshield wipers leave smears on
the windshield after the vehicle has been
128Windshield wipersLights and windshield wipers
Page 226 of 384
Selecting the unit of distance for the
digital speedometerXPress V or U on the steering wheel
to select the Settings menu.XPress the & button to select submenus.XPress the W or X button to select the
Instrument cluster submenu.XPress the & button to display Display
unit Digital speedometer .XPress the W or X button to select
km or miles as the unit of measurement for
distance.XPress the &, V or U button to
select a different display.
Selecting the language
The Language: function allows you to select
the language for the instrument cluster.
XPress V or U on the steering wheel
to select the Settings menu.XPress the & button to select submenus.XPress W or X to select the
Instrument cluster submenu.XPress & to select Language .XPress the W or X button to select the
desired language.XPress the &, V or U button to
select a different display.
Selecting the status line display
XPress V or U on the steering wheel
to select the Settings menu.XPress the & button to select submenus.XPress W or X to select the
Instrument cluster submenu.XPress & to select Status line
display .XPress W or X to select the display in
the status line: speed ( Speed) or outside
temperature ( Outside temp. ).
The selected display now appears
constantly in the lower multifunction
display. When you scroll through theStandard display menu (Y page 220), you
will see the display you have not selected.XPress the &, V or U button to
select a different display.
Time/date
This submenu is only available on vehicles
with no navigation module. To set the time
and the date for vehicles with a navigation
module, see the separate operating
instructions.
In the Time/date submenu, you can set the
time and date.
XPress V or U on the steering wheel
to select the Settings... menu.XPress the & button to select submenus.XPress the W or X button to select the
Time/date submenu.XTo set the time: press & to select
Clock Set Hour or Clock Set
Minute(s) .
or
XTo set the date: press & to select
Date Set Day , Date Set Month or Date
Set Year .XPress W or X to set a value.XPress the &, V or U button to
select a different display.
Lights
Switching the daytime running lamps on/
off
This function is not available in Canada.
If you have activated the Daytime Running
Lights function and the light switch is in the
$ or à position, the daytime running
lamps are automatically switched on when
the engine is running.
In the dark, the following also light up:
R the low-beam headlamps
R the parking lamps
R the tail lamps
224Menus and submenusOn-board computer and displays
Page 227 of 384
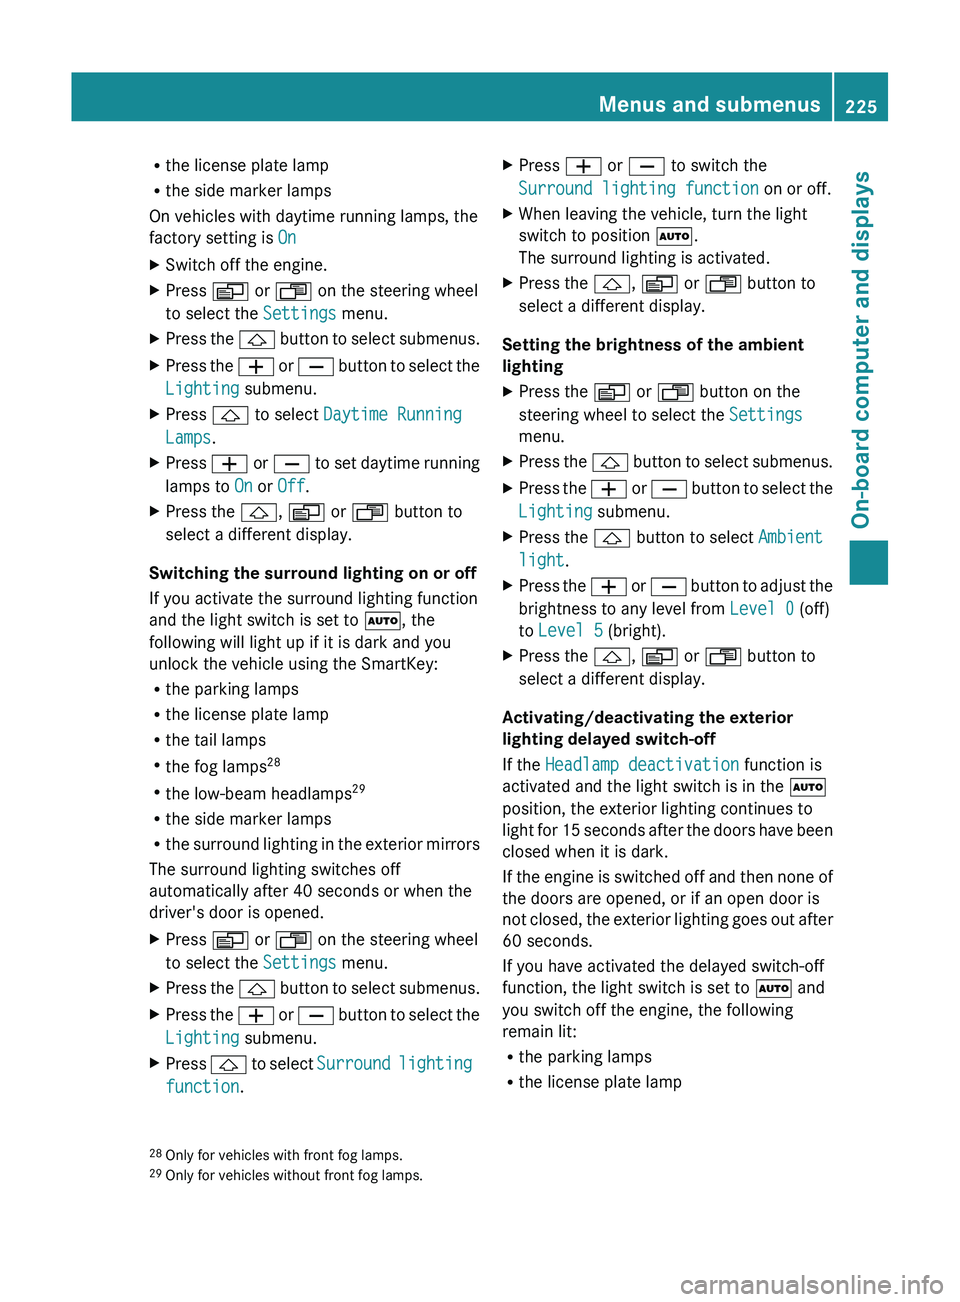
Rthe license plate lamp
R the side marker lamps
On vehicles with daytime running lamps, the
factory setting is OnXSwitch off the engine.XPress V or U on the steering wheel
to select the Settings menu.XPress the & button to select submenus.XPress the W or X button to select the
Lighting submenu.XPress & to select Daytime Running
Lamps .XPress W or X to set daytime running
lamps to On or Off .XPress the &, V or U button to
select a different display.
Switching the surround lighting on or off
If you activate the surround lighting function
and the light switch is set to Ã, the
following will light up if it is dark and you
unlock the vehicle using the SmartKey:
R the parking lamps
R the license plate lamp
R the tail lamps
R the fog lamps 28
R the low-beam headlamps 29
R the side marker lamps
R the surround lighting in the exterior mirrors
The surround lighting switches off
automatically after 40 seconds or when the
driver's door is opened.
XPress V or U on the steering wheel
to select the Settings menu.XPress the & button to select submenus.XPress the W or X button to select the
Lighting submenu.XPress & to select Surround lighting
function .XPress W or X to switch the
Surround lighting function on or off.XWhen leaving the vehicle, turn the light
switch to position Ã.
The surround lighting is activated.XPress the &, V or U button to
select a different display.
Setting the brightness of the ambient
lighting
XPress the V or U button on the
steering wheel to select the Settings
menu.XPress the & button to select submenus.XPress the W or X button to select the
Lighting submenu.XPress the & button to select Ambient
light .XPress the W or X button to adjust the
brightness to any level from Level 0 (off)
to Level 5 (bright).XPress the &, V or U button to
select a different display.
Activating/deactivating the exterior
lighting delayed switch-off
If the Headlamp deactivation function is
activated and the light switch is in the Ã
position, the exterior lighting continues to
light for 15 seconds after the doors have been
closed when it is dark.
If the engine is switched off and then none of
the doors are opened, or if an open door is
not closed, the exterior lighting goes out after
60 seconds.
If you have activated the delayed switch-off
function, the light switch is set to à and
you switch off the engine, the following
remain lit:
R the parking lamps
R the license plate lamp
28Only for vehicles with front fog lamps.
29 Only for vehicles without front fog lamps.Menus and submenus225On-board computer and displaysZ
Page 228 of 384
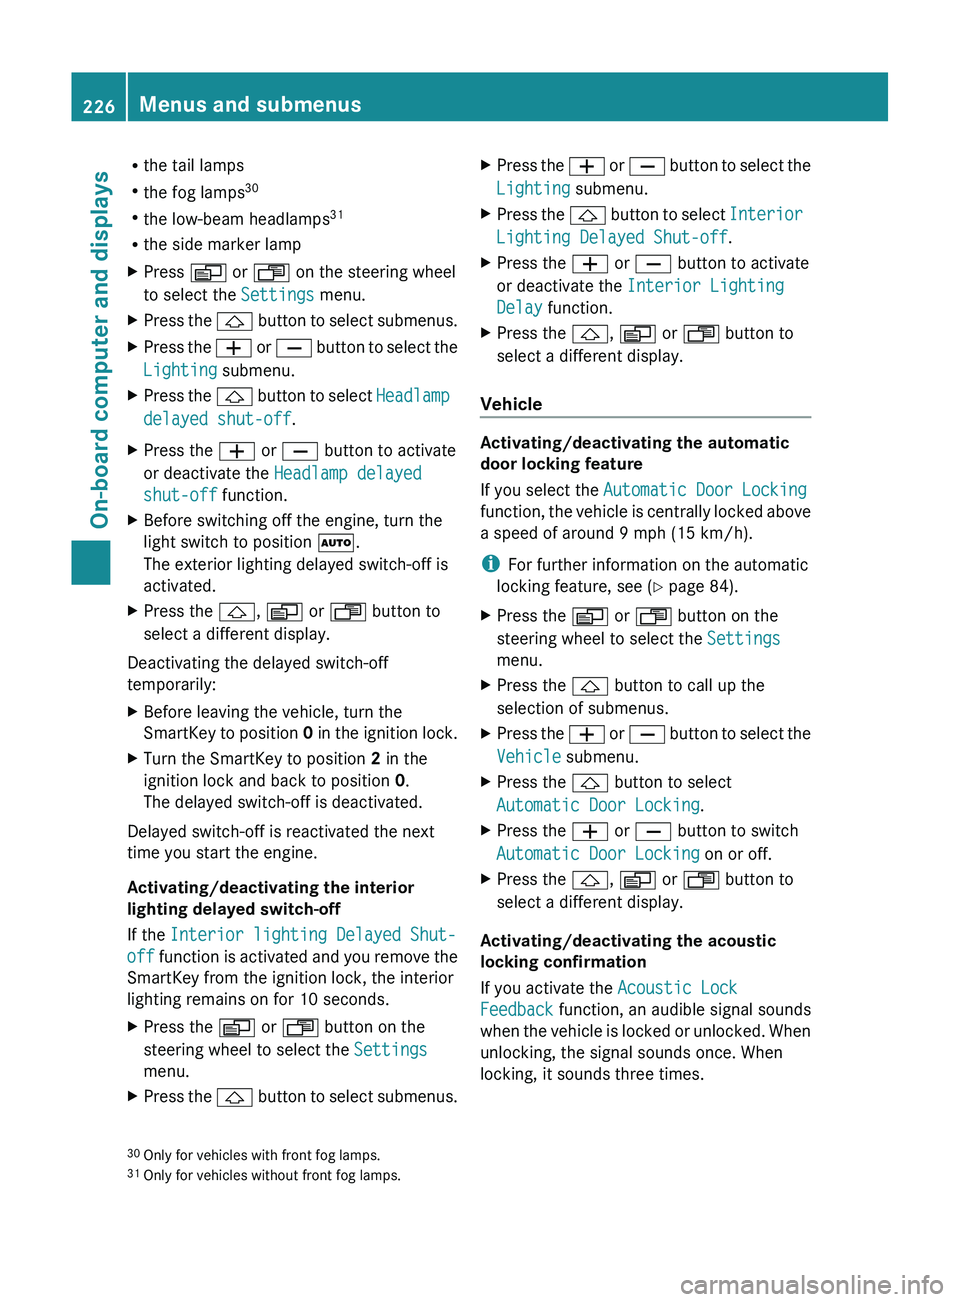
Rthe tail lamps
R the fog lamps 30
R the low-beam headlamps 31
R the side marker lampXPress V or U on the steering wheel
to select the Settings menu.XPress the & button to select submenus.XPress the W or X button to select the
Lighting submenu.XPress the & button to select Headlamp
delayed shut-off .XPress the W or X button to activate
or deactivate the Headlamp delayed
shut-off function.XBefore switching off the engine, turn the
light switch to position Ã.
The exterior lighting delayed switch-off is
activated.XPress the &, V or U button to
select a different display.
Deactivating the delayed switch-off
temporarily:
XBefore leaving the vehicle, turn the
SmartKey to position 0 in the ignition lock.XTurn the SmartKey to position 2 in the
ignition lock and back to position 0.
The delayed switch-off is deactivated.
Delayed switch-off is reactivated the next
time you start the engine.
Activating/deactivating the interior
lighting delayed switch-off
If the Interior lighting Delayed Shut-
off function is activated and you remove the
SmartKey from the ignition lock, the interior
lighting remains on for 10 seconds.
XPress the V or U button on the
steering wheel to select the Settings
menu.XPress the & button to select submenus.XPress the W or X button to select the
Lighting submenu.XPress the & button to select Interior
Lighting Delayed Shut-off .XPress the W or X button to activate
or deactivate the Interior Lighting
Delay function.XPress the &, V or U button to
select a different display.
Vehicle
Activating/deactivating the automatic
door locking feature
If you select the Automatic Door Locking
function, the vehicle is centrally locked above
a speed of around 9 mph (15 km/h).
i For further information on the automatic
locking feature, see ( Y page 84).
XPress the V or U button on the
steering wheel to select the Settings
menu.XPress the & button to call up the
selection of submenus.XPress the W or X button to select the
Vehicle submenu.XPress the & button to select
Automatic Door Locking .XPress the W or X button to switch
Automatic Door Locking on or off.XPress the &, V or U button to
select a different display.
Activating/deactivating the acoustic
locking confirmation
If you activate the Acoustic Lock
Feedback function, an audible signal sounds
when the vehicle is locked or unlocked. When
unlocking, the signal sounds once. When
locking, it sounds three times.
30 Only for vehicles with front fog lamps.
31 Only for vehicles without front fog lamps.226Menus and submenusOn-board computer and displays
Page 243 of 384
GWARNING
If the 42 indicator lamp remains lit with an adult occupant on the front-passenger
seat even after performing the above corrective steps, do not have any passenger use the front-
passenger seat until the system has been repaired.
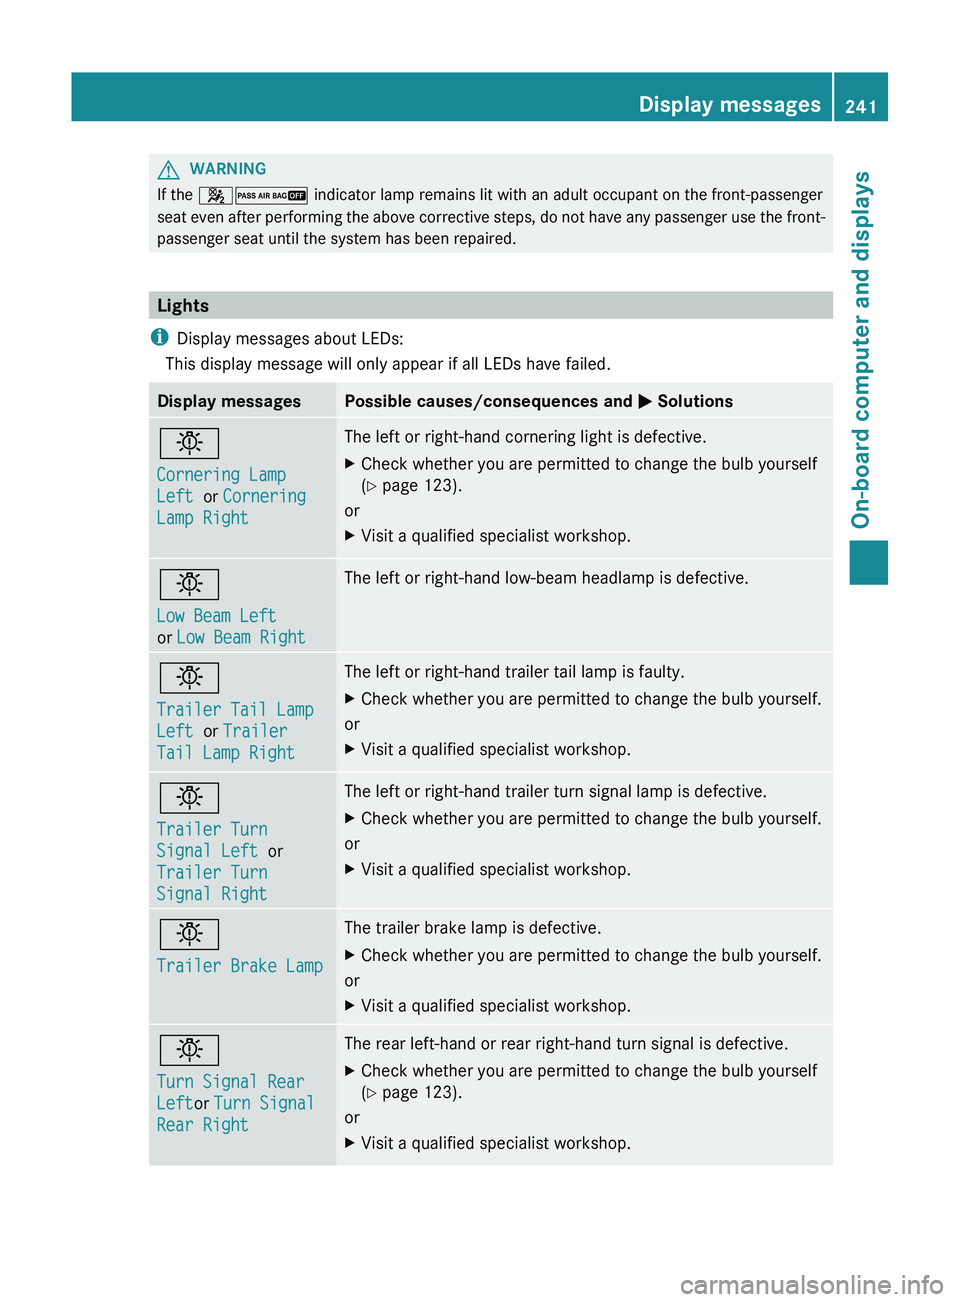
Lights
i Display messages about LEDs:
This display message will only appear if all LEDs have failed.
Display messagesPossible causes/consequences and M Solutionsb
Cornering Lamp
Left or Cornering
Lamp RightThe left or right-hand cornering light is defective.XCheck whether you are permitted to change the bulb yourself
( Y page 123).
or
XVisit a qualified specialist workshop.b
Low Beam Left
or Low Beam RightThe left or right-hand low-beam headlamp is defective.b
Trailer Tail Lamp
Left or Trailer
Tail Lamp RightThe left or right-hand trailer tail lamp is faulty.XCheck whether you are permitted to change the bulb yourself.
or
XVisit a qualified specialist workshop.b
Trailer Turn
Signal Left or
Trailer Turn
Signal RightThe left or right-hand trailer turn signal lamp is defective.XCheck whether you are permitted to change the bulb yourself.
or
XVisit a qualified specialist workshop.b
Trailer Brake LampThe trailer brake lamp is defective.XCheck whether you are permitted to change the bulb yourself.
or
XVisit a qualified specialist workshop.b
Turn Signal Rear
Left or Turn Signal
Rear RightThe rear left-hand or rear right-hand turn signal is defective.XCheck whether you are permitted to change the bulb yourself
( Y page 123).
or
XVisit a qualified specialist workshop.Display messages241On-board computer and displaysZ