2012 MERCEDES-BENZ GL inflation pressure
[x] Cancel search: inflation pressurePage 176 of 384

Slippery road surfacesGWARNING
The outside temperature indicator is not
designed to serve as an ice-warning device
and is therefore unsuitable for that purpose.
Indicated temperatures just above the
freezing point do not guarantee that the road
surface is free of ice. The road may still be icy,
especially in wooded areas or on bridges.
GWARNING
On slippery road surfaces, never downshift in
order to obtain braking action. This could
result in drive wheel slip and reduced vehicle
control. Your vehicle's ABS will not prevent
this type of control loss.
Do not engage the transfer case in position
LOW when driving on ice or packed snow. At
speeds below 18 mph (30 km/h) vehicle
steering is adversely affected by the Off-road
ABS.
Drive particularly carefully on slippery road
surfaces. Avoid sudden acceleration, steering
and braking maneuvers. Do not use cruise
control.
If the vehicle threatens to skid or cannot be
stopped when moving at low speed:
XShift the transmission to position N.
i
For more information on driving with
snow chains, see ( Y page 173).
GWARNING
Make sure that you do not endanger other
road users when you apply the brakes.
Off-road driving
Important safety notes
GWARNING
Grains of sand, particles of dirt and other
abrasive materials can enter the brake
system. This can lead to excessive wear and
unpredictable braking efficiency.
After the brakes have been exposed to dirty
conditions, have them checked and cleaned
at a qualified specialist workshop, e.g. an
authorized Mercedes-Benz Center.
Otherwise, there is a risk that braking power
may be insufficient in the event of an
emergency, or that the braking effect may be
unpredictable.GWARNING
Do not load items on the crossbars. It may
cause instability during some maneuvers
which could result in an accident.
Drive slowly in unknown terrain. This will
make it easier to recognize unexpected
obstacles and avoid damage to the vehicle.
To help avoid the vehicle rolling over, never
turn it around on steep inclines. If the vehicle
cannot complete the attempted climb, back it
down in reverse gear.
Do not drive along the side of a slope. The
vehicle might otherwise rollover. If in doing so
the vehicle begins to show a tendency to roll,
immediately steer into a line of gravity
(straight up or downhill).
Never let the vehicle roll backwards in idle.
You may lose control of the vehicle if you use
only the service brake. For information on
driving downhill, see "Driving downhill".
GWARNING
Please be aware that by raising the vehicle
level, the center of gravity also rises.
Therefore, always ensure that the vehicle
level is as low as possible. With higher ride
height the ESP ®
may activate earlier in certain
situations.
GWARNING
Do not reduce the tire inflation pressure
before driving through sand. However, if you
do so, remember to correct the tire inflation
pressure before continuing your trip. Driving
with reduced tire inflation pressure increases
174Driving tipsDriving and parking
Page 178 of 384
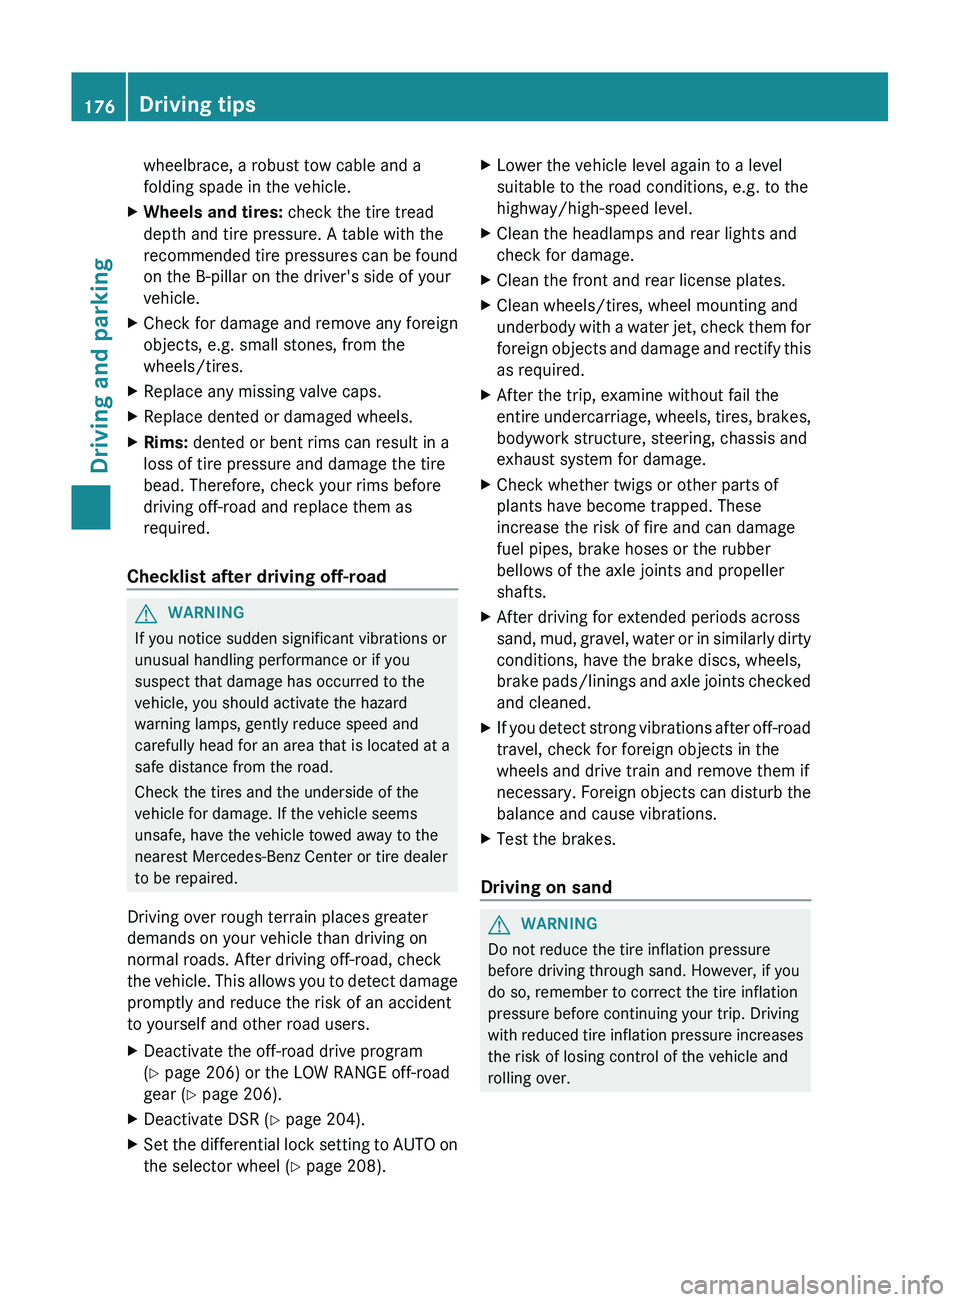
wheelbrace, a robust tow cable and a
folding spade in the vehicle.XWheels and tires: check the tire tread
depth and tire pressure. A table with the
recommended tire pressures can be found
on the B-pillar on the driver's side of your
vehicle.XCheck for damage and remove any foreign
objects, e.g. small stones, from the
wheels/tires.XReplace any missing valve caps.XReplace dented or damaged wheels.XRims: dented or bent rims can result in a
loss of tire pressure and damage the tire
bead. Therefore, check your rims before
driving off-road and replace them as
required.
Checklist after driving off-road
GWARNING
If you notice sudden significant vibrations or
unusual handling performance or if you
suspect that damage has occurred to the
vehicle, you should activate the hazard
warning lamps, gently reduce speed and
carefully head for an area that is located at a
safe distance from the road.
Check the tires and the underside of the
vehicle for damage. If the vehicle seems
unsafe, have the vehicle towed away to the
nearest Mercedes-Benz Center or tire dealer
to be repaired.
Driving over rough terrain places greater
demands on your vehicle than driving on
normal roads. After driving off-road, check
the vehicle. This allows you to detect damage
promptly and reduce the risk of an accident
to yourself and other road users.
XDeactivate the off-road drive program
( Y page 206) or the LOW RANGE off-road
gear ( Y page 206).XDeactivate DSR ( Y page 204).XSet the differential lock setting to AUTO on
the selector wheel ( Y page 208).XLower the vehicle level again to a level
suitable to the road conditions, e.g. to the
highway/high-speed level.XClean the headlamps and rear lights and
check for damage.XClean the front and rear license plates.XClean wheels/tires, wheel mounting and
underbody with a water jet, check them for
foreign objects and damage and rectify this
as required.XAfter the trip, examine without fail the
entire undercarriage, wheels, tires, brakes,
bodywork structure, steering, chassis and
exhaust system for damage.XCheck whether twigs or other parts of
plants have become trapped. These
increase the risk of fire and can damage
fuel pipes, brake hoses or the rubber
bellows of the axle joints and propeller
shafts.XAfter driving for extended periods across
sand, mud, gravel, water or in similarly dirty
conditions, have the brake discs, wheels,
brake pads/linings and axle joints checked
and cleaned.XIf you detect strong vibrations after off-road
travel, check for foreign objects in the
wheels and drive train and remove them if
necessary. Foreign objects can disturb the
balance and cause vibrations.XTest the brakes.
Driving on sand
GWARNING
Do not reduce the tire inflation pressure
before driving through sand. However, if you
do so, remember to correct the tire inflation
pressure before continuing your trip. Driving
with reduced tire inflation pressure increases
the risk of losing control of the vehicle and
rolling over.
176Driving tipsDriving and parking
Page 254 of 384
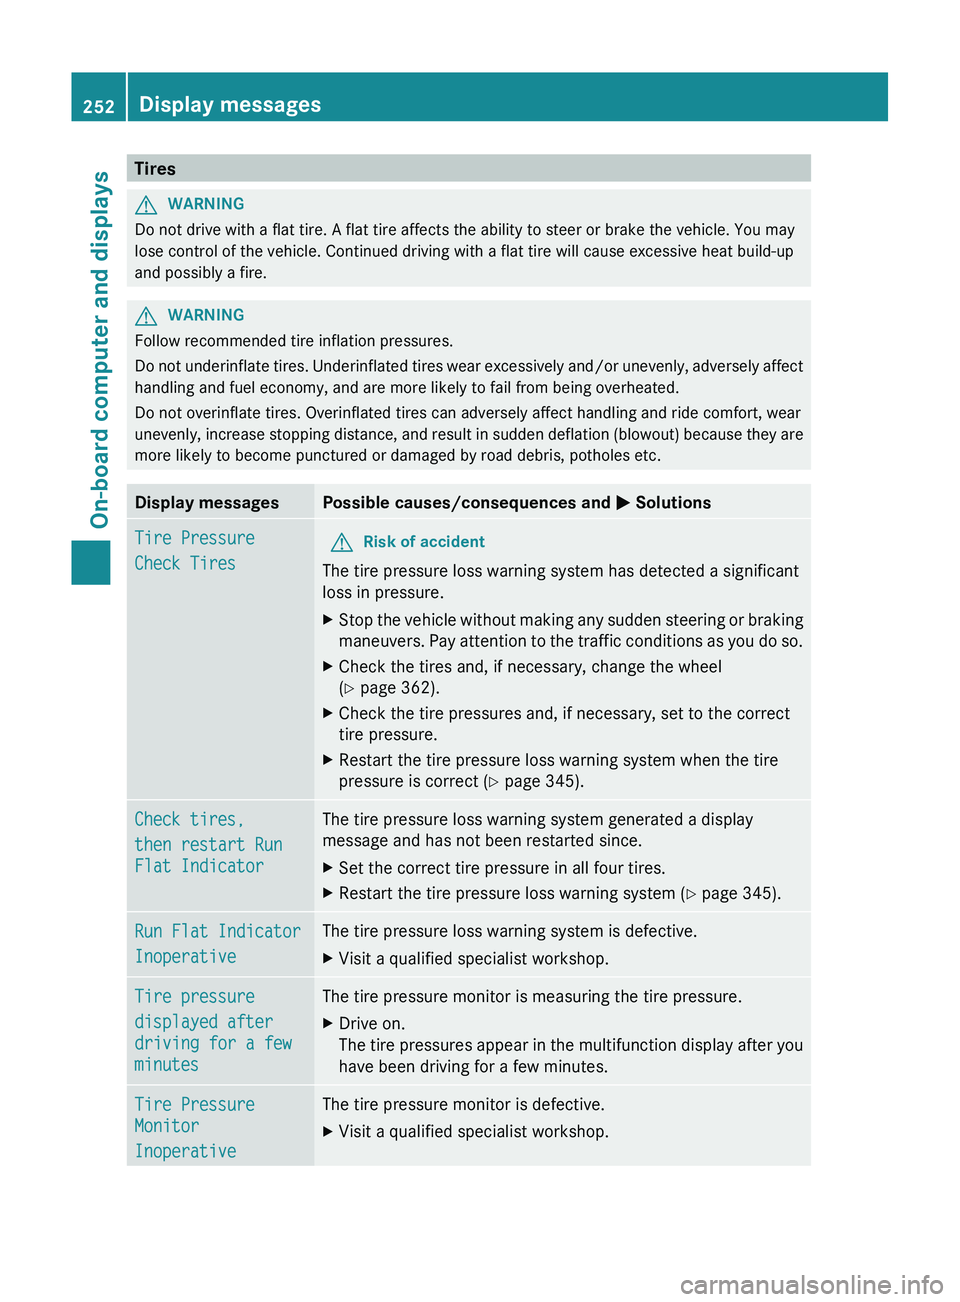
TiresGWARNING
Do not drive with a flat tire. A flat tire affects the ability to steer or brake the vehicle. You may
lose control of the vehicle. Continued driving with a flat tire will cause excessive heat build-up
and possibly a fire.
GWARNING
Follow recommended tire inflation pressures.
Do not underinflate tires. Underinflated tires wear excessively and/or unevenly, adversely affect
handling and fuel economy, and are more likely to fail from being overheated.
Do not overinflate tires. Overinflated tires can adversely affect handling and ride comfort, wear
unevenly, increase stopping distance, and result in sudden deflation (blowout) because they are
more likely to become punctured or damaged by road debris, potholes etc.
Display messagesPossible causes/consequences and M SolutionsTire Pressure
Check TiresGRisk of accident
The tire pressure loss warning system has detected a significant
loss in pressure.
XStop the vehicle without making any sudden steering or braking
maneuvers. Pay attention to the traffic conditions as you do so.XCheck the tires and, if necessary, change the wheel
( Y page 362).XCheck the tire pressures and, if necessary, set to the correct
tire pressure.XRestart the tire pressure loss warning system when the tire
pressure is correct ( Y page 345).Check tires,
then restart Run
Flat IndicatorThe tire pressure loss warning system generated a display
message and has not been restarted since.XSet the correct tire pressure in all four tires.XRestart the tire pressure loss warning system ( Y page 345).Run Flat Indicator
InoperativeThe tire pressure loss warning system is defective.XVisit a qualified specialist workshop.Tire pressure
displayed after
driving for a few
minutesThe tire pressure monitor is measuring the tire pressure.XDrive on.
The tire pressures appear in the multifunction display after you
have been driving for a few minutes.Tire Pressure
Monitor
InoperativeThe tire pressure monitor is defective.XVisit a qualified specialist workshop.252Display messagesOn-board computer and displays
Page 267 of 384
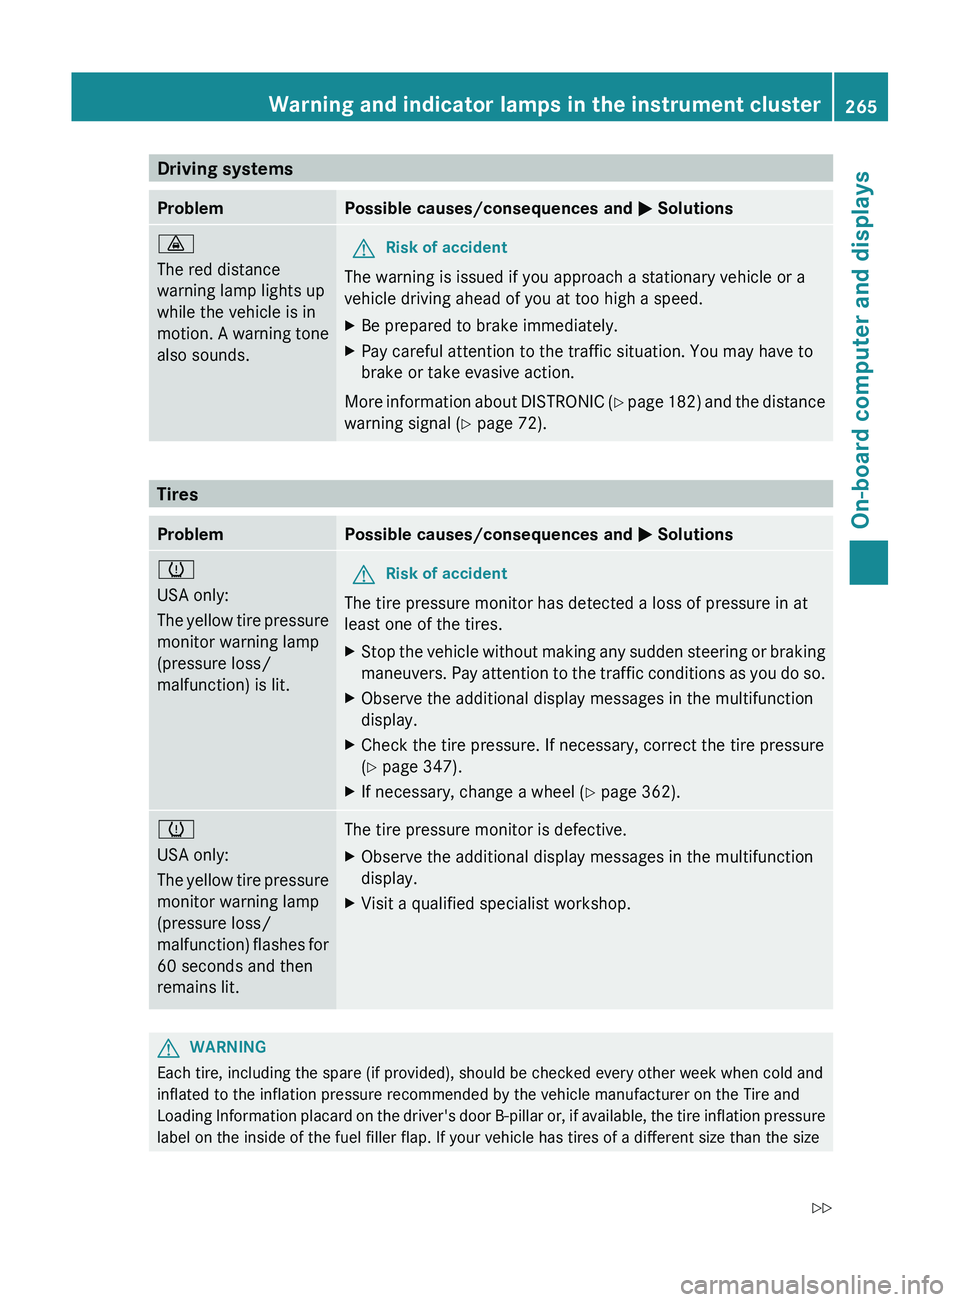
Driving systemsProblemPossible causes/consequences and M Solutions·
The red distance
warning lamp lights up
while the vehicle is in
motion. A warning tone
also sounds.GRisk of accident
The warning is issued if you approach a stationary vehicle or a
vehicle driving ahead of you at too high a speed.
XBe prepared to brake immediately.XPay careful attention to the traffic situation. You may have to
brake or take evasive action.
More information about DISTRONIC (Y page 182) and the distance
warning signal ( Y page 72).
Tires
ProblemPossible causes/consequences and M Solutionsh
USA only:
The yellow tire pressure
monitor warning lamp
(pressure loss/
malfunction) is lit.GRisk of accident
The tire pressure monitor has detected a loss of pressure in at
least one of the tires.
XStop the vehicle without making any sudden steering or braking
maneuvers. Pay attention to the traffic conditions as you do so.XObserve the additional display messages in the multifunction
display.XCheck the tire pressure. If necessary, correct the tire pressure
( Y page 347).XIf necessary, change a wheel ( Y page 362).h
USA only:
The yellow tire pressure
monitor warning lamp
(pressure loss/
malfunction) flashes for
60 seconds and then
remains lit.The tire pressure monitor is defective.XObserve the additional display messages in the multifunction
display.XVisit a qualified specialist workshop.GWARNING
Each tire, including the spare (if provided), should be checked every other week when cold and
inflated to the inflation pressure recommended by the vehicle manufacturer on the Tire and
Loading Information placard on the driver's door B-pillar or, if available, the tire inflation pressure
label on the inside of the fuel filler flap. If your vehicle has tires of a different size than the size
Warning and indicator lamps in the instrument cluster265On-board computer and displaysZ
Page 268 of 384
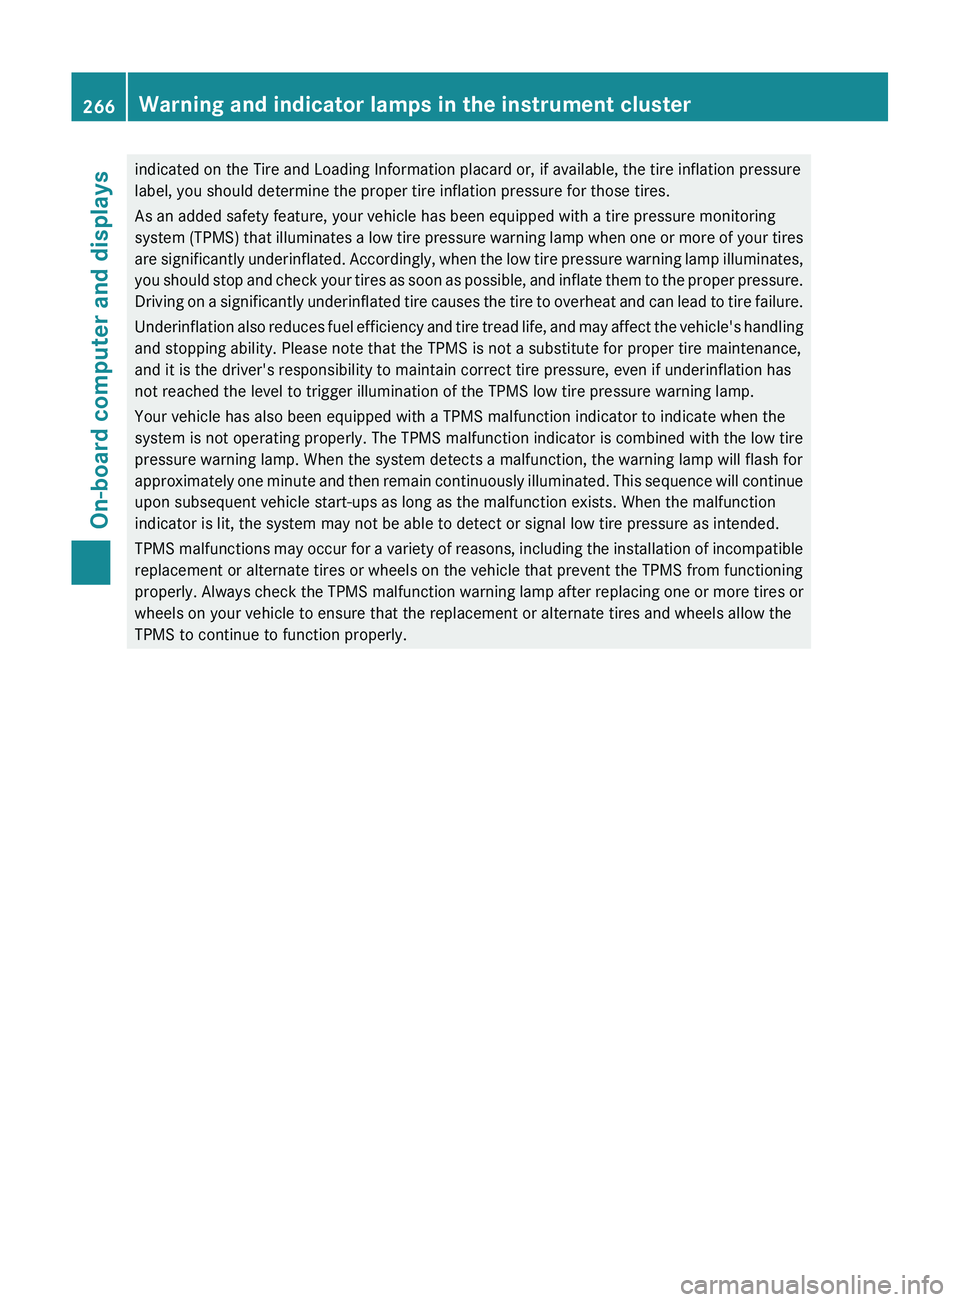
indicated on the Tire and Loading Information placard or, if available, the tire inflation pressure
label, you should determine the proper tire inflation pressure for those tires.
As an added safety feature, your vehicle has been equipped with a tire pressure monitoring
system (TPMS) that illuminates a low tire pressure warning lamp when one or more of your tires
are significantly underinflated. Accordingly, when the low tire pressure warning lamp illuminates,
you should stop and check your tires as soon as possible, and inflate them to the proper pressure.
Driving on a significantly underinflated tire causes the tire to overheat and can lead to tire failure.
Underinflation also reduces fuel efficiency and tire tread life, and may affect the vehicle's handling
and stopping ability. Please note that the TPMS is not a substitute for proper tire maintenance,
and it is the driver's responsibility to maintain correct tire pressure, even if underinflation has
not reached the level to trigger illumination of the TPMS low tire pressure warning lamp.
Your vehicle has also been equipped with a TPMS malfunction indicator to indicate when the
system is not operating properly. The TPMS malfunction indicator is combined with the low tire
pressure warning lamp. When the system detects a malfunction, the warning lamp will flash for
approximately one minute and then remain continuously illuminated. This sequence will continue
upon subsequent vehicle start-ups as long as the malfunction exists. When the malfunction
indicator is lit, the system may not be able to detect or signal low tire pressure as intended.
TPMS malfunctions may occur for a variety of reasons, including the installation of incompatible
replacement or alternate tires or wheels on the vehicle that prevent the TPMS from functioning
properly. Always check the TPMS malfunction warning lamp after replacing one or more tires or
wheels on your vehicle to ensure that the replacement or alternate tires and wheels allow the
TPMS to continue to function properly.266Warning and indicator lamps in the instrument clusterOn-board computer and displays
Page 319 of 384
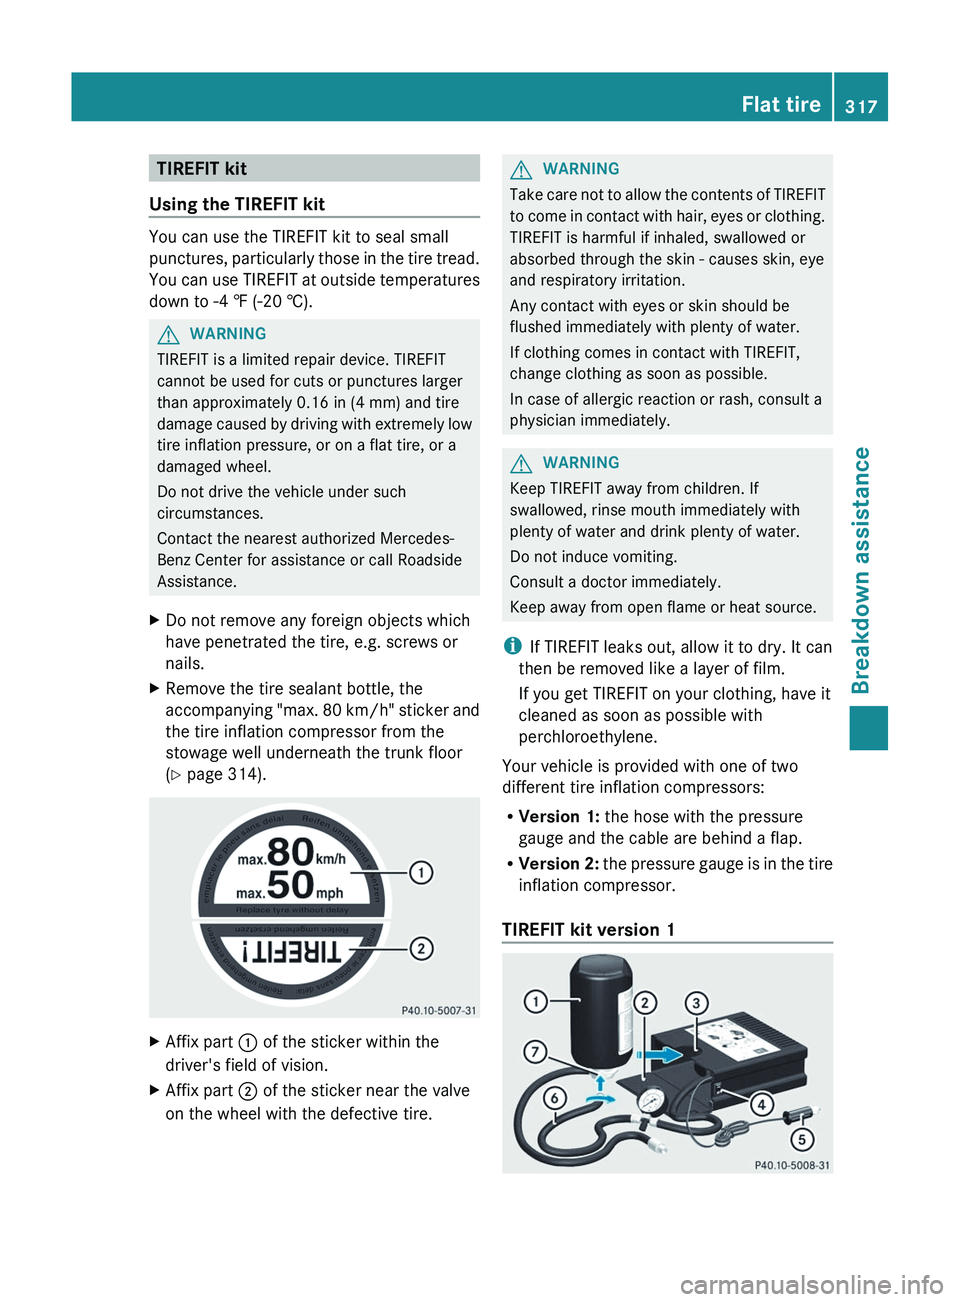
TIREFIT kit
Using the TIREFIT kit
You can use the TIREFIT kit to seal small
punctures, particularly those in the tire tread.
You can use TIREFIT at outside temperatures
down to -4 ‡ (-20 †).
GWARNING
TIREFIT is a limited repair device. TIREFIT
cannot be used for cuts or punctures larger
than approximately 0.16 in (4 mm) and tire
damage caused by driving with extremely low
tire inflation pressure, or on a flat tire, or a
damaged wheel.
Do not drive the vehicle under such
circumstances.
Contact the nearest authorized Mercedes-
Benz Center for assistance or call Roadside
Assistance.
XDo not remove any foreign objects which
have penetrated the tire, e.g. screws or
nails.XRemove the tire sealant bottle, the
accompanying "max. 80 km/h" sticker and
the tire inflation compressor from the
stowage well underneath the trunk floor
( Y page 314).XAffix part : of the sticker within the
driver's field of vision.XAffix part ; of the sticker near the valve
on the wheel with the defective tire.GWARNING
Take care not to allow the contents of TIREFIT
to come in contact with hair, eyes or clothing.
TIREFIT is harmful if inhaled, swallowed or
absorbed through the skin - causes skin, eye
and respiratory irritation.
Any contact with eyes or skin should be
flushed immediately with plenty of water.
If clothing comes in contact with TIREFIT,
change clothing as soon as possible.
In case of allergic reaction or rash, consult a
physician immediately.
GWARNING
Keep TIREFIT away from children. If
swallowed, rinse mouth immediately with
plenty of water and drink plenty of water.
Do not induce vomiting.
Consult a doctor immediately.
Keep away from open flame or heat source.
i If TIREFIT leaks out, allow it to dry. It can
then be removed like a layer of film.
If you get TIREFIT on your clothing, have it
cleaned as soon as possible with
perchloroethylene.
Your vehicle is provided with one of two
different tire inflation compressors:
R Version 1: the hose with the pressure
gauge and the cable are behind a flap.
R Version 2: the pressure gauge is in the tire
inflation compressor.
TIREFIT kit version 1
Flat tire317Breakdown assistanceZ
Page 320 of 384
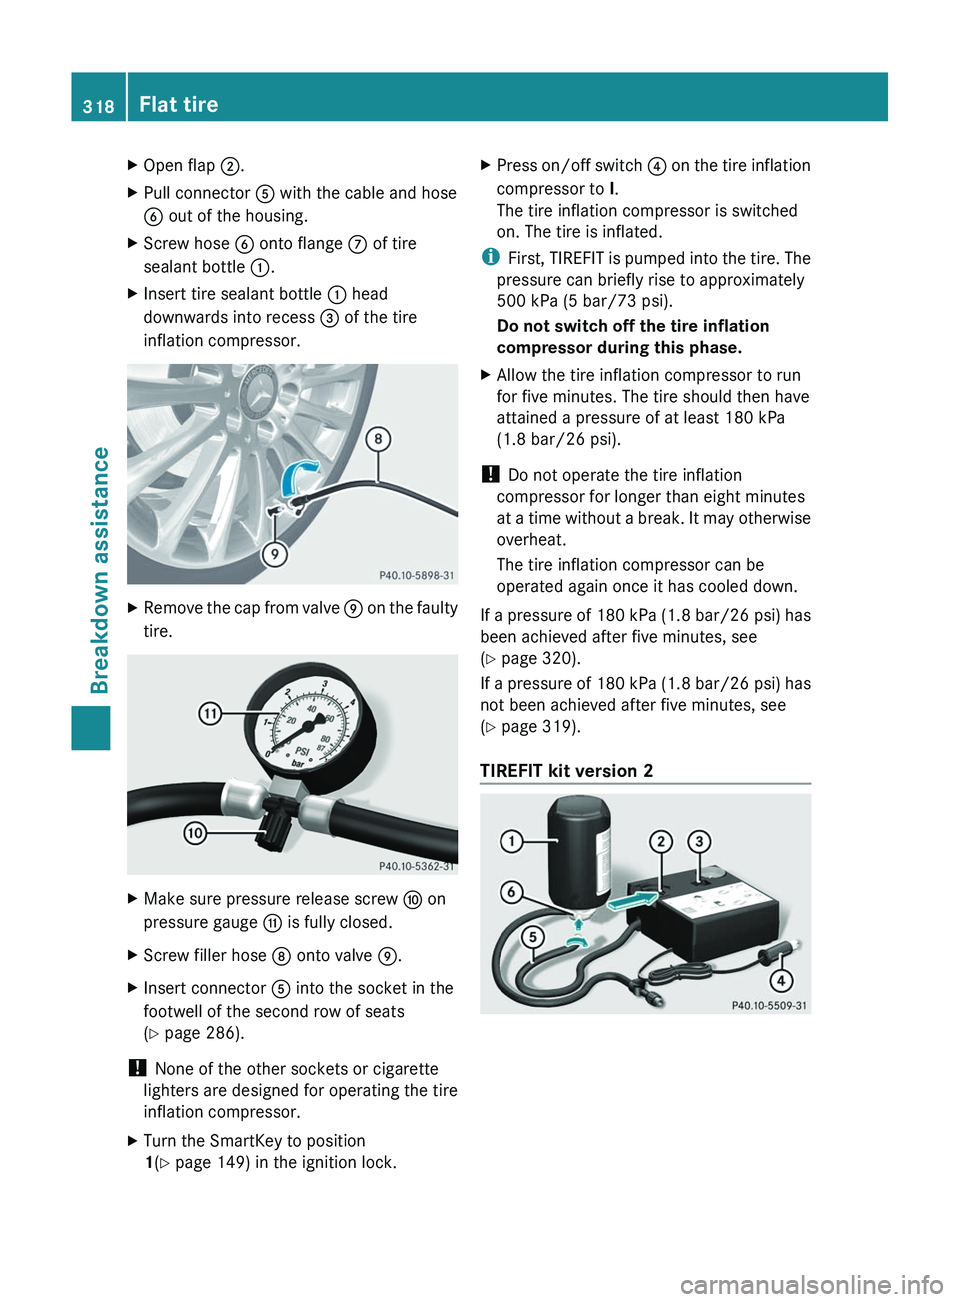
XOpen flap ;.XPull connector A with the cable and hose
B out of the housing.XScrew hose B onto flange C of tire
sealant bottle :.XInsert tire sealant bottle : head
downwards into recess = of the tire
inflation compressor.XRemove the cap from valve E on the faulty
tire.XMake sure pressure release screw F on
pressure gauge G is fully closed.XScrew filler hose D onto valve E.XInsert connector A into the socket in the
footwell of the second row of seats
( Y page 286).
!
None of the other sockets or cigarette
lighters are designed for operating the tire
inflation compressor.
XTurn the SmartKey to position
1 (Y page 149) in the ignition lock.XPress on/off switch ? on the tire inflation
compressor to I.
The tire inflation compressor is switched
on. The tire is inflated.
i First, TIREFIT is pumped into the tire. The
pressure can briefly rise to approximately
500 kPa (5 bar/73 psi).
Do not switch off the tire inflation
compressor during this phase.
XAllow the tire inflation compressor to run
for five minutes. The tire should then have
attained a pressure of at least 180 kPa
(1.8 bar/26 psi).
! Do not operate the tire inflation
compressor for longer than eight minutes
at a time without a break. It may otherwise
overheat.
The tire inflation compressor can be
operated again once it has cooled down.
If a pressure of 180 kPa (1.8 bar/26 psi) has
been achieved after five minutes, see
( Y page 320).
If a pressure of 180 kPa (1.8 bar/26 psi) has
not been achieved after five minutes, see
( Y page 319).
TIREFIT kit version 2
318Flat tireBreakdown assistance
Page 321 of 384
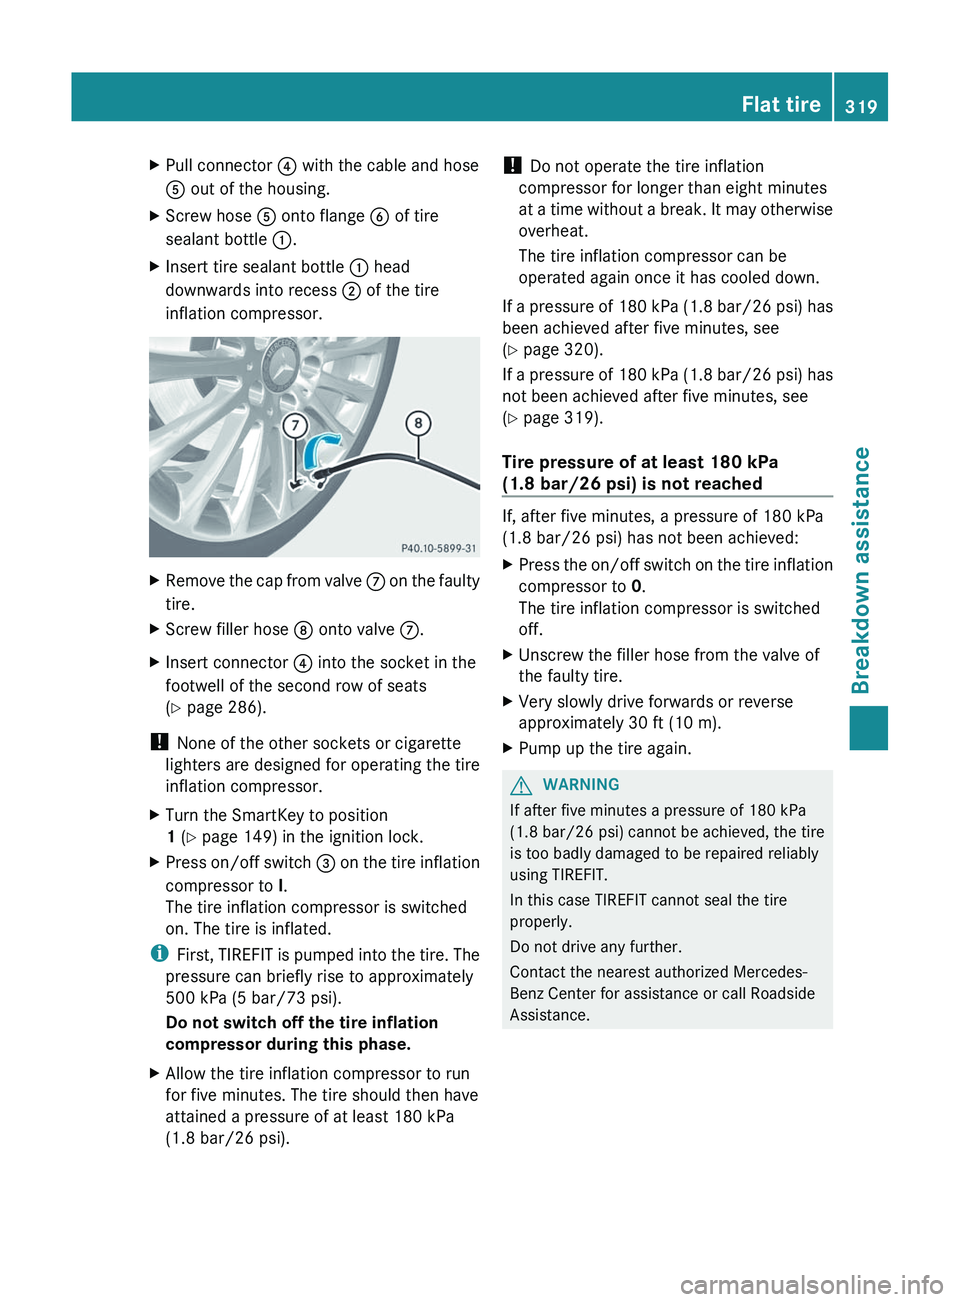
XPull connector ? with the cable and hose
A out of the housing.XScrew hose A onto flange B of tire
sealant bottle :.XInsert tire sealant bottle : head
downwards into recess ; of the tire
inflation compressor.XRemove the cap from valve C on the faulty
tire.XScrew filler hose D onto valve C.XInsert connector ? into the socket in the
footwell of the second row of seats
( Y page 286).
!
None of the other sockets or cigarette
lighters are designed for operating the tire
inflation compressor.
XTurn the SmartKey to position
1 (Y page 149) in the ignition lock.XPress on/off switch = on the tire inflation
compressor to I.
The tire inflation compressor is switched
on. The tire is inflated.
i First, TIREFIT is pumped into the tire. The
pressure can briefly rise to approximately
500 kPa (5 bar/73 psi).
Do not switch off the tire inflation
compressor during this phase.
XAllow the tire inflation compressor to run
for five minutes. The tire should then have
attained a pressure of at least 180 kPa
(1.8 bar/26 psi).! Do not operate the tire inflation
compressor for longer than eight minutes
at a time without a break. It may otherwise
overheat.
The tire inflation compressor can be
operated again once it has cooled down.
If a pressure of 180 kPa (1.8 bar/26 psi) has
been achieved after five minutes, see
( Y page 320).
If a pressure of 180 kPa (1.8 bar/26 psi) has
not been achieved after five minutes, see
( Y page 319).
Tire pressure of at least 180 kPa
(1.8 bar/26 psi) is not reached
If, after five minutes, a pressure of 180 kPa
(1.8 bar/26 psi) has not been achieved:
XPress the on/off switch on the tire inflation
compressor to 0.
The tire inflation compressor is switched
off.XUnscrew the filler hose from the valve of
the faulty tire.XVery slowly drive forwards or reverse
approximately 30 ft (10 m).XPump up the tire again.GWARNING
If after five minutes a pressure of 180 kPa
(1.8 bar/26 psi) cannot be achieved, the tire
is too badly damaged to be repaired reliably
using TIREFIT.
In this case TIREFIT cannot seal the tire
properly.
Do not drive any further.
Contact the nearest authorized Mercedes-
Benz Center for assistance or call Roadside
Assistance.
Flat tire319Breakdown assistanceZ