2012 MERCEDES-BENZ GL warning light
[x] Cancel search: warning lightPage 286 of 384
XTo close: pull out the roller sunblind using
handle = and attach arm ; to
bracket :.
The roller sunblind engages.XTo open: press release knob ? to release
the roller sunblind from bracket :.XRetract the roller sunblind by hand.
Ashtray
Ashtray in the front-compartment
center console
i You can remove the ashtray insert and
use the resulting compartment for
stowage.
! The stowage space under the ashtray is
not heat resistant. Before placing lit
cigarettes in the ashtray, make sure that
the ashtray is properly engaged. Otherwise,
the stowage space could be damaged.
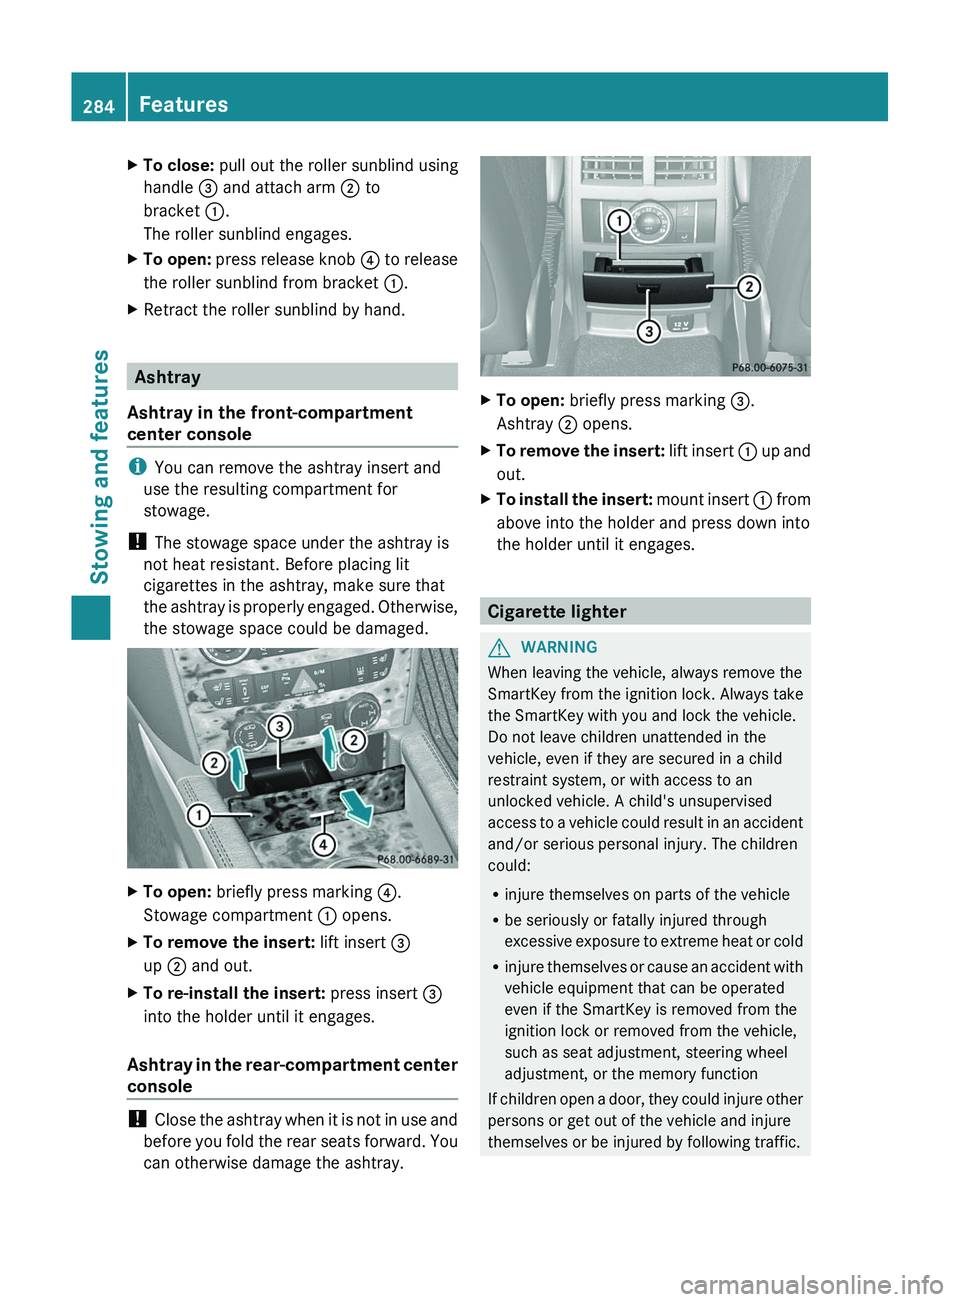
XTo open: briefly press marking ?.
Stowage compartment : opens.XTo remove the insert: lift insert =
up ; and out.XTo re-install the insert: press insert =
into the holder until it engages.
Ashtray in the rear-compartment center
console
! Close the ashtray when it is not in use and
before you fold the rear seats forward. You
can otherwise damage the ashtray.
XTo open: briefly press marking =.
Ashtray ; opens.XTo remove the insert: lift insert : up and
out.XTo install the insert: mount insert : from
above into the holder and press down into
the holder until it engages.
Cigarette lighter
GWARNING
When leaving the vehicle, always remove the
SmartKey from the ignition lock. Always take
the SmartKey with you and lock the vehicle.
Do not leave children unattended in the
vehicle, even if they are secured in a child
restraint system, or with access to an
unlocked vehicle. A child's unsupervised
access to a vehicle could result in an accident
and/or serious personal injury. The children
could:
R injure themselves on parts of the vehicle
R be seriously or fatally injured through
excessive exposure to extreme heat or cold
R injure themselves or cause an accident with
vehicle equipment that can be operated
even if the SmartKey is removed from the
ignition lock or removed from the vehicle,
such as seat adjustment, steering wheel
adjustment, or the memory function
If children open a door, they could injure other
persons or get out of the vehicle and injure
themselves or be injured by following traffic.
284FeaturesStowing and features
Page 287 of 384
Do not expose the child restraint system to
direct sunlight. The child restraint system's
metal parts, for example, could become very
hot, and the child could be burned on these
parts.GWARNING
Never touch the heating element or sides of
the lighter; they are extremely hot. Hold the
knob only.
Make sure any children traveling with you do
not injure themselves or start a fire with the
hot cigarette lighter.
! The 12 V socket in the cigarette lighter
can be used for accessories (up to a
maximum of 180 W) as long as they have
the standard socket type for cigarette
lighters. Note that the socket in the
cigarette lighter can be damaged when
connecting accessories, for example by
frequent insertion and removal or by
sockets that do not fit correctly. A damaged
socket can cause the cigarette lighter to
stop working.
! The cigarette lighter in the center console
in the front compartment is not intended
for operating the tire inflation compressor.
XTurn the SmartKey to position 2 in the
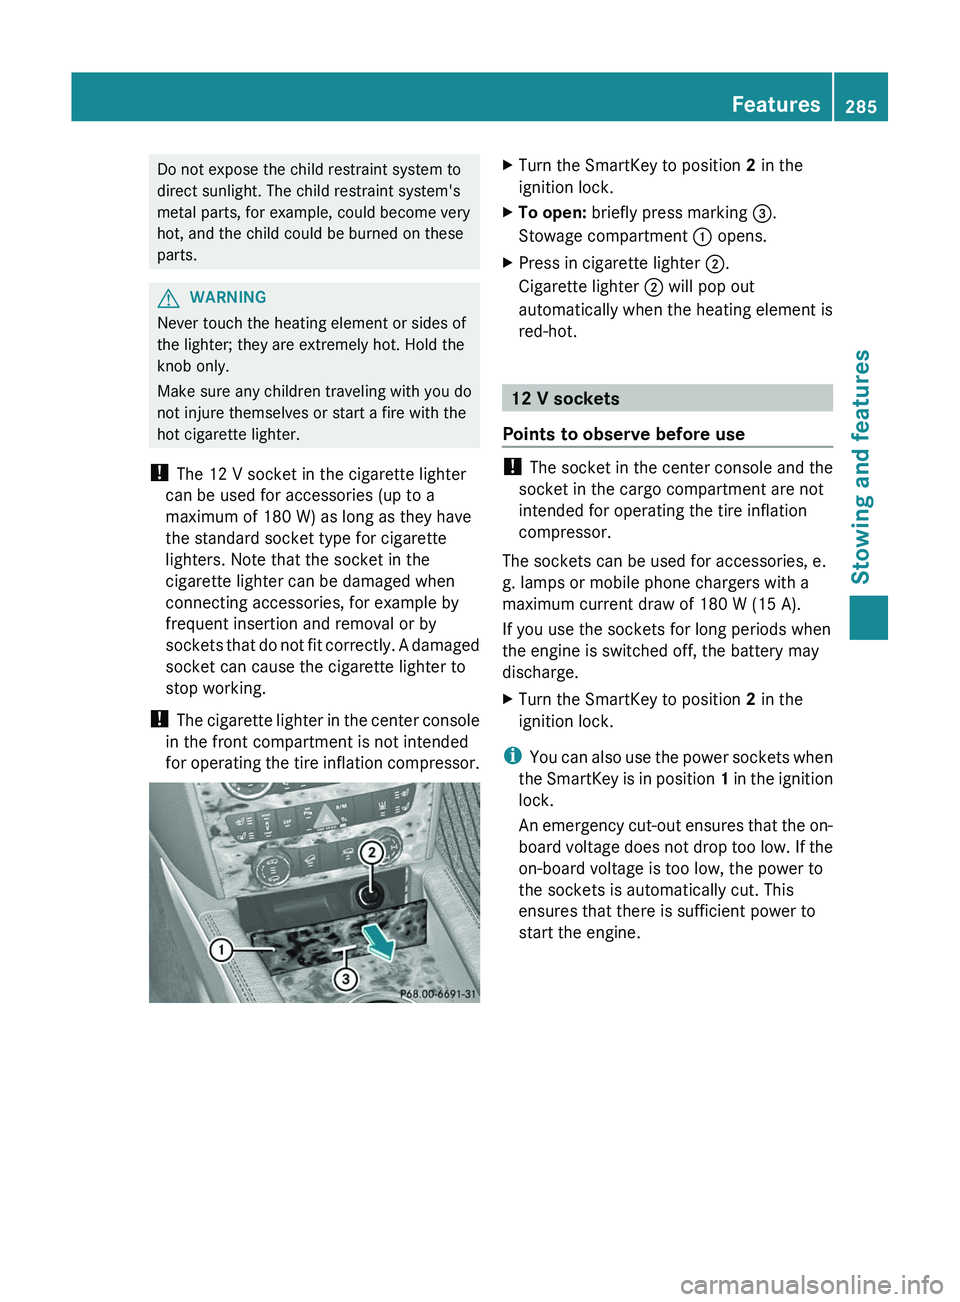
ignition lock.XTo open: briefly press marking =.
Stowage compartment : opens.XPress in cigarette lighter ;.
Cigarette lighter ; will pop out
automatically when the heating element is
red-hot.
12 V sockets
Points to observe before use
! The socket in the center console and the
socket in the cargo compartment are not
intended for operating the tire inflation
compressor.
The sockets can be used for accessories, e.
g. lamps or mobile phone chargers with a
maximum current draw of 180 W (15 A).
If you use the sockets for long periods when
the engine is switched off, the battery may
discharge.
XTurn the SmartKey to position 2 in the
ignition lock.
i You can also use the power sockets when
the SmartKey is in position 1 in the ignition
lock.
An emergency cut-out ensures that the on-
board voltage does not drop too low. If the
on-board voltage is too low, the power to
the sockets is automatically cut. This
ensures that there is sufficient power to
start the engine.
Features285Stowing and featuresZ
Page 288 of 384
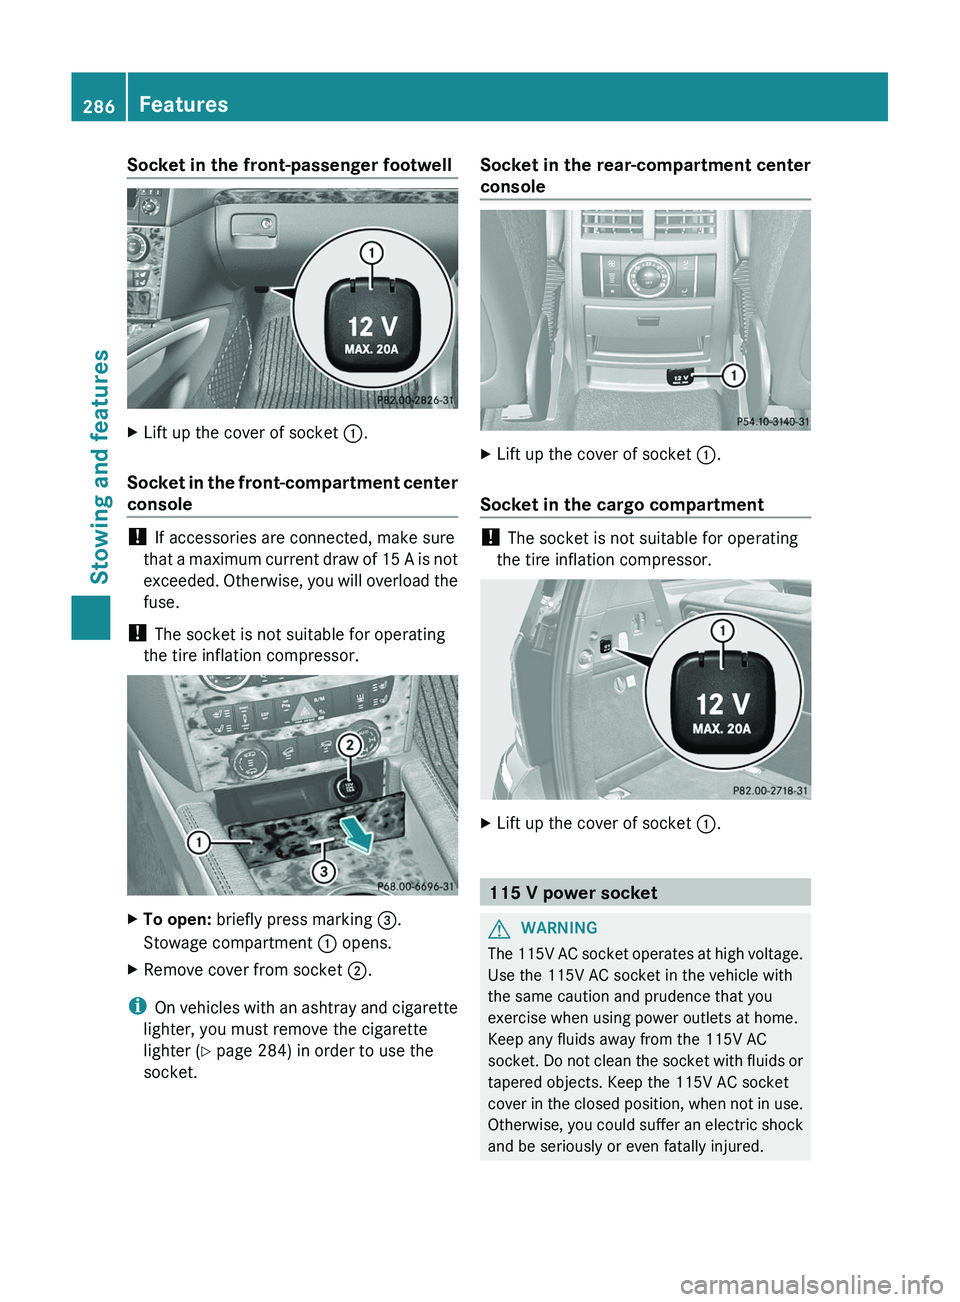
Socket in the front-passenger footwellXLift up the cover of socket :.
Socket in the front-compartment center
console
! If accessories are connected, make sure
that a maximum current draw of 15 A is not
exceeded. Otherwise, you will overload the
fuse.
! The socket is not suitable for operating
the tire inflation compressor.
XTo open: briefly press marking =.
Stowage compartment : opens.XRemove cover from socket ;.
i
On vehicles with an ashtray and cigarette
lighter, you must remove the cigarette
lighter ( Y page 284) in order to use the
socket.
Socket in the rear-compartment center
consoleXLift up the cover of socket :.
Socket in the cargo compartment
!
The socket is not suitable for operating
the tire inflation compressor.
XLift up the cover of socket :.
115 V power socket
GWARNING
The 115V AC socket operates at high voltage.
Use the 115V AC socket in the vehicle with
the same caution and prudence that you
exercise when using power outlets at home.
Keep any fluids away from the 115V AC
socket. Do not clean the socket with fluids or
tapered objects. Keep the 115V AC socket
cover in the closed position, when not in use.
Otherwise, you could suffer an electric shock
and be seriously or even fatally injured.
286FeaturesStowing and features
Page 289 of 384
GWARNING
Any device that you connect must have a
suitable plug and meet U.S. standards. Never
pull at a cable to disconnect a plug from a
115 V AC power socket. Never use a damaged
connection cable. The 115 V AC power socket
must never be connected to another 115 V
AC power source. Do not use a converter with
an earthed plug for the 115 V AC power
socket. This could cause serious injury to you
and/or other people.
GWARNING
If the 115V AC socket is damaged or torn out
of the trim, do not use or touch the 115V AC
socket. Using a 115V AC socket that is
damaged or torn out of the trim could cause
serious personal injury to you and/or others.
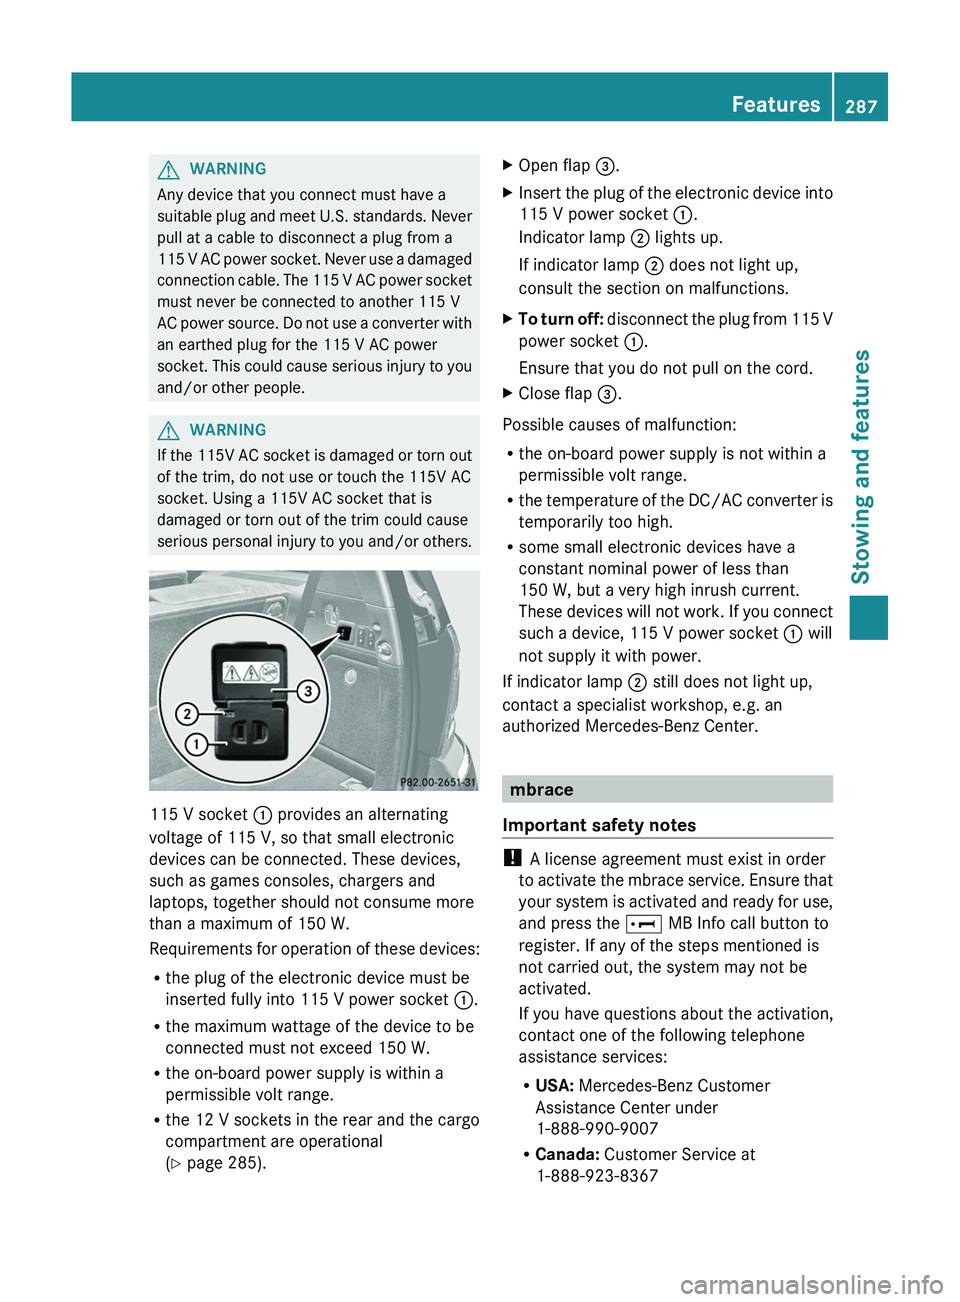
115 V socket : provides an alternating
voltage of 115 V, so that small electronic
devices can be connected. These devices,
such as games consoles, chargers and
laptops, together should not consume more
than a maximum of 150 W.
Requirements for operation of these devices:
R the plug of the electronic device must be
inserted fully into 115 V power socket :.
R the maximum wattage of the device to be
connected must not exceed 150 W.
R the on-board power supply is within a
permissible volt range.
R the 12 V sockets in the rear and the cargo
compartment are operational
( Y page 285).
XOpen flap =.XInsert the plug of the electronic device into
115 V power socket :.
Indicator lamp ; lights up.
If indicator lamp ; does not light up,
consult the section on malfunctions.XTo turn off: disconnect the plug from 115 V
power socket :.
Ensure that you do not pull on the cord.XClose flap =.
Possible causes of malfunction:
R the on-board power supply is not within a
permissible volt range.
R the temperature of the DC/AC converter is
temporarily too high.
R some small electronic devices have a
constant nominal power of less than
150 W, but a very high inrush current.
These devices will not work. If you connect
such a device, 115 V power socket : will
not supply it with power.
If indicator lamp ; still does not light up,
contact a specialist workshop, e.g. an
authorized Mercedes-Benz Center.
mbrace
Important safety notes
! A license agreement must exist in order
to activate the mbrace service. Ensure that
your system is activated and ready for use,
and press the E MB Info call button to
register. If any of the steps mentioned is
not carried out, the system may not be
activated.
If you have questions about the activation,
contact one of the following telephone
assistance services:
R USA: Mercedes-Benz Customer
Assistance Center under
1-888-990-9007
R Canada: Customer Service at
1-888-923-8367
Features287Stowing and featuresZ
Page 290 of 384
Shortly after successfully registering with the
mbrace service, a user ID and password will
be sent to you by post. You can use this
password to log in to the mbrace section
under "Owners Online" at http://
www.mbusa.com 32
.
The mbrace system is available if:
R it has been activated and is operational.
R the corresponding mobile phone network
is available for transmitting data to the
Customer Center.
R a service subscription is available.
R the starter battery is sufficiently charged.
i Determining the location of the vehicle on
a map is only possible if there is sufficient
GPS reception and the vehicle position can
be forwarded to the Customer Center.
The mbrace system
The mbrace system provides different
services, e.g.:
R automatic and manual emergency call
R Roadside Assistance call
R MB Info call
To adjust the volume during an mbrace call,
proceed as follows:
XPress the W or X button on the
multifunction steering wheel.
or
XUse the volume controller of COMAND.
You can find further information and a
description of all available features under
"Owners Online" at http://
www.mbusa.com 33
.
System self-test
After you have switched on the ignition, the
system carries out a self-diagnosis.
GWARNING
A malfunction in the system has been
detected if one of the following conditions
occurs:
R the indicator lamp in the SOS button does
not light up during the system self-
diagnosis.
R the indicator lamp in the º Roadside
Assistance button does not light up during
the system self-diagnosis.
R The indicator lamp in the E information
button does not light up during self-
diagnosis of the system.
R the indicator lamp in the SOS button,
º Roadside Assistance button or E
information button continues to be lit red
after the system self-diagnosis.
R The Tele Aid Inoperative or Tele Aid
Not Activated message appears in the
multifunction display after the system self-
test.
If a malfunction is indicated as outlined above,
the system may not operate as expected. In
the event of an emergency, assistance must
be summoned by other means.
Have the system checked at the nearest
authorized Mercedes-Benz Center or contact
the following service hotlines:
R USA: Response Center under
888-990-9007
R Canada: Customer Service at
1-888-923-8367
Emergency call
Important safety notes
! A license agreement must exist in order
to activate the mbrace service. Ensure that
your system is activated and ready for use,
and press the E MB Info call button to
register. If any of the steps mentioned is
32 USA only.
33 USA only.288FeaturesStowing and features
Page 299 of 384
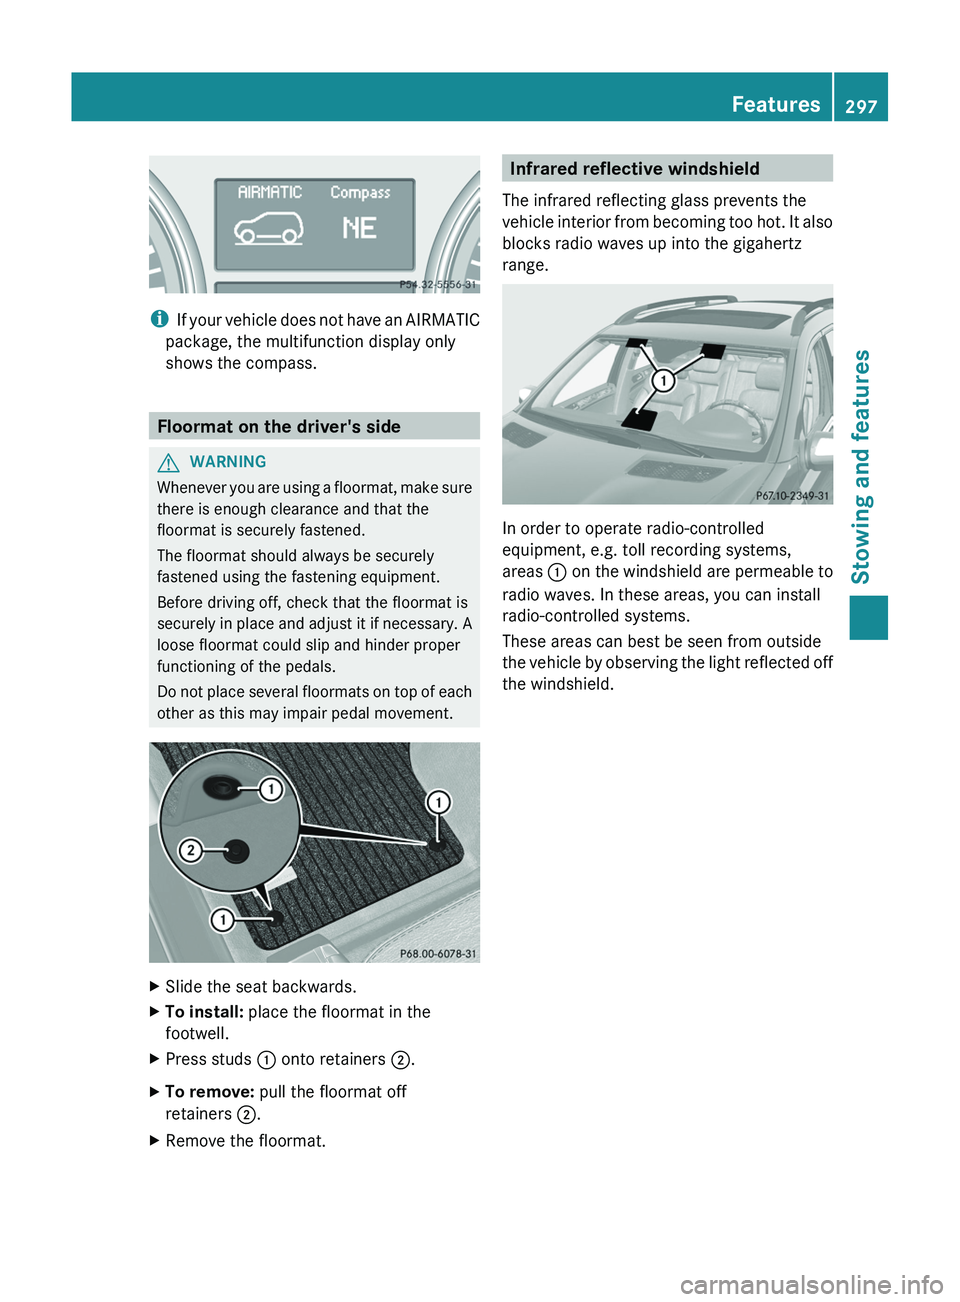
iIf your vehicle does not have an AIRMATIC
package, the multifunction display only
shows the compass.
Floormat on the driver's side
GWARNING
Whenever you are using a floormat, make sure
there is enough clearance and that the
floormat is securely fastened.
The floormat should always be securely
fastened using the fastening equipment.
Before driving off, check that the floormat is
securely in place and adjust it if necessary. A
loose floormat could slip and hinder proper
functioning of the pedals.
Do not place several floormats on top of each
other as this may impair pedal movement.
XSlide the seat backwards.XTo install: place the floormat in the
footwell.XPress studs : onto retainers ;.XTo remove: pull the floormat off
retainers ;.XRemove the floormat.Infrared reflective windshield
The infrared reflecting glass prevents the
vehicle interior from becoming too hot. It also
blocks radio waves up into the gigahertz
range.
In order to operate radio-controlled
equipment, e.g. toll recording systems,
areas : on the windshield are permeable to
radio waves. In these areas, you can install
radio-controlled systems.
These areas can best be seen from outside
the vehicle by observing the light reflected off
the windshield.
Features297Stowing and featuresZ
Page 303 of 384
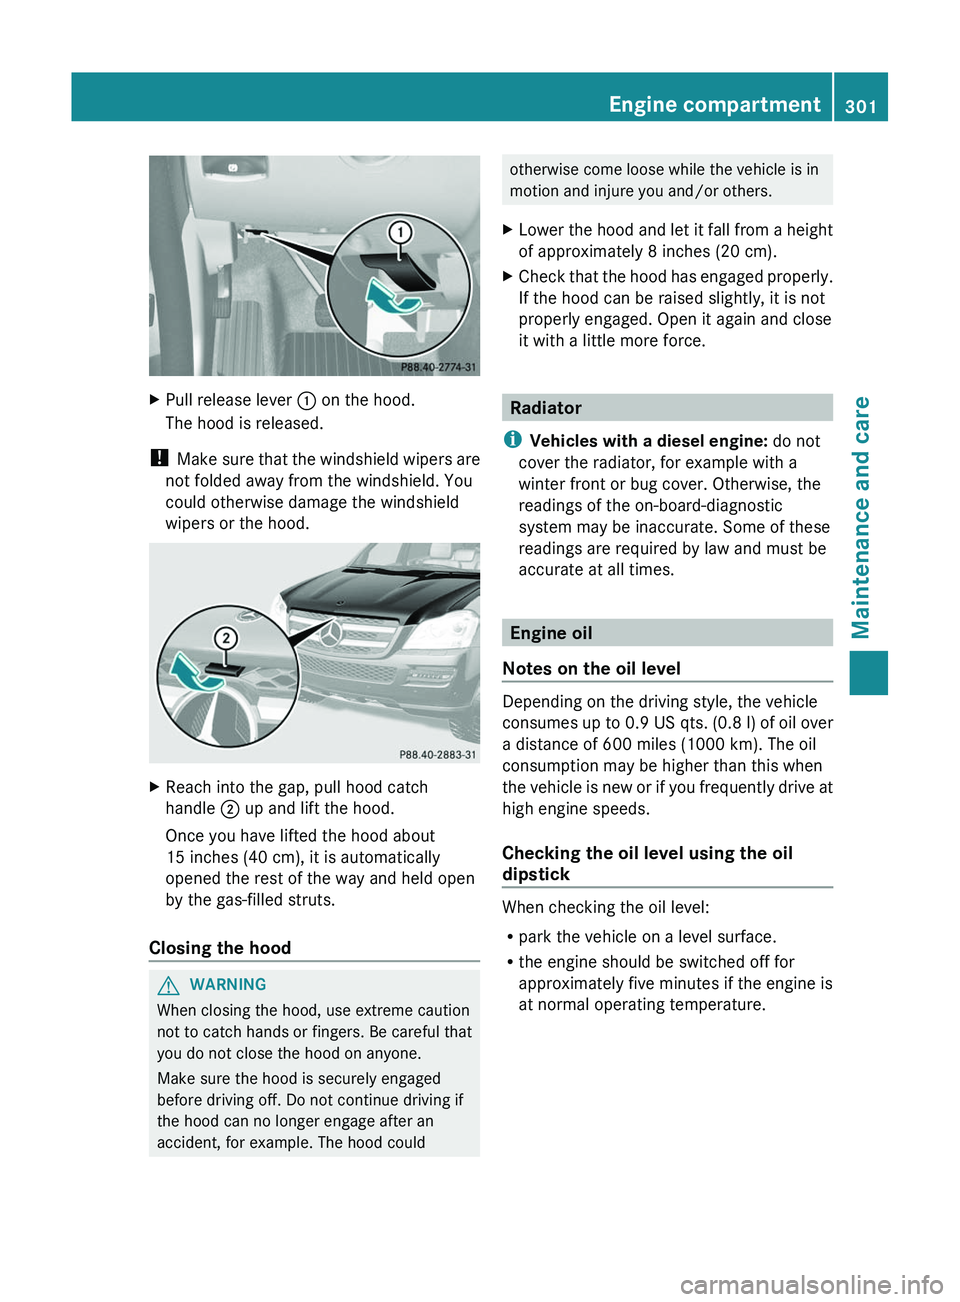
XPull release lever : on the hood.
The hood is released.
! Make sure that the windshield wipers are
not folded away from the windshield. You
could otherwise damage the windshield
wipers or the hood.
XReach into the gap, pull hood catch
handle ; up and lift the hood.
Once you have lifted the hood about
15 inches (40 cm), it is automatically
opened the rest of the way and held open
by the gas-filled struts.
Closing the hood
GWARNING
When closing the hood, use extreme caution
not to catch hands or fingers. Be careful that
you do not close the hood on anyone.
Make sure the hood is securely engaged
before driving off. Do not continue driving if
the hood can no longer engage after an
accident, for example. The hood could
otherwise come loose while the vehicle is in
motion and injure you and/or others.XLower the hood and let it fall from a height
of approximately 8 inches (20 cm).XCheck that the hood has engaged properly.
If the hood can be raised slightly, it is not
properly engaged. Open it again and close
it with a little more force.
Radiator
i Vehicles with a diesel engine: do not
cover the radiator, for example with a
winter front or bug cover. Otherwise, the
readings of the on-board-diagnostic
system may be inaccurate. Some of these
readings are required by law and must be
accurate at all times.
Engine oil
Notes on the oil level
Depending on the driving style, the vehicle
consumes up to 0.9 US qts. (0.8 l) of oil over
a distance of 600 miles (1000 km). The oil
consumption may be higher than this when
the vehicle is new or if you frequently drive at
high engine speeds.
Checking the oil level using the oil
dipstick
When checking the oil level:
R park the vehicle on a level surface.
R the engine should be switched off for
approximately five minutes if the engine is
at normal operating temperature.
Engine compartment301Maintenance and careZ
Page 309 of 384
XMake sure the vehicle is stationary and the
ignition is switched off.XTurn the SmartKey to position
2 (Y page 149) in the ignition lock.
Use the SmartKey instead of the Start/
Stop button on vehicles with KEYLESS-GO.XDepress and hold the brake pedal.XShift the automatic transmission to
position N.XRelease the brake pedal.XRelease the parking brake.XSwitch off the ignition and leave the
SmartKey in the ignition lock.
! Make sure that:
R the side windows and the sliding sunroof
are fully closed.
R the ventilation/heating is switched off
(the OFF button has been pressed).
R the windshield wiper switch is in position
0 .
Otherwise, the vehicle might be damaged.
After using an automatic car wash, wipe off
wax from the windshield and the wiper
blades. This will prevent smears and reduce
wiping noises caused by residue on the
windshield.
Washing by hand
Carefully remove all deposits of road salt as
soon as possible when driving in winter.
Also, clean the insides of the wheels when
washing the underbody of the vehicle.
XDo not use hot water and do not wash the
vehicle in direct sunlight.XUse a soft car sponge for cleaning.XUse a gentle cleaning agent, e.g. a
Mercedes-Benz approved car shampoo.XWash down the vehicle with a gentle water
jet.XDo not point the water jet directly at the air
inlets.XUse plenty of water and rinse the sponge
frequently.XRinse the vehicle with clean water and dry
it thoroughly with a chamois.XDo not allow the cleaning agent to dry on
the paintwork.
Power washers
GWARNING
Do not use power washers with circular-jet
nozzles (dirt grinders) to clean your vehicle, in
particular the tires. You could otherwise
damage the tires and cause an accident.
! Always maintain a distance of at least
11.8 in (30 cm) between the vehicle and the
power washer nozzle. Information about
the correct distance is available from the
equipment manufacturer.
Move the power washer nozzle around
when cleaning your vehicle.
Do not aim directly at any of the following:
R tires
R door gaps, roof gaps, joints etc.
R electrical components
R battery
R connectors
R lights
R seals
R trim elements
R ventilation slots
Damaged seals or electrical components
can lead to leaks or failures.
Cleaning the wheels
! Do not use acidic wheel cleaning products
to remove brake dust. This could damage
wheel bolts and brake components.
! Do not park the vehicle for an extended
period straight after cleaning it, particularly
after having cleaned the wheels with wheel
cleaner. Wheel cleaners could cause
increased corrosion of the brake discs and
brake pads/linings. For this reason, you
should drive for a few minutes after
Care307Maintenance and careZ