2012 MERCEDES-BENZ G-CLASS SUV interior lights
[x] Cancel search: interior lightsPage 101 of 357

X
To activate: make sure tha tthe key is in
position 1or 2in the ignition lock.
X Turn the catch in the direction of
arrow :.
Indicator lamp =lights up.
X To deactivate: make sure that the key is
in position 1or 2in the ignition lock.
X Turn the catch in the direction of
arrow ;.
Indicator lamp =goes out.
i The steering wheel heating does not
switch off automatically.
Problems with the steering wheel heat-
ing :
To switch on the steering-wheel heating
; To switch off the steering-wheel heating
= Indicator lamp
If steering wheel heating indicator lamp =is
flashing, the steering wheel heating has
switched off automatically .The vehicle's
electrical system voltage is too low because
too many electrical consumers are switched
on.
X Switch off electrical consumers that you do
not need, such as the rear window heating
or interior lighting.
Once the battery is sufficiently charged, the
steering wheel heating will switch back on
automatically. Steering wheel EASY-ENTRY/EXIT fea-
ture
Important safety notes G
WARNING
Make sure that nobody can become trapped
when you activate the EASY-ENTRY/EXIT fea-
ture.
If there is a risk of someone becoming trap-
ped, stop the adjustment procedure. To halt
the procedure:
R press the steering column adjustment but-
ton.
R briefly press one of the memory function
position buttons.
The steering column stops moving immedi-
ately.
Do not keep the memory function position
button pressed down, otherwise the memory
function will start and the steering wheel and
seat will begin to move.
Never leave children unsupervised in the vehi-
cle. They could open the driver's door and
thereby unintentionally activate the EASY-
ENTRY feature and become trapped.
! Do not activate the EASY-ENTRY/EXIT
feature, if the seat backrest is reclined too
far backwards. This can damage the front
or rear seats. You must first move the back-
rest to a vertical position.
The EASY-ENTRY/EXIT feature makes getting
in and out of your vehicle easier.
You can activate and deactivate the EASY-
ENTRY/EXIT feature in the on-board com-
puter (Y page 224). 98
Steering wheelSeats, steering wheel and mirrors
Page 106 of 357
Useful information
............................104
Exterior lighting ................................ 104
Interior lighting ................................. 110
Replacing bulbs ................................. 114
Windscreen wipers ...........................119 103Lights and windscreen wipers
Page 113 of 357
The hazard warning lamps automatically
switch on if:
R
an airbag is deployed
R the seat belt tensioners are triggered, or
R the vehicle decelerates rapidly from a
speed of more than 70 km/ha nd comes to
a standstill.
The hazard warning lamp switches on auto-
matically if an airbag or the belt tensioners
are triggered and the key is in position 1in
the ignition lock.
The hazard warning lamps switch off auto-
matically if the vehicle reaches a speed of
over 10 km/h again after a full brake appli-
cation.
i The hazard warning lamps still operate if
the ignition is switched off. Cornering light function
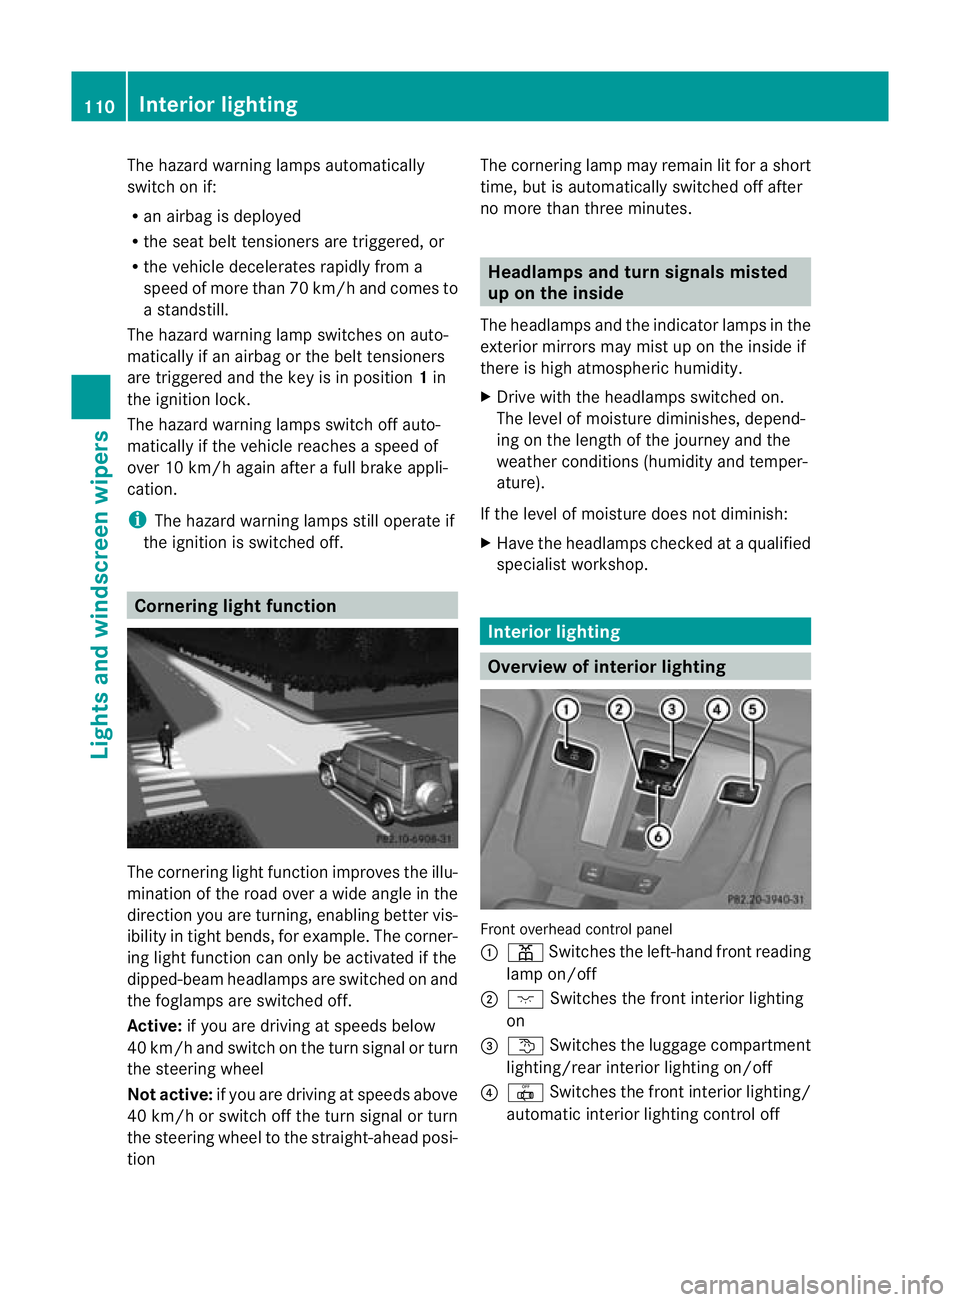
The cornering light functio
nimproves the illu-
mination of the road over a wide angle in the
directio nyou are turning, enabling better vis-
ibility in tight bends, for example. The corner-
ing light function can only be activated if the
dipped-beam headlamps are switched on and
the foglamps are switched off.
Active: if you are driving at speeds below
40 km/ha nd switch on the tur nsignal or turn
the steering wheel
Not active: if you are driving at speeds above
40 km/h or switch off the turn signal or turn
the steering wheel to the straight-ahead posi-
tion The cornering lamp may remain lit for a short
time, but is automatically switched off after
no more than three minutes. Headlamps and turn signals misted
up on the inside
The headlamps and the indicator lamps in the
exterior mirrors may mist up on the inside if
there is high atmospheric humidity.
X Drive with the headlamps switched on.
The level of moisture diminishes, depend-
ing on the length of the journey and the
weathe rconditions (humidity and temper-
ature).
If the level of moisture does not diminish:
X Have the headlamps checked at a qualified
specialist workshop. Interior lighting
Overview of interior lighting
Front overhead control panel
:
p Switches the left-hand front reading
lamp on/off
; c Switches the front interior lighting
on
= t Switches the luggage compartment
lighting/rear interior lighting on/off
? | Switches the front interior lighting/
automatic interior lighting control off 110
Interior lightingLights and windscreen wipers
Page 114 of 357
A
p Switches the right-hand reading
lamp on/off
B Switches the automatic interio rlighting
control on Example: rear-compartment overhead control
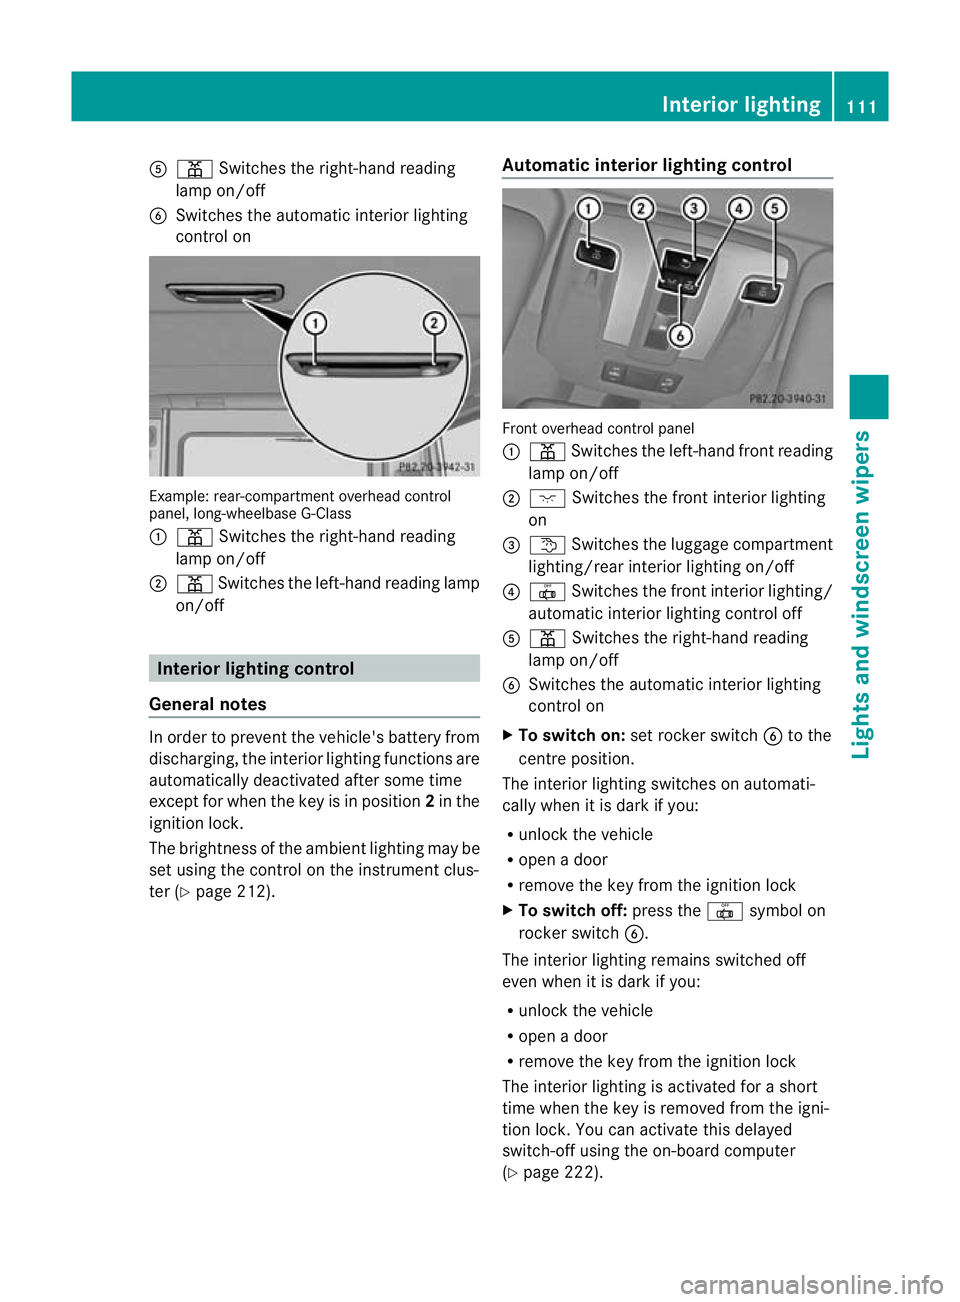
panel, long-wheelbase G-Class
: p Switches the right-hand reading
lamp on/off
; p Switches the left-hand reading lamp
on/off Interior lighting control
General notes In order to prevent the vehicle's battery from
discharging, the interior lighting functions are
automatically deactivated after some time
except for when the key is in position 2in the
ignition lock.
The brightness of the ambien tlighting may be
set using the control on the instrument clus-
ter (Y page 212). Automatic interior lighting control Front overhead control panel
:
p Switches the left-hand front reading
lamp on/off
; c Switches the front interior lighting
on
= t Switches the luggage compartment
lighting/rear interior lighting on/off
? | Switches the front interior lighting/
automatic interior lighting control off
A p Switches the right-hand reading
lamp on/off
B Switches the automatic interior lighting
control on
X To switch on: set rocker switch Bto the
centre position.
The interior lighting switches on automati-
cally when it is dark if you:
R unloc kthe vehicle
R open a door
R remove the key from the ignition lock
X To switch off: press the|symbol on
rocker switch B.
The interior lighting remains switched off
even when it is dark if you:
R unlock the vehicle
R open a door
R remove the key from the ignition lock
The interior lighting is activated for a short
time when the key is removed from the igni-
tion lock. You can activate this delayed
switch-off using the on-board computer
(Y page 222). Interior lighting
111Lights and windscreen wipers Z
Page 115 of 357
When a fron
tdoor is opened, the front interior
lighting comes on. When arear door is
opened, the rear interior lighting comes on.
In addition, the courtesy lights come on.
i If a door remains open and the ignition
key is not in the ignition lock, the interior
lighting switches off automatically after
approximately 30 minutes.
Manual interior lighting control Front interior lighting
!
If the interior lighting has been switched
on manually, it will not be switched off
automatically.
This can cause the starter battery to dis-
charge.
Make sure that the interior lighting does
not remain switched on too long after the
engine has been switched off. Front overhead control panel
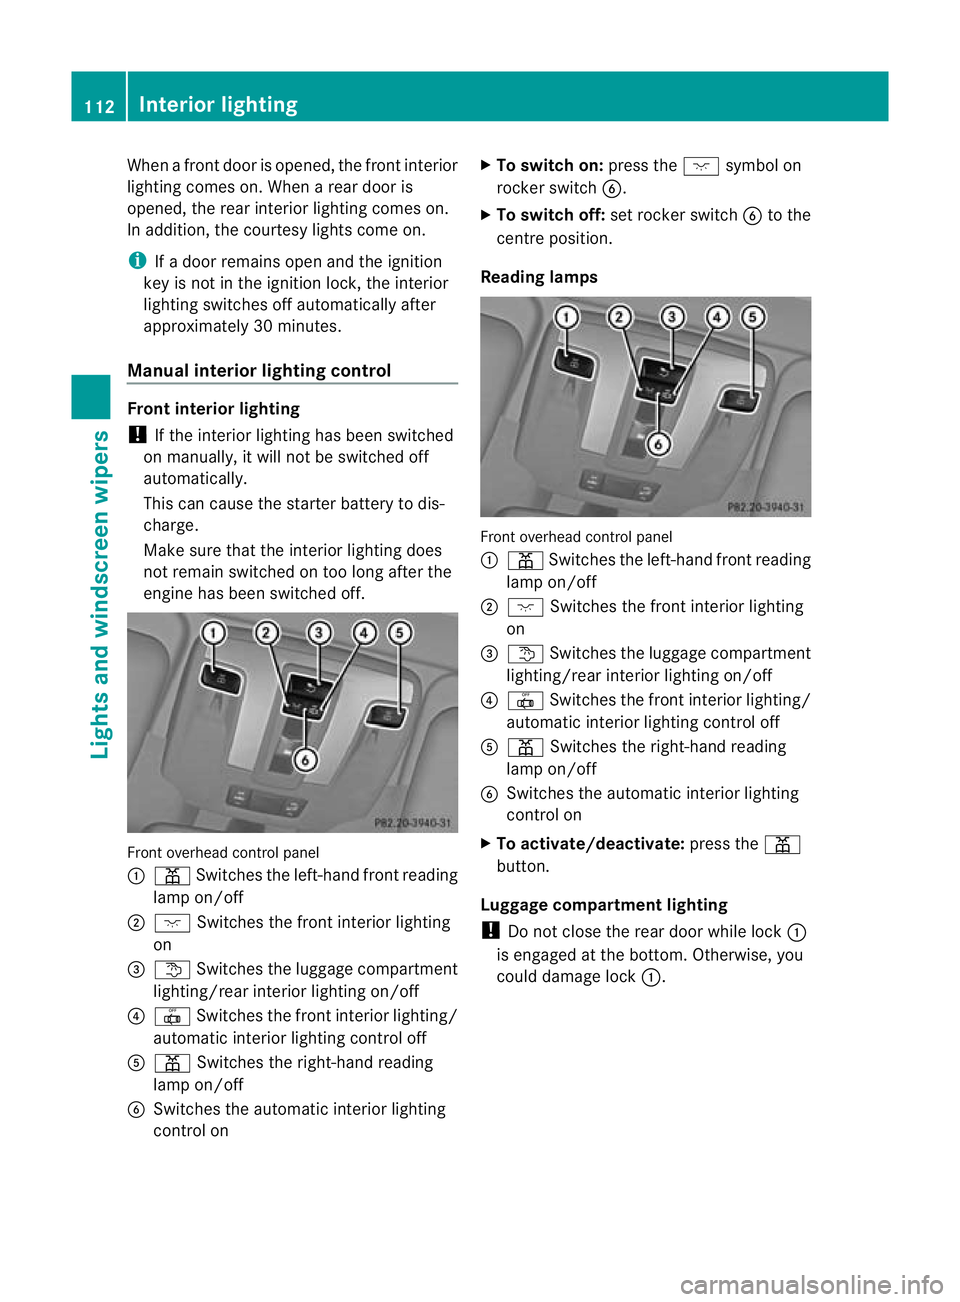
:
p Switches the left-hand fron treading
lamp on/off
; c Switches the front interior lighting
on
= t Switches the luggage compartment
lighting/rear interior lighting on/off
? | Switches the fron tinterior lighting/
automatic interio rlighting control off
A p Switches the right-hand reading
lamp on/off
B Switches the automatic interior lighting
control on X
To switch on: press thecsymbol on
rocker switch B.
X To switch off: set rocker switch Bto the
centre position.
Reading lamps Front overhead control panel
:
p Switches the left-hand front reading
lamp on/off
; c Switches the front interior lighting
on
= t Switches the luggage compartment
lighting/rear interior lighting on/off
? | Switches the front interior lighting/
automatic interior lighting control off
A p Switches the right-hand reading
lamp on/off
B Switches the automatic interior lighting
control on
X To activate/deactivate: press thep
button.
Luggage compartment lighting
! Do not close the rear door while lock :
is engaged at the bottom .Otherwise, you
could damage lock :.112
Interior lightingLights and
windscreen wipers
Page 116 of 357
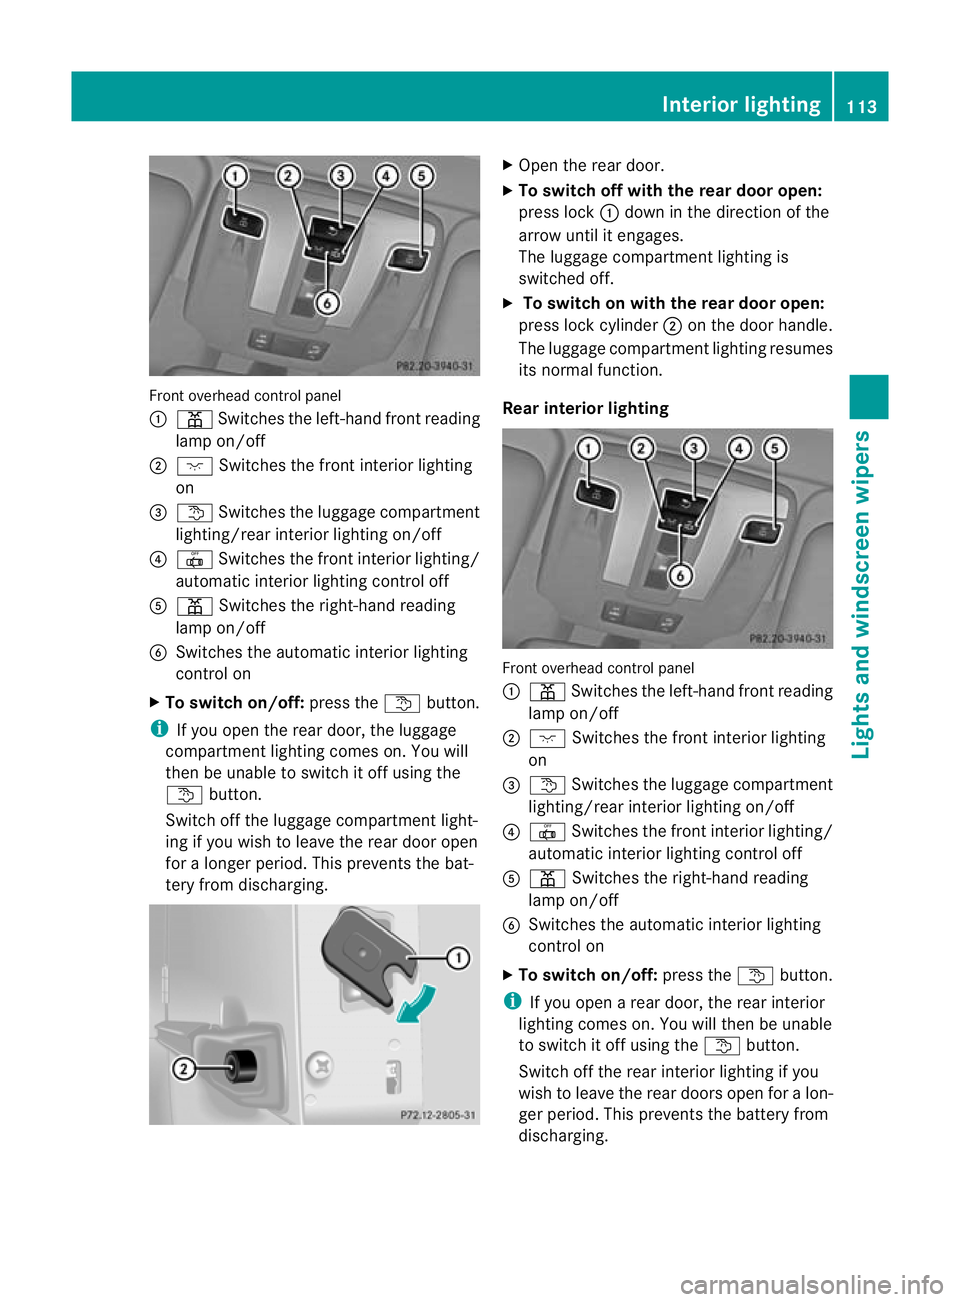
Front overhead control panel
:
p Switches the left-hand front reading
lamp on/off
; c Switches the front interior lighting
on
= t Switches the luggage compartment
lighting/rea rinterior lighting on/off
? | Switches the front interio rlighting/
automatic interior lighting control off
A p Switches the right-hand reading
lamp on/off
B Switches the automatic interior lighting
control on
X To switch on/off: press thetbutton.
i If you open the rear door, the luggage
compartmen tlighting comes on. You will
the nbe unable to switch it off using the
t button.
Switch off the luggage compartment light-
ing if you wish to leave the rear door open
for a longer period. This prevents the bat-
tery from discharging. X
Open the rear door.
X To switch off with the rear door open:
press lock :down in the direction of the
arrow until it engages.
The luggage compartment lighting is
switched off.
X To switch on with the rear door open:
press lock cylinder ;on the door handle.
The luggage compartment lighting resumes
its normal function.
Rear interior lighting Front overhead control panel
:
p Switches the left-hand fron treading
lamp on/off
; c Switches the front interior lighting
on
= t Switches the luggage compartment
lighting/rear interior lighting on/off
? | Switches the fron tinterior lighting/
automatic interio rlighting control off
A p Switches the right-hand reading
lamp on/off
B Switches the automatic interior lighting
control on
X To switch on/off: press thetbutton.
i If you open a rear door, the rear interior
lighting comes on. You will the nbe unable
to switch it off using the tbutton.
Switch off the rear interior lighting if you
wish to leave the rear doors open for a lon-
ger period. This prevents the battery from
discharging. Interior lighting
113Lights and windscreen wipers Z
Page 117 of 357
Courtesy lighting in the front doors
The courtesy light is switched on to help you
see bette rwhen it is dark.
X To switch on: activate the interior lighting
automatic control.
X Open the door.
X To switch off: close the door. Replacing bulbs
Important safety notes
Xenon bulbs G
DANGER
Xenon bulbs carry a high voltage. You could
get an electric shock and be seriously or even
fatally injured if you touch the electric con-
tacts on xenon bulbs. Therefore, never
remove the cover from xenon bulbs.
Do not change the xenon bulbs yourself, but
have them replaced at a qualified workshop.
If your vehicle is equipped with xenon bulbs,
you can recognise this by the following: the
cone of light from the xenon bulbs moves
from the top to the bottom and back again
when you start the engine. For this to be
observed, the lights must be switched on
before starting the engine.
Bulbs and lamps are an important aspect of
vehicle safety. You must therefore make sure
that these function correctly at all times.
Have the headlamp setting checked regularly.
LED lamps You can neither replace xenon bulbs nor LED
bulbs. Have LED bulbs changed at a qualified
specialist workshop.
Bulbs and lamps are an important aspect of
vehicle safety. You must therefore make sure
that these function correctly at all times.
Have the headlamp setting checked regularly. Other bulbs G
WARNING
Bulbs and lamps can be very hot. You should
therefore allow them to cool down before you
change them. Otherwise, you could be burned
if you touch them.
Keep bulbs out of the reach of children. Oth-
erwise, they could damage the bulbs, for
example, and injure themselves.
Never use a bulb which has been dropped.
Such a bulb may break or even explode and
injure you.
Halogen bulbs are pressurised and can
explode when you change them, particularly
if they are very hot. You should therefore wear
eye protection and gloves when you are
changing them.
There are bulbs other than the xenon bulbs
that you cannot replace. Replace only the
bulbs listed (Y page 115). Have the bulbs that
you cannot replace yourself changed at a
qualified specialist workshop.
If you require assistance replacing bulbs, con-
sult a qualified specialist workshop.
Do not touch the glass tube of new bulbs with
your bare hands. Even minor contamination
can burn into the glass surface and reduce
the service life of the bulbs. Always use a lint-
free cloth or only touch the base of the bulb
when fitting.
Only use bulbs of the correct type.
If the new bulb still does not light up, consult
a qualified specialist workshop.
Bulbs and lamps are an important aspect of
vehicle safety. You must therefore make sure
that these function correctly at all times.
Have the headlamp setting checked regularly. 114
Replacing bulbsLights and windscreen wipers
Page 136 of 357
back on as soon as ther
eis sufficient volt-
age. Switching the rear window heating
on/off
Switching on/off G
WARNING
Cleara ll windows of ice or snow before setting
off .O therwise, impaired visibility could
endanger you and others.
X Turn the key to position 2(Ypage 143) in
the ignition lock.
X USA only: press theªbutton.
The indicator lamp in the ªbutton lights
up or goes out.
i The rea rwindow heating has ahigh cur-
ren tdraw.Y ou should therefore switch it
off as soon as the window is clear. It only
switches itself off automatically after a few
minutes.
i If the battery voltage is too low, the rear
window heating may switch off.
Problems with the rear window heating If the indicator lamp in the
ªrear window
heating button flashes, the on-board voltage
is too low. The rear window heating has
switched off prematurely or cannot be acti-
vated.
X Switch off any consumers that are not
required, e.g. reading lamps or interior
lighting.
When the battery is sufficiently charged,
the rear window heating is activated again
automatically. Activating/deactivating air-recircula-
tion mode
G
WARNING
Only switch over to air-recirculation mode
briefly at low outside temperatures. Other-
wise, the windows could mist up, thus impair-
ing visibility and endangering yourself and
others. This may prevent you from observing
the traffic conditions, thereby causing an
accident.
X Turn the key to position 2(Ypage 143) in
the ignition lock.
X To switch on: press thedbutton.
The indicator lamp in the dbutton lights
up.
i Air-recirculation mode is automatically
activated at high levels of pollution or at
high outside temperatures. When air-recir-
culation mode is activated automatically,
the indicator lamp in the dbutton is not
lit.
Outside air is added after approximately
30 minutes.
X To deactivate: press thedbutton.
The indicator lamp in the dbutton goes
out.
i Air-recirculation mode switches off auto-
matically:
R after approximately five minutes at out-
side temperatures below approximately
5 †
R after approximately five minutes if cool-
ing with air dehumidification is deactiva-
ted
R after approximately 30 minutes at out-
side temperatures above approximately
5 † Activating/deactivating the residual
heat function
It is possible to make use of the residual heat
of the engine to continue heating the station- Operating the climate control system
133Climate control Z