2012 MERCEDES-BENZ E-CLASS ESTATE ad blue
[x] Cancel search: ad bluePage 7 of 457
1, 2, 3 ...
12 Vsocket
see Socket
4ETS
see ETS/4ETS (Electronic Trac-
tionS ystem)
4MATIC (permanent four-wheel
drive) .................................................. 211
4MATIC off-road system ...................211 A
ABS (Anti-lock Braking System) Display message ............................ 269
Function/notes ................................ 70
Important safety notes ....................70
Warning lamp ................................. 301
Activating/deactivating air-recir-
culation mode .................................... 149
Activating/deactivating cooling
with air dehumidification .................145
Active Blin dSpot Assist
Activating/deactivating (on-
board computer) ............................ 257
Display message ............................ 285
Function/notes ............................. 229
Towing atrailer .............................. 232
Active Driving Assistance package .229
Active Lane Keeping Assist Activating/deactivating (on-
board computer) ............................ 257
Display message ............................ 284
Function/notes ............................. 232
Towing atrailer .............................. 234
Active light function .........................130
Active multicontour seat ..................112
Active Service System see ASSYST PLUS
ADAPTIVE BRAKE ................................. 76
Adaptive brake lamps .........................72
Adaptive Highbeam Assist Display message ............................ 278
Function/notes ............................. 131
Adaptive Main-beam Assist
Switching on/off (on-board com-
puter) ............................................. 260AdBlue
®
Display message ............................ 281
Filling capacity ............................... 440
Notes ............................................. 440
Service indicator ............................ 350
AdBlue ®
service indicator ................350
Additional speedometer ...................258
Additives (engine oil) ........................442
Adjusting the headlamp range .........128
Airbags Front airbag (driver, front
passenger )....................................... 46
Important safety guidelines .............44
Kneebag .......................................... .46
Pelvis airbag .................................... 47
Sidebag ............................................ 47
Triggering ......................................... 43
Windowba g...................................... 48
Air-conditioning system
see Climate control
Airf ilter (white display message) ....281
AIRMATIC Display message ............................ 282
Function/notes ............................. 208
Air pressure
see Tyre pressure
Airv ents
Glove compartmen t....................... 156
Important safety notes ..................155
Rea r............................................... 156
Setting ........................................... 155
Setting the centre air vents ...........156
Setting the side air vents ...............156
Alarm system
see ATA (Anti-Theft Alarm system)
Ambient lighting
Setting the brightness (on-board
computer) ...................................... 260
AMG RIDE CONTROL sports sus-
pension ............................................... 209
Anti-glare film .................................... 341
Anti-loc kBraking System
see ABS (Anti-lock Braking System)
Anti-Theft Alarm system
see ATA (Anti-Theft Alarm system)
Aquaplaning ....................................... 188
Ashtray ............................................... 3314
Index
Page 9 of 457
Battery (key)
Checking .......................................... 85
Important safety notes ....................85
Replacing ......................................... 85
Battery (vehicle)
Charging ........................................ 369
Display message ............................ 280
Important safety notes ..................367
Jump starting ................................. 370
Belt
see Seat belt
Belt force limiters (activation) ...........43
Belt tensioner Activation ......................................... 43
Function .......................................... .54
Blind Spo tAssist
Activating/deactivating .................257
Display message ............................ 285
Notes/function .............................. 225
Trailer towing ................................. 227
see Active Blind Spot Assist
BlueTEC (AdBlue ®
) ............................. 440
Bluetooth ®
SAP V3 telephone mod-
ule see Separate operating instructions
Bonnet
Active bonnet (pedestrian protec-
tion) ............................................... 344
Closing .......................................... .346
Display message ............................ 295
Opening ......................................... 345
Boot
Emergency release ..........................94
Boot lid
Display message ............................ 294
Opening dimensions ......................444
Boot load (maximum) ........................ 444
Bottle holders .................................... 329
Box (boot) .......................................... .322
Brake Assist System see BAS (Brake Assist System)
Brake fluid
Display message ............................ 272
Notes ............................................. 442
Brake lamps
Adaptive .......................................... .72
Display message ............................ 276Brakes
ABS .................................................. 70
BAS .................................................. 71
BAS PLUS ........................................ 71
Brake fluid (notes) .........................442
Display message ............................ 269
Driving tips .................................... 186
High-performance brake system ....188
Important safety notes ..................186
Parking brake ................................ 184
Warning lamp ................................. 300
Breakdown
see Flat tyre
Bulbs
see Changing bulbs C
Calling up a fault see Display messages
Car
see Vehicle
Care
Automatic car wash .......................351
Carpets .......................................... 357
Display ........................................... 355
Exterior lighting ............................. 354
Gea rors electo rlever .................... 356
High-pressure cleaner .................... 352
Interior ........................................... 355
Matt paintwork .............................. 353
Nigh tView Assist Plus ...................355
Notes ............................................. 350
Paint .............................................. 352
Plastic trim .................................... 356
Reversing camera ..........................354
Roof lining ...................................... 357
Seat bel t........................................ 357
Seat cover ..................................... 356
Sensors ......................................... 354
Steering wheel ............................... 356
Tai lpipes ....................................... 355
Trim pieces .................................... 356
Washing by hand ........................... 352
Wheels ........................................... 353
Windows ........................................ 353
Wiper blades .................................. 353
Wooden trim .................................. 3566
Index
Page 21 of 457
Switching sea
theating on/off .......115
Switching the sea tventilation on/
off .................................................. 116
Selector lever
Cleaning ......................................... 356
Sensors (cleaning instructions) .......354
Service see ASSYST PLUS
Service Centre
see Qualified specialist workshop
Service menu (on-board computer) .257
Service products
AdBlue ®
special additive s.............. 440
Brake fluid ..................................... 442
Coolant (engine) ............................ 442
Engine oil ....................................... 440
Fuel ................................................ 436
Important safety notes ..................435
Washer fluid .................................. .443
Settings
Factory (on-board computer) .........264
On-board computer .......................258
Setting the air distribution ...............147
Setting the airflow ............................148
SETUP (on-board computer) .............265
Shifting to neutral (manual trans-
mission) ............................................. 170
Short journeys (diesel particle fil-
ter) ...................................................... 186
Sidebag ................................................ 47
Side lamps Switching on/off ........................... 127
Side marker lamp Display mes-
sage .................................................... 277
Side windows Convenience closing ........................97
Convenience opening ......................96
Important safety notes ....................95
Opening/closing .............................. 96
Problem (malfunction) .....................99
resetting .......................................... 98
Skibag ................................................ 314
Sliding sunroof Important safety information ...........99
Opening/closing ............................ 100
Problem (malfunction) ...................103Rain closing feature
.......................100
Resetting ....................................... 100
see Panorama sliding sunroof
Snow chains ...................................... 383
Socket Centre console .............................. 332
Luggage compartment ...................333
Rea rcompartmen t......................... 332
Sockets
General notes ................................ 332
Spare wheel
Storing ........................................... 427
Specialist workshop ............................ 25
Spectacles compartment .................311
Speed, controlling see Cruise control
Spee dLimit Assist
Activating/deactivating the warn-
ing function .................................... 255
Displayin g...................................... 255
Display message ............................ 283
Display message in the multifunc-
tion displa y.................................... 221
Important safety notes ..................221
Speedometer
Activating/deactivating the addi-
tional speedometer ........................258
Digita l............................................ 250
In the Instrument cluster .........32, 245
Segments ...................................... 247
Selecting the unit of measure-
ment .............................................. 258
see Instrument cluster
SPEEDTRONIC
Deactivating variabl e..................... 194
Display message ............................ 287
Function/notes ............................. 192
Important safety notes ..................192
LIM indicator lamp .........................193
Permanent ..................................... 195
Selecting ........................................ 193
Storing the current spee d.............. 193
Variabl e......................................... 193
SPORT handling mode
Activating/deactivating (AMG
vehicles) .......................................... 74
Warning lamp ................................. 303 18
Index
Page 119 of 457
The system automatically switches down
from level
3to level 2after approximately
eight minutes.
Driver's and front-passenger seat: the sys-
tem automatically switches down from level
3 to level 2after approximately eight
minutes.
Rear seat: the system automatically
switches down from level 3to level 2after
approximately five minutes.
The system automatically switches down
from level 2to level 1after approximately ten
minutes.
The system automatically switches off
approximately 20 minutes after it is set to
level 1.
X Make sure that the key is in position 1or
2 in the ignition lock.
X To switch on: press button:repeatedly
until the desired heating level is set.
X To switch off: press button:repeatedly
until all the indicator lamps go out.
i If the battery voltage is too low, the seat
heating may switch off.
Problems with the seat heating The seat heating has switched off prema-
turely or cannot be switched on. The vehicle's
electrical system voltage is too low because
too many electrical consumers are switched
on.
X Switch off electrical consumers that you do
not need, such as the rear window heating
or interior lighting. Switching the seat ventilation on/off
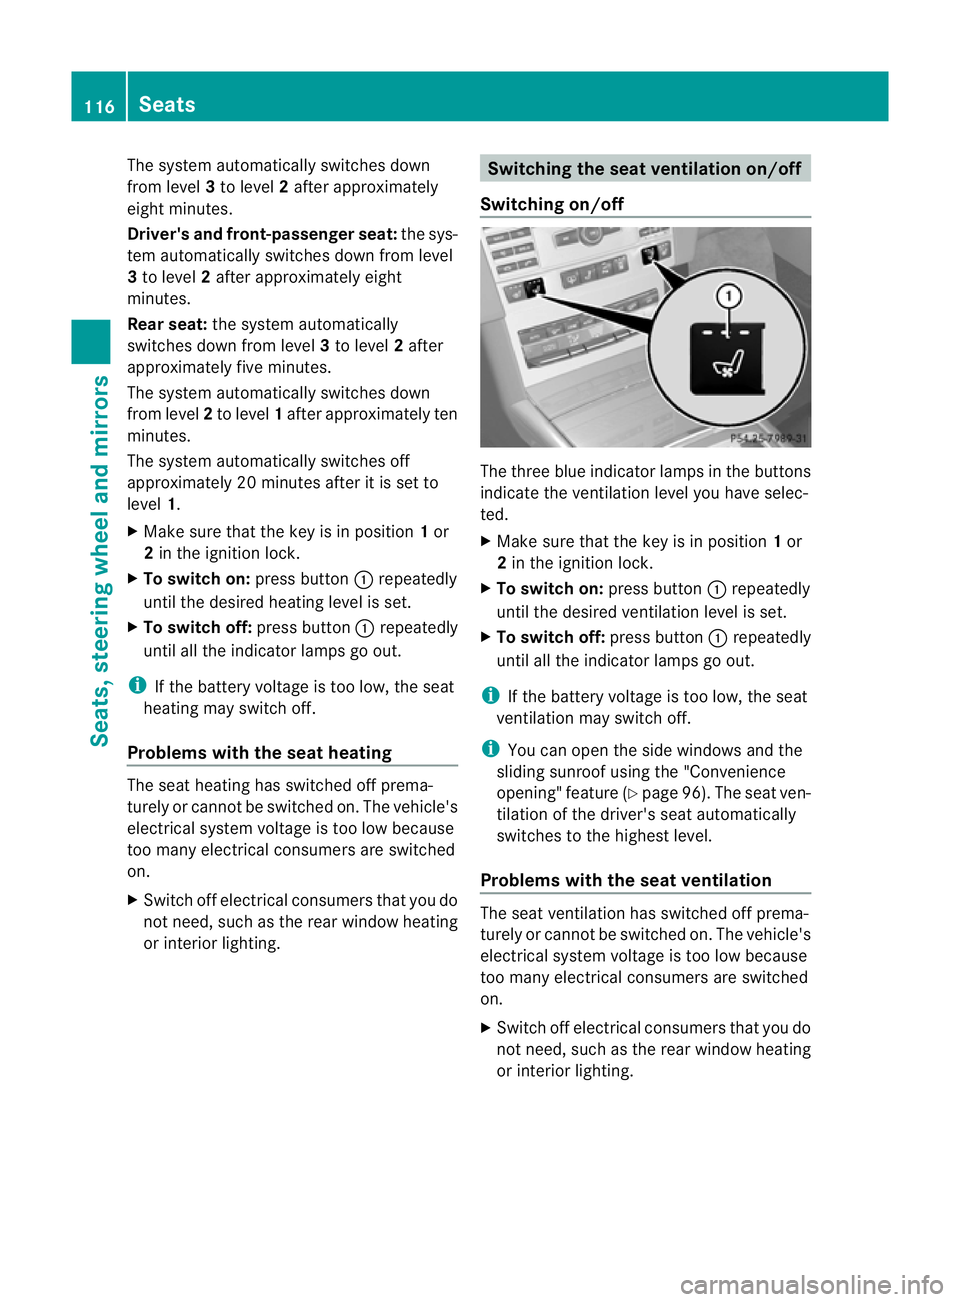
Switching on/off The three blue indicator lamps in the buttons
indicate the ventilation level you have selec-
ted.
X
Make sure that the key is in position 1or
2 in the ignition lock.
X To switch on: press button:repeatedly
until the desired ventilation level is set.
X To switch off: press button:repeatedly
until all the indicator lamps go out.
i If the battery voltage is too low, the seat
ventilation may switch off.
i You can open the side windows and the
sliding sunroof using the "Convenience
opening" feature (Y page 96). The seat ven-
tilation of the driver's seat automatically
switches to the highest level.
Problems with the seat ventilation The seat ventilation has switched off prema-
turely or cannot be switched on. The vehicle's
electrical system voltage is too low because
too many electrical consumers are switched
on.
X
Switch off electrical consumers that you do
not need, such as the rear window heating
or interior lighting. 116
SeatsSeats, steering wheel and mirrors
Page 132 of 457
X
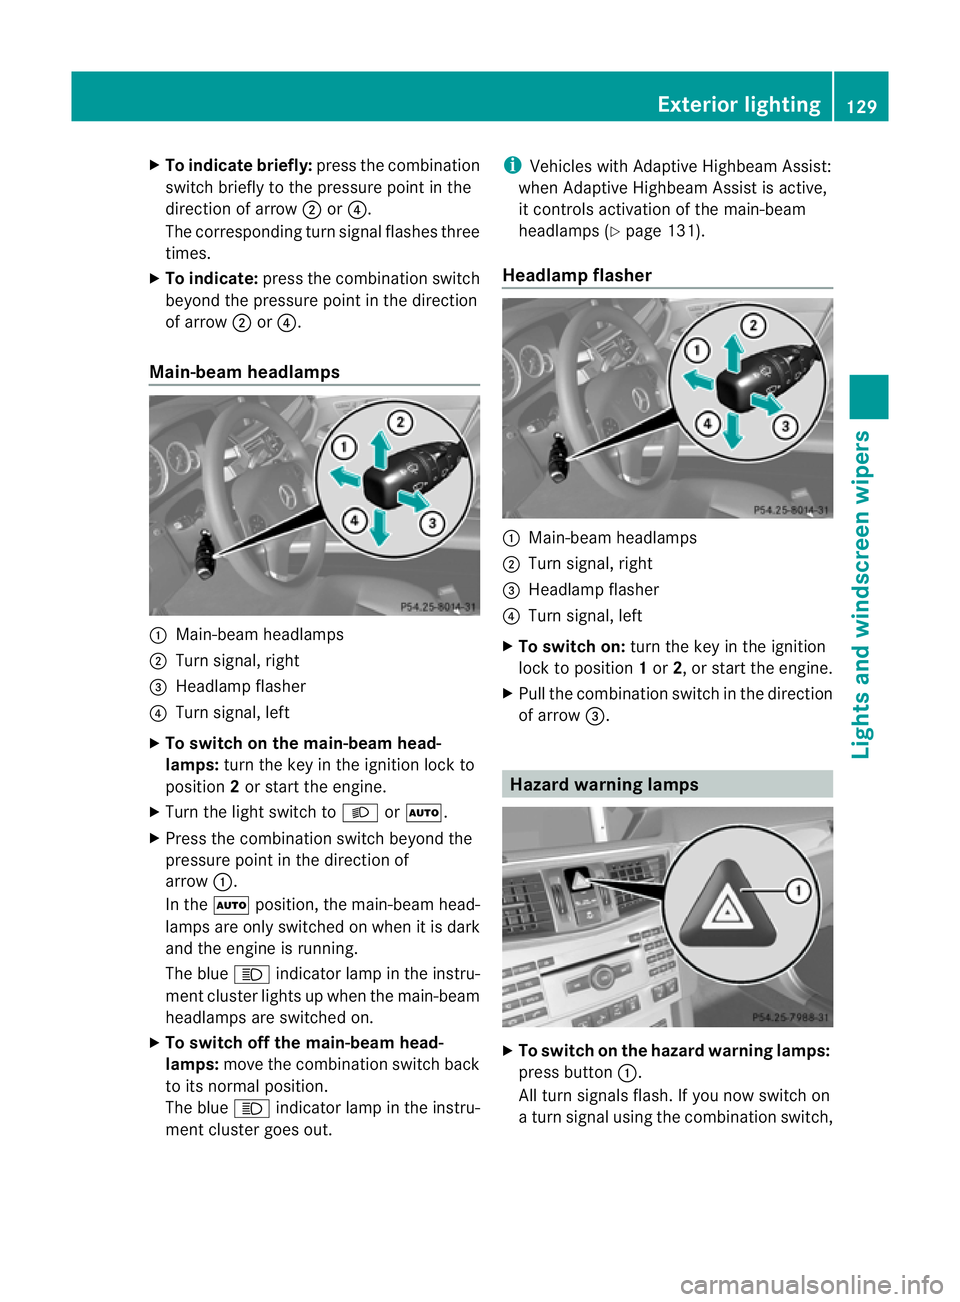
To indicate briefly: press the combination
switch briefly to the pressure point in the
direction of arrow ;or?.
The corresponding tur nsignal flashes three
times.
X To indicate: press the combination switch
beyond the pressure point in the direction
of arrow ;or?.
Main-beam headlamps :
Main-beam headlamps
; Turn signal, right
= Headlamp flasher
? Turn signal, left
X To switch on the main-beam head-
lamps: turn the key in the ignition lock to
position 2or start the engine.
X Turn the light switch to LorÃ.
X Press the combination switc hbeyond the
pressure point in the direction of
arrow :.
In the Ãposition, the main-beam head-
lamps are only switched on when it is dark
and the engine is running.
The blue Kindicator lamp in the instru-
ment cluster lights up when the main-beam
headlamps are switched on.
X To switch off the main-beam head-
lamps: move the combination switch back
to its normal position.
The blue Kindicator lamp in the instru-
ment cluster goes out. i
Vehicles with Adaptive Highbeam Assist:
when Adaptive Highbeam Assist is active,
it controls activation of the main-beam
headlamps (Y page 131).
Headlamp flasher :
Main-beam headlamps
; Turn signal, right
= Headlamp flasher
? Turn signal, left
X To switch on: turn the key in the ignition
lock to position 1or 2, or start the engine.
X Pull the combination switch in the direction
of arrow =. Hazard warning lamps
X
To switch on the hazard warning lamps:
press button :.
All turn signals flash. If you now switch on
a turn signal using the combination switch, Exterior lighting
129Lights and windscreen wipers Z
Page 155 of 457
when the system is set to automatic mode.
Set the temperature to 22 †.
The auxiliary heating/ventilatio ncan be acti-
vated or deactivated using the remote control
or the button on the centre console.
The on-board computer can be used to spec-
ify up to three departur etimes, one of which
may be preselected (Y page 262).
Switching the auxiliar yheating/venti-
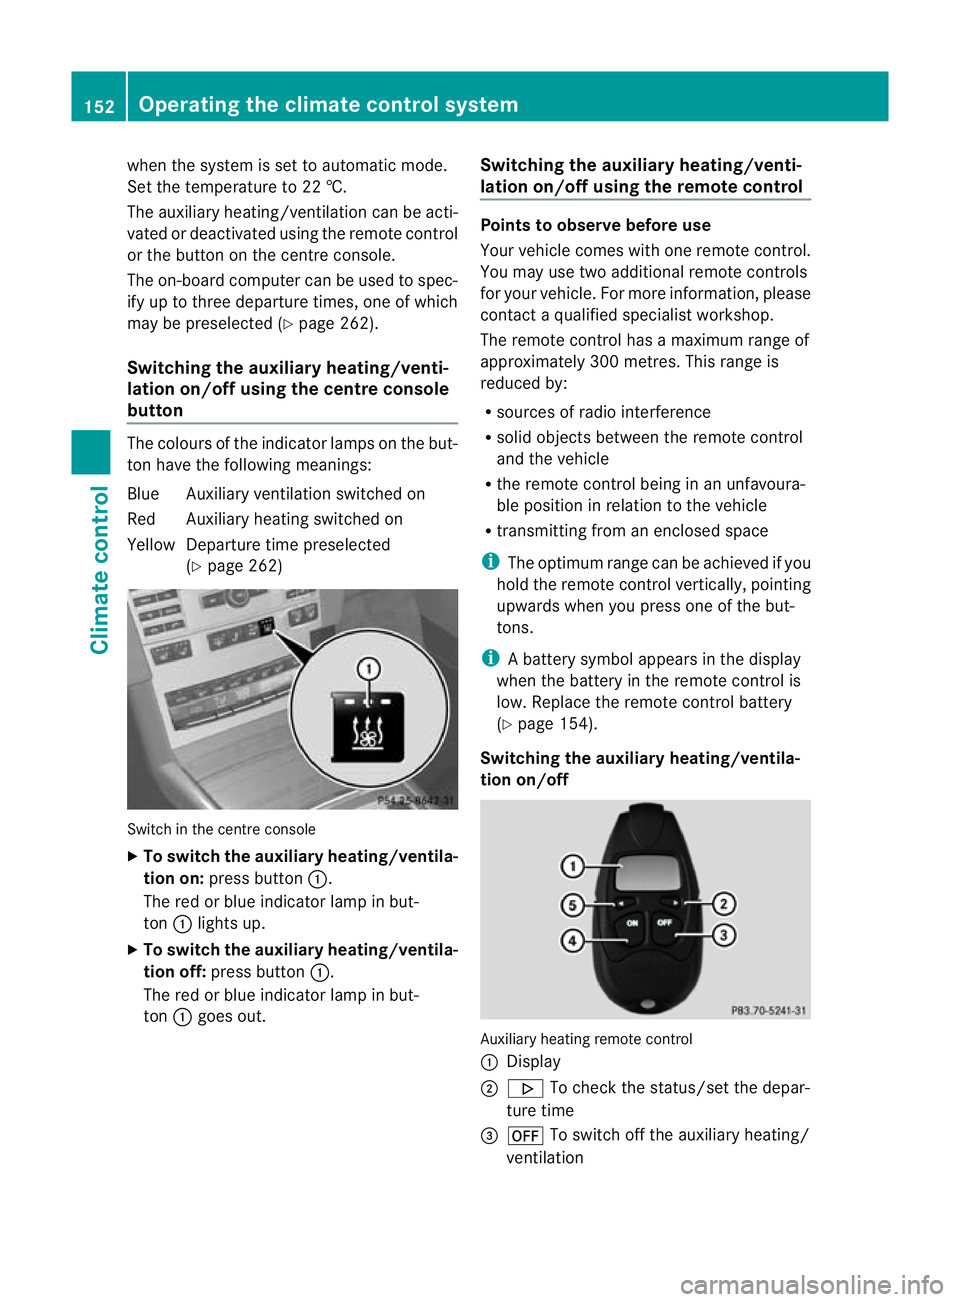
lation on/off using the centre console
button The colours of the indicator lamps on the but-
to nh ave the following meanings:
Blue Auxiliary ventilatio nswitched on
Red Auxiliary heating switched on
Yellow Departure time preselected (Ypage 262) Switch in the centre console
X
To switch the auxiliary heating/ventila-
tion on: press button :.
The red or blue indicator lamp in but-
ton :lights up.
X To switch the auxiliary heating/ventila-
tion off: press button :.
The red or blue indicator lamp in but-
ton :goes out. Switching the auxiliary heating/venti-
lation on/off using the remote control Points to observe before use
Your vehicle comes with one remote control.
You may use two additional remote controls
for your vehicle. For more information, please
contac
taqualified specialist workshop.
The remote control has a maximum range of
approximately 300 metres. This range is
reduced by:
R sources of radio interference
R solid objects between the remote control
and the vehicle
R the remote control being in an unfavoura-
ble position in relation to the vehicle
R transmitting from an enclosed space
i The optimum range can be achieved if you
hold the remote control vertically, pointing
upwards when you press one of the but-
tons.
i Abattery symbol appears in the display
when the battery in the remote control is
low. Replace the remote control battery
(Y page 154).
Switching the auxiliary heating/ventila-
tion on/off Auxiliary heating remote control
: Display
; . To check the status/set the depar-
ture time
= ^ To switch off the auxiliary heating/
ventilation 152
Operating the climate control systemClimate control
Page 222 of 457
could otherwise endanger yoursel
fand oth-
ers. G
WARNING
Unde rthe following circumstances, the
reversing camera will not function, or will
function in a limited manner:
R if the tailgate is open
R in heavy rain, snow or fog
R at night or in very dark places
R if the camera is exposed to very bright light
R if the area is lit by fluorescent light or LED
lighting (the display may flicker)
R if there is a sudden change in temperature,
e.g. when driving into a heated garage in
winter
R if the camera lens is dirty or obstructed
R if the rear of your vehicle is damaged. In this
event, have the camera position and setting
checked at a qualified specialist workshop.
Mercedes-Ben zrecommends that you use
a Mercedes-Benz Service Centre for this
purpose.
Do not use the reversing camera in these
types of situation .You could otherwise injure
others or damage objects and your vehicle
while you are parking.
The area behind the vehicle is displayed as a
mirror image, as in the rear-view mirror.
Activating the reversing camera X
Make sure that the key is in position 2in
the ignition lock.
X Make sure that the "Reversing camera"
function is selected in COMAND APS (see
the separate operating instructions for
COMAND APS).
X Engage reverse gear.
The area behind the vehicle is shown with
guide lines in the COMAND display. Guide lines in the COMAND display G
WARNING
Using the reversing camera can be dangerous
if you are colour blind or your ability to distin-
guish colours is impaired.
Only use the reversing camera if you can see
and distinguish between all the coloured
guide lines that are displayed by the reversing
camera in the COMAND display. G
WARNING
Please note that objects not at ground level
may appear to be further away than they
actually are. These include:
R the bumper of a vehicle that is parked
behind your vehicle
R a trailer drawbar
R the ball coupling of a trailer tow hitch
R the tail-end of a lorry
R slanted posts
The lines are only guides, not accurate meas-
urements of the distance to an obstacle.
Therefore, you should never pass the red line
when approaching an obstacle. You could oth-
erwise cause an accident and injure yourself
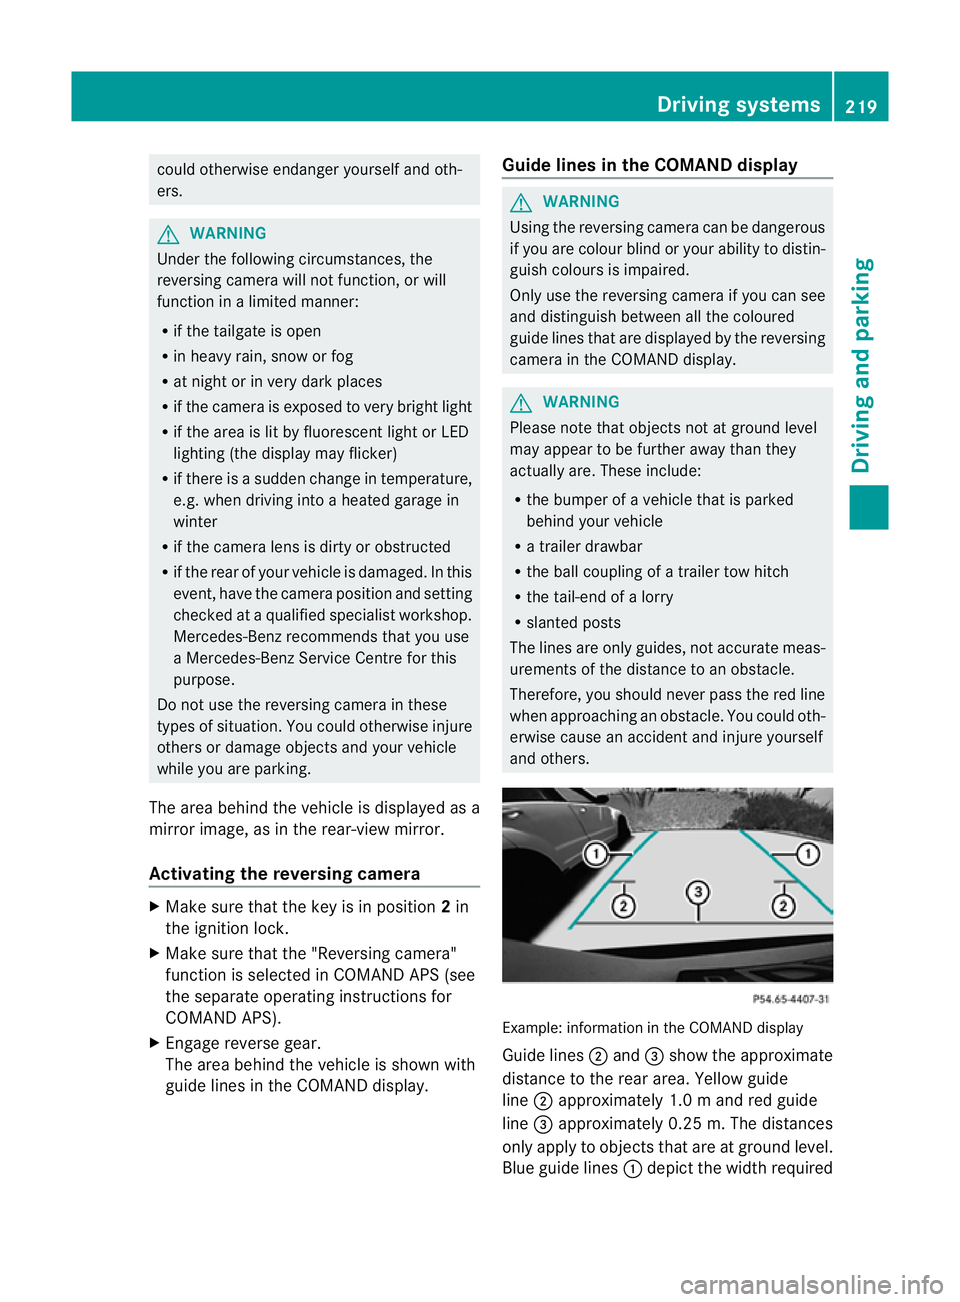
and others. Example: information in the COMAND display
Guide lines
;and =show the approximate
distance to the rear area. Yellow guide
line ;approximately 1.0 mand red guide
line =approximately 0.25 m. The distances
only apply to objects that are at ground level.
Blue guide lines :depict the width required Driving systems
219Driving and parking Z
Page 257 of 457
X
To select the next or previous scene:
briefly press the 9or: button.
X To select ascene from the scene list
(rapid scrolling): press and hold the
9 or: buttonuntil desired
scene :has been reached. Telephone menu
Introduction G
WARNING
Observe the legal requirements of the country
in which you are currently driving regarding
the use of mobile phones in the vehicle.
If it is permitted to use mobile phones while
the vehicle is in motion, you should only use
them when the road and traffic conditions
allow. Otherwise, you may be distracted from
the traffic conditions, cause an accident and
injure yoursel fand others.
X Switch on the mobile phone (see the sep-
arate operating instructions).
X Switch on the audio system or COMAND
Online; see the separate operating instruc-
tions.
X Insert the mobile phone into the bracket
(Y page 334).
or
X Establish a Bluetooth ®
connection to the
audio system or COMAND Online; see the
separate operating instructions.
X Press the =or; button on the steer-
ing wheel to select the Tel menu.
You will see one of the following display mes-
sages in the multifunctio ndisplay:
R Please enter PIN :t
he mobile phone has
been placed in the mobile phone bracket
and the PIN has not been entered.
When you enter your PIN via the mobile
phone, LINGUATRONIC, the audio system or COMAND Online, the mobile phone
searches for a network.
R Telephone ready or the name of the net-
work provider: the mobile phone has found
a network and is ready to receive.
R Telephone No service : there is no net-
work available or the mobile phone is
searching for a network.
i You can obtain further information about
suitable mobile phones and connecting
mobile phones via Bluetooth ®
:
R from any Mercedes Benz Service Centre
R on the Internet at: http://
www.mercedes-benz.com/connect
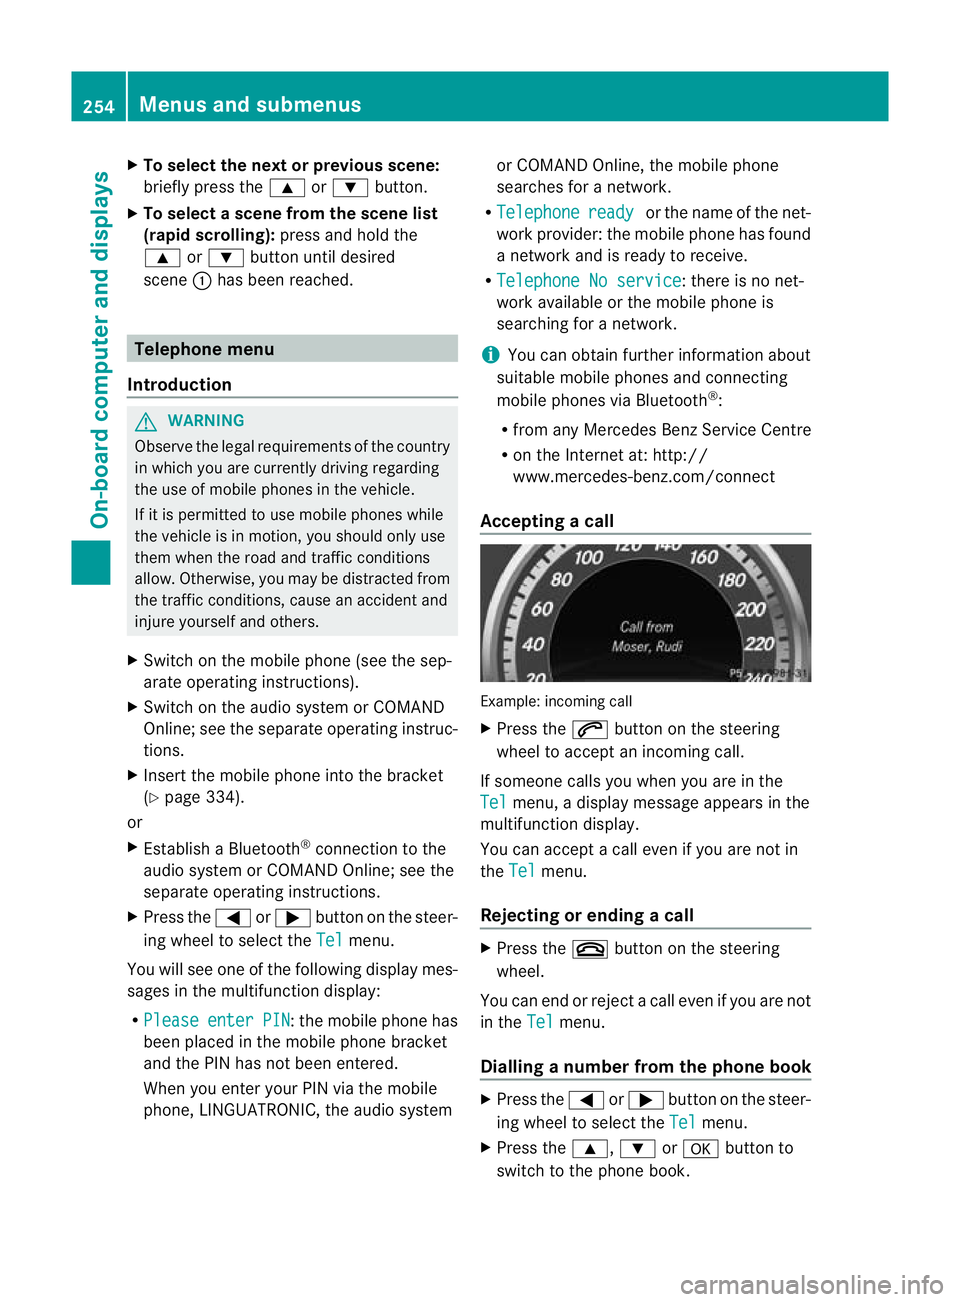
Accepting acall Example: incoming call
X
Press the 6button on the steering
wheel to accep tanincoming call.
If someone calls you when you are in the
Tel menu, a display message appears in the
multifunctio ndisplay.
You can accept a call even if you are not in
the Tel menu.
Rejecting or ending acall X
Press the ~button on the steering
wheel.
You can end or reject a call even if you are not
in the Tel menu.
Dialling anumber from the phone book X
Press the =or; button on the steer-
ing wheel to select the Tel menu.
X Press the 9,:ora button to
switch to the phone book. 254
Menus and submenusOn-board computer and displays