2012 MERCEDES-BENZ E-CLASS ESTATE check engine light
[x] Cancel search: check engine lightPage 11 of 457
Convenience closing feature
..............97
Convenience opening/closing (air-
recirculation mode) ........................... 150
Convenience opening feature ............96
Coolan t(engine)
Checkin gthe level ......................... 348
Display message ............................ 279
Important safety notes ..................442
Temperature (on-board computer) .264
Temperature gauge ........................ 246
Warning lamp ................................. 305
Cooling
see Climate control
Cornering light function
Display message ............................ 275
Function/notes ............................. 130
Crash-responsive emergency light-
ing ....................................................... 134
Cruise control Activatio ncondition s..................... 190
Cruise control leve r....................... 190
Deactivating ................................... 192
Display message ............................ 287
Driving system ............................... 189
Important safety notes ..................189
LIM indicator lamp .........................190
Selecting ........................................ 190
Setting aspeed .............................. 191
Storing and maintaining current
speed ............................................ .190
Cup holder
Centre console .............................. 328
Folding bench sea t........................ 329
Important safety notes ..................328
Rea rcompartmen t......................... 328 D
Dashboard see Instrument cluster
Dashboard lighting
see Instrument cluster lighting
Data
see Technical data Daytime driving lights
Display message ............................ 278
Function/notes ............................. 125
Switching on/off (on-board com-
puter) ............................................. 259
Dealership
see Qualified specialist workshop
Delaye dswitch-off
Exterio rlighting (on-board com-
puter )............................................. 260
Interior lighting .............................. 261
Diagnostics connection ......................25
Diesel particle filter ..........................186
Digital speedometer .........................250
Dipped-beam headlamps Changing bulbs .............................. 136
Display message ............................ 275
Setting for driving abroad (sym-
metrical) ........................................ 124
Setting for driving on the right/
left ................................................. 260
Switching on/off ........................... 126
DIRECT SELECTl ever
see Automatic transmission
Displa ymessage
ASSYS TPLUS ................................ 349
General information .......................268
Hiding (on-board computer) ...........268
KEYLESS-GO .................................. 297
Display messages
Calling up (on-board computer) .....268
Driving systems ............................. 282
Engine ............................................ 279
Key ................................................ 297
Lights ............................................ .275
Safety systems .............................. 269
Tyres .............................................. 289
Vehicle .......................................... .293
Distance display (on-board com-
puter) ................................................. .256
Distance warning signal (warning
lamp) .................................................. 307
DISTRONIC PLUS Deactivating ................................... 203
Display message ............................ 286
Displays in the multifunctio ndis-
play ................................................ 202
Function/notes ............................. 1958
Index
Page 16 of 457
Interior lighting
................................. 133
Automatic control system ..............134
Delayed switch-off (on-board
computer) ...................................... 261
Emergency lighting ........................134
Manual control ............................... 134
Overview ........................................ 133
Reading lamp ................................. 133
Setting the ambient lighting
brightness (on-board computer) ....260
Interior motion sensor ........................79
ISOFIX child seat securing system ....58 J
Jack Storage location ............................ 361
Using ............................................. 390
Jump start (engine)
see Jump starting (engine)
Jump starting (engine) ......................370 K
Key Changing the battery .......................85
Checking the battery .......................85
Convenience closing feature ............97
Convenience opening feature ..........96
Display message ............................ 297
Door central locking/unlocking .......83
Emergency key element ................... 84
Important safety notes ....................82
Loss ................................................. 87
Modifying the programming .............84
Positions (ignition lock) .................161
Problem (malfunction) .....................87
Starting the engine ........................163
KEYLESS-GO
Convenience closing ........................97
Display message ............................ 297
Locking ............................................ 83
Start/Stop button .......................... 161
Starting the engine ........................163
Unlocking ......................................... 83
Keyp ositions
Key ................................................ 161
KEYLESS GO .................................. 161Kickdown
Driving tips .................................... 174
Manual drive program ....................177
Kneebag ............................................... 46 L
Lamps see Warning and indicator lamps
Lane detection (automatic)
see Lane Keeping Assist
Lane Keeping Assist
Activating/deactivating .................257
Display message ............................ 284
Function/informatio n.................... 227
Lane package ..................................... 225
Lap time (RACETIMER) ......................265
Lashing eyelets ................................. 318
Licence plate lamp (display mes-
sage) ................................................... 277
Lighting see Lights
Lights
Activating/deactivating the Intel-
ligent Ligh tSystem ........................ 259
Activating/deactivating the inte-
rior lighting delayed switch-off .......261
Active light function .......................130
Automatic headlamp mode ............125
Cornering light function .................130
Dipped-bea mheadlamps ............... 126
Driving abroad ............................... 124
Foglamps ....................................... 126
Foglamps (extended range) ...........131
Hazard warning lamps ...................129
Headlamp flasher ........................... 129
Headlamp range ............................ 128
Ligh tswitc h................................... 125
Main-beam headlamps ................... 129
Motorway mode ............................. 131
Parking lamps ................................ 128
Rea rfoglamp ................................. 127
Setting the ambient lighting
brightness (on-board computer) ....260
Side lamps ..................................... 127
Switching Adaptive Highbeam
Assist on/off ................................. 260 Index
13
Page 46 of 457
To ensure that the restraint systems can
deliver their full potential protection, make
sure that:
R the seat and head restraint are adjusted
properly (Y page 106).
R the seat belt has been fastened properly
(Y page 51).
R the airbags can inflate unrestricted if
deployed (Y page 44).
R the steering wheel is adjusted properly
(Y page 117).
R the restraint systems have not been modi-
fied.
An airbag increases the protection of vehicle
occupants wearing a seat belt. However, air-
bags are only an additional restraint system
which complements, but does not replace,
the seat belt. All vehicle occupants must wear
their seat belt correctly at all times, even if
the vehicle is equipped with airbags. The air-
bags are not deployed in all types of acci-
dents .For example, if the protective capacity
of correctly fastened seat belts is not
increased by deploying the airbags, the air-
bags will not deploy.
Airbag deployment only provides increased
protection if the seat belt is worn correctly.
First, the seat belt helps to keep the vehicle
occupant in the best position in relation to the
airbag. Second, in a head-on collision, for
example, the seat belt prevents the vehicle
occupant from being propelled towards the
point of impact. SRS (Supplemental Restraint System)
Introduction SRS consists of:
R
the 6 SRS warning lamp
R airbags
R the airbag control unit with crash sensors
R belt tensioners
R belt force limiters SRS reduces the risk of occupants coming
into contact with the vehicle's interior in the
event of an accident. It can also reduce the
forces to which occupant
sare subjected dur-
ing an accident.
SRS warning lamp G
WARNING
If SRS is malfunctioning, individual systems
may be triggered unintentionally or might not
be triggered in the event of an accident with
a high rate of vehicle deceleration.
A malfunction has occurred if:
R the 6 SRS warning lamp does not light
up when the ignitio nis switched on.
R the engine is running and the 6SRS
warning lamp does not go out after a few
seconds.
R the engine is running and the 6SRS
warning lamp lights up again.
In this case, have SRS checked immediately
at a qualified specialist workshop.
SRS functions are checked regularly when
you switch on the ignition and when the
engine is running. Therefore, malfunctions
can be detected in good time.
The 6 SRS warning lamp in the instrument
cluster lights up when the ignition is switched
on. It goes out no later than a few seconds
after the engine is started.
Triggering of belt tensioners, belt force
limiters and airbags During the first stage of a collision, the airbag
control unit evaluates important physical
data relating to vehicle deceleration or accel-
eration, such as:
R
duration
R direction
R magnitude
Based on the evaluation of this data, the air-
bag control unit pre-emptively triggers the
belt tensioners in the first stage. Occupant safety
43Safety Z
Page 73 of 457
atio
nis possible using the switches in the
rear compartment. Driving safety systems
Driving safety systems overview
In this section, you will find information about
the following driving safety systems:
R ABS ( Anti-lock BrakingSystem)
(Y page 70)
R BAS ( Brake Assist System) (Y page 71)
R BAS PLUS(Brake AssistSystem PLUS)
(Y page 71)
R Adaptive brake lamps (Y page 72)
R ESP ®
(Electronic StabilityProgram)
(Y page 72)
R EBD ( electronic brake force distribution)
(Y page 76)
R ADAPTIVE BRAKE (Y page 76)
R PRE-SAFE ®
Brake (Y page 76) Important safety notes
G
WARNING
Hybrid vehicles: ensure that you read the
"HYBRID" supplement. You could otherwise
fail to recognise dangers.
If you fail to adapty our driving style or if you
are inattentive, the driving safety systems can
neither reduce the risk of accident nor over-
ride the laws of physics. Driving safety sys-
tems are merely aids designed to assist driv-
ing. You are responsible for the distance to
the vehicle in front, for vehicle speed and for
braking in good time. Always adapt your driv-
ing style to suit the prevailing road and
weather conditions and maintain a safe dis-
tance from the vehicle in front. Drive care-
fully.
i The driving safety systems described only
work as effectively as possible when there
is adequate contact between the tyres and the road surface. Please pay special atten-
tion to the notes on tyres, recommended
minimum tyre tread depths, etc.
(Y
page 380).
In wintry driving conditions, always use
winter tyres (M+S tyres) and, if necessary,
snow chains. Only in this way will the driv-
ing safety systems described in this section
work as effectively as possible. ABS (Anti-lock Braking System)
Important safety notes i
Observe the "Important safety notes" sec-
tion (Y page 70). G
WARNING
If ABS is faulty, the wheels could lock when
braking. The steerability and braking charac-
teristics may be severely impaired. Addition-
ally, further driving safety systems are deac-
tivated. There is an increased danger of skid-
ding and accidents.
Drive on carefully. Have ABS checked imme-
diately at a qualified specialist workshop.
When ABS is malfunctioning, other systems,
including driving safety systems, will also
become inoperative. Observe the information
on the ABS warning lamp (Y page 301) and
display messages which may be shown in the
instrument cluster (Y page 269).
ABS regulates brake pressure in such a way
that the wheels do not lock when you brake.
This allows you to continue steering the vehi-
cle when braking.
ABS works from a speed of about 8 km/h
upwards, regardless of road-surface condi-
tions. ABS works on slippery surfaces, even
when you only brake gently.
The yellow !ABS warning lamp in the
instrument cluster lights up when the ignition
is switched on. It goes out when the engine is
running. 70
Driving safety systemsSafety
Page 76 of 457
G
WARNING
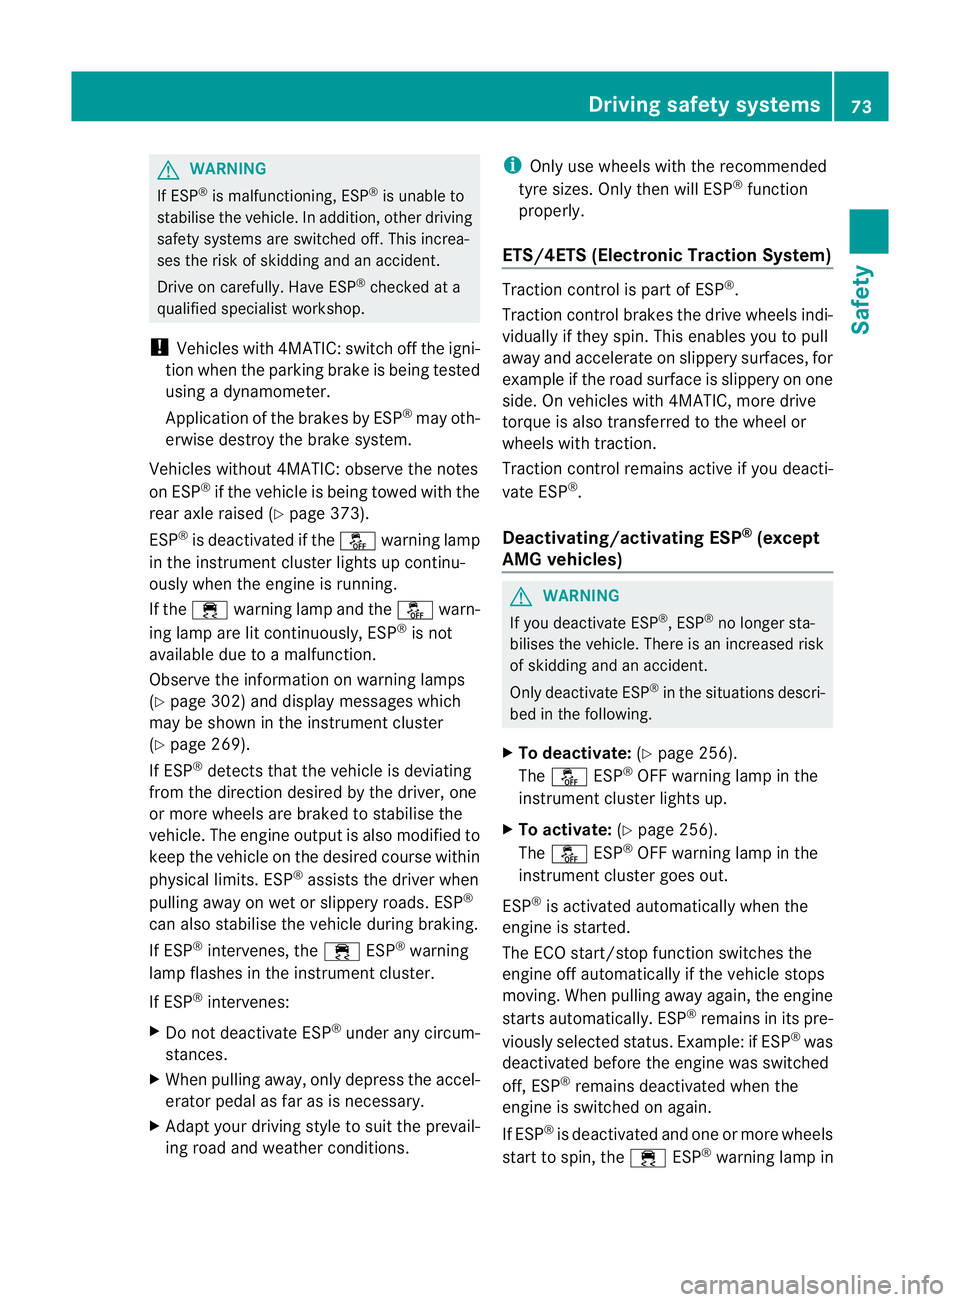
If ESP ®
is malfunctioning, ESP ®
is unable to
stabilise the vehicle. In addition, other driving
safety systems are switched off. This increa-
ses the risk of skidding and an accident.
Drive on carefully. Have ESP ®
checked at a
qualified specialist workshop.
! Vehicles with 4MATIC: switch off the igni-
tion when the parking brake is being tested
using a dynamometer.
Application of the brakes by ESP ®
may oth-
erwise destroy the brake system.
Vehicles without 4MATIC: observe the notes
on ESP ®
if the vehicle is being towed with the
rear axle raised (Y page 373).
ESP ®
is deactivated if the åwarning lamp
in the instrument cluster lights up continu-
ously when the engine is running.
If the ÷ warning lamp and the åwarn-
ing lamp are lit continuously, ESP ®
is not
available due to a malfunction.
Observe the information on warning lamps
(Y page 302) and display messages which
may be show ninthe instrumentc luster
(Y page 269).
If ESP ®
detects that the vehicle is deviating
fro mt he direction desired by the driver, one
or more wheels are braked to stabilise the
vehicle. The engine output is also modified to
keep the vehicle on the desired course within
physical limits. ESP ®
assists the driver when
pulling away on wet or slippery roads. ESP ®
can also stabilise the vehicle during braking.
If ESP ®
intervenes, the ÷ESP®
warning
lamp flashes in the instrumentc luster.
If ESP ®
intervenes:
X Do not deactivate ESP ®
under any circum-
stances.
X When pulling away, only depress the accel-
erator pedal as far as is necessary.
X Adapt your driving style to suit the prevail-
ing road and weathe rconditions. i
Only use wheels with the recommended
tyre sizes. Only then will ESP ®
function
properly.
ETS/4ETS (Electronic Traction System) Traction control is part of ESP
®
.
Traction control brakes the drive wheels indi-
vidually if they spin. This enables you to pull
away and accelerate on slippery surfaces, for
example if the road surface is slippery on one
side. On vehicles with 4MATIC, more drive
torque is also transferred to the wheel or
wheels with traction.
Traction control remains active if you deacti-
vate ESP ®
.
Deactivating/activating ESP ®
(except
AMG vehicles) G
WARNING
If you deactivate ESP ®
, ESP ®
no longer sta-
bilises the vehicle. There is an increased risk
of skidding and an accident.
Only deactivate ESP ®
in the situations descri-
bed in the following.
X To deactivate: (Ypage 256).
The å ESP®
OFF warning lamp in the
instrument cluster lights up.
X To activate: (Ypage 256).
The å ESP®
OFF warning lamp in the
instrument cluster goes out.
ESP ®
is activated automatically when the
engine is started.
The ECO start/stop function switches the
engine off automatically if the vehicle stops
moving. When pulling away again, the engine
starts automatically. ESP ®
remains in its pre-
viously selected status. Example: if ESP ®
was
deactivated before the engine was switched
off, ESP ®
remains deactivated when the
engine is switched on again.
If ESP ®
is deactivated and one or more wheels
start to spin, the ÷ESP®
warning lamp in Driving safety systems
73Safety Z
Page 79 of 457
trailer combination by depressing the brake
firmly.
In this situation, ESP
®
assists you and can
detect if the vehicle/traile rcombination
begins to lurch. ESP ®
slows the vehicle down
by braking and limiting the engine output until
the vehicle/trailer combination has stabi-
lised.
Trailer stabilisation is active above speeds of
about 65 km/h.
Trailer stabilisation does not work if ESP ®
is
deactivated or disabled because of a mal-
function. EBD (electronic brake force distribu-
tion)
i Observe the "Important safety notes" sec-
tion (Y page 70). G
WARNING
If EBD has malfunctioned, the rear wheels can
still lock, e.g. under full braking. This increa-
ses the risk of skidding and an accident.
You should therefore adapt your driving style
to the different handling characteristics. Have
the brake system checked at a qualified spe-
cialist workshop.
Observe information regarding indicator and
warning lamps (Y page 301) as well as dis-
play messages (Y page 271).
EBD monitors and controls the brake pres-
sure on the rear wheels to improve driving
stability while braking. ADAPTIVE BRAKE
ADAPTIVE BRAKE enhances braking safety
and offers increased braking comfort. In addi-
tion to the braking function, ADAPTIVE BRAKE
also has the HOLD function (Y page 205) and
hill start assist (Y page 164). PRE-SAFE
®
Brake
i Observe the "Important safety notes" sec-
tion (Y page 70).
PRE-SAFE ®
Brake is only available in vehicles
with DISTRONIC PLUS.
PRE-SAFE ®
Brake can help you to minimise
the risk of a collision with a vehicle ahead or
reduce the effects of such a collision. If PRE-
SAFE ®
Brake detects a risk of collision, you
will be warned visually and acoustically as
well as by automatic braking. PRE-SAFE ®
Brake cannot prevent a collision without your
intervention.
This function will issue a warning if:
R at speeds of around 30 km/ho rmore, over
several seconds, the distance maintained
to the vehicle travelling in front is insuffi-
cient.
The · distance warning lamp then lights
up in the instrument cluster.
R at a speed of approximately 7km/h or
higher, you very quickly approach a vehicle
in front.
An intermittent warning tone will then
sound and the ·distance warning lamp
will light up in the instrument cluster.
X Brake immediately in order to increase the
distance from the vehicle in front.
or
X Take evasive action provided it is safe to do
so.
From a speed of approximately 7km/h, if the
driver and passengers have fastened their
seat belts, PRE-SAFE ®
Brake can brake the
vehicle automatically at speeds up to approx-
imatel y200 km/h.
Due to the nature of the system, particularly
complicated driving conditions may cause
unnecessary warnings or the unnecessary
intervention of PRE-SAFE ®
Brake. 76
Driving safety systemsSafety
Page 86 of 457
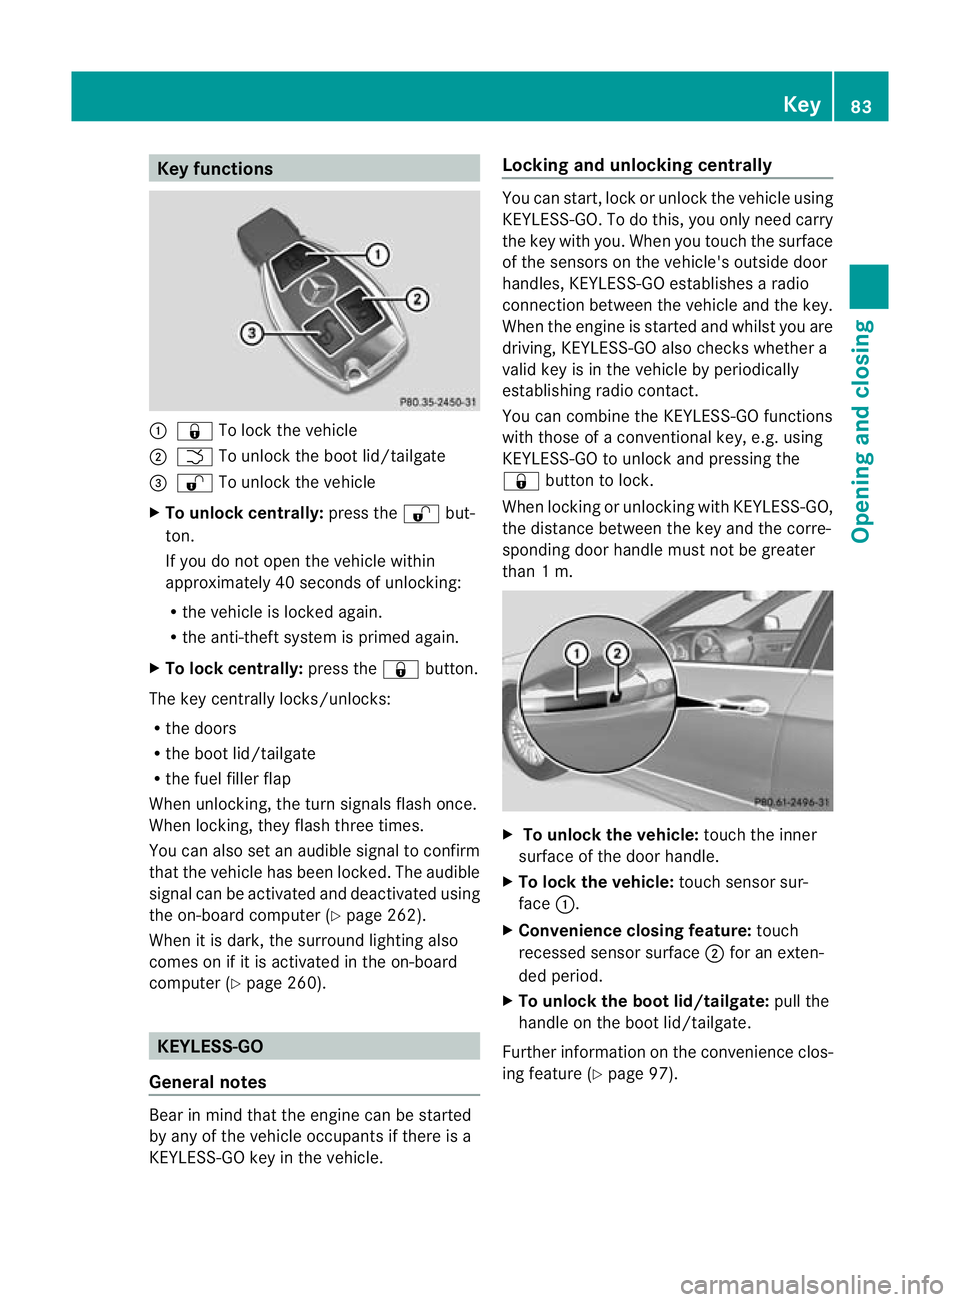
Key functions
:
& To loc kthe vehicle
; F To unlock the boot lid/tailgate
= % To unlock the vehicle
X To unlock centrally: press the%but-
ton.
If you do not open the vehicle within
approximately 40 seconds of unlocking:
R the vehicle is locked again.
R the anti-theft system is primed again.
X To lock centrally: press the&button.
The key centrally locks/unlocks:
R the doors
R the boot lid/tailgate
R the fuel filler flap
When unlocking, the turn signals flash once.
When locking, they flash three times.
You can also set an audible signal to confirm
that the vehicle has been locked. The audible
signal can be activated and deactivated using
the on-board computer (Y page 262).
When it is dark, the surround lighting also
comes on if it is activated in the on-board
computer (Y page 260). KEYLESS-GO
General notes Bear in mind that the engine can be started
by any of the vehicle occupants if there is a
KEYLESS-GO key in the vehicle. Locking and unlocking centrally You can start, lock or unlock the vehicle using
KEYLESS-GO. To do this, you only need carry
the key with you. When you touch the surface
of the sensors on the vehicle's outside door
handles, KEYLESS-GO establishes a radio
connection between the vehicle and the key.
When the engine is started and whilst you are
driving, KEYLESS-GO also checks whether a
valid key is in the vehicle by periodically
establishing radio contact.
You can combine the KEYLESS-GO functions
with those of a conventional key, e.g. using
KEYLESS-GO to unlock and pressing the
&
button to lock.
When locking or unlocking with KEYLESS-GO,
the distance between the key and the corre-
sponding door handle must not be greater
than 1 m. X
To unlock the vehicle: touch the inner
surface of the door handle.
X To lock the vehicle: touch sensor sur-
face :.
X Convenience closing feature: touch
recessed sensor surface ;for an exten-
ded period.
X To unlock the boot lid/tailgate: pull the
handle on the boot lid/tailgate.
Further information on the convenience clos-
ing feature (Y page 97). Key
83Opening and closing Z
Page 91 of 457
Problem Possible causes/consequences and
M Solutions
You have lost the emer-
gency key element. X
Report the loss immediately to the vehicle insurers.
X If necessary, have the locks changed as well. The engine cannot be
started using the key. the on-board voltage is too low.
X
Switch off non-essential consumers, e.g. seat heating or interior
lighting, and try to start the engine again.
If this does not work:
X Check the starter battery and charge it if necessary
(Y page 369).
or
X Jump-start the vehicle (Y page 370).
or
X Consult a qualified specialist workshop. Only vehicles without a
DIRECT SELECT lever:
The engine cannot be
started using the key. The steering lock is mechanically blocked.
X
Remove the key and reinsert it into the ignition lock. While doing
this, turn the steering wheel in both directions. The engine cannot be
started using KEYLESS-
GO. The key is in the
vehicle. Ad
oor is open. Therefore, the key cannot be detected as easily.
X Close the door and try to start the vehicle again. There is interference from a powerful source of radio waves.
X
Start your vehicle with the key in the ignition lock. Doors
Important safety notes
G
WARNING
Only for the United Kingdom: if the vehicle
has been locked with the key or with KEY-
LESS-GO, the double lock function is activa-
ted as standard. It is then not possible to open
the doors from inside the vehicle.
Therefore, do not leave any people behind in
the vehicle, particularly children, elderly peo-
ple or people requiring special assistance. As
a result, they may not be able to free them-
selves in the event of an emergency. They
could be seriously or even fatally injured by
prolonged exposure to extremely high or low
temperatures, for example. In this case, res- cuing people from outside the vehicle is diffi-
cult.
Deactivate the interior motion sensor before
you lock the vehicle. The doors can then be
opened from the inside after the vehicle has
been locked from the outside.
G
WARNING
If children are left unsupervised in the vehicle,
they could:
R open a door from inside the vehicle at any
time, even if it has been locked
R start the vehicle using akey which has been
left in the vehicle
R release the parking brake 88
DoorsOpening and closing