2012 MERCEDES-BENZ E-CLASS COUPE key battery
[x] Cancel search: key batteryPage 117 of 389
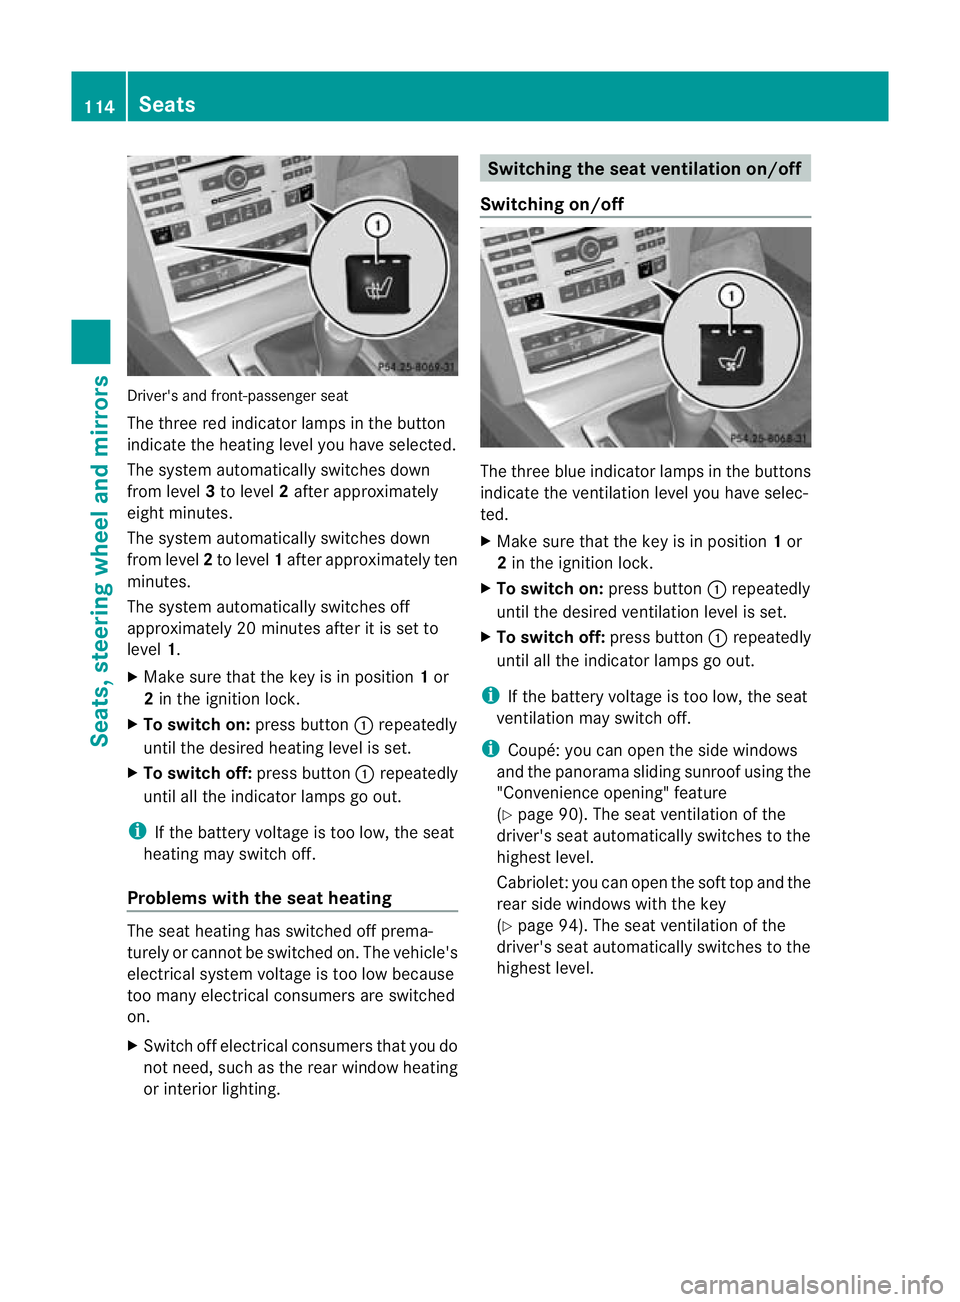
Driver's and front-passenge
rseat
The three red indicato rlamps in the button
indicate the heating level you have selected.
The system automatically switches down
from level 3to level 2after approximately
eigh tminutes.
The system automatically switches down
fro ml evel 2to level 1after approximately ten
minutes.
The system automatically switches off
approximately 20 minutes after it is set to
level 1.
X Make sure that the key is in position 1or
2 in the ignition lock.
X To switch on: press button:repeatedly
until the desired heating level is set.
X To switch off: press button:repeatedly
until all the indicator lamps go out.
i If the battery voltage is too low, the seat
heating may switch off.
Problems with the seat heating The seat heating has switched off prema-
turely or cannot be switched on. The vehicle's
electrical system voltage is too low because
too many electrical consumers are switched
on.
X Switch off electrical consumers that you do
not need, such as the rear window heating
or interior lighting. Switching the seat ventilation on/off
Switching on/off The three blue indicator lamps in the buttons
indicate the ventilation level you have selec-
ted.
X
Make sure that the key is in position 1or
2 in the ignition lock.
X To switch on: press button:repeatedly
until the desired ventilation level is set.
X To switch off: press button:repeatedly
until all the indicator lamps go out.
i If the battery voltage is too low, the seat
ventilation may switch off.
i Coupé: you can open the side windows
and the panorama sliding sunroof using the
"Convenience opening" feature
(Y page 90). The seat ventilation of the
driver's seat automatically switches to the
highest level.
Cabriolet: you can open the soft top and the
rear side windows with the key
(Y page 94). The seat ventilation of the
driver's seat automatically switches to the
highest level. 114
SeatsSeats, steering wheel and mirrors
Page 118 of 389
Problems with the seat ventilation
The seat ventilation has switched off prema-
turely or cannot be switched on. The vehicle's
electrical system voltage is too low because
too many electrical consumers are switched
on.
X Switch off electrical consumers that you do
not need, such as the rear window heating
or interior lighting. AIRSCARF (Cabriolet)
G
WARNING
Very hot air can flow out of the AIRSCARF
vents in the head restraints when AIRSCARF
is in operation. This can cause burns on unpro-
tected skin near the AIRSCARF vents. Lower
the heating output in good time, when neces-
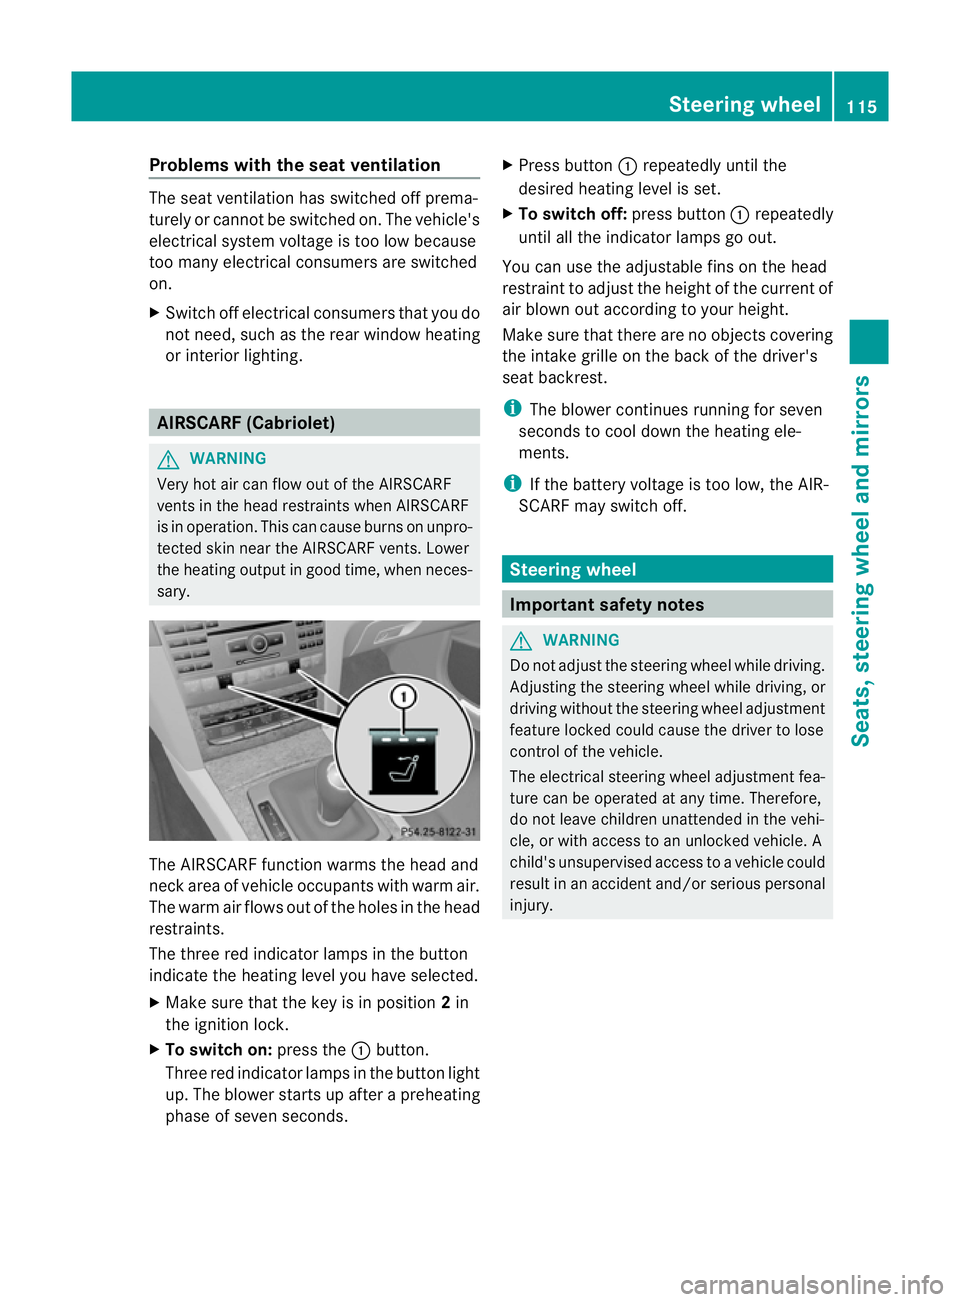
sary. The AIRSCARF function warms the head and
neck area of vehicle occupants with warm air.
The warm air flows out of the holes in the head
restraints.
The three red indicator lamps in the button
indicate the heating level you have selected.
X Make sure that the key is in position 2in
the ignition lock.
X To switch on: press the:button.
Three red indicator lamps in the button light
up. The blower starts up after a preheating
phase of seven seconds. X
Press button :repeatedly until the
desired heating level is set.
X To switch off: press button:repeatedly
until all the indicator lamps go out.
You can use the adjustable fins on the head
restraint to adjust the height of the current of
air blown out according to your height.
Make sure that there are no objects covering
the intake grille on the back of the driver's
seat backrest.
i The blower continues running for seven
seconds to cool down the heating ele-
ments.
i If the battery voltage is too low, the AIR-
SCARF may switch off. Steering wheel
Important safety notes
G
WARNING
Do not adjust the steering wheel while driving.
Adjusting the steering wheel while driving, or
driving without the steering wheel adjustment
feature locked could cause the driver to lose
control of the vehicle.
The electrical steering wheel adjustment fea-
ture can be operated at any time. Therefore,
do not leave children unattended in the vehi-
cle, or with access to an unlocked vehicle. A
child's unsupervised access to a vehicle could
result in an accident and/or serious personal
injury. Steering wheel
115Seats, steering wheel and mirrors Z
Page 121 of 389
X
Make sure that the key is in position 1or
2 in the ignition lock.
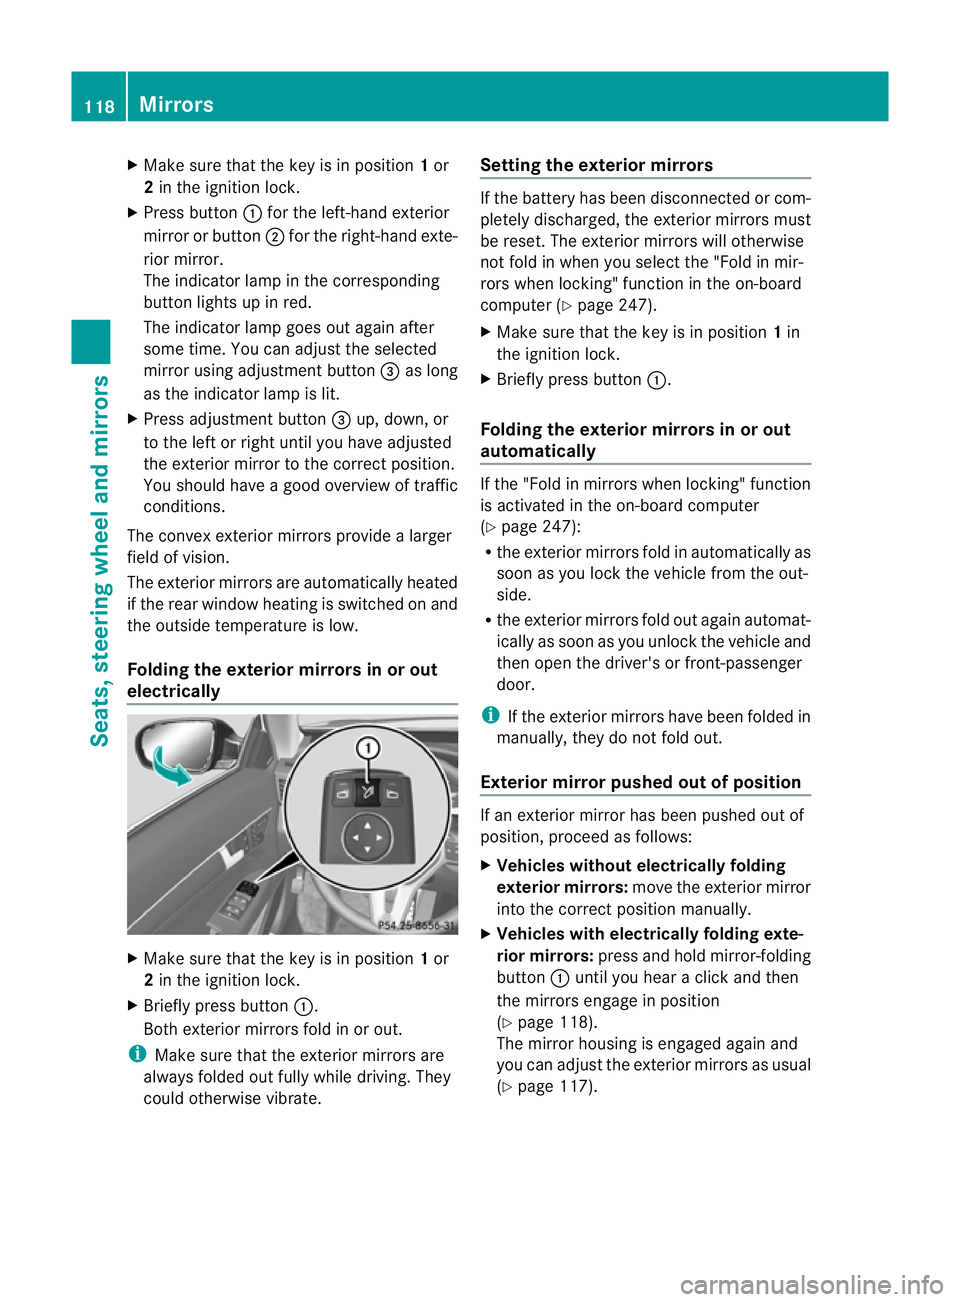
X Press button :for the left-hand exterior
mirror or button ;for the right-hand exte-
rior mirror.
The indicator lamp in the corresponding
button lights up in red.
The indicator lamp goes out again after
some time. You can adjust the selected
mirror using adjustment button =as long
as the indicator lamp is lit.
X Press adjustment button =up, down, or
to the left or right until you have adjusted
the exterior mirror to the correct position.
You should have a good overview of traffic
conditions.
The convex exterior mirrors provide a larger
field of vision.
The exterior mirrors are automatically heated
if the rear window heating is switched on and
the outside temperature is low.
Folding the exterior mirrors in or out
electrically X
Make sure that the key is in position 1or
2 in the ignition lock.
X Briefly press button :.
Both exterior mirrors fold in or out.
i Make sure that the exterior mirrors are
always folded out fully while driving. They
could otherwise vibrate. Setting the exterior mirrors If the battery has been disconnected or com-
pletely discharged, the exterior mirrors must
be reset. The exterior mirrors will otherwise
not fold in when you select the "Fold in mir-
rors when locking" function in the on-board
computer (Y
page 247).
X Make sure that the key is in position 1in
the ignition lock.
X Briefly press button :.
Folding the exterior mirrors in or out
automatically If the "Fold in mirrors when locking" function
is activated in the on-board computer
(Y
page 247):
R the exterior mirrors fold in automatically as
soon as you lock the vehicle from the out-
side.
R the exterior mirrors fold out again automat-
ically as soon as you unlock the vehicle and
then open the driver's or front-passenger
door.
i If the exterior mirrors have been folded in
manually, they do not fold out.
Exterior mirror pushed out of position If an exterior mirror has been pushed out of
position, proceed as follows:
X
Vehicles without electrically folding
exterior mirrors: move the exterior mirror
into the correct position manually.
X Vehicles with electrically folding exte-
rior mirrors: press and hold mirror-folding
button :until you hear a click and then
the mirrors engage in position
(Y page 118).
The mirror housing is engaged again and
you can adjust the exterior mirrors as usual
(Y page 117). 118
MirrorsSeats, steering wheel and mirrors
Page 128 of 389

X
Press the Nbutton.
The green Nindicator lamp in the instru-
ment cluster lights up.
X To switch off the front foglamps: press
the N button.
The green Nindicator lamp in the instru-
ment cluster goes out.
Only vehicles with frontf oglamps are equip-
ped with the "Foglamp" function; information
on the foglamp function for vehicles with
Intelligent Light System (Y page 129).
Rear foglamp 1W
Left-hand parking lamps
2X Right-hand parking lamps
3T Side lamps, licence plate and instru-
ment cluster lighting
4Ã Automatic headlamp mode, control-
led by the light sensor
5L Dipped-beam/main-beam head-
lamps
BR Rear foglamp
CN Foglamps (only vehicles with front
foglamps).
The rear foglamp improves visibility of your
vehicle for the traffic behind in the event of
heavy fog. Please take note of the country-
specific regulations for the use of rear fog-
lamps.
X To switch on the rear foglamp: turn the
key in the ignition lock to position 2or start
the engine.
X Turn the light switch to LorÃ. X
Press the Rbutton.
The yellow Rindicator lamp in the
instrument cluster lights up.
X To switch off the rear foglamp: press the
R button.
The yellow Rindicator lamp in the
instrument cluster goes out.
Side lamps
! If the battery has been excessively dis-
charged, the side lamps or parking lamps
are automatically switched off to enable
the next engine start.A lways park your
vehicle safely and sufficiently lit according
to legal standards. Avoid the continuous
use of the Tside lamps for several
hours. If possible, switch on the Xright
or the Wleft parking lamp. 1W
Left-hand parking lamps
2X Right-hand parking lamps
3T Side lamps, licence plate and instru-
mentcluster lighting
4Ã Automatic headlamp mode, control-
led by the light sensor
5L Dipped-beam/main-beam head-
lamps
BR Rear foglamp
CN Foglamps (only vehicles with front
foglamps).
X To switch on: turn light switch to T.
The green Tindicator lamp in the instru-
men tcluster lights up. Exterior lighting
125Lights and windscreen wipers Z
Page 134 of 389
indicator lamp in the multifunction display
remains lit.
X To deactivate: move the combination
switch back to its normal position.
The _ indicator lamp in the instrument
cluster goes out. Headlamps misted up on the inside
The headlamps may mist up on the inside if
there is high atmospheric humidity.
X Switch on the lights and drive off.
The level of moisture diminishes, depend-
ing on the length of the journey and the
weathe rconditions (humidity and temper-
ature).
If the level of moisture does not diminish:
X Have the headlamps checked at a qualified
specialist workshop. Interior lighting
Overview of interior lighting
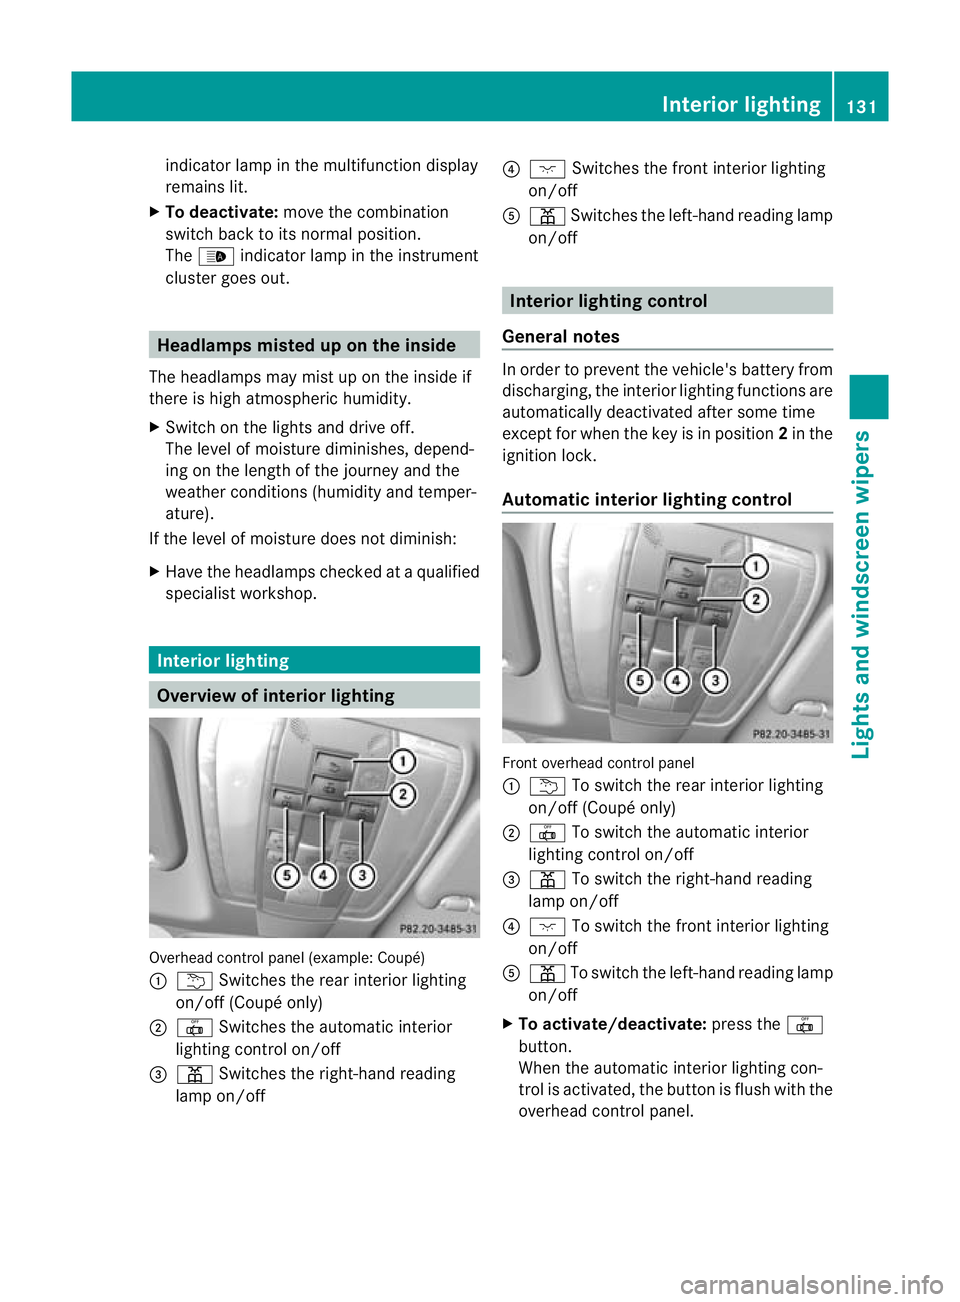
Overhead control panel (example: Coupé)
:
u Switches the rear interior lighting
on/off( Coupé only)
; | Switches the automatic interior
lighting control on/off
= p Switches the right-hand reading
lamp on/off ?
c Switches the front interior lighting
on/off
A p Switches the left-hand reading lamp
on/off Interior lighting control
General notes In order to preven
tthe vehicle's battery from
discharging, the interior lighting functions are
automatically deactivated after some time
except for when the key is in position 2in the
ignition lock.
Automatic interior lighting control Front overhead control panel
:
u To switch the rear interior lighting
on/off (Coupé only)
; | To switch the automatic interior
lighting control on/off
= p To switch the right-hand reading
lamp on/off
? c To switch the front interior lighting
on/off
A p To switch the left-hand reading lamp
on/off
X To activate/deactivate: press the|
button.
When the automatic interior lighting con-
trol is activated, the button is flush with the
overhead control panel. Interior lighting
131Lights and windscreen wipers Z
Page 150 of 389
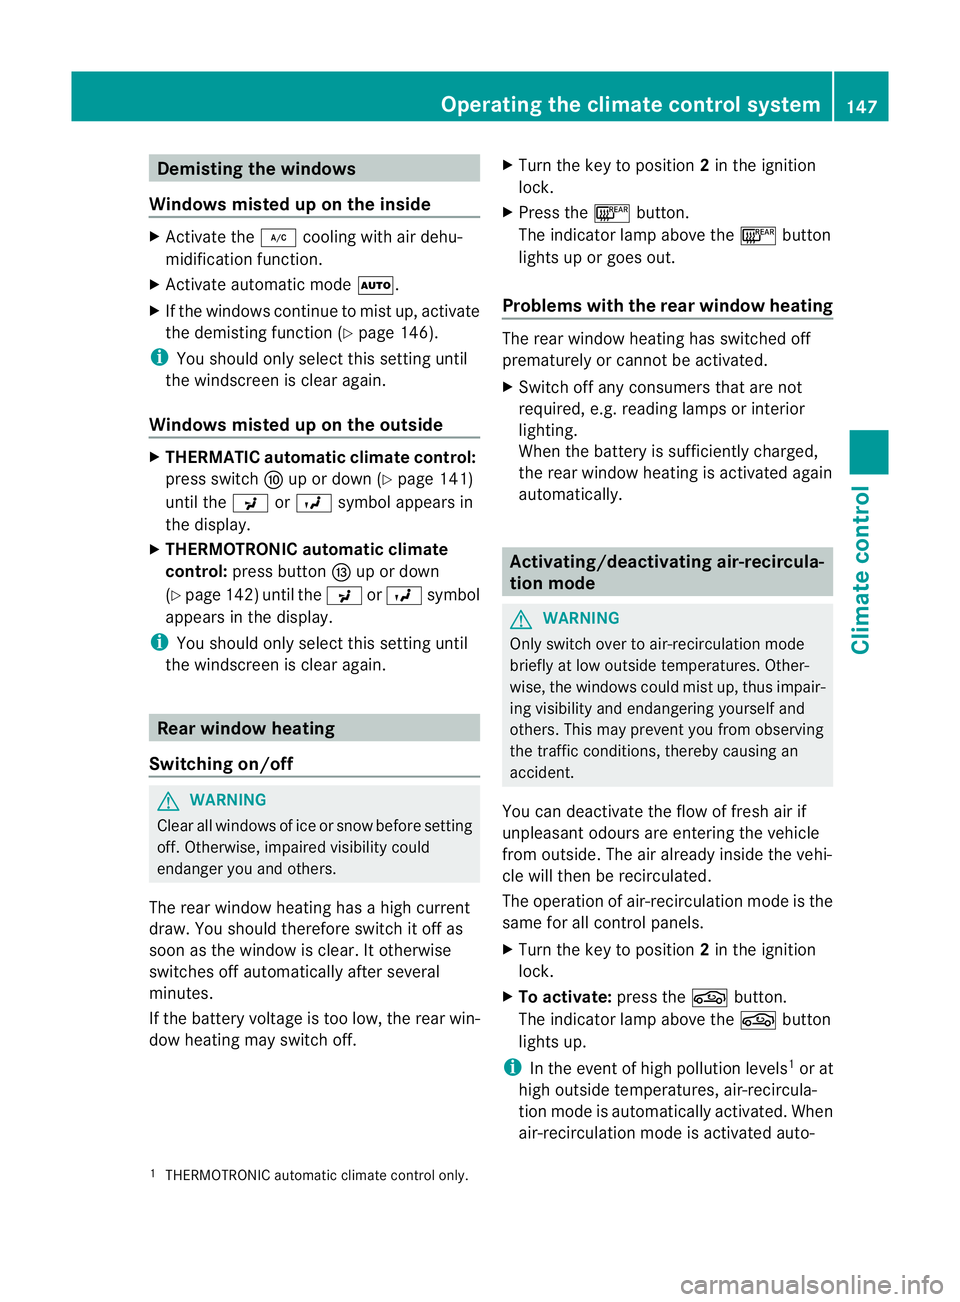
Demisting the windows
Windows misted up on th einside X
Activate the ¿cooling with air dehu-
midification function.
X Activate automatic mode Ã.
X If the windows continue to mist up, activate
the demisting function (Y page 146).
i You should only select this setting until
the windscreen is clear again.
Windows misted up on the outside X
THERMATIC automatic climat econtrol:
press switch Fup or down ( Ypage 141)
until the PorO symbol appears in
the display.
X THERMOTRONIC automatic climate
control: press button Iup or down
(Y page 142) until the PorO symbol
appears in the display.
i You should only selec tthis setting until
the windscreen is clear again. Rear window heating
Switching on/off G
WARNING
Clear all windows of ice or snow before setting
off. Otherwise, impaired visibility could
endanger you and others.
The rear window heating has ahigh current
draw. You should therefore switch it off as
soon as the window is clear .Itotherwise
switches off automatically after several
minutes.
If the battery voltage is too low, the rea rwin-
dow heating may switch off. X
Turn the key to position 2in the ignition
lock.
X Press the ¤button.
The indicator lamp above the ¤button
lights up or goes out.
Problems with the rea rwindow heating The rear window heating has switched off
prematurely or cannot be activated.
X
Switch off any consumers that are not
required, e.g. reading lamps or interior
lighting.
When the battery is sufficiently charged,
the rear window heating is activated again
automatically. Activating/deactivating air-recircula-
tion mode
G
WARNING
Only switch over to air-recirculatio nmode
briefly at low outside temperatures. Other-
wise, the windows could mist up, thus impair-
ing visibility and endangering yourself and
others. This may prevent you from observing
the traffic conditions, thereby causing an
accident.
You can deactivate the flow of fresh air if
unpleasant odours are entering the vehicle
from outside. The air already inside the vehi-
cle will then be recirculated.
The operation of air-recirculation mode is the
same for all control panels.
X Turn the key to position 2in the ignition
lock.
X To activate: press thegbutton.
The indicator lamp above the gbutton
lights up.
i In the event of high pollution levels 1
or at
high outside temperatures, air-recircula-
tion mode is automatically activated. When
air-recirculation mode is activated auto-
1 THERMOTRONIC automatic climate control only. Operating the climate control system
147Climate control Z
Page 152 of 389
i
If you activate the residual heat function
at high temperatures, only the ventilation
will be activated. The blower runs at
mediums peed.
X To deactivate: press theÌbutton.
The indicator lamp above the Ìbutton
goes out.
i It is possible that the residual heat func-
tion may be activated automatically an hour
after the key has been removed. The vehi-
cle is then ventilated for 30minutes to dry
the air-conditioning system.
Residual heat is deactivated automatically:
R after approximately 30 minutes
R when the ignition is switched on
R if the battery voltage drops Auxiliar
yheating
Important safety notes G
WARNING
Exhaust fumes are produced when the auxili-
ary heating is in operation. Inhaling these
exhaust fumes can be poisonous .You should
therefore switch off the auxiliary heating in
confined spaces without an extraction sys-
tem, e.g. a garage. G
WARNING
When operating the auxiliary heating parts of
the vehicle can get very hot. Make sure that
the exhaust system does not under any cir-
cumstances come into contact with easily
ignitable material such as dry grass or fuels.
The material could otherwise ignite and set
the vehicle alight. Choose your parking spot
accordingly.
Operating the auxiliary heating is thus pro-
hibited at filling stations or when your vehicle
is being refuelled. You must therefore switch
off the auxiliary heating at filling stations.
! Operating the auxiliary heating/ventila-
tion draws on the vehicle battery. After you have heated or ventilated the vehicle a
maximum of two times, drive for a longer
distance.
i Switch the auxiliary heating on regularly
once a month for about ten minutes.
The auxiliary heating heats the air in the
passenger compartment to the selected tem-
perature. It does not use the heat of the run-
ning engine to do this. The auxiliary heating
is operated directly using the vehicle's fuel.
For this reason, the tank content must be at
least at reserve fuel level to ensure that the
auxiliary heating functions.
The auxiliary heating/ventilation automati-
cally adjusts to changes in temperature and
weather conditions. For this reason, the aux-
iliary heating could switch from ventilation
mode to heating mode or from heating mode
to ventilation mode.
The auxiliary heating switches off automati-
cally after 50 minutes. This time limit can be
altered. To do this, visit a qualified specialist
workshop.
You cannot use the auxiliary ventilation to
cool the vehicle interior to a temperature
lower than the outside temperature.
Before switching on X
Turn the key to position 2in the ignition
lock.
X Set the temperature.
The auxiliary heating/ventilation can be acti-
vated even when climate control is set to
manual. Optimum comfort can be attained
when the system is set to automatic mode.
Set the temperature to 22 †.
The auxiliary heating/ventilation can be acti-
vated or deactivated using the remote control
or the button on the centre console.
The on-board computer can be used to spec-
ify up to three departure times, one of which
may be preselected (Y page 246). Operating the climate control system
149Climate control Z
Page 167 of 389

Automatic engine start
General notes
The engine is started automatically if:
R
you switch off the ECO start/stop function
by pressing the ECO button.
R you engage reverse gear R.
R the vehicle starts to roll.
R the brake system requires this.
R the temperature in the vehicle interior devi-
ates from the set range.
R the system detects moisture on the wind-
scree nwhen the air-conditioning system is
switched on.
R the battery's charge status is too low.
R you unfasten your seat belt or open the
driver's door
Vehicles with manual transmission
! Only engage gear when the clutch pedal
is depressed.
The engine is started automatically if you:
R fully depress the clutch pedal.
R depress the accelerator pedal.
Vehicles with automatic transmission
The engine is started automatically if you:
R release the brake pedal when HOLD is not
activated and the transmission is in posi-
tion Dor N
R depress the accelerator pedal
R move the transmission out of position P.
i Shifting the transmission to position P
does not start the engine. Deactivating/activating the ECO start/
stop function ECO button
X
To switch off: press the:button.
Indicator lamp ;on button :and the
¤ symbol in the multifunction display go
out.
X To switch on: press the:button.
Indicator lamp ;lights up. If all conditions
for automatic engine switch-off
(Y page 163) are fulfilled, the ¤symbol
is shown in green in the multifunction dis-
play.
If not all conditions for automatic engine
switch-off (Y page 163) are fulfilled, the
¤ symbol is shown in yellow in the mul-
tifunction display. If this is the case, the
ECO start/stop function is not available.
i If indicator lamp ;is off, the ECO start/
stop function has been deactivated man-
ually or as the result of a malfunction. The
engine will then not be switched off auto-
matically when the vehicle stops.
i Every time you switch on the engine using
the key or the Start/Stop button, the ECO
start/stop function is activated. 164
DrivingDriving and parking