2012 MERCEDES-BENZ E-CLASS COUPE engine
[x] Cancel search: enginePage 234 of 389
At high outside temperatures and when driv-
ing uphill, the coolant temperature may rise
to the end of the scale. Rev counter
! Do not drive in the overrevving range.
Doing so will damage the engine.
The red band in the rev counter indicates the
engine's overrevving range.
The fuel supply is interrupte dto protec tthe
engine when the red band is reached. Outside temperature display
G
WARNING
At temperatures just above freezing point, the
street may be icy, especially in wooded areas
or on bridges. If you do not adapt your driving
style to the conditions, the vehicle could skid.
For this reason, adapt your driving style and
speed to the weather conditions.
The outside temperature displayi s in the mul-
tifunction display (Y page 232).
Changes in the outside temperature are dis-
played after a short delay. Speedometer with segments
The segments in the speedometer indicate
which speed range is available.
R Cruise control activated (Y page 182):
The segments light up from the stored
speed to the maximum speed.
R Variable SPEEDTRONIC activated
(Y page 185):
The segments light up from the start of the
scale to the selected limit speed.
R DISTRONIC PLUS activated (Y page 188):
One or two segments in the set speed
range light up.
R DISTRONIC PLUS detects avehicle in front: The segments between the speed of the
vehicle in fron tand the stored speed light
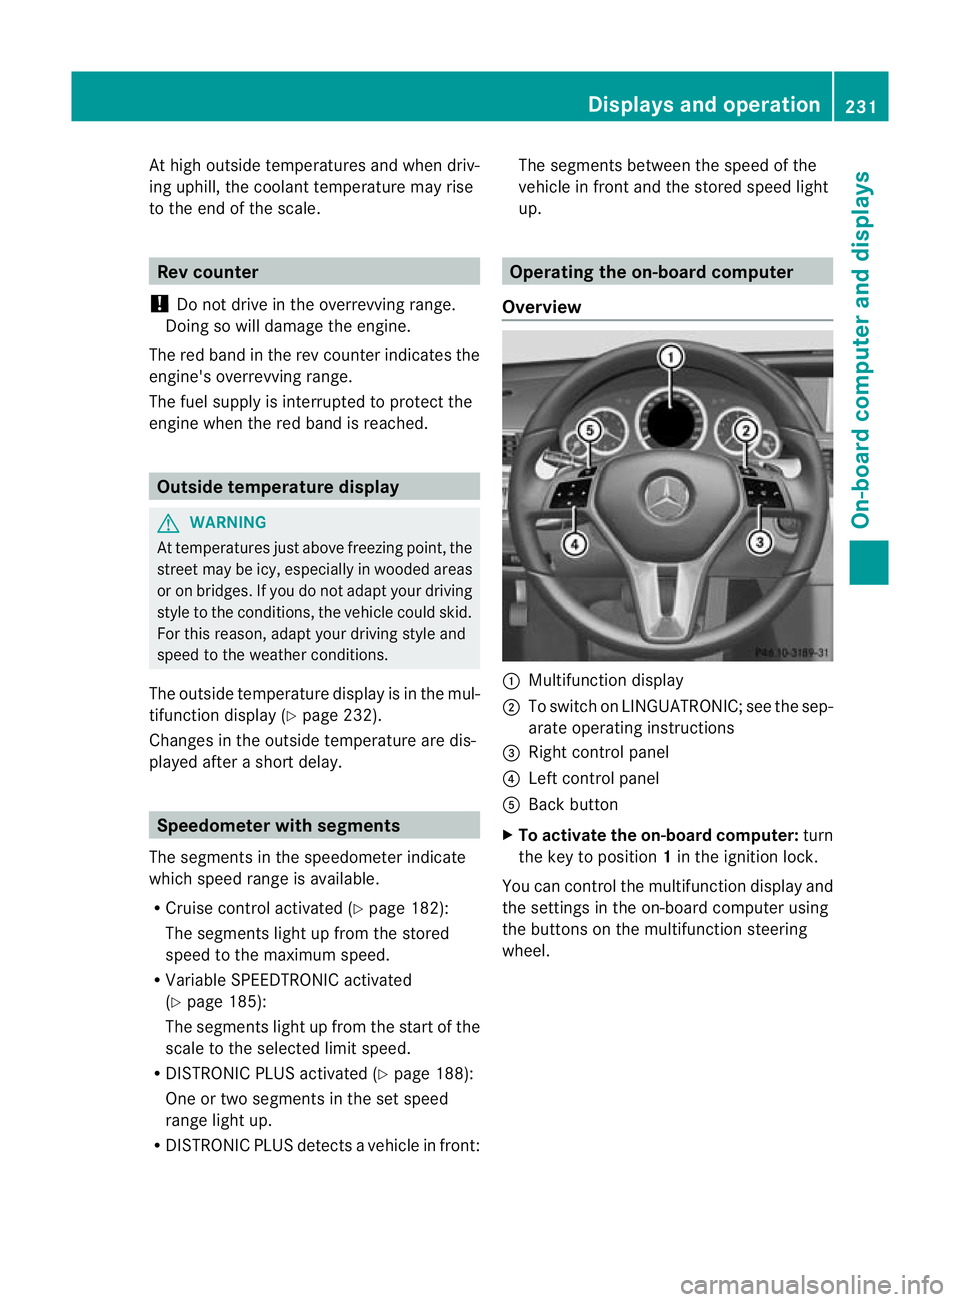
up. Operating the on-board computer
Overview :
Multifunctio ndisplay
; To switch on LINGUATRONIC; see the sep-
arate operating instructions
= Right control panel
? Left control panel
A Back button
X To activat ethe on-board computer: turn
the key to position 1in the ignition lock.
You can control the multifunction display and
the settings in the on-board computer using
the buttons on the multifunction steering
wheel. Displays and operation
231On-board computer and displays Z
Page 243 of 389
X
Press the abutton.
The multifunction display shows Speed
Limit Assist.
X Press the :button.
The curren tselection is displayed.
X To activate or deactivate: pressa.
If the Speed Limit Assist message function
is activated, a detected speed limit is auto-
matically displayed for five seconds. Other
items in the multifunction display are not
shown during this time.
If Speed Limit Assist is operational and the
message function is activated, the multifunc-
tion display shows the Äsymbol when the
ignition is switched on.
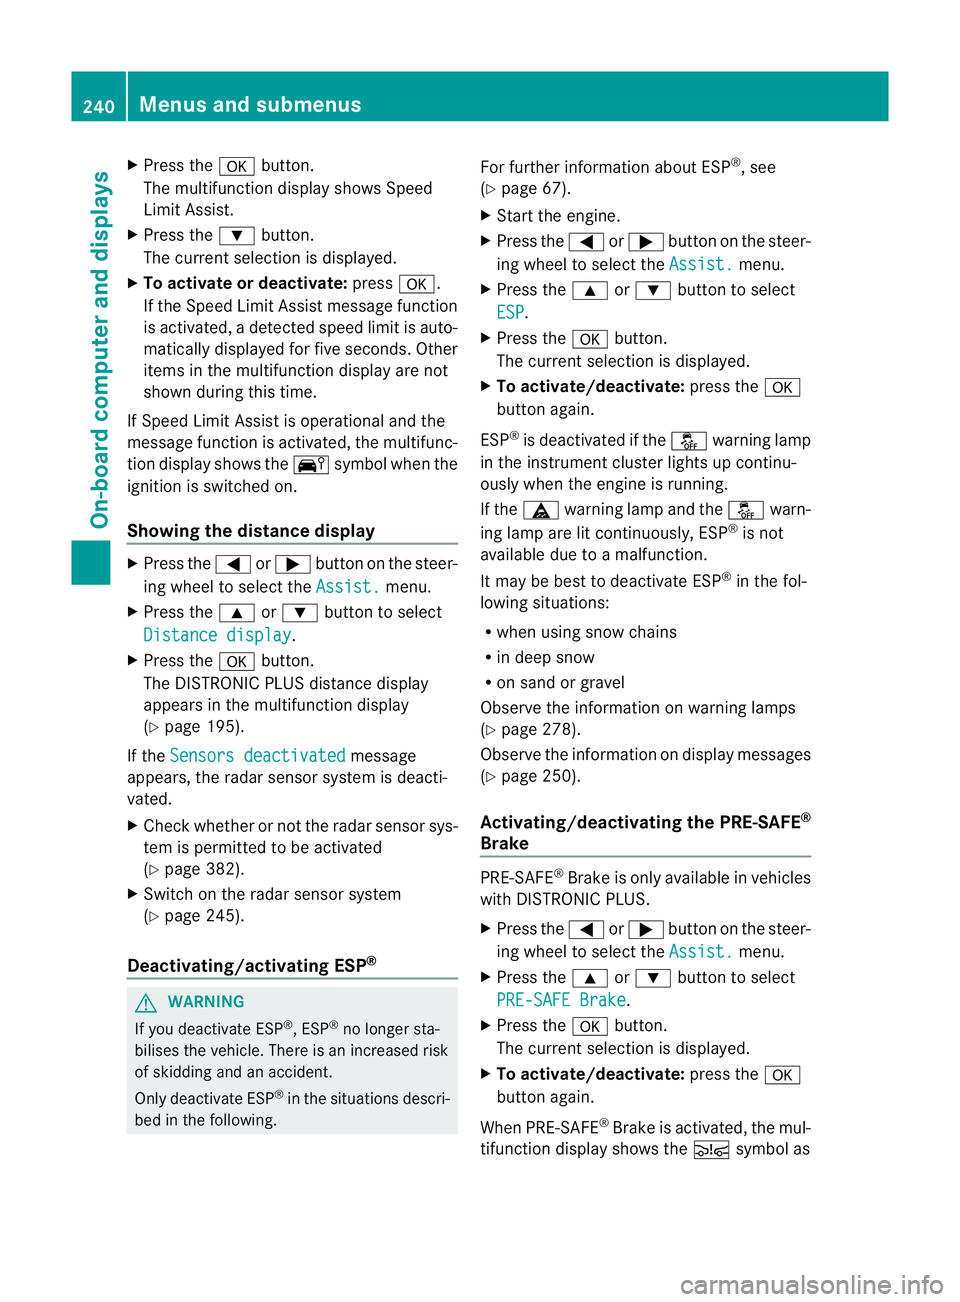
Showing the distance display X
Press the =or; button on the steer-
ing wheel to select the Assist. menu.
X Press the 9or: button to select
Distance display .
X Press the abutton.
The DISTRONIC PLUS distance display
appears in the multifunction display
(Y page 195).
If the Sensors deactivated message
appears, the radar sensor system is deacti-
vated.
X Check whether or not the radar sensor sys-
tem is permitted to be activated
(Y page 382).
X Switch on the radar sensor system
(Y page 245).
Deactivating/activating ESP ®G
WARNING
If you deactivate ESP ®
, ESP ®
no longer sta-
bilises the vehicle. There is an increased risk
of skidding and an accident.
Only deactivate ESP ®
in the situations descri-
bed in the following. For further information about ESP
®
, see
(Y page 67).
X Start the engine.
X Press the =or; button on the steer-
ing wheel to select the Assist. menu.
X Press the 9or: button to select
ESP .
X Press the abutton.
The curren tselection is displayed.
X To activate/deactivate: press thea
button again.
ESP ®
is deactivated if the åwarning lamp
in the instrument cluster lights up continu-
ously when the engine is running.
If the ä warning lamp and the åwarn-
ing lamp are lit continuously, ESP ®
is not
available due to a malfunction.
It may be best to deactivate ESP ®
in the fol-
lowing situations:
R when using snow chains
R in deep snow
R on sand or gravel
Observe the information on warning lamps
(Y page 278).
Observe the information on display messages
(Y page 250).
Activating/deactivating the PRE-SAFE ®
Brake PRE-SAFE
®
Brake is only available in vehicles
with DISTRONIC PLUS.
X Press the =or; button on the steer-
ing wheel to select the Assist. menu.
X Press the 9or: button to select
PRE-SAFE Brake .
X Press the abutton.
The curren tselection is displayed.
X To activate/deactivate: press thea
button again.
When PRE-SAFE ®
Brake is activated, the mul-
tifunction display shows the Äsymbol as 240
Menus and submenusOn-board computer and displays
Page 246 of 389
i
Vehicles for the United Kingdom: this
function is not available.
Selecting the permanent display function
You can determine whether the multifunction
display permanently shows yours peed or the
outside temperature.
X Press the =or; button on the steer-
ing wheel to select the Settings menu.
X Press the :or9 button to select the
Inst. cluster submenu.
X Press ato confirm.
X Press the :or9 button to select the
Permanent display: function.
You will see the selected setting: outsidetemperature or
Dig. speedo [mph] .
X Press the abutton to save the setting.
i Speed is displayed in mph.
i Vehicles for the United Kingdom :this
function is unavailable.
Lights Switching the Daytime driving lights on/
off
The Day lights function can only be
switched on with the engine turned off.
X Press the =or; button on the steer-
ing wheel to select the Settings menu.
X Press the :or9 button to select the
Light submenu.
X Press ato confirm.
X Press the :or9 button to select the
Day lights: function.
If the Day lights: function has been
switched on, the cone of light and the
W symbol in the multifunction display
are shown in red.
X Press the abutton to save the setting.
Further information on daytime driving lights
(Y page 123). Switching the Intelligent Light System
on/off
X
Press the =or; button on the steer-
ing wheel to select the Settings menu.
X Press the :or9 button to select the
Light submenu.
X Press ato confirm.
X Press the :or9 button to select the
Intell. Light System function.
If the Intell. Light System function has
been switched on, the cone of light and the
L symbol in the multifunction display
are shown in red.
X Press the abutton to save the setting.
When you activate Intell. Light System ,
you activate the following functions:
R motorway mode
R active light function
R cornering light function
R extended range foglamps
If you set the dipped-beamh eadlamps for
driving on the right/left, the multifunction
display shows the Intell. Light System:
system inoperative Inactive for
left-side traffic or
Intell. Light System: System inoperative Inactive
for right-side traffic (Y
page 243)
display message instead of the Intell. Light System function in the
Light sub-
menu.
Further information on the Intelligent Light
System (Y page 128).
Setting the dipped-beam headlamps for
driving on the left/right
X Press the =or; button on the steer-
ing wheel to select the Settings menu.
X Press the :or9 button to select the
Light submenu.
X Press ato confirm. Menus and submenus
243On-board computer and displays Z
Page 247 of 389
X
Press the :or9 button to select the
Dipped beams Setting for: function.
You will see the selected setting: Right-side traffic or
Left-side traffic .
X Press the abutton to save the setting.
If you change the setting, conversion does
not take place until the next time the vehi-
cle is stationary.
This function is only available on vehicles with
the Intelligent Light System.
You can use this function to switch between
symmetrical and asymmetrical dipped beam
(Y page 122).
If you set the dipped-beam headlamps for
driving on the right/left, then motorway
mode and the extended range foglamps are
unavailable.
Aq ualified specialist workshop can set the
dipped-beam headlamps for driving on the
right or left .
Switching Adaptive Highbeam Assis ton/
off
X Press the =or; button on the steer-
ing wheel to select the Settings menu.
X Press the :or9 button to select the
Light submenu.
X Press ato confirm.
X Press the :or9 button to select the
Adapt. main beam function.
If the Adapt. main beam function has
been switched on, the cone of light and the
_ symbol in the upper multifunction
display are shown in red.
X Press the abutton to save the setting.
For further information about Adaptive High-
beam Assist, see (Y page 130).
Activating/deactivating the surround
lighting and exterior lighting delayed
switch-off
X Press the =or; button on the steer-
ing wheel to select the Settings menu.
X Press the :or9 button to select the
Light submenu. X
Press ato confirm.
X Press the :or9 button to select the
Surround lighting function.
When the Surround lighting function is
activated, the light cone and the area
around the vehicle are displayed in red in
the multifunction display.
X Press the abutton to save the setting.
Deactivating delayed switch-off of the exte-
rior lighting temporarily:
X Before leaving the vehicle, turn the key to
position 0in the ignition lock.
X Turn the key to position 2in the ignition
lock.
The exterior lighting delayed switch-off is
deactivated.
Delayed switch-off of the exterior lighting is
reactivated the next time you start the
engine.
If you have activated the Surround light‐ ing function and the light switch is set to
Ã, the following functions are activated
when it is dark:
R surround lighting: the exterior lighting
remains lit for 40 seconds after unlocking
with the key. If you start the engine, the
surround lighting is switched off and auto-
matic headlamp mode is activated
(Y page 123).
R Exterior lighting delayed switch-off: the
exterior lighting remains lit for 60seconds
after the engine is switched off. If you close
all the doors and the boot lid, the exterior
lighting goes off after 5seconds.
i Depending on your vehicle's equipment,
when the surround lighting and delayed
switch-off exterior lighting are on, the fol-
lowing light up:
R side lamps
R foglamps
R dipped-beam headlamps
R daytime driving lights
R surround lighting in the exterior mirrors 244
Menus and submenusOn-board computer and displays
Page 255 of 389

Display messages Possible causes/consequences and
M Solutions
T!
÷
inoperative See
Owner's Manual EBD (electronic brake force distribution), ABS, ESP
®
, BAS, PRE-
SAFE ®
, the HOLD function ,hill start assist and ESP ®
trailer stabi-
lisatio nare unavailable due to a malfunction.
The adaptive brake lights, BAS PLUS and PRE-SAFE ®
Brake may
also have failed.
In addition, the ä,åand! warning lamps light up in
the instrument cluster and a warning tone sounds.
G WARNING
The brake system continues to function normally, but withou tthe
functions listed above. The front and rear wheels could therefore
lock if you brake hard, for example.
The steerability and braking characteristics may be severely affec-
ted. The braking distance in an emergency braking situation can
increase.
If ESP ®
is not operational, ESP ®
is unable to stabilise the vehicle.
The danger of skidding and having an accident increases.
X Drive on carefully.
X Visit a qualified specialist workshop immediately. J
Release parking
brake You are driving with the parking brake applied.
Awarning tone also
sounds.
X Release the parking brake. J
Brake immediately or
Vehicles with manual transmission
:with the HOL Dfunction acti-
vated, you have either:
R opened the driver's door and released the seat belt or
R switched off the engine or
R opened the bonnet.
At one may also sound at regular intervals. If you attempt to lock
the vehicle, the tone becomes louder.
You cannot start the engine.
X Paying attention to the traffic situation, immediately depress the
brake pedal firmly and hold until the display message disap-
pears.
X Secure the vehicle against rolling away (Y page 177).
You can restart the engine. 252
Display messagesOn-board computer and displays
Page 256 of 389

Display messages Possible causes/consequences and
M Solutions
J
Check brake fluid
level There is insufficien
tbrake fluid in the brake flui dreservoir.
In addition, the red Jwarning lamp lights up in the instrument
cluster and a warning tone sounds.
G WARNING
The braking efficiency may be impaired.
There is a risk of an accident.
X Pull over and stop the vehicle safely as soon as possible, paying
attention to road and traffic conditions .Donot continue driving
under any circumstances.
X Secure the vehicle against rolling away (Y page 177).
X Consult a qualified specialist workshop.
X Do not top up the brake fluid. This does not correct the error. #
Check brake pad
wear The brake pads/linings have reached their wear limit.
X Visit a qualified specialist workshop. PRE-SAFE
inoperative See
Owner's Manual Important functions of PRE-SAFE
®
have failed. All other occupant
safety systems, e.g. airbags, remain available.
X Visit a qualified specialist workshop immediately. PRE-SAFE
Functions cur‐
rently limited See
Owner's Manual PRE-SAFE
®
Brake is temporarily inoperative. Possible causes:
R the function is impaired due to heavy rain or snow.
R the sensors in the radiator trim and in the bumpers are dirty.
R the radar sensor system is temporarily inoperative, e.g. due to
electromagnetic radiation emitted by nearby TV or radio sta-
tions or other sources of electromagnetic radiation.
R the system is outside the operating temperature range.
R the on-board voltage is too low.
Once the causes listed above no longer apply, the display message
goes out.
PRE-SAFE ®
Brake is operational again.
If the display message does not disappear:
X Pull over and stop the vehicle safely as soon as possible, paying
attention to road and traffic conditions.
X Secure the vehicle against rolling away (Y page 177).
X Clean the sensors in the radiator trim and in the bumpers
(Y page 317).
X Restart the engine. Display messages
253On-board computer and displays Z
Page 262 of 389
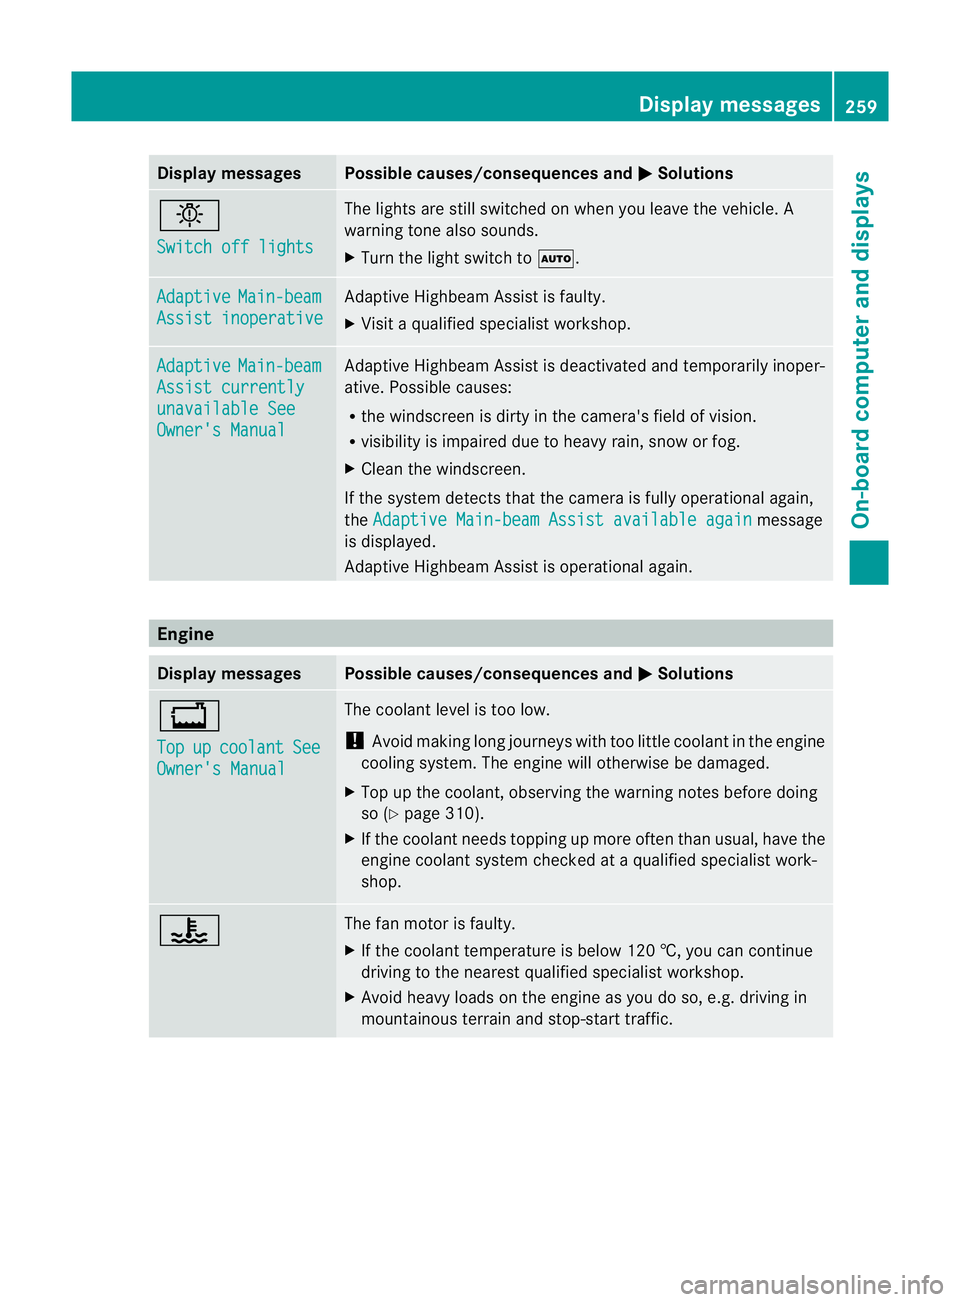
Display messages Possible causes/consequences and
M Solutions
b
Switch off lights The lights are still switched on when you leave the vehicle. A
warning tone also sounds.
X Tur nthe light switch to Ã. Adaptive Main-beam
Assist inoperative Adaptive Highbeam Assist is faulty.
X
Visit a qualified specialist workshop. Adaptive Main-beam
Assist currently
unavailable See
Owner's Manual Adaptive Highbeam Assist is deactivated and temporarily inoper-
ative. Possible causes:
R
the windscreen is dirty in the camera's field of vision.
R visibility is impaired due to heavy rain, snow or fog.
X Cleant he windscreen.
If the system detects that the camera is fully operational again,
the Adaptive Main-beam Assist available again message
is displayed.
Adaptive Highbeam Assist is operational again. Engine
Display messages Possible causes/consequences and
M Solutions
+
Top
up coolant See
Owner's Manual The coolant level is too low.
!
Avoid making long journeys with too little coolant in the engine
cooling system. The engine will otherwise be damaged.
X Top up the coolant, observing the warning notes before doing
so (Y page 310).
X If the coolant needs topping up more often than usual, have the
engine coolant system checked at a qualified specialist work-
shop. ? The fan motor is faulty.
X
If the coolant temperature is below 120 †, you can continue
driving to the nearest qualified specialist workshop.
X Avoid heavy loads on the engine as you do so, e.g. driving in
mountainous terrain and stop-start traffic. Display messages
259On-board computer and displays Z
Page 263 of 389
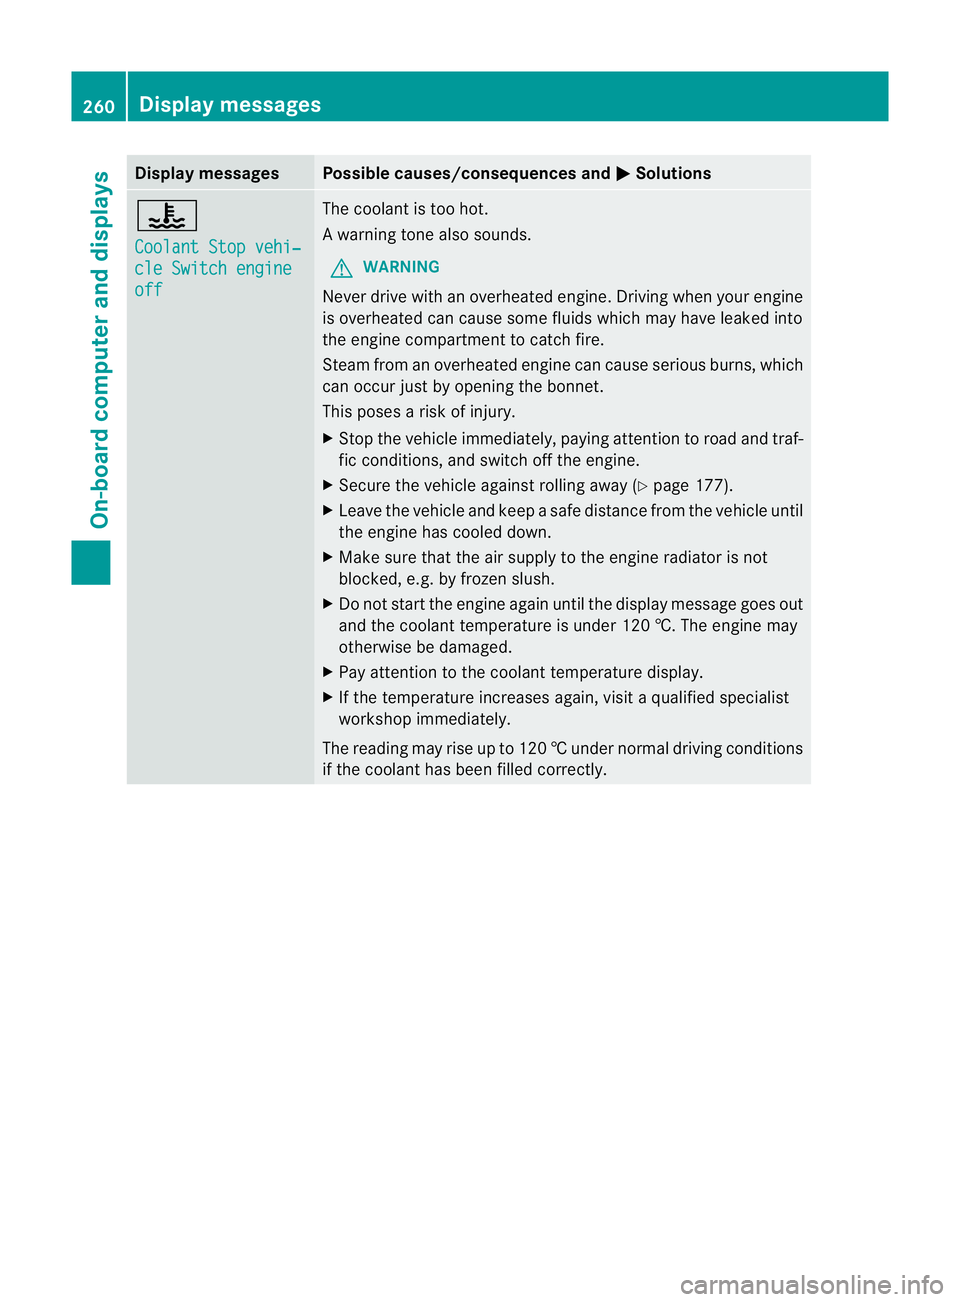
Display messages Possible causes/consequences and
M Solutions
?
Coolant Stop vehi‐
cle Switch engine
off The coolan
tis too hot.
Aw arning tone also sounds.
G WARNING
Never drive with an overheated engine. Driving when your engine
is overheated can cause som efluids which may have leaked into
the engine compartment to catch fire.
Steam fro manoverheated engine can cause serious burns, which
can occur just by opening the bonnet.
This poses a risk of injury.
X Stop the vehicle immediately, paying attention to road and traf-
fic conditions, and switch off the engine.
X Secure the vehicle against rolling away (Y page 177).
X Leave the vehicle and keep a safe distance from the vehicle until
the engine has cooled down.
X Make sure that the air supply to the engine radiator is not
blocked, e.g. by frozen slush.
X Do not start the engine again until the display message goes out
and the coolant temperature is under 120 †. The engine may
otherwise be damaged.
X Pay attention to the coolant temperature display.
X If the temperature increases again, visi taqualified specialist
workshop immediately.
The reading may rise up to 120 †undernormal driving conditions
if the coolant has been filled correctly. 260
Display messagesOn-board computer and displays