2012 MERCEDES-BENZ CLS SHOOTING BRAKE fog light
[x] Cancel search: fog lightPage 208 of 405
Permanently showing detected traffic
signs in the multifunction display
X Display Speed Limit Assist using the on-
board computer (Y page 236).
At raffic sign indicating a speed limi torthe
end of a speed limit :appears in the mul-
tifunction display as soon as it is detected.
Traffic sign indicating a speed limit :is
generally displayed until:
R a traffic sign indicating the end of the
speed limit is detected.
R you make a turn.
R you leave or enter a town.
R the road type changes (e.g. motorway,
country road).
R you have travelled a certain minimum
distance without the traffic sign being
repeated or detected again.
i You can also activate Speed Limit Assist
using COMAND APS. The maximum per-
missible speed is then shown in the
COMAND display; see the COMAND APS
operating instructions. Night View Assist Plus
Important safety notes G
WARNING
Night View Assist Plus is only an aid designed
to assist driving and does not relieve you of
the responsibility to pay attention. Continue
to look through the windscreen instead of
relying on the Night View Assist Plus display.
You are responsible for safety and must drive
in accordance with traffic conditions. You
could otherwise endanger yourself and oth-
ers. The system may be impaired or may not func-
tion if:
R
there is poor visibility, e.g. due to snow,
rain, fog or spray.
R the windscreen is dirty, misted up or cov-
ered, for instance by a sticker, in the vicinity
of the camera.
R on bends, on uphill gradients or downhill
gradients. G
WARNING
Night View Assist Plus does not detect
objects in the immediate vicinity of the vehi-
cle. Look through the windscreen when
manoeuvring. Make sure that there are no
people or animals in the area in which you are
manoeuvring. In addition to the illumination provided by the
normal headlamps, Night View Assist Plus
uses infrared light to illuminate the road.
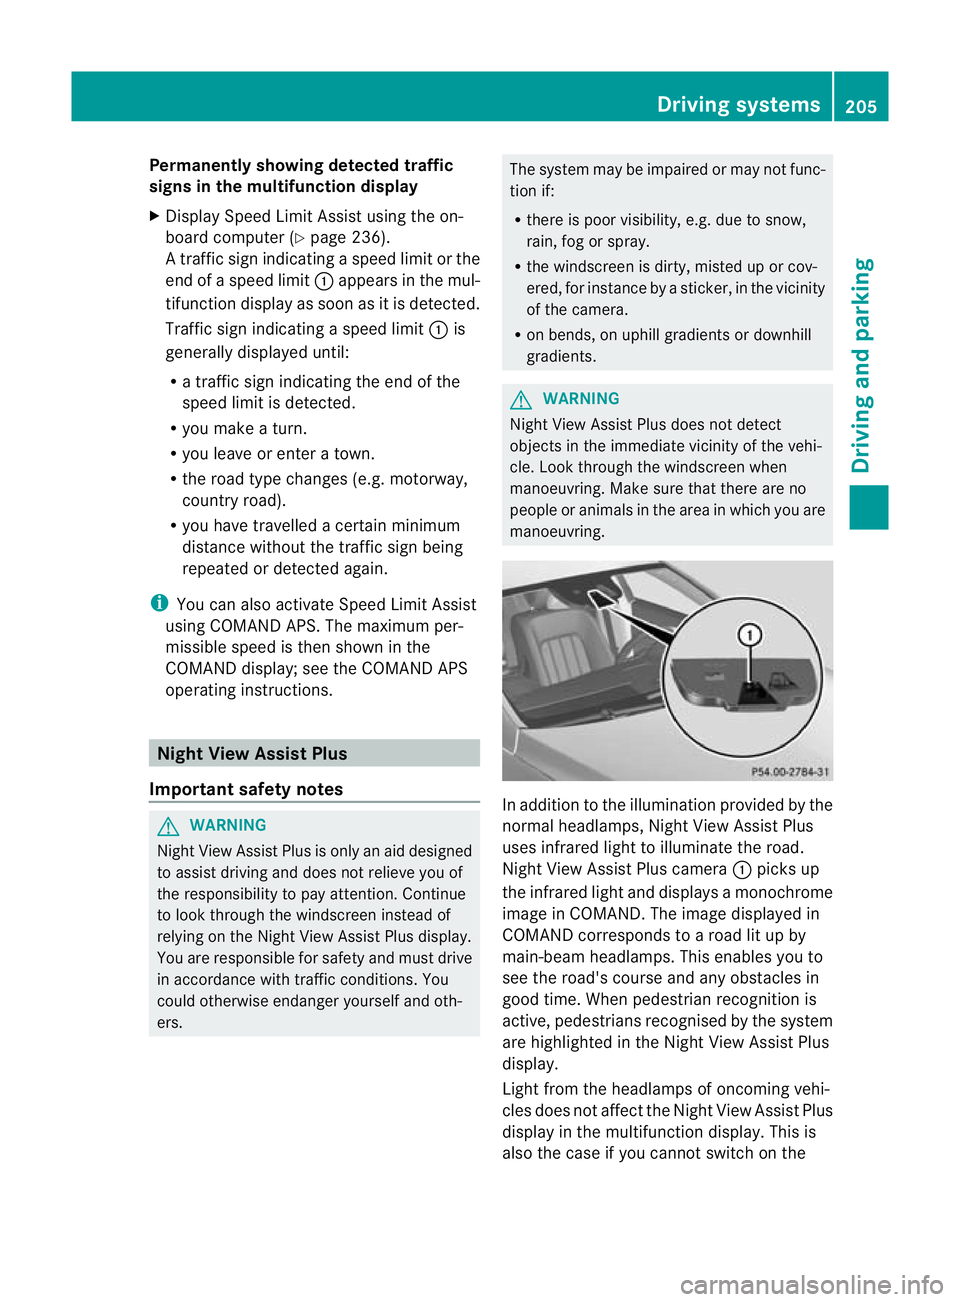
Night View Assist Plus camera
:picks up
the infrared light and displays a monochrome
image in COMAND. The image displayed in
COMAND corresponds to a road lit up by
main-beam headlamps. This enables you to
see the road's course and any obstacles in
good time. When pedestrian recognition is
active, pedestrians recognised by the system
are highlighted in the Night View Assist Plus
display.
Light from the headlamps of oncoming vehi-
cles does not affect the Night View Assist Plus
display in the multifunction display. This is
also the case if you cannot switch on the Driving systems
205Driving and parking Z
Page 213 of 405
If a vehicle is detected within the monitoring
range of Blind Spot Assist at speeds above
30 km/h, warning lamp
:on the corre-
sponding side lights up red. This warning
always occurs when a vehicle enters the blind
spot monitoring range from behind or from
the side. When you overtake a vehicle, the
warning only occurs if the difference in speed
is less than 12 km/h.
The yellow indicator lamp goes out if reverse
gear is engaged. Blind Spot Assist is then
deactivated.
The brightness of the indicator/warning
lamps is adjusted automatically according to
the ambient light.
Collision warning
If a vehicle is detected in the monitoring range
of Blind Spot Assist and you switch on the
corresponding turn signal, a double warning
tone sounds. Red warning lamp :flashes. If
the turn signal remains on, detected vehicles
are indicated by the flashing of red warning
lamp :.There are no further warning tones.
Switching on Blind Spot Assist
X Make sure that the radar sensor system
(Y page 243) and Blind Spot Assist
(Y page 238) are activated in the on-board
computer.
X Turn the key to position 2in the ignition
lock.
Warning lamps :in the exterior mirrors
light up red for approximately
1.5 seconds and then turn yellow.
Towing atrailer
If you attach a trailer, make sure tha tyou have
correctly established the electrical connec-
tion. This can be accomplished by checking
the trailer lighting. Blind Spot Assist is then
deactivated. The indicator lamp lights up yel-
low in the exterior mirrors and the message:
appears in the multifunction display.
i You can deactivate the indicator lamps in
the exterior mirrors. To do so, switch off Blind Spot Assist if:
R
the key is in position 2in the ignition
lock.
R the engine is not running.
R the electrical connection to the trailer
has been established.
Lane Keeping Assist Important safety notes
G
WARNING
Lane Keeping Assist does not keep your vehi-
cle in its lane. It is only an aid and may detect
the lane markings on the road incorrectly or
not at all.
The system may be impaired or may not func-
tion if:
R there is poor visibility, e.g. due to insuffi-
cient illumination of the road, or due to
snow, rain, fog or spray.
R there is glare, e.g. from oncoming traffic,
the sun, or reflection from other vehicles.
R the windscreen is dirty, misted up or cov-
ered, for instance by a sticker, in the vicinity
of the camera
R several or no lane markings for a single lane
are present.
R the lane markings are worn away, dark or
covered up, e.g. by dirt or snow.
R the distance to the vehicle in front is too
small and the lane markings thus cannot be
detected.
R the lane markings on the road are unclear,
e.g. near roadworks.
R the lane markings change quickly, e.g.
lanes branch off, cross one another or
merge.
R the road is narrow and winding.
Lane Keeping Assist cannot detect road and
traffic conditions. It is not a substitute for
attentive driving. You are responsible for the
vehicle's speed, braking in good time, and
steering correctly. Always adapt your driving
style to suit the prevailing road and weather 210
Driving systemsDriving and parking
Page 218 of 405
R
ESP ®
is deactivated.
R a loss of tyre pressure or a defective tyre is
detected.
Activating Active Blind Spo tAssist
X Make sure that the radar sensor system
(Y page 243) and Active Blind Spot Assist
(Y page 238) are activated in the on-board
computer.
X Turn the key to position 2in the ignition
lock.
Warning lamps :in the exterior mirrors
light up red for approximately
1.5 seconds and then turn yellow.
Towing atrailer
If you attach a trailer, make sure tha tyou have
correctly established the electrical connec-
tion. This can be accomplished by checking
the trailer lighting. Active Blind Spot Assist is
then deactivated. The indicator lamp lights up
yellow in the exterior mirrors and the ActiveBlind Spot Assist currently unavail‐
able See Owner's Manual message
appears in the multifunction display.
Active Lane Keeping Assist Important safety notes
G
WARNING
Active Lane Keeping Assist does not keep
your vehicle in its lane. It is only an aid and
may detect the lane markings on the road
incorrectly or not at all.
The system may be impaired or may not func-
tion if:
R there is poor visibility, e.g. due to inade-
quate illumination of the road surface,
snow, rain, fog or spray.
R there is glare, e.g. from oncoming traffic,
the sun, or reflection from other vehicles.
R the windscreen is dirty, fogged up or cov-
ered, for instance by a sticker, in the vicinity
of the camera. R
several or no lane markings for a single lane
are present.
R the lane markings are worn away, dark or
covered up, e.g. by dirt or snow.
R the distance to the vehicle in front is too
small and as a result the lane markings can-
not be recognised.
R the lane markings on the road are unclear,
e.g. near roadworks.
R the lane markings change quickly, e.g.
branch off, cross, or merge.
R the road is narrow and winding.
Active Lane Keeping Assist cannot detect
road and traffic conditions. It is not a substi-
tute for attentive driving. You are responsible
for the vehicle's speed, braking in good time,
and steering correctly. Always adapt your
driving style to suit the prevailing road and
weather conditions. Always pay attention to
traffic conditions and your surroundings. Oth-
erwise, you may fail to recognise dangers in
time, cause an accident and injure yourself
and others.
General notes Active Lane Keeping Assist monitors the area
in front of your vehicle by means of a cam-
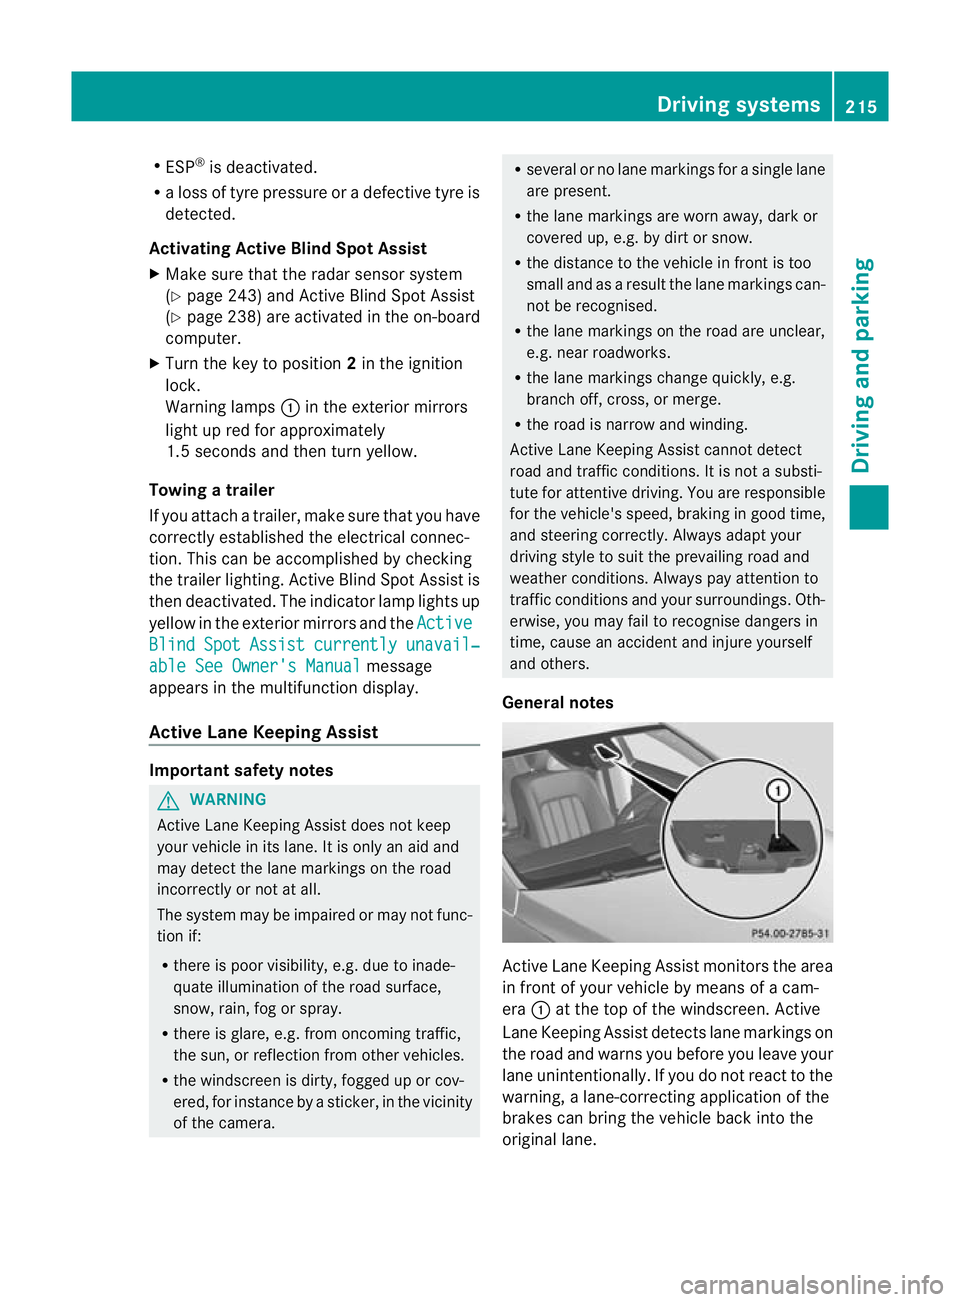
era
:at the top of the windscreen. Active
Lane Keeping Assist detect slane markings on
the road and warns you before you leave your
lane unintentionally. If you do no treact to the
warning, a lane-correcting application of the
brakes can bring the vehicle back into the
original lane. Driving systems
215Driving and parking Z
Page 243 of 405
![MERCEDES-BENZ CLS SHOOTING BRAKE 2012 Owners Manual X
Press ato confirm.
X Press the :or9 button to select the
Permanent display: function.
You will see the selected setting: outsidetemperature or
Dig. speedo [mph] .
X Press the abutton to save the set MERCEDES-BENZ CLS SHOOTING BRAKE 2012 Owners Manual X
Press ato confirm.
X Press the :or9 button to select the
Permanent display: function.
You will see the selected setting: outsidetemperature or
Dig. speedo [mph] .
X Press the abutton to save the set](/manual-img/4/55492/w960_55492-242.png)
X
Press ato confirm.
X Press the :or9 button to select the
Permanent display: function.
You will see the selected setting: outsidetemperature or
Dig. speedo [mph] .
X Press the abutton to save the setting.
i Speed is displayed in mph.
i Vehicles for the United Kingdom: this
function is unavailable.
Lights Setting the brightness for the instrument
cluster lighting and switches
The lighting in the instrument cluster, in the
displays and the controls in the vehicle inte-
rior can be adjusted using the BrightnessDisplay/switches: function.
X Press the =or; button on the steer-
ing wheel to select the Settings menu.
X Press the :or9 button to select the
Light submenu.
X Press ato confirm.
X Press the :or9 button to select the
Brightness Display/Switches: func-
tion.
You will see the selected setting.
X Press ato confirm.
X Press the :or9 button to adjust the
brightness to any level from Level 1 to
Level 5 (bright).
X Press the aor% button to save the
setting.
If the light switch is set to Ã,Tor
L, the brightness is dependent upon
the brightness of the ambient light.
i The light sensor in the instrument cluster
automatically controls the brightness of
the multifunction display.
In daylight, the displays in the instrument
cluster are not illuminated. Switching the Daytime driving lights on/
off
The
Day lights function can only be
switched on with the engine turned off.
X Press the =or; button on the steer-
ing wheel to select the Settings menu.
X Press the :or9 button to select the
Light submenu.
X Press ato confirm.
X Press the :or9 button to select the
Day lights: function.
If the Day lights: function has been
switched on, the cone of light and the
W symbol in the multifunction display
are shown in red.
X Press the abutton to save the setting.
Further information on daytime driving lights
(Y page 115).
Switching the Intelligent Light System
on/off
X Press the =or; button on the steer-
ing wheel to select the Settings menu.
X Press the :or9 button to select the
Light submenu.
X Press ato confirm.
X Press the :or9 button to select the
Intell. Light System function.
If the Intell. Light System function has
been switched on, the cone of light and the
L symbol in the multifunction display
are shown in red.
X Press the abutton to save the setting.
When you activate Intell. Light System ,
you activate the following functions:
R motorway mode
R active light function
R cornering light function
R extended range foglamps
If you set the dipped-beam headlamps for
driving on the right/left, the multifunction
display shows the Intell. Light System:
system inoperative Inactive for240
Menus and submenusOn-board computer and displays
Page 244 of 405
left-side traffic or
Intell. Light System: System inoperative Inactive
for right-side traffic (Y
page 241)
display message instead of the Intell.Light System function in the
Light sub-
menu.
Further information on the Intelligent Light
System (Y page 119).
Setting the dipped-beam headlamps for
driving on the left/right
X Press the =or; button on the steer-
ing wheel to select the Settings menu.
X Press the :or9 button to select the
Light submenu.
X Press ato confirm.
X Press the :or9 button to select the
Dipped beams Setting for: function.
You will see the selected setting: Right-side traffic or
Left-side traffic .
X Press the abutton to save the setting.
If you change the setting, conversion does
not take place until the next time the vehi-
cle is stationary.
This function is only available on vehicles with
the Intelligent Light System.
You can use this function to switch between
symmetrical and asymmetrical dipped beam
(Y page 114).
If you set the dipped-beam headlamps for
driving on the right/left, then motorway
mode and the extended range foglamps are
unavailable.
Aq ualified specialist workshop can set the
dipped-beam headlamps for driving on the
right or left .
Switching Adaptive Highbeam Assis ton/
off
X Press the =or; button on the steer-
ing wheel to select the Settings menu.
X Press the :or9 button to select the
Light submenu.
X Press ato confirm. X
Press the :or9 button to select the
Adapt. main beam function.
If the Adapt. main beam function has
been switched on, the cone of light and the
_ symbol in the upper multifunction
display are shown in red.
X Press the abutton to save the setting.
For further information about Adaptive High-
beam Assist, see (Y page 121).
Setting the brightness of the ambient
lighting
X Press the =or; button on the steer-
ing wheel to select the Settings menu.
X Press the :or9 button to select the
Light submenu.
X Press ato confirm.
X Press the :or9 button to select the
Amb. light +/- function.
You will see the selected setting.
X Press ato confirm.
X Press the :or9 button to adjust the
brightness to any level from Off to
Level 5 (bright).
X Press the aor% button to save the
setting.
Setting the ambient lighting colour
X Press the =or; button on the steer-
ing wheel to select the Settings menu.
X Press the :or9 button to select the
Light submenu.
X Press ato confirm.
X Press the :or9 button to select the
Ambient light colour function.
X Press ato confirm.
X Press the :or9 button to set the
colour to SOLAR ,
NEUTRAL or
POLAR .
X Press the aor% button to save the
setting. Menus and submenus
241On-board computer and displays Z
Page 261 of 405
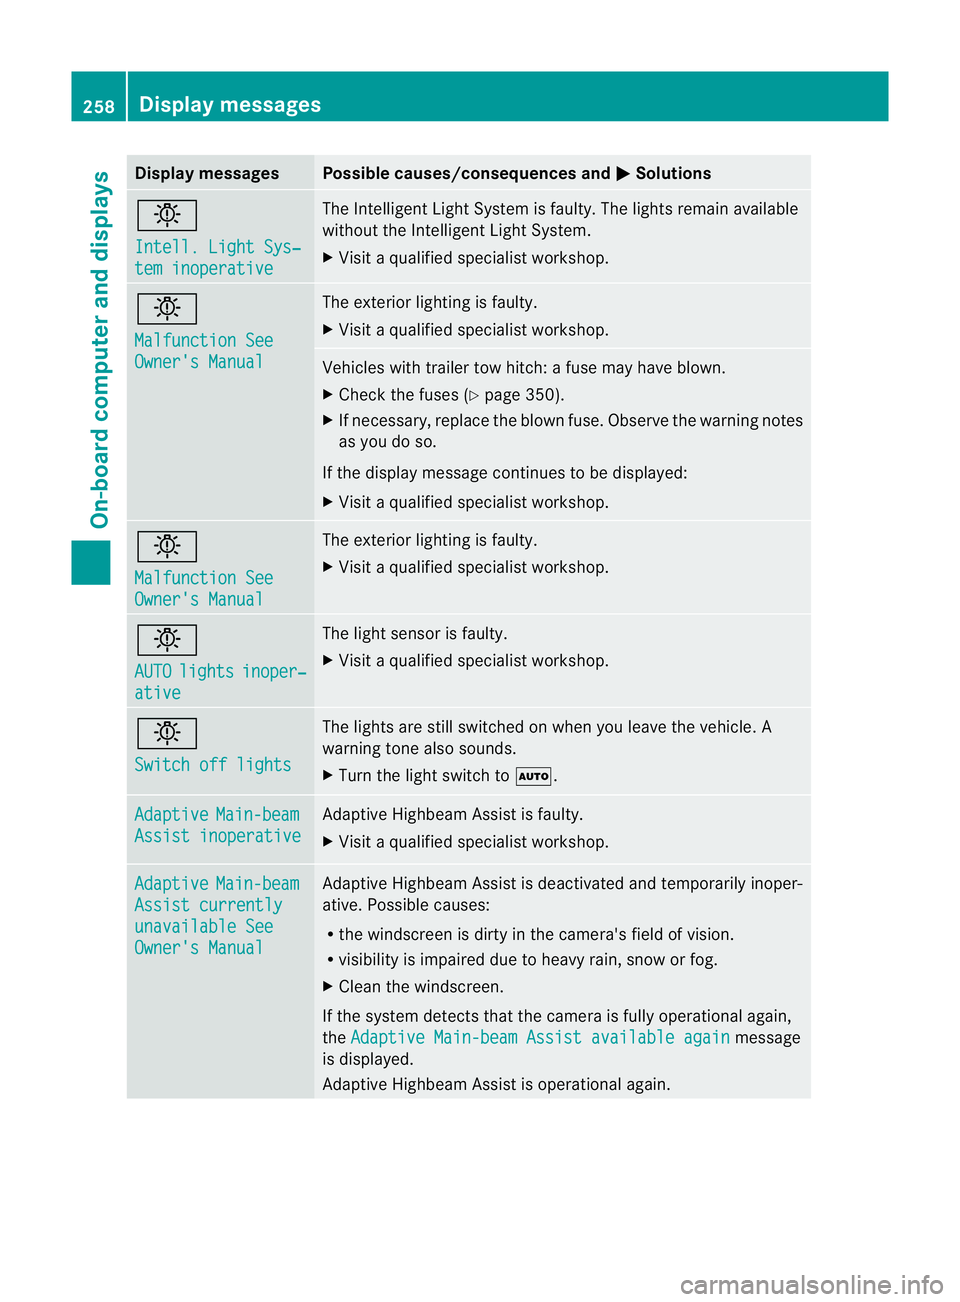
Display messages Possible causes/consequences and
M Solutions
b
Intell. Light Sys‐
tem inoperative The Intelligent Light Syste
mis faulty. The lights remain available
without the Intelligent Light System.
X Visit a qualified specialist workshop. b
Malfunction See
Owner's Manual The exterior lighting is faulty.
X
Visit a qualified specialist workshop. Vehicles with trailer tow hitch: a fuse may have blown.
X
Check the fuses (Y page 350).
X If necessary, replace the blown fuse. Observe the warning notes
as you do so.
If the display message continues to be displayed:
X Visit a qualified specialist workshop. b
Malfunction See
Owner's Manual The exterior lighting is faulty.
X
Visit a qualified specialist workshop. b
AUTO
lights inoper‐
ative The light sensor is faulty.
X
Visit a qualified specialist workshop. b
Switch off lights The lights are still switched on when you leave the vehicle. A
warning tone also sounds.
X
Turn the light switch to Ã.Adaptive Main-beam
Assist inoperative Adaptive Highbeam Assist is faulty.
X
Visit a qualified specialist workshop. Adaptive Main-beam
Assist currently
unavailable See
Owner's Manual Adaptive Highbeam Assist is deactivated and temporarily inoper-
ative. Possible causes:
R
the windscreen is dirty in the camera's field of vision.
R visibility is impaired due to heavy rain, snow or fog.
X Cleant he windscreen.
If the system detects that the camera is fully operational again,
the Adaptive Main-beam Assist available again message
is displayed.
Adaptive Highbeam Assist is operational again. 258
Display messagesOn-board computer and displays