2012 MERCEDES-BENZ CLS SHOOTING BRAKE cooling
[x] Cancel search: coolingPage 139 of 405
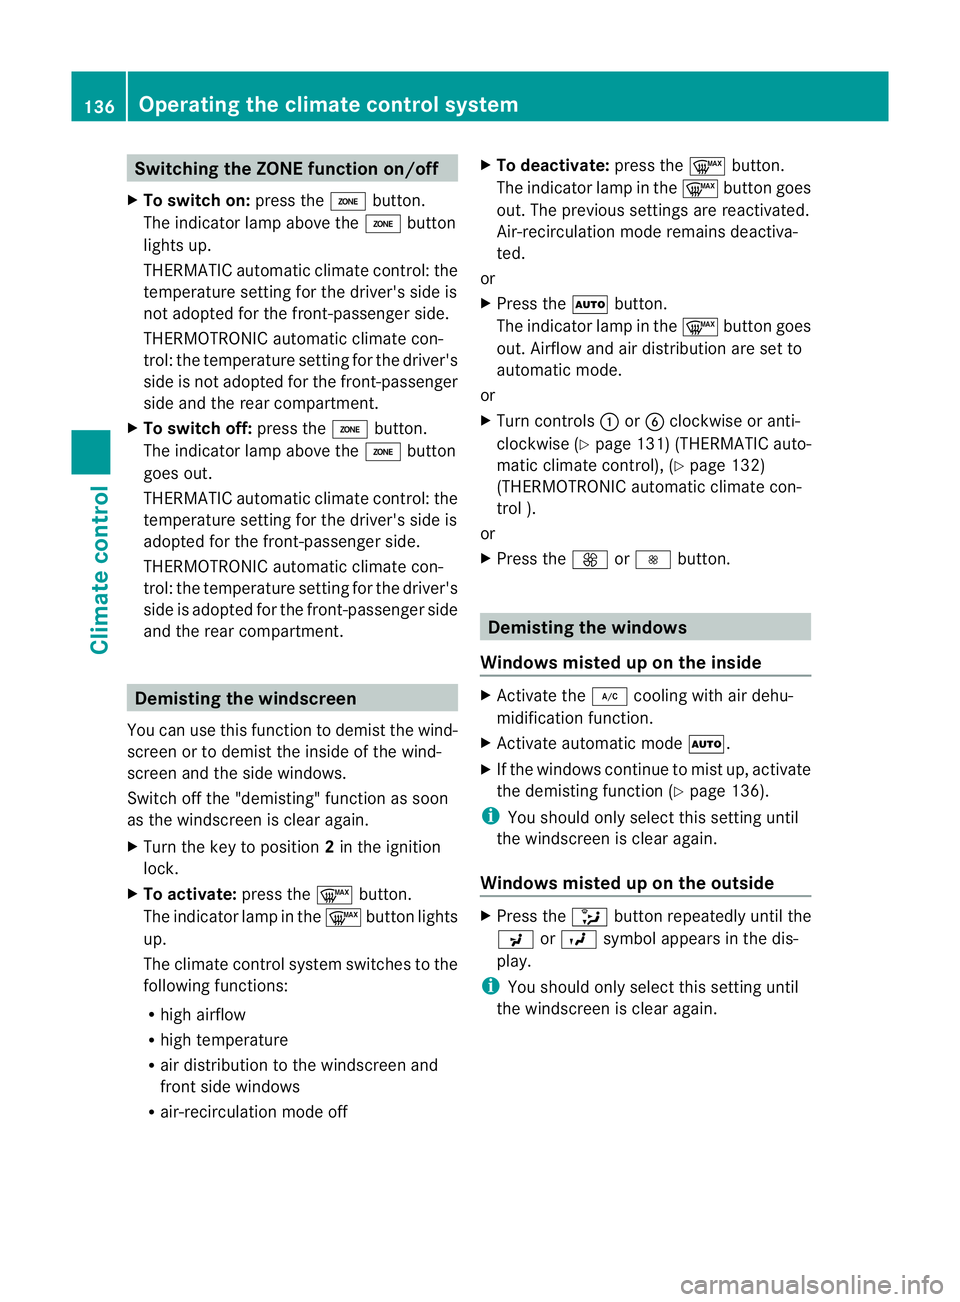
Switching the ZONE function on/off
X To switch on: press theábutton.
The indicator lamp above the ábutton
lights up.
THERMATIC automatic climate control: the
temperature setting for the driver's side is
not adopted for the front-passenger side.
THERMOTRONIC automatic climate con-
trol: the temperature setting for the driver's
side is not adopted for the front-passenger
side and the rear compartment.
X To switch off: press theábutton.
The indicator lamp above the ábutton
goes out.
THERMATIC automatic climate control: the
temperature setting for the driver's side is
adopted for the front-passenger side.
THERMOTRONIC automatic climate con-
trol: the temperature setting for the driver's
side is adopted for the front-passenger side
and the rear compartment. Demisting the windscreen
You can use this function to demist the wind-
screen or to demist the inside of the wind-
screen and the side windows.
Switch off the "demisting" function as soon
as the windscreen is clear again.
X Turn the key to position 2in the ignition
lock.
X To activate: press the¬button.
The indicator lamp in the ¬button lights
up.
The climate control system switches to the
following functions:
R high airflow
R high temperature
R air distribution to the windscreen and
front side windows
R air-recirculation mode off X
To deactivate: press the¬button.
The indicator lamp in the ¬button goes
out. The previous settings are reactivated.
Air-recirculation mode remains deactiva-
ted.
or
X Press the Ãbutton.
The indicator lamp in the ¬button goes
out. Airflow and air distribution are set to
automatic mode.
or
X Turn controls :orB clockwise or anti-
clockwise (Y page 131) (THERMATIC auto-
matic climate control), (Y page 132)
(THERMOTRONIC automatic climate con-
trol ).
or
X Press the KorI button. Demisting the windows
Windows misted up on the inside X
Activate the ¿cooling with air dehu-
midification function.
X Activate automatic mode Ã.
X If the windows continue to mist up, activate
the demisting function (Y page 136).
i You should only select this setting until
the windscreen is clear again.
Windows misted up on the outside X
Press the _button repeatedly until the
P orO symbol appears in the dis-
play.
i You should only select this setting until
the windscreen is clear again. 136
Operating the climate control systemClimate control
Page 140 of 405
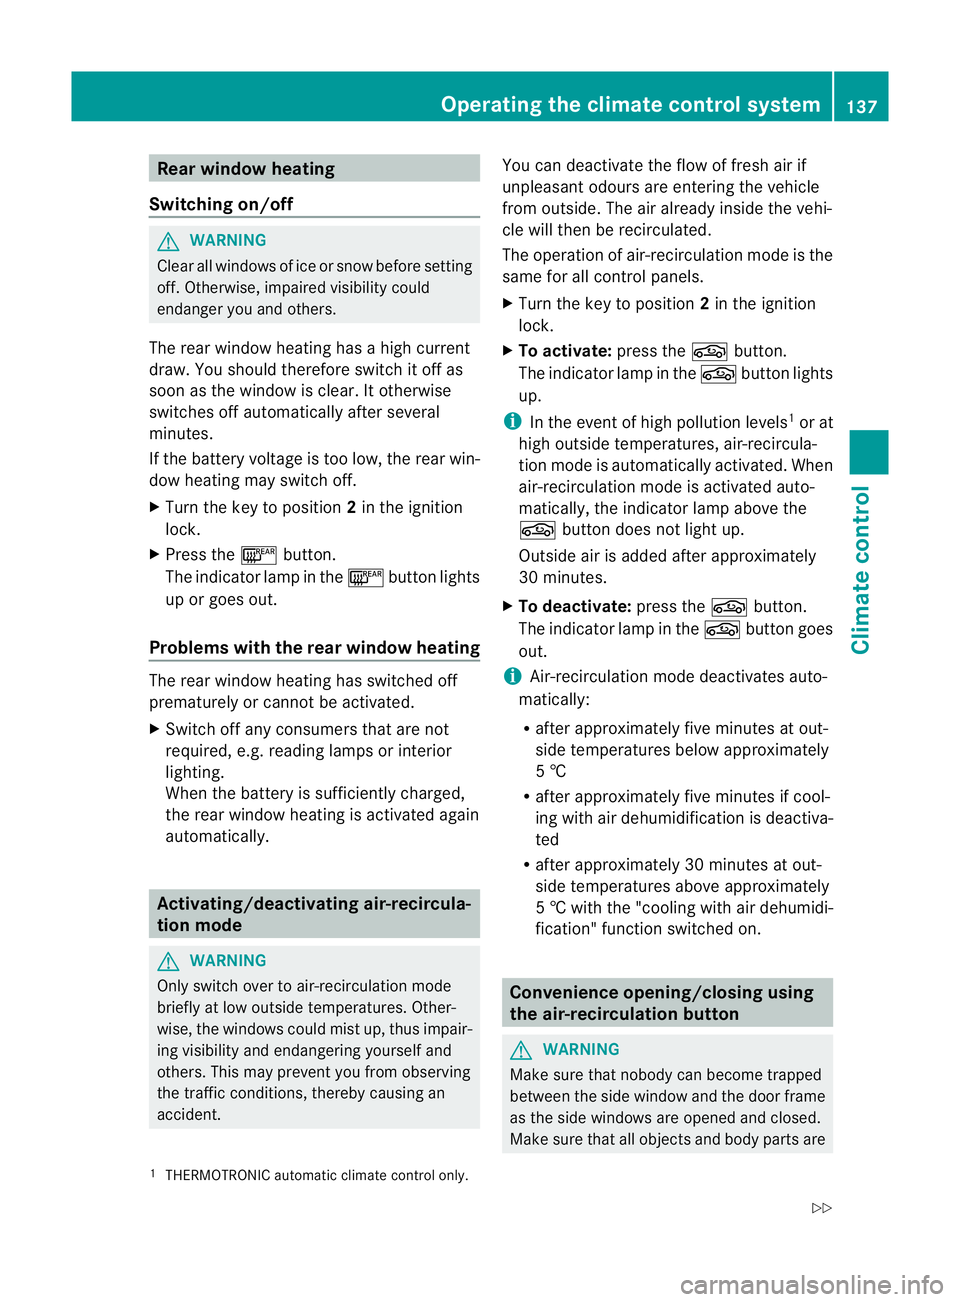
Rear window heating
Switching on/off G
WARNING
Clea rall windows of ice or snow before setting
off .O therwise, impaired visibility could
endanger you and others.
The rea rwindow heating has ahigh current
draw. You should therefore switch it off as
soon as the window is clear .Itotherwise
switches off automatically after several
minutes.
If the battery voltage is too low, the rea rwin-
dow heating may switch off.
X Turn the key to position 2in the ignition
lock.
X Press the ¤button.
The indicator lamp in the ¤button lights
up or goes out.
Problems with the rea rwindow heating The rear window heating has switched off
prematurely or cannot be activated.
X Switch off any consumers that are not
required, e.g. reading lamps or interior
lighting.
When the battery is sufficiently charged,
the rear window heating is activated again
automatically. Activating/deactivating air-recircula-
tion mode G
WARNING
Only switch over to air-recirculatio nmode
briefly at low outside temperatures. Other-
wise, the windows could mist up, thus impair-
ing visibility and endangering yourself and
others. This may prevent you from observing
the traffic conditions, thereby causing an
accident. You can deactivate the flow of fresh air if
unpleasant odours are entering the vehicle
from outside. The air already inside the vehi-
cle will then be recirculated.
The operation of air-recirculation mode is the
same for all control panels.
X
Turn the key to position 2in the ignition
lock.
X To activate: press thegbutton.
The indicator lamp in the gbutton lights
up.
i In the event of high pollution levels 1
or at
high outside temperatures, air-recircula-
tion mode is automatically activated. When
air-recirculation mode is activated auto-
matically, the indicator lamp above the
g button does not light up.
Outside air is added after approximately
30 minutes.
X To deactivate: press thegbutton.
The indicator lamp in the gbutton goes
out.
i Air-recirculation mode deactivates auto-
matically:
R after approximately five minutes at out-
side temperatures below approximately
5 †
R after approximately five minutes if cool-
ing with air dehumidification is deactiva-
ted
R after approximately 30 minutes at out-
side temperatures above approximately
5† with the "cooling with air dehumidi-
fication" function switche don. Convenience opening/closing using
the air-recirculation button
G
WARNING
Make sure tha tnobody can become trapped
between the side window and the door frame
as the side windows are opened and closed.
Make sure that all object sand body parts are
1 THERMOTRONIC automatic climate control only. Operating the climate control system
137Climate control
Z
Page 146 of 405
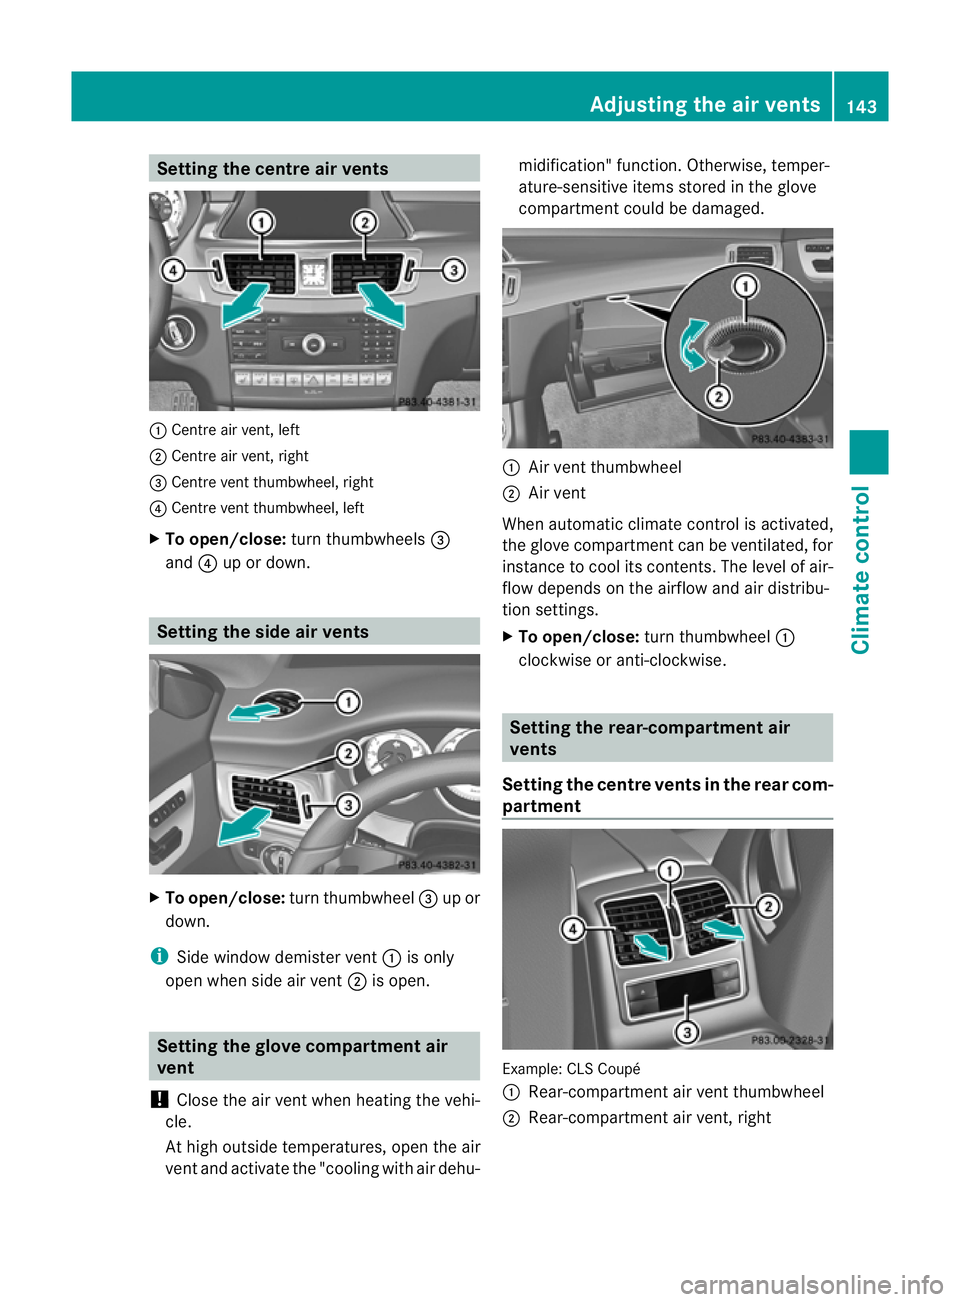
Setting the centre air vents
:
Centre air vent, left
; Centre air vent, right
= Centre vent thumbwheel, right
? Centre vent thumbwheel, left
X To open/close: turn thumbwheels =
and ?up or down. Setting the side air vents
X
To open/close: turn thumbwheel =up or
down.
i Side window demister vent :is only
open when side air vent ;is open. Setting the glove compartment air
vent
! Close the air vent when heating the vehi-
cle.
At high outside temperatures, open the air
vent and activate the "cooling with air dehu- midification" function. Otherwise, temper-
ature-sensitive items stored in the glove
compartmen
tcould be damaged. :
Air vent thumbwheel
; Air vent
When automatic climate control is activated,
the glove compartment can be ventilated, for
instance to cool its contents.T he level of air-
flow depends on the airflow and air distribu-
tion settings.
X To open/close: turn thumbwheel :
clockwise or anti-clockwise. Setting the rear-compartment air
vents
Setting the centre vents in the rear com-
partment Example: CLS Coupé
:
Rear-compartment air vent thumbwheel
; Rear-compartment air vent, right Adjusting the air vents
143Climate control Z
Page 262 of 405
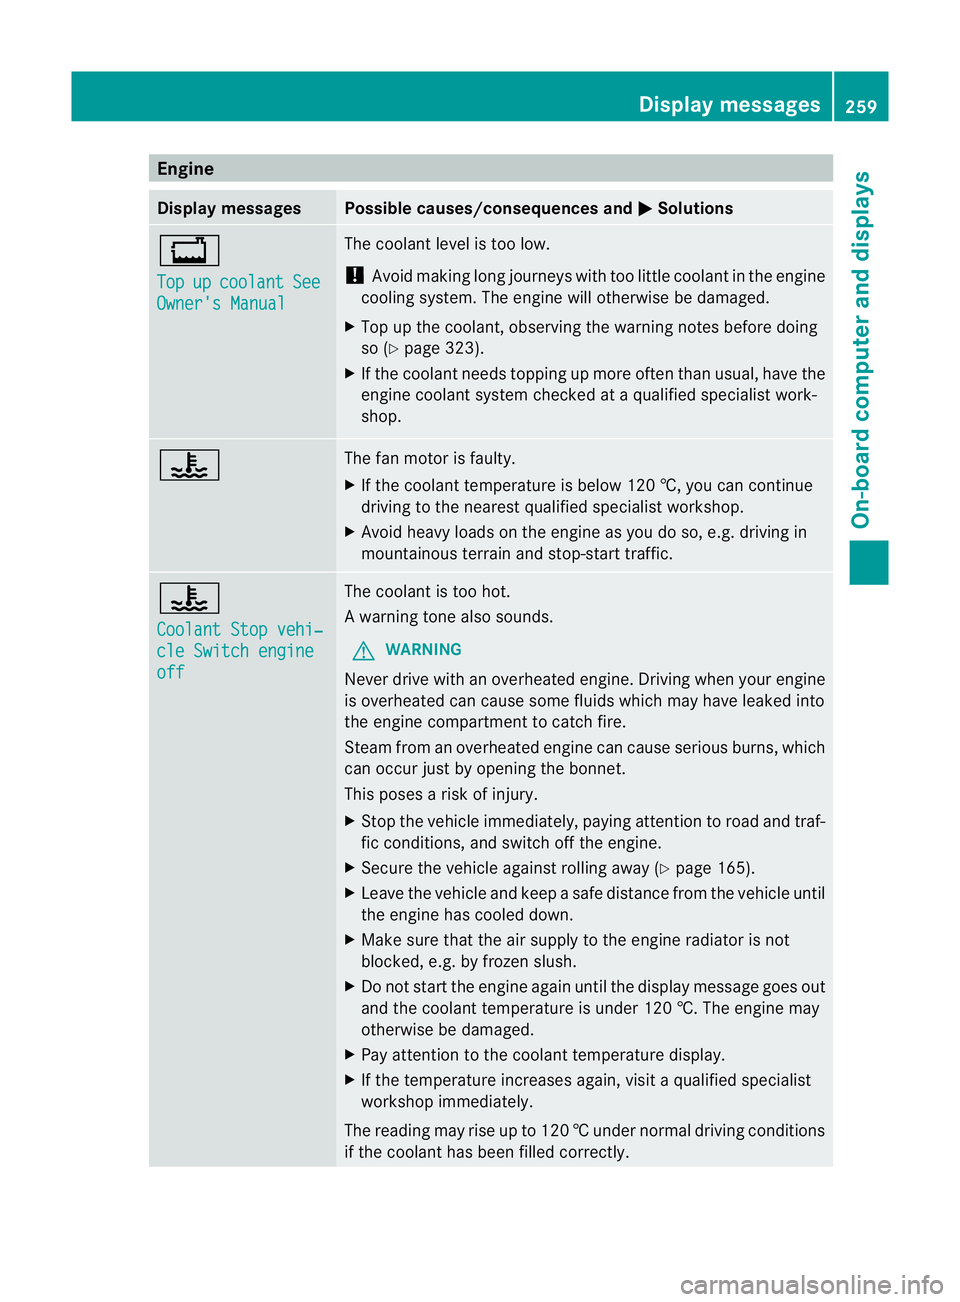
Engine
Display messages Possible causes/consequences and
M Solutions
+
Top
up coolant See
Owner's Manual The coolant level is too low.
!
Avoid making long journeys with too little coolant in the engine
cooling system. The engine will otherwise be damaged.
X Top up the coolant, observing the warning notes before doing
so (Y page 323).
X If the coolant needs topping up more often than usual, have the
engine coolant system checked at a qualified specialist work-
shop. ? The fan motor is faulty.
X
If the coolant temperature is below 120 †, you can continue
driving to the neares tqualified specialist workshop.
X Avoid heavy loads on the engine as you do so, e.g. driving in
mountainous terrain and stop-start traffic. ?
Coolant Stop vehi‐
cle Switch engine
off The coolan
tis too hot.
Aw arning tone also sounds.
G WARNING
Never drive with an overheated engine. Driving when your engine
is overheated can cause som efluids which may have leaked into
the engine compartment to catch fire.
Steam fro manoverheated engine can cause serious burns, which
can occur just by opening the bonnet.
This poses a risk of injury.
X Stop the vehicle immediately, paying attention to road and traf-
fic conditions, and switch off the engine.
X Secure the vehicle against rolling away (Y page 165).
X Leave the vehicle and keep a safe distance from the vehicle until
the engine has cooled down.
X Make sure that the air supply to the engine radiator is not
blocked, e.g. by frozen slush.
X Do not start the engine again until the display message goes out
and the coolant temperature is under 120 †. The engine may
otherwise be damaged.
X Pay attention to the coolant temperature display.
X If the temperature increases again, visi taqualified specialist
workshop immediately.
The reading may rise up to 120 †undernormal driving conditions
if the coolant has been filled correctly. Display messages
259On-board computer and displays Z
Page 289 of 405
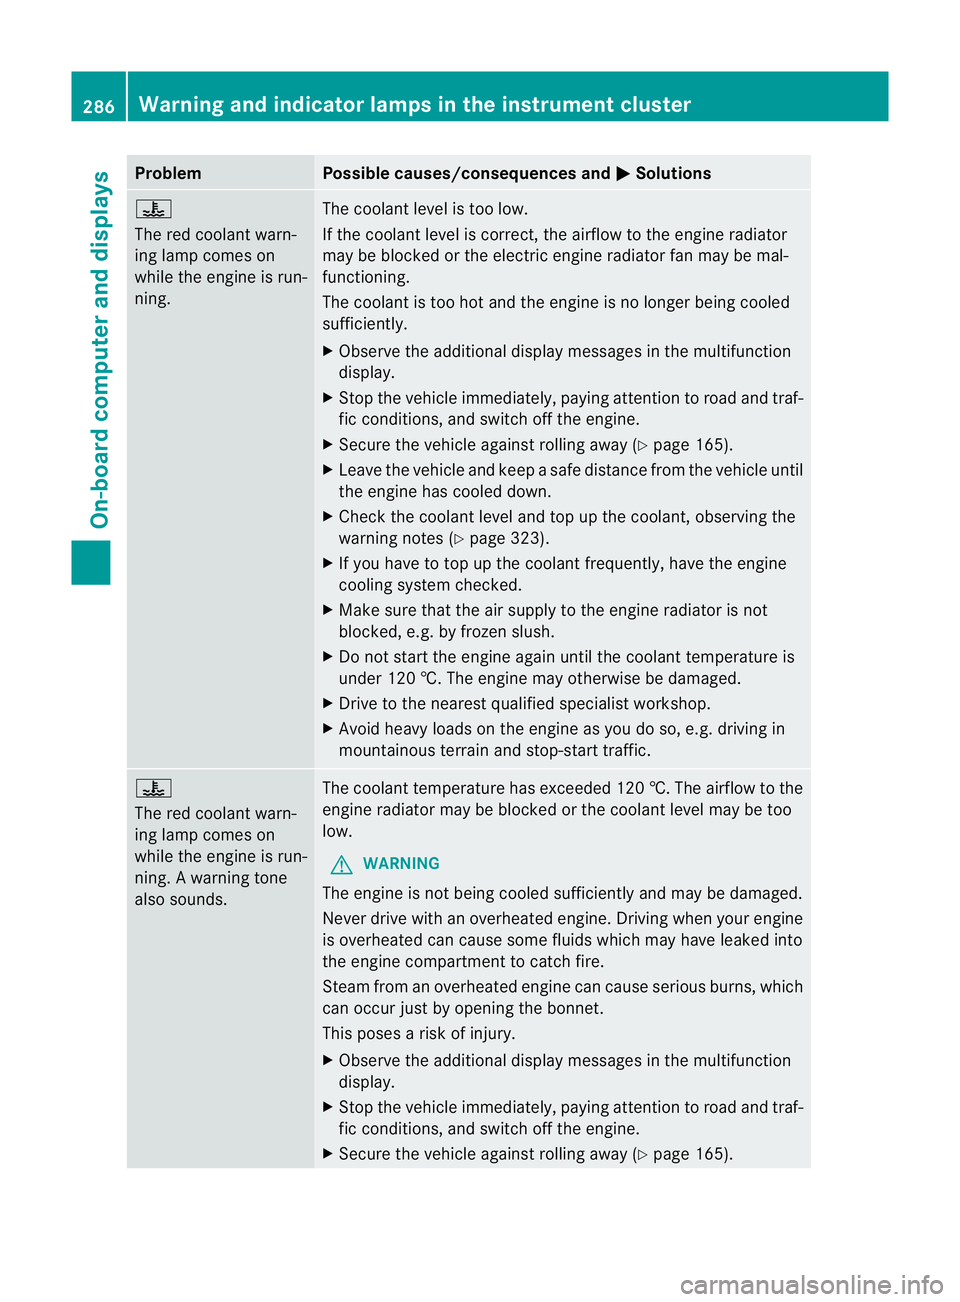
Problem Possible causes/consequences and
M Solutions
?
The red coolant warn-
ing lamp comes on
while the engine is run-
ning.
The coolant level is too low.
If the coolant level is correct, the airflow to the engine radiator
may be blocked or the electric engine radiator fan may be mal-
functioning.
The coolant is too hot and the engine is no longer being cooled
sufficiently.
X
Observe the additional display messages in the multifunction
display.
X Stop the vehicle immediately, paying attention to road and traf-
fic conditions, and switch off the engine.
X Secure the vehicle against rolling away (Y page 165).
X Leave the vehicle and keep a safe distance from the vehicle until
the engine has cooled down.
X Check the coolant level and top up the coolant, observing the
warning notes (Y page 323).
X If you have to top up the coolant frequently, have the engine
cooling system checked.
X Make sure that the air supply to the engine radiator is not
blocked, e.g. by frozen slush.
X Do not start the engine again until the coolant temperature is
under 120 †. The engine may otherwise be damaged.
X Drive to the nearest qualified specialist workshop.
X Avoid heavy loads on the engine as you do so, e.g. driving in
mountainous terrain and stop-start traffic. ?
The red coolant warn-
ing lamp comes on
while the engine is run-
ning. A warning tone
also sounds.
The coolant temperature has exceeded 120 †. The airflow to the
engine radiator may be blocked or the coolant level may be too
low.
G WARNING
The engine is not being cooled sufficiently and may be damaged.
Never drive with an overheated engine. Driving when your engine
is overheated can cause some fluids which may have leaked into
the engine compartment to catch fire.
Steam from an overheated engine can cause serious burns, which
can occur just by opening the bonnet.
This poses a risk of injury.
X Observe the additional display messages in the multifunction
display.
X Stop the vehicle immediately, paying attention to road and traf-
fic conditions, and switch off the engine.
X Secure the vehicle against rolling away (Y page 165).286
Warning and indicator lamps in the instrument clusterOn-board computer and displays
Page 290 of 405
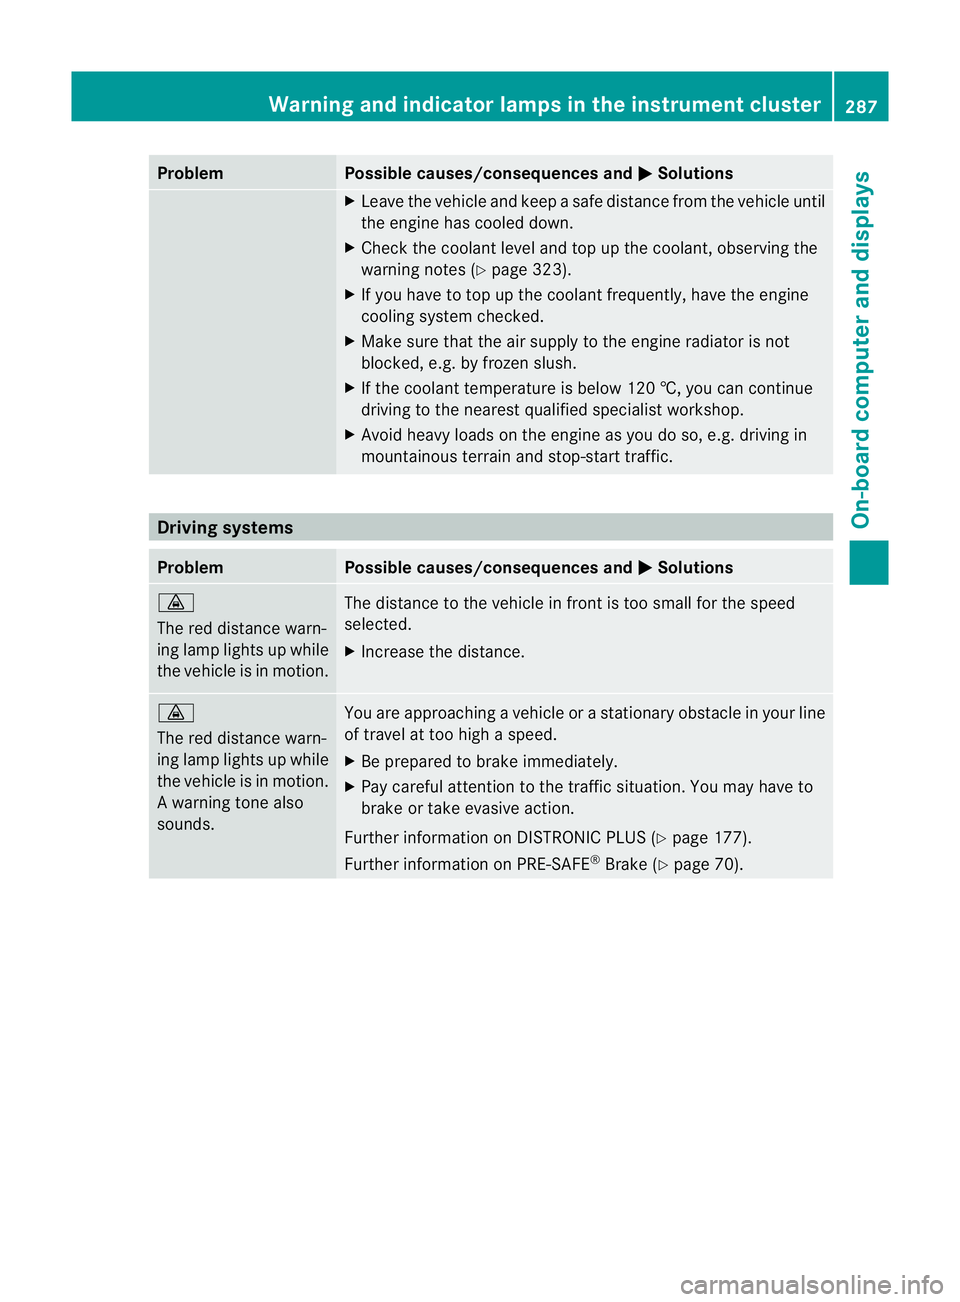
Problem Possible causes/consequences and
M Solutions
X
Leave the vehicle and keep a safe distance from the vehicle until
the engine has cooled down.
X Check the coolant level and top up the coolant, observing the
warning notes (Y page 323).
X If you have to top up the coolant frequently, have the engine
cooling system checked.
X Make sure that the air supply to the engine radiator is not
blocked, e.g. by frozen slush.
X If the coolant temperature is below 120 †, you can continue
driving to the nearest qualified specialist workshop.
X Avoid heavy loads on the engine as you do so, e.g. driving in
mountainous terrain and stop-start traffic. Driving systems
Problem Possible causes/consequences and
M Solutions
·
The red distance warn-
ing lamp lights up while
the vehicle is in motion.
The distance to the vehicle in front is too small for the speed
selected.
X Increase the distance. ·
The red distance warn-
ing lamp lights up while
the vehicle is in motion.
Aw
arning tone also
sounds. You are approaching a vehicle or a stationary obstacle in your line
of travel at too high a speed.
X
Be prepared to brake immediately.
X Pay careful attention to the traffic situation. You may have to
brake or take evasive action.
Further information on DISTRONIC PLUS (Y page 177).
Further information on PRE-SAFE ®
Brake (Y page 70). Warning and indicator lamps in the instrument cluster
287On-board computer and displays Z
Page 326 of 405
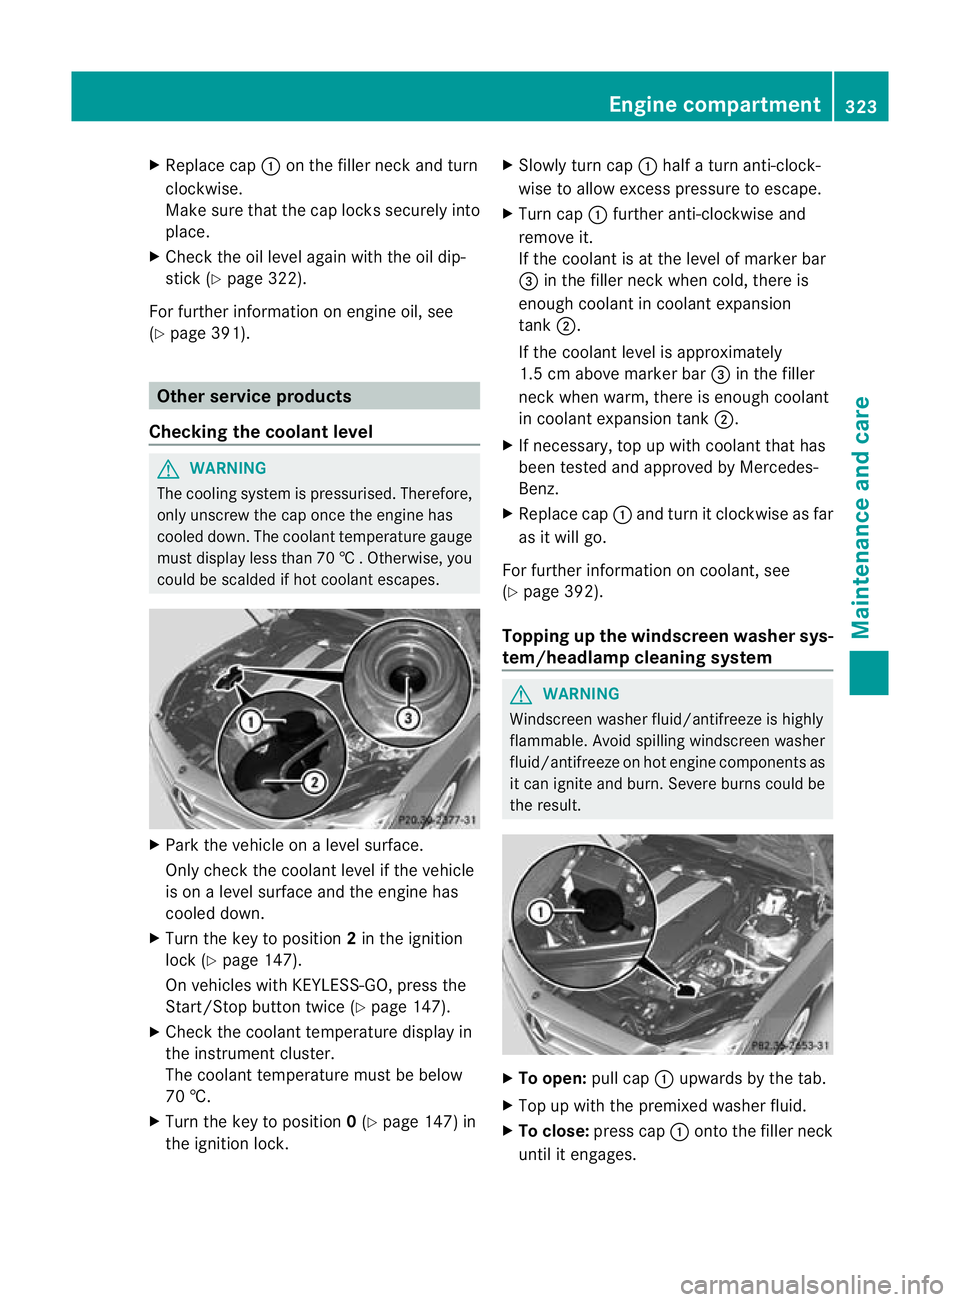
X
Replace cap :on the filler neck and turn
clockwise.
Make sure that the cap locks securely into
place.
X Chec kthe oil level again with the oil dip-
stick (Y page 322).
For further information on engine oil, see
(Y page 391). Other service products
Checking the coolant level G
WARNING
The cooling system is pressurised. Therefore,
only unscrew the cap once the engine has
cooled down. The coolant temperature gauge
must display less than 70 †.Otherwise, you
could be scalded if hot coolant escapes. X
Park the vehicle on a level surface.
Only check the coolant level if the vehicle
is on a level surface and the engine has
cooled down.
X Turn the key to position 2in the ignition
lock (Y page 147).
On vehicles with KEYLESS-GO, press the
Start/Stop button twice (Y page 147).
X Check the coolant temperature display in
the instrument cluster.
The coolant temperature must be below
70 †.
X Turn the key to position 0(Y page 147) in
the ignition lock. X
Slowly tur ncap : half a turn anti-clock-
wise to allow excess pressure to escape.
X Turn cap :further anti-clockwise and
remove it.
If the coolant is at the level of marker bar
= in the fille rneck when cold, there is
enough coolant in coolant expansion
tank ;.
If the coolant level is approximately
1.5 cm above marker bar =in the filler
neckw hen warm, there is enough coolant
in coolant expansion tank ;.
X If necessary, top up with coolant that has
been tested and approved by Mercedes-
Benz.
X Replace cap :and turn it clockwise as far
as it will go.
For further information on coolant, see
(Y page 392).
Topping up the windscreen washer sys-
tem/headlampc leaning system G
WARNING
Windscreen washer fluid/antifreeze is highly
flammable. Avoid spilling windscreen washer
fluid/antifreeze on hot engine components as
it can ignite and burn. Severe burns could be
the result. X
To open: pull cap:upwards by the tab.
X Top up with the premixed washer fluid.
X To close: press cap :onto the filler neck
until it engages. Engine compartment
323Maintenance and care Z
Page 396 of 405

!
Only add coolant that has been premixed
with the desired antifreeze protection. You
could otherwise damage the engine.
Further information on coolants can be
found in the Mercedes-Benz Specifications
for Service Products, MB Specifications for
Service Products 310.1, e.g. on the Inter-
net at http://bevo.mercedes-benz.com.
Or contact a qualified specialist workshop.
! Always use a suitable coolant mixture,
even in countries where high temperatures
prevail.
Otherwise, the engine cooling system is not
sufficiently protected from corrosion and
overheating.
! The engine cooling system is filled with
coolant, which must be renewed after
15 years or after 250,000 kilometres at the
latest.
The coolant is a mixture of water and anti-
freeze/corrosion inhibitor. It performs the
following tasks:
R anti-corrosion protection
R antifreeze protection
R raising the boiling point
If antifreeze/corrosion inhibitor is present in
the correct concentration, the boiling point of
the coolant during operation will be approx-
imately 130 †.
The antifreeze/corrosion inhibitor concentra-
tion in the engine cooling system should:
R be at least 50%. This will protect the engine
cooling system against freezing down to
approximately -37 †.
R not exceed 55% (antifreeze protection
down to -45 †). Heat will otherwise not be
dissipated as effectively.
If the vehicle has lost coolant, top it up with
equal amounts of water and antifreeze/cor-
rosion inhibitor. Mercedes-Benz recom-
mends an antifreeze/corrosion inhibitor con-
centrate in accordance with MB Specifica-
tions for Service Products 310.1. The coolant is checked at every maintenance
interval at a qualified specialist workshop.
i
When the vehicle is first delivered, it is fil-
led with a coolant mixture that ensures
adequate antifreeze and corrosion protec-
tion. Windscreen washer system and head-
lamp cleaning system
Important safety notes G
WARNING
Windscreen washer concentrate is highly
flammable. If it comes into contact with hot
engine components or the exhaust system it
could ignite. There is a risk of fire and injury.
Make sure that no windscreen washer con-
centrate is spilled next to the filler neck.
! Only use washer fluid that is suitable for
plastic lamp lenses, e.g. MB SummerFit or
MB WinterFit. Unsuitable washer fluid
could damage the plastic lenses of the
headlamps.
! Do not use distilled or de-ionised water in
the washer fluid reservoir. Otherwise, the
level sensor may be damaged.
! Only the washer fluids SummerFit and
WinterFit can be mixed. Otherwise, the
spraying nozzles could become blocked.
At temperatures above freezing:
X Fill the washer fluid reservoir with a mixture
of water and washer fluid, e.g. MB Sum-
merFit.
Mix 1 part MB SummerFit to 100 parts water. Service products and capacities
393Technical data Z