2012 MERCEDES-BENZ CLS SHOOTING BRAKE audio
[x] Cancel search: audioPage 233 of 405
?
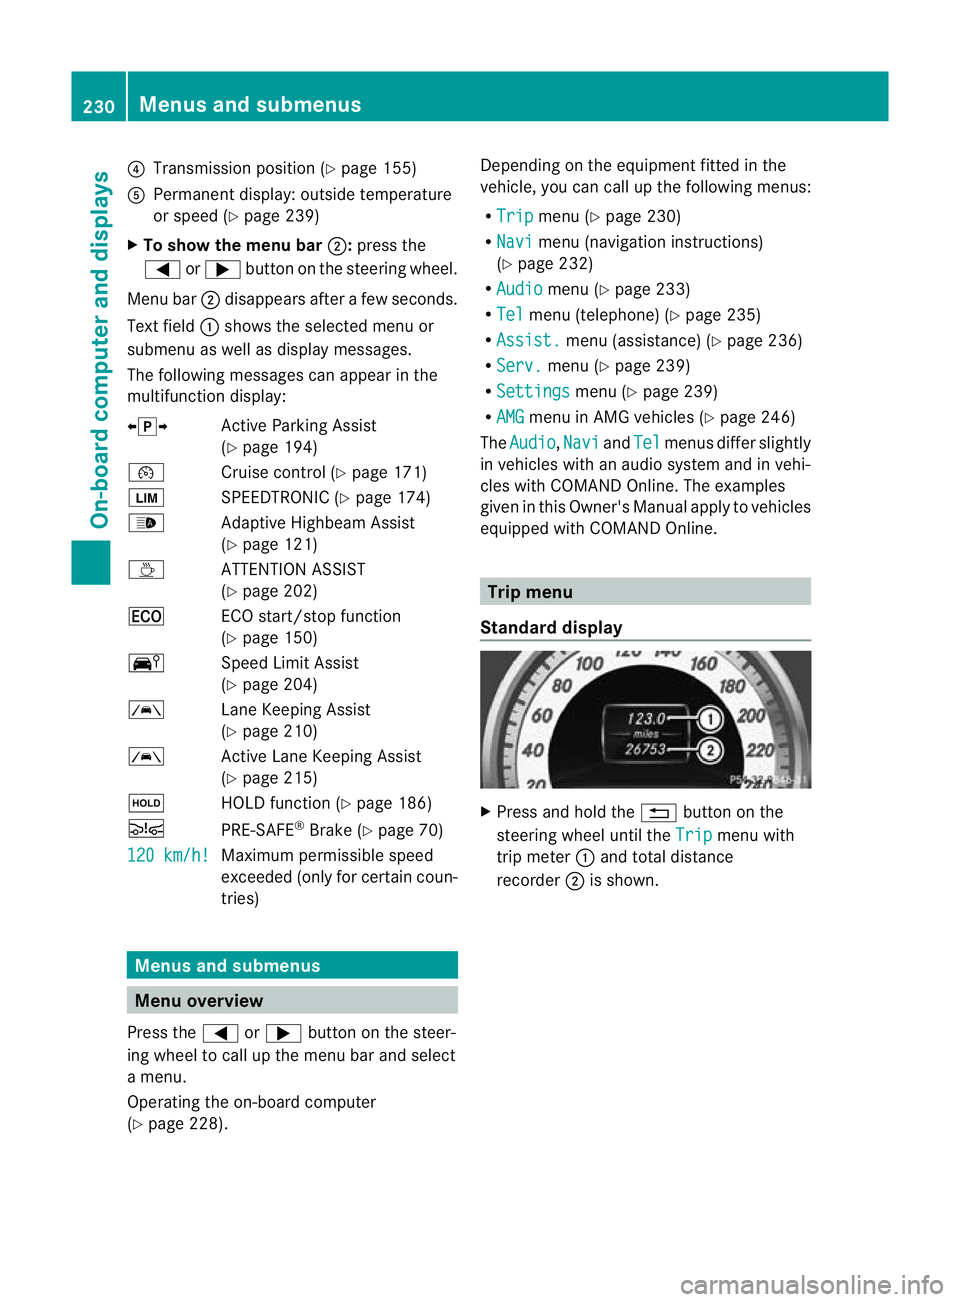
Transmission position (Y page 155)
A Permanen tdisplay: outside temperature
or speed (Y page 239)
X To show the menu bar ;:press the
= or; button on the steerin gwheel.
Menu bar ;disappears after a few seconds.
Text field :shows the selected menu or
submenu as well as display messages.
The following messages can appearint he
multifunction display:
XjY Active Parking Assist
(Ypage 194)
¯ Cruise control (Y page 171)
È SPEEDTRONIC (Y page 174)
_ Adaptive Highbeam Assist
(Ypage 121)
À ATTENTION ASSIST
(Ypage 202)
¤ ECO start/stop function
(Ypage 150)
Ä Speed Limit Assist
(Ypage 204)
à Lane Keeping Assist
(Ypage 210)
à Active Lane Keeping Assist
(Ypage 215)
ë HOLD function (Y page 186)
Ä PRE-SAFE®
Brake (Y page 70)
120 km/h! Maximum permissible speed
exceeded (only for certain coun-
tries)
Menus and submenus
Menu overview
Press the =or; button on the steer-
ing wheel to call up the menu bar and select
a menu.
Operating the on-board computer
(Y page 228). Depending on the equipment fitted in the
vehicle, you can call up the following menus:
R
Trip menu (Y
page 230)
R Navi menu (navigation instructions)
(Y page 232)
R Audio menu (Y
page 233)
R Tel menu (telephone) (Y
page 235)
R Assist. menu (assistance) (Y
page 236)
R Serv. menu (Y
page 239)
R Settings menu (Y
page 239)
R AMG menu in AMG vehicles (Y
page 246)
The Audio ,
Navi and
Tel menus differ slightly
in vehicles with an audio system and in vehi-
cles with COMAND Online. The examples
given in this Owner's Manual apply to vehicles
equipped with COMAND Online. Trip menu
Standard display X
Press and hold the %button on the
steering wheel until the Trip menu with
trip meter :and total distance
recorder ;is shown. 230
Menus and submenusOn-board computer and displays
Page 235 of 405
Resetting values
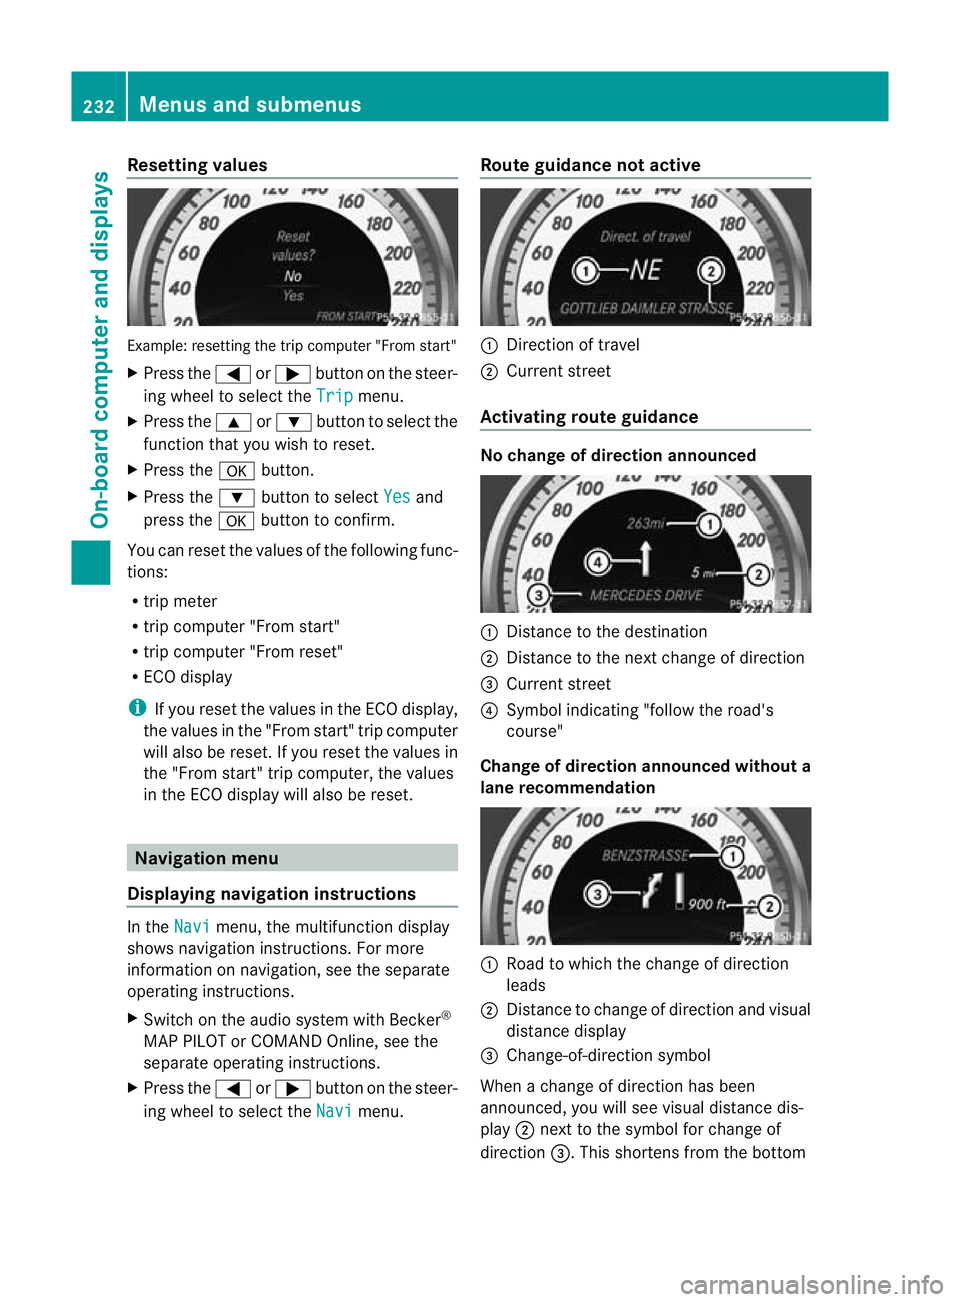
Example: resetting the trip computer "From start"
X
Press the =or; button on the steer-
ing wheel to select the Trip menu.
X Press the 9or: button to select the
function that you wish to reset.
X Press the abutton.
X Press the :button to select Yes and
press the abutton to confirm.
You can reset the values of the following func-
tions:
R trip meter
R trip computer "From start"
R trip computer "From reset"
R ECO display
i If you reset the value sinthe ECO display,
the values in the "From start" trip computer
will also be reset. If you reset the values in
the "From start" trip computer, the values
in the ECO display will also be reset. Navigation menu
Displaying navigation instructions In the
Navi menu, the multifunction display
shows navigation instructions. For more
information on navigation, see the separate
operating instructions.
X Switch on the audio system with Becker ®
MAP PILOT or COMAND Online, see the
separate operating instructions.
X Press the =or; button on the steer-
ing wheel to select the Navi menu.Route guidance not active :
Direction of travel
; Current street
Activating route guidance No change of direction announced
:
Distance to the destination
; Distance to the next change of direction
= Current street
? Symbol indicating "follow the road's
course"
Change of direction announced without a
lane recommendation :
Road to which the change of direction
leads
; Distance to change of direction and visual
distance display
= Change-of-direction symbol
When a change of direction has been
announced, you will see visual distance dis-
play ;next to the symbol for change of
direction =.This shortens from the bottom 232
Menus and submenusOn-board computer and displays
Page 236 of 405
to the top of the display as you approach the
point of the announced change of direction.
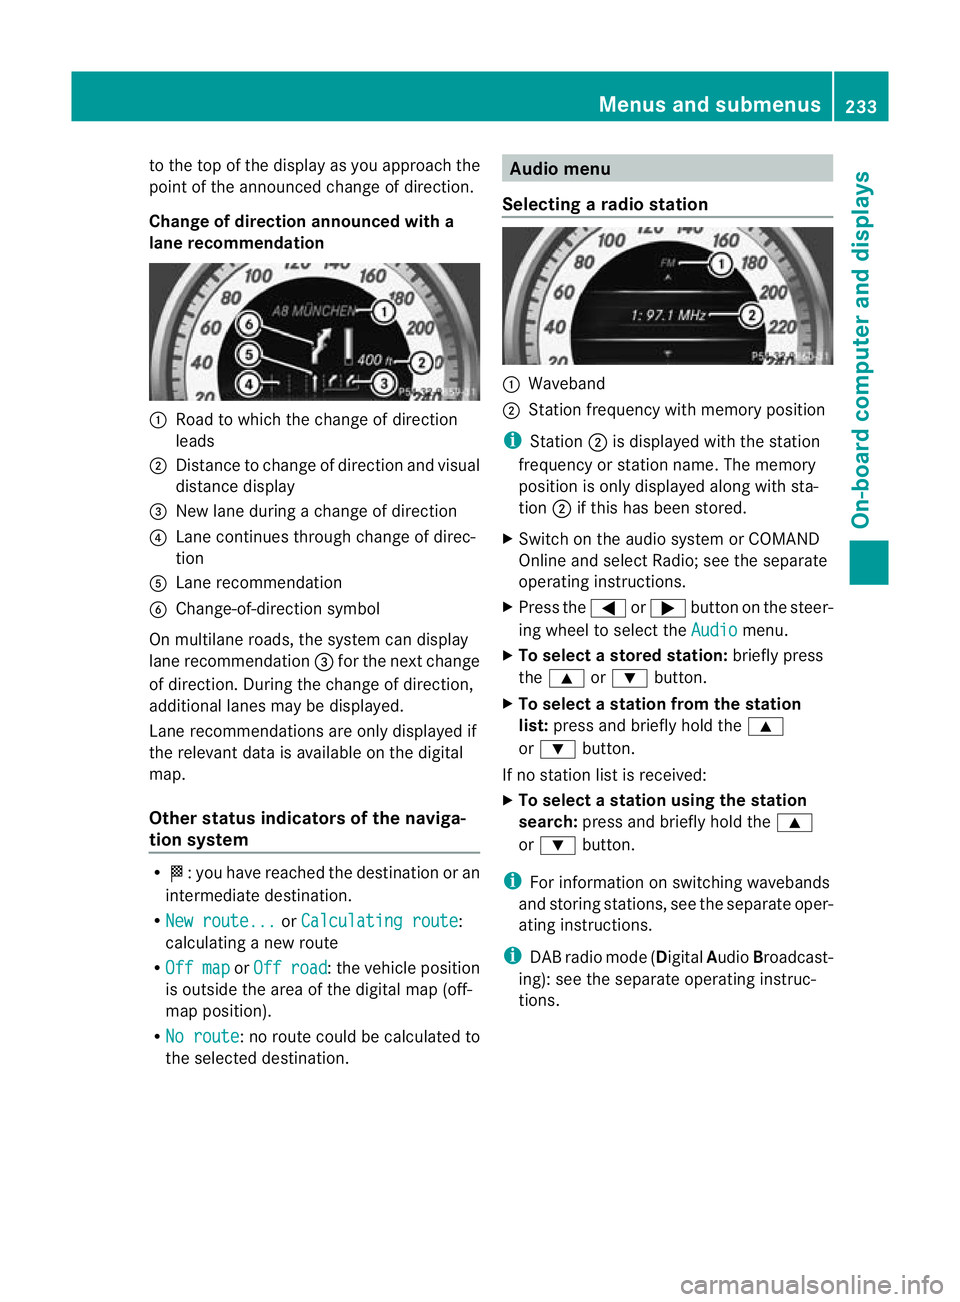
Change of direction announced with a
lane recommendation :
Road to which the change of direction
leads
; Distance to change of directio nand visual
distance display
= New lane during a change of direction
? Lane continues through change of direc-
tion
A Lane recommendation
B Change-of-direction symbol
On multilane roads, the system can display
lane recommendation =for the next change
of direction. During the change of direction,
additional lanes may be displayed.
Lane recommendations are only displayed if
the relevant data is availabl eonthe digital
map.
Other status indicators of the naviga-
tion system R
O:y ou have reached the destination or an
intermediate destination.
R New route... or
Calculating route :
calculating a new route
R Off map or
Off road :t
he vehicle position
is outside the area of the digital map (off-
map position).
R No route :n
o route could be calculated to
the selected destination. Audio menu
Selecting aradio station :
Waveband
; Station frequency with memory position
i Station ;is displayed with the station
frequency or station name. The memory
position is only displayed along with sta-
tion ;if this has bee nstored.
X Switch on the audio syste morCOMAND
Online and select Radio; see the separate
operating instructions.
X Press the =or; button on the steer-
ing wheel to select the Audio menu.
X To select astore dstation: briefly press
the 9 or: button.
X To select a station from the station
list: press and briefly hold the 9
or : button.
If no statio nlist is received:
X To select astation using the station
search: press and briefly hold the 9
or : button.
i For informatio nonswitching wavebands
and storing stations, see the separate oper-
ating instructions.
i DABradio mode ( DigitalAudioBroadcast-
ing): see the separate operating instruc-
tions. Menus and submenus
233On-board computer and displays Z
Page 237 of 405
Audio player or audio media operation
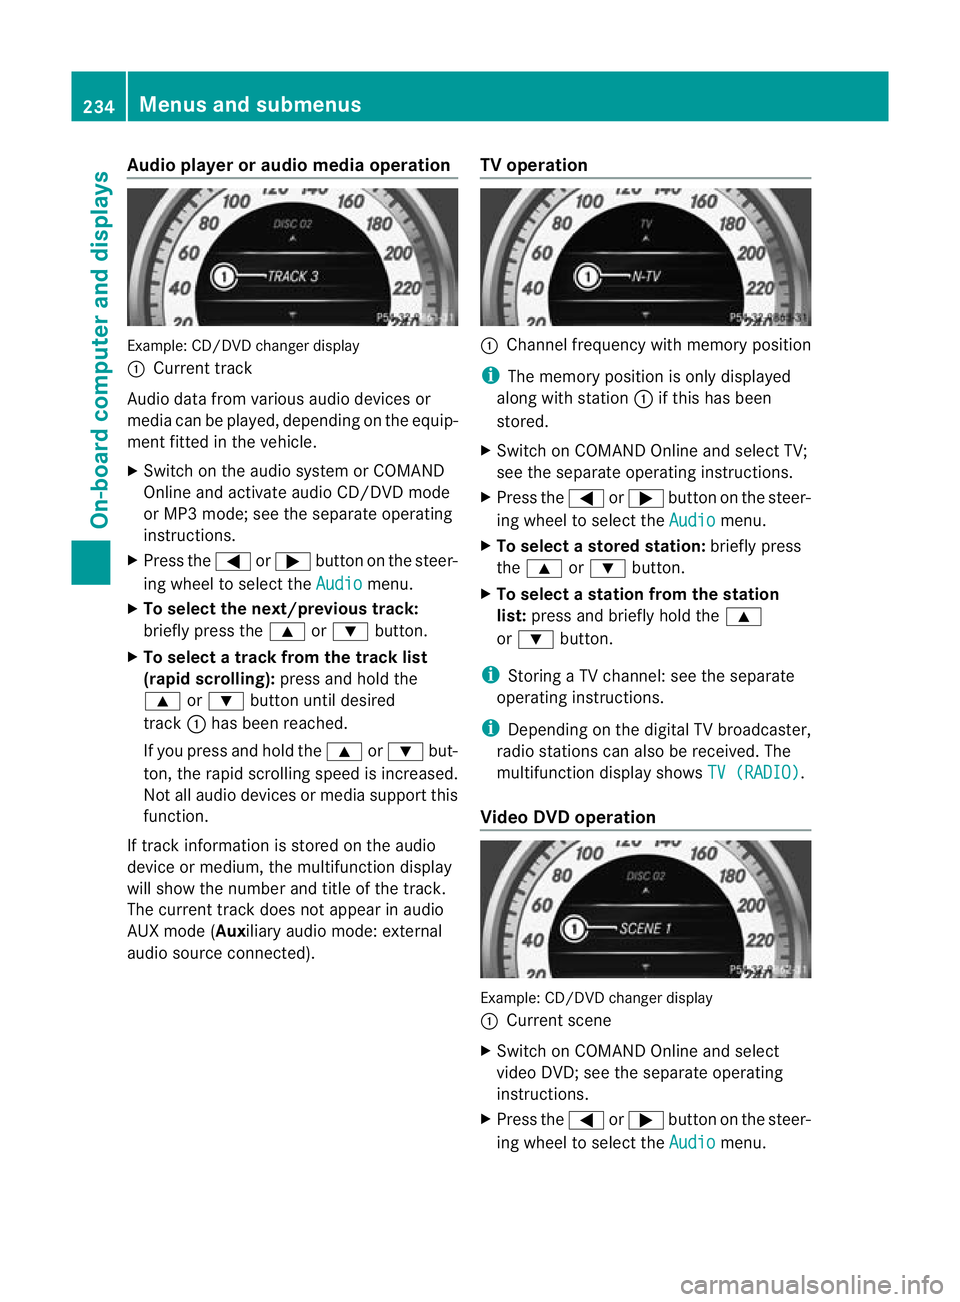
Example: CD/DV
Dchanger display
: Current track
Audio data from various audiod evices or
media can be played, depending on the equip-
ment fitted in the vehicle.
X Switch on the audio system or COMAND
Online and activate audio CD/DVD mode
or MP3 mode; see the separate operating
instructions.
X Press the =or; button on the steer-
ing wheel to select the Audio menu.
X To select the next/previous track:
briefly press the 9or: button.
X To select a track from the track list
(rapid scrolling): press and hold the
9 or: button until desired
track :has been reached.
If you press and hold the 9or: but-
ton, the rapid scrolling speed is increased.
Not all audio devices or media support this
function.
If track information is stored on the audio
device or medium, the multifunction display
will show the number and title of the track.
The curren ttrack does not appear in audio
AUX mode (Auxiliary audio mode: external
audio source connected). TV operation :
Channel frequency with memory position
i The memory position is only displayed
along with station :if this has been
stored.
X Switch on COMAND Online and select TV;
see the separate operating instructions.
X Press the =or; button on the steer-
ing wheel to select the Audio menu.
X To selectas toredstation: briefly press
the 9 or: button.
X To select a station from the station
list: press and briefly hold the 9
or : button.
i Storing a TV channel :see the separate
operating instructions.
i Depending on the digital TV broadcaster,
radio stations can also be received. The
multifunction display shows TV (RADIO) .
Video DVD operation Example: CD/DVD changer display
:
Current scene
X Switch on COMAND Online and select
video DVD; see the separate operating
instructions.
X Press the =or; button on the steer-
ing wheel to select the Audio menu.234
Menus and submenusOn-board computer and displays
Page 238 of 405
X
To select the next or previous scene:
briefly press the 9or: button.
X To select ascene from the scene list
(rapid scrolling): press and hold the
9 or: buttonuntil desired
scene :has been reached. Telephone menu
Introduction G
WARNING
Observe the legal requirements of the country
in which you are currently driving regarding
the use of mobile phones in the vehicle.
If it is permitted to use mobile phones while
the vehicle is in motion, you should only use
them when the road and traffic conditions
allow. Otherwise, you may be distracted from
the traffic conditions, cause an accident and
injure yoursel fand others.
X Switch on the mobile phone (see the sep-
arate operating instructions).
X Switch on the audio system or COMAND
Online; see the separate operating instruc-
tions.
X Insert the mobile phone into the bracket
(Y page 311).
or
X Establish a Bluetooth ®
connection to the
audio system or COMAND Online; see the
separate operating instructions.
X Press the =or; button on the steer-
ing wheel to select the Tel menu.
You will see one of the following display mes-
sages in the multifunctio ndisplay:
R Please enter PIN :t
he mobile phone has
been placed in the mobile phone bracket
and the PIN has not been entered.
When you enter your PIN via the mobile
phone, LINGUATRONIC, the audio system or COMAND Online, the mobile phone
searches for a network.
R Telephone ready or the name of the net-
work provider: the mobile phone has found
a network and is ready to receive.
R Telephone No service : there is no net-
work available or the mobile phone is
searching for a network.
i You can obtain further information about
suitable mobile phones and connecting
mobile phones via Bluetooth ®
:
R from any Mercedes Benz Service Centre
R on the Internet at: http://
www.mercedes-benz.com/connect
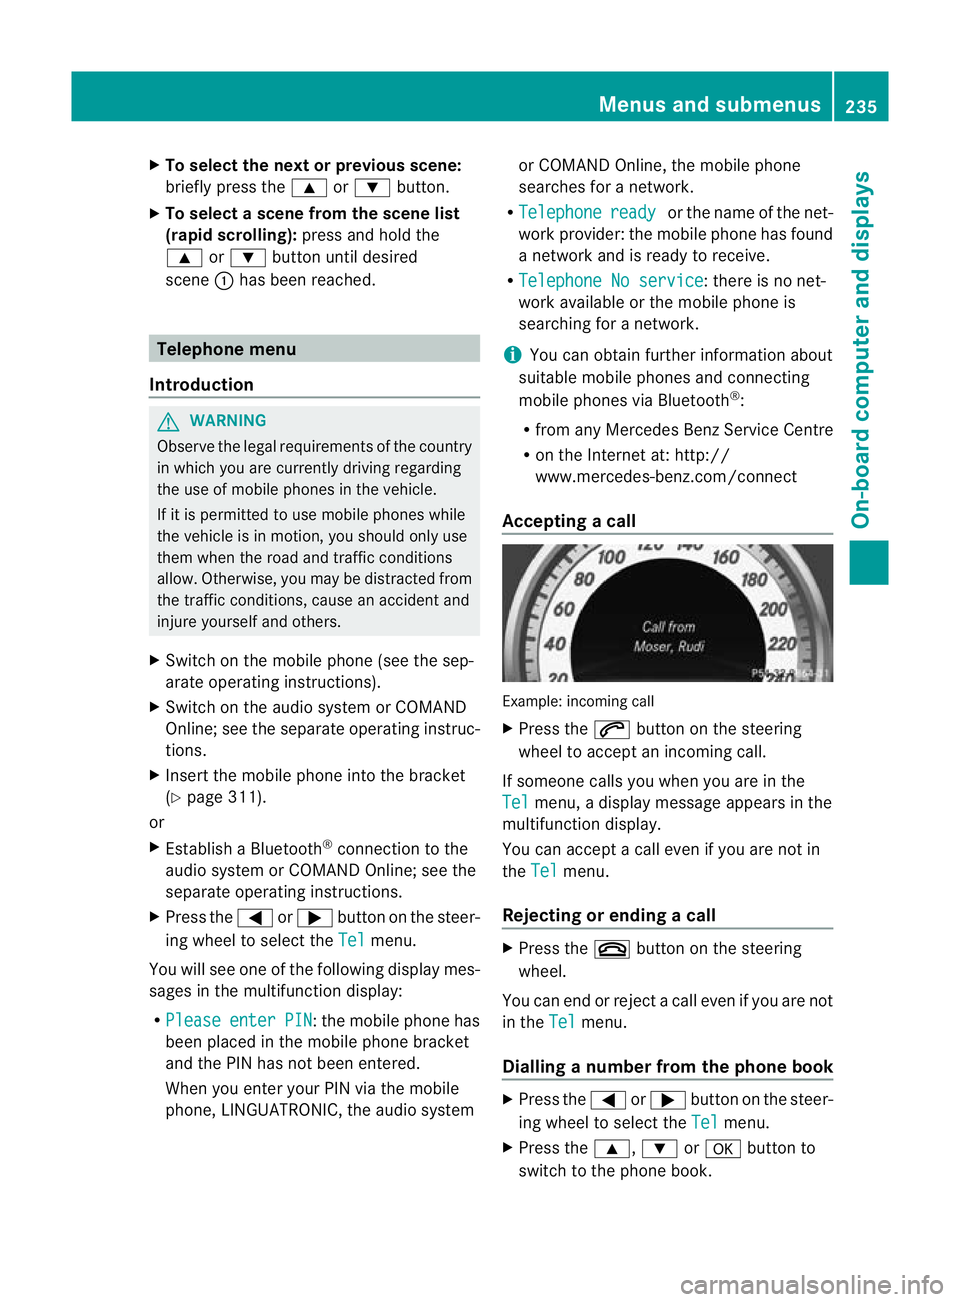
Accepting acall Example: incoming call
X
Press the 6button on the steering
wheel to accep tanincoming call.
If someone calls you when you are in the
Tel menu, a display message appears in the
multifunctio ndisplay.
You can accept a call even if you are not in
the Tel menu.
Rejecting or ending acall X
Press the ~button on the steering
wheel.
You can end or reject a call even if you are not
in the Tel menu.
Dialling anumber from the phone book X
Press the =or; button on the steer-
ing wheel to select the Tel menu.
X Press the 9,:ora button to
switch to the phone book. Menus and submenus
235On-board computer and displays Z
Page 295 of 405
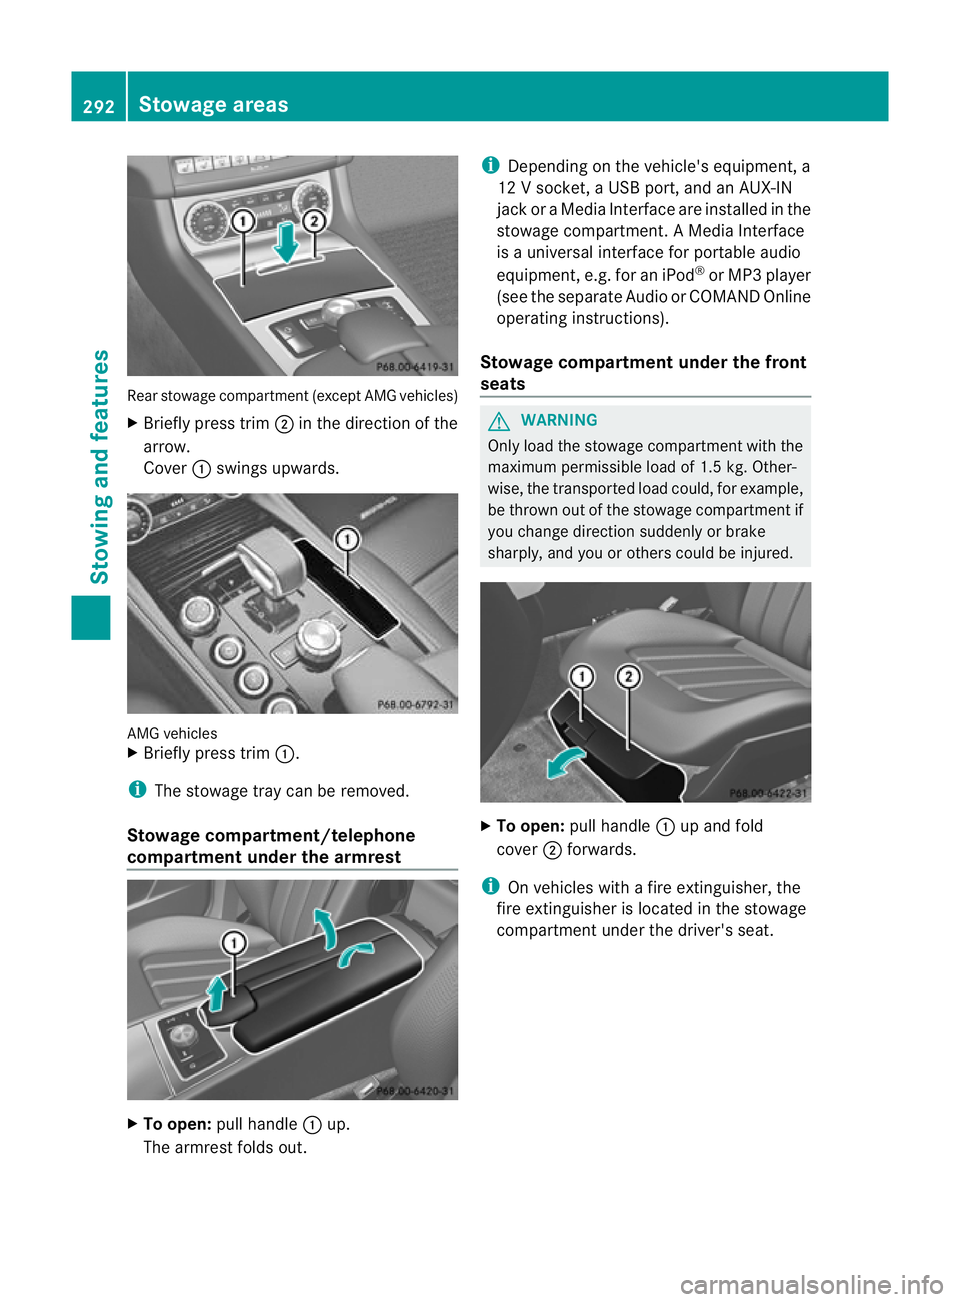
Rear stowage compartmen
t(except AMG vehicles)
X Briefly press trim ;in the direction of the
arrow.
Cover :swings upwards. AMG vehicles
X
Briefly press trim :.
i The stowage tray can be removed.
Stowage compartment/telephone
compartment under the armrest X
To open: pull handle :up.
The armrest folds out. i
Depending on the vehicle's equipment, a
12 V socket, a USB port, and an AUX-IN
jack or a Media Interface are installed in the
stowage compartment. A Media Interface
is a universal interface for portable audio
equipment, e.g. for an iPod ®
or MP3 player
(see the separate Audio or COMAND Online
operating instructions).
Stowage compartment under the front
seats G
WARNING
Only load the stowage compartment with the
maximum permissible load of 1.5 kg. Other-
wise, the transported load could, for example,
be thrown out of the stowage compartment if
you change direction suddenly or brake
sharply, and you or others could be injured. X
To open: pull handle :up and fold
cover ;forwards.
i On vehicles with a fire extinguisher, the
fire extinguisher is located in the stowage
compartment under the driver's seat. 292
Stowage areasStowing and features
Page 313 of 405
An exterio
raerial has the following advan-
tages:
R it conducts the electromagnetic fields gen-
erated by a wireless device to the exterior.
R the field strength in the vehicle interior is
lower than in a vehicle that does not have
an exterior aerial.
i There are various mobile phone brackets
that may be fitted in your vehicle; in some
cases, these are country-specific.
i You can connect a Bluetooth ®
-capable
mobile phone with Audio 20, Audio 50 or
COMAND Online via the Bluetooth ®
inter-
face. This also applies if your vehicle is
equipped with convenience telephony.
More information on suitable mobile phones,
mobile phone brackets and on connecting
Bluetooth ®
-capable mobile phones with
Audio 20, Audio 50 or COMAND Online can
be obtained:
R at your Mercedes-Benz Service Centre
R on the Internet at http://www.mercedes-
benz.com/connect
i The functions and services available when
you use the phone depend on your mobile
phone model and service provider.
Using amobile phone If the mobile phone is inserted in the mobile
phone bracket, you can speak to the person
you are calling using the hands-free system.
X
Open the telephone compartment
(Y page 292).
X If required by the desig nofthe mobile
phone bracket, install the sliding adapter
(Y page 311).
X Insert the mobile phone into the mobile
phone bracket (see the separate installa-
tion instructions for the mobile phone fit-
ting).
i On some mobile phone brackets, you first
have to connect the mobile phone via Blue-
tooth ®
to the mobile phone bracket (see the separate operating instructions for the
mobile phone bracket).
If this is the case, the mobile phone does
not have to be inserted into the bracket for
you to be able to use the telephone func-
tions. However, the charging function and
aerial function are not available.
Operating the mobile phone You can operate the telephone using the
6
and~ buttons on the multifunction
steering wheel. You can operate other mobile
phone functions via the on-board computer
(Y page 235).
When you remove the key from the ignition
lock, the mobile phone stays switched on.
However, you can no longer use the hands-
free system.
If you have an active call and would like to
take the key out of the ignition lock, first
remove the mobile phone from the bracket.
Otherwise, the call is ended.
i When using a bracket connected to the
mobile phone via Bluetooth ®
:
If you wish to continue a call in private
mode, you will need to perform the neces-
sary steps on the mobile phone. Informa-
tion can be found in the separate mobile
phone operating instructions.
i When using a bracket connected to the
mobile phone via Bluetooth ®
and you wish
to proceed with a call:
Switch to private mode before removing
the key from the ignition lock. Otherwise, it
may take up to 20 seconds, before the
mobile phone separates from the system.
Only then can the telephone call continue.
Information on the necessary steps for set-
ting up "private mode" can be found in the
separate mobile phone operating instruc-
tions.
i Not all mobile phones support "private
mode". 310
FeaturesStowing and features
Page 385 of 405
Useful information
i This Owner's Manual describes all mod-
els, series and optional equipment for your
vehicle that were available at the time of
going to press. National variations are pos-
sible. Note that your vehicle may not be
equipped with all of the functions descri-
bed. This is also the case for systems and
functions relevant to safety.
i Read the information on qualified special-
ist workshops: (Y page 24). Information on technical data
You can find current technical data on the
Internet at:
http://www.mercedes-benz.com
i The technical data was determined in
accordance with EC Directives. All data
applies to the vehicle's standard equip-
ment. The data may therefore differ for
vehicles with optional equipment .You can
obtain further information from a
Mercedes-Benz Service Centre. Genuine Mercedes-Benz parts
G
WARNING
Driving safety may be impaired if non-
approved parts, tyres and wheels or safety-
relevant accessories are used.
This could lead to malfunctions in safety-rel-
evant systems, e.g. the brake system. This
could cause you to lose control of your vehicle
and cause an accident.
For this reason, Mercedes-Benz recommends
that you use genuine Mercedes-Benz parts or
parts of equal quality. Only use tyres, wheels
and accessories that have been specifically
approved for your vehicle. H
Environmental note
Daimler AG also supplies reconditioned
assemblies and parts which are of the same
quality as new parts. For these, the same war-
ranty applies as for new parts.
! Airbags and seat belt tensioners, as well
as control units and sensors for these
restraint systems, may be installed in the
following areas of your vehicle:
R doors
R door pillars
R door sills
R seats
R dashboard
R instrument cluster
R centre console
Do not install accessories such as audio
systems in these areas. Do not carry out
repairs or welding. You could impair the
operating efficiency of the restraint sys-
tems.
Have accessories retrofitted at a qualified
specialist workshop.
Mercedes-Benz tests genuine parts and con-
version parts and accessories that have been
specifically approved for your vehicle for their
reliability, safety and suitability. Despite
ongoing market research, Mercedes-Benz is
unable to assess other parts. Mercedes-Benz
accepts no responsibility for the use of parts
that have been independently or officially
approved.
In Germany, certain parts are only officially
approved for installation or modification if
they comply with legal requirements. This
also applies to some other countries. All gen-
uine Mercedes-Benz parts meet the approval
requirements. The use of non-approved parts
may invalidate the vehicle's general operating
permit. 382
Genuine Mercedes-Benz partsTechnical data