2012 MERCEDES-BENZ C-Class ad blue
[x] Cancel search: ad bluePage 143 of 234
X
Sea rch foranentry inthe phoneboo kon
the mob ile pho ned (Ypage 126) .
X Sel ect the list symbo lto the right ofthe
entry bysliding VY theCOMAND
control lera nd pre ssW toconfi rm.
X Sel ect SaveEnt ry and
pressW to
confi rm.
The Saving Procedure Successful mes
sage appe ars. The phone book entry is
now saved asan addre ssbook entry .
The diconisreplaced bythe ¥icon. Importing
contacts
Information andrequirem ents You
canimport contacts (vCards) fromthe
memory cardandaUSB device intothe
address book,orreceive vCardsvia
Bluetooth ®
.
i Upto2500 entries canbeimported into
the address book.Amessage notifies you
when themaximum numberisreached.
You now have todelete existingentries
(Y page 137)ino rder toimport newentries.
Dependi ngon the source ofthe contact data,
differe ntrequ ireme ntsapply: Source Con
dition s Memory
card The
SDmemory cardmust
be inserted (Ypag e157)
and must contain
importa blecontact data. USB
device The
USB devicemust be
inserted inthe USB port
and must contain
importa blecontact data. Requiremen
tsfor rece ivingvCards via
Bluetoo th®
You canreceive vCards from devices(e.g.
from aPC) whichsup port thesending of
vCa rds viaBlue tooth ®
. It
is not necessary toauthorize thedevi cein
COMAND todo so.
Plea sebea rthe following inmind:
R Bluetooth ®
must beactivated inCOMAND
and onthe Bluetooth ®
device (see
operating instructionsforthe device).
R the Bluetooth ®
device mustbeable tosend
vCards viaBluetooth ®
(see operating
instruct ionsforthe device).
R the Bluetooth ®
device inthe vehicle must
be switched on.
Import ingfrom thememory cardorUSB
device Ent
ries imported fromthememory cardor
from aUSB device havethe¯ symbol.
The following conditionsmust befulfilled in
order toimport vCards:
R vCards (vcffiles) maybelocated inthe main
directory orinfolders. COMAND allowsfor
a targeted selection ofthe corresponding
directories.
R vCards musthavethefileexten sion".vcf".
i Avcffilecan also contai nseveral vCards.
COMAND supportsvCardsinversion s2.1
and 3.0.
X Select Address Book in
the address book
or, ifthe telephon ebasic menu isshown,
select Phone by
sliding VÆandturning
cVd theCOMAND controller andpress
W tocon firm.
X Select Downloa dContact s and
press W
to con firm.
Am enu appears.
X Select FromTheMemory Card or
From USB
Device in
the menu byturn ingcVd
the COMAND controller andpress Wto
con firm.
X Select Add or
Overwri te and
press Wto
con firm.
Add import
sthe entries from thememory
card orUSB device intothe address book. Using
theadd ress book
141Telephone Z
Page 144 of 234
Overwrite imports
theentries fromthe
memory cardorUSB device andoverwrites
all entries inthe address bookwiththe
¯ symbol. Theprevious entriesarethen
no longer available.
Aft erthe cont actdata hasbeen imported
successfully ,you willsee amessage tothis
effec t.The address bookorthe respect ive
telephon ebasic menu isdisplayed.
i You canselect theOverwri te menu
item
if the address bookalready contains
corr espondin gent ries. Amessage notifies
you when theaddress bookisfull.
Receiving vCardsvia Bluet ooth® Received
vCardsareidentif iedbythe ®
symbol inthe address book.
i Ifyou switch toanoth ermain function,
e.g. navigation ,while receivin gvCards, the
recept ionofvCards willbeterm inated.
X Select Address Book in
the address book
or, ifthe telephon ebasic menu isshown,
select Phone by
sliding VÆandturning
cVd theCOMAND controller andpress
W tocon firm.
Am enu appears.
X Select Downloa dContact s and
press W
to con firm.
X Select Receive dBusines sCards in
the
menu byturn ingcVd theCOMAND
con troller andpress Wtocon firm.
This interrupts theBluetoot h®
con nection
between COMAND andyour active mobile
phone. COMAND is,however, readyto
receive vCardsfromanoth erBluetoot h®
device (PC,mobile phone).
X Start the data transfer onthe external
Bluetoot h®
device (seetheoperatin g
inst ruct ions forthe device).
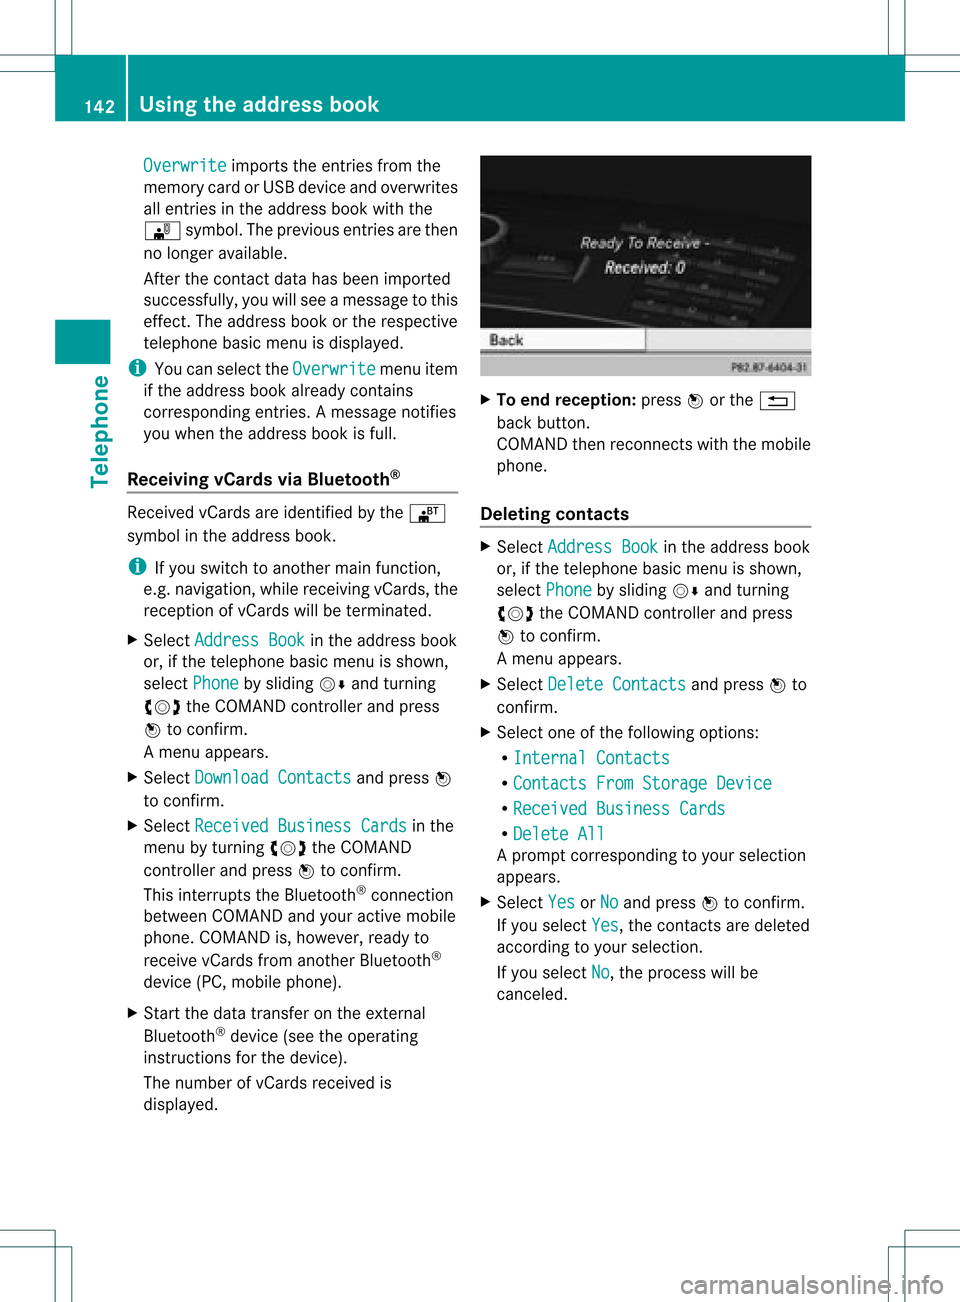
The number ofvCards received is
displayed. X
To end recept ion:press Worthe %
back button .
COMAND thenrecon nectswith themobile
phone.
Deleting contacts X
Select Address Book in
the address book
or, ifthe telephon ebasic menu isshown,
select Phone by
sliding VÆandturning
cVd theCOMAND controller andpress
W tocon firm.
Am enu appears.
X Select Delete Contacts and
press Wto
con firm.
X Select oneofthe following options:
R Interna lContact s R
Contact sFrom Storage Device R
Receive dBusines sCards R
Delete All Ap
rompt correspo ndingtoyou rselection
appears.
X Select Yes or
No and
press Wtocon firm.
If you select Yes ,
the contact sare deleted
accor dingtoyour select ion.
If you select No ,
the process willbe
canc eled. 142
Using
theadd ress bookTelephone
Page 145 of 234

COMAN
Dfea tures ........ .......... ........... 144
Ra dio mod e........ .......... ...................... 144
Sat ellit era dio <0021002100210021002100210021002100210021002100210021002100210021
0021002100210021002100210021002100210021002100210021002100210021
0021002100210021> 148
Audio CD/DVD andMP3 mode ........ 154
Music search <0021002100210021002100210021002100210021002100210021002100210021
0021002100210021002100210021002100210021002100210021002100210021
00210021002100210021> 165
MUSIC REGISTER<0021002100210021002100210021002100210021002100210021002100210021
00210021002100210021002100210021002100210021002100210021V 168
Bluet ooth®
aud iomode <0021002100210021002100210021002100210021002100210021002100210021
0021002100210021V 172
Media Interfacemode <0021002100210021002100210021002100210021002100210021002100210021
002100210021002100210021V 178
Audio AUXmode <0021002100210021002100210021002100210021002100210021002100210021
002100210021002100210021002100210021002100210021002100210021V 182 143Audio
Page 159 of 234

Inser
ting anSD mem orycard X
Inser tthe memory cardintotheslot until it
engages inplace. Theside with the
cont acts must facedownwards andpoint
towards theslot.
COMAND loadsthememory cardand
shows amessage tothis effect .Ifn oMP3
track scan befound, youwillsee amessage
to this effect .
Ejecting anSD memor ycard X
Press thememory card.
The memory cardiseject ed.
X Take thememory cardoutofthe slot
(Y page 17),position H. Connec
tingaUSBdevice
The USB portislocated inthe stowage
compartmen tin the cent erconsole.
Elect ricalconsumpt ionatthis conn ection
must notexceed acont inuous current of
500 mA.Ifthe electrical consumpt ionis
higher, useaseparate sourcetoprovide
power forthe USB device (e.g.
12 Vp ower supply).
X Connect theUSB device (e.g.USBstick)to
the USB port. Ac
tiv atin gaudi oCD /DVD orMP3
mode
Opti on1 X
Inse rtaC D/DVD (Ypage 154) ,SDmem ory
car d(Y page 157) orconne ctaU SBdevice
(Y page 157) .
CO MAND load sthe med iumi nser tedand
sta rts toplay it.
Opti on2 X
Pre ssthe h functio nbu tton oneormor e
time s. i
Bypre ssing the functio nbutton
rep eatedly, youcan chang eth eoper ating
mod ein thefol lowin gord er:
R audio CD/DVD/vide oDV D/ MP3 CD/
MP3 DVDin theDV Dch ang er(disc
mod e)
R mem orycardmod e
R MUS ICREGI STER
R US Bstorag edev ice
R Medi aIn te rface oraudio AUXmod e
R Blue toot h®
audio mode
X Se lec tana udio mediumfrom themed ialist
(Y page 159).
Op tion 3 X
Se lec tAud io in
themain function bar by
slidi ngZV andturnin gcVd theCOMA ND
co ntrol ler and pressW toconfirm .
The lastactive audio sourceisno w
act ivat ed.
You canactivat eadiff ere ntaudio source
usin gth eaudio menu.
X Se lec tAud io by
slidi ngZV andturnin g
cVd theCOMA NDcontrol ler and press
W toconfirm .
The audio menuappear s.
X Se lec tDis c ,
Mem ory Card ,
Mus ic Reg
ister ,
USB Storage or
Med ia Int
erface and
pressW toconfirm .
This switches tothedesi redaudio source.
X Se lec tana udio mediumfrom themed ialist
(Y page 159). Aud
ioCD/DVD andMP3 mode
157Aud io Z
Page 161 of 234

In
audio DVD modeonly X
To pause playba ck:swit chon audio DVD
mod e(Y page 157).
X Se lec tË byslidi ngVÆ andturnin g
cVd theCOMA NDcontrol ler and press
W toconfirm .
The Ë displaychang estoÌ.
X To cont inuepla yba ck:sele ctÌ and
pre ssW toconfirm .
Playbac kcont inues fromthepoint where it
was inter rupted. TheÌ display changes
to Ë. Stop
function
This funct ionisonly availa bleinaudio DVD
mode.
X Switch onaudio DVDmode (Ypage 157).
X To interr uptplayback: selectÉby
sliding VÆandturnin gcVd theCOMAND
cont roller andpress Wtoconf irm.
The Ë display changes toÌ. É
remains highlighted.
X To continue playback: selectÌand
press Wtoconf irm.
Playba ckcont inues fromthepoint where it
was inter rupted.
X To stop playback: whileplaybackis
inter rupted, selectÉagain andpress
W toconf irm.
or
X Select Éandconf irmbypressing W
twice inrapid succession.
Ì ishighlighted.
X To resta rtplayback: selectÌand
press Wtoconf irm.
Playba ckstart sat the beginning ofthe
DVD . Selecting
audioCD/DVD/MP3 discs
Selecting viathe media list X
In audio CD/DVDand MP3 mode: select
Media by
sliding VÆorturnin gcVd the
COMAND controller andpress Wto
conf irm.
The media listappears. The#dot
indicates thecurrent medium beingplayed. Media
listwhen equipped withaDVD changer
: Todisplay allmagazine trays
The media listshows thediscs current ly
availa ble. Media
list Magazine
trays,positions 1to6: readable
data media areaudio CDs,MP3CDsorMP3
DVD s,audio DVDsand video DVDs. Memory
card,position 7 MUSIC
REGISTER, position8 USB
storage device,position 9 Media
Interface, position 0 Bluetooth
®
audio i
Ifadisc cann otbe read, anentr yappears
next tothe correspon dingmagazine tray.
X To show allmagaz inetrays: press Wthe
COMAND controller when :is
highlighted. Audio
CD/DVD andMP3 mode
159Audio Z
Page 170 of 234
X
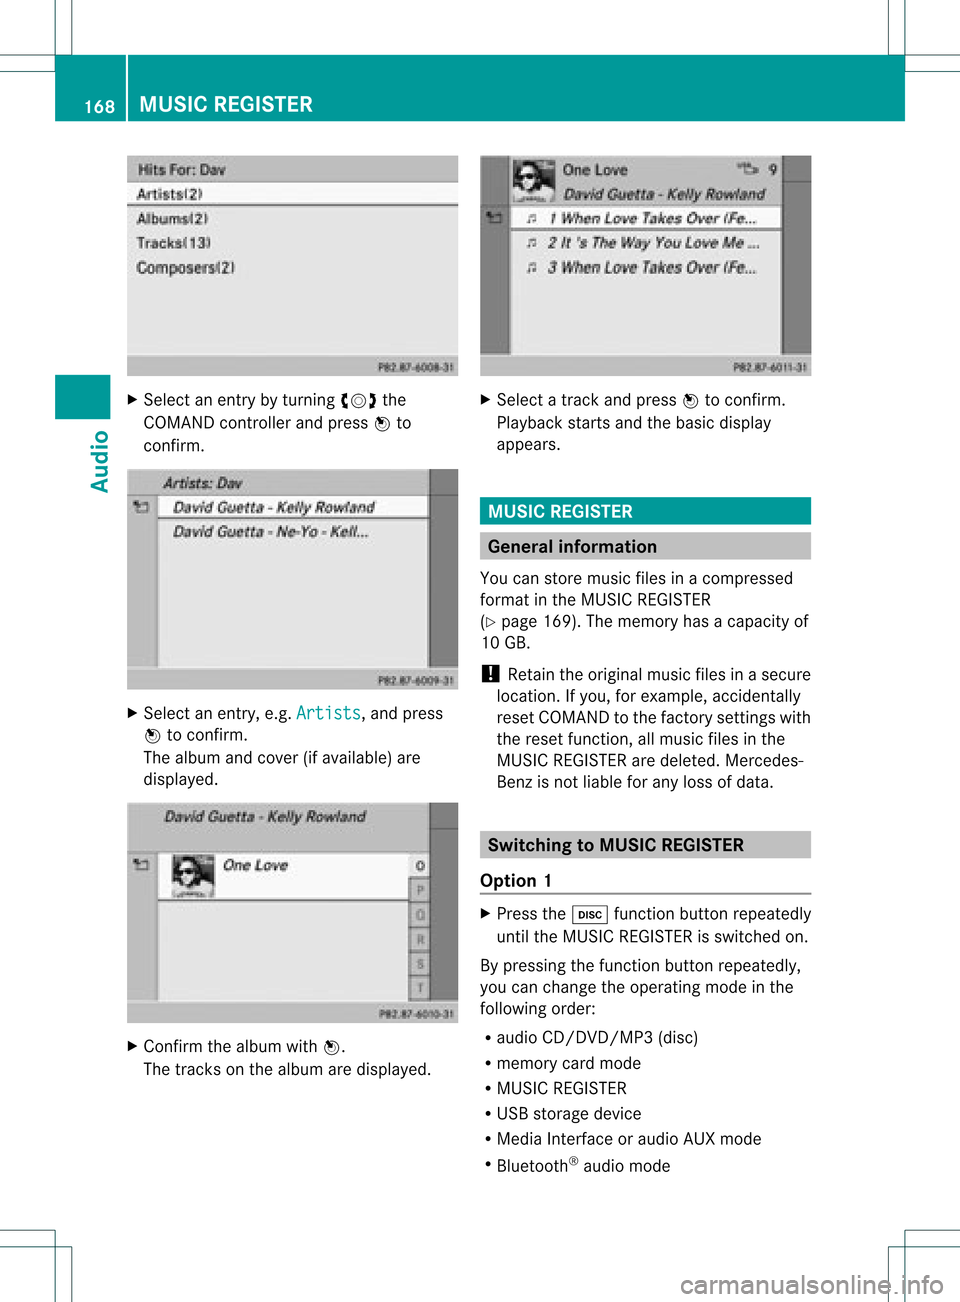
Sel ect anentry byturni ngcVd the
CO MAND controllera nd pre ssW to
confi rm. X
Sel ect anentry ,e.g .Art ists ,
and press
W toconfi rm.
The albu ma ndcove r(ifavailable) are
displayed. X
Conf irmthealbum withW.
The track son the album aredisplayed. X
Selec ta track and press Wtocon firm .
Playback start sand thebasic display
appears. MUSIC
REGISTER Gener
alinfor mation
You canstore music filesinacom press ed
for mat inthe MUS ICREGIS TER
(Y page 169).The memo ryhas acapac ityof
10 GB.
! Retain theorigin almusic filesinasecur e
locat ion.Ifyou, forexam ple,accident ally
reset COMA NDtothe fact orysettings with
the reset function,all music filesinthe
MUS ICREGIS TERaredelet ed.Merc edes-
Ben zisnot liablefor any loss ofdata. Switching
toMUSIC REGISTER
Option 1 X
Press theh function buttonrepeatedly
until theMUSIC REGISTER isswitched on.
By pressing thefunction buttonrepeatedly ,
you can change theoperating modeinthe
followi ngorder:
R audi oCD/DVD /MP3(disc)
R memory cardmode
R MUSIC REGISTER
R USB storage device
R Media Interfaceoraudi oAUX mode
R Bluetooth ®
audi omode 168
MUSIC
REGISTERAudio
Page 174 of 234
X
To select opti ons:sw itch tothe MUSI C
REG ISTER (Ypage 168) .
X Sel ect Mus ic Reg
ister by
slid ing VÆ and
tur ning cVd theCOMAND controller and
pre ssW toconfi rm.
The optio ns list appe ars. The #dot
ind icates the optio ns elected.
X Select anoption andpress Wtocon firm.
The option isswitch edon. For alloption s
exc ept Normal TrackSequenc e ,
you will
see acorr espondin gdisplay inthe display/
select ionwindow.
i The Normal TrackSequenc e option
is
automatic allyselect edwhen youchange
the disc youarecurren tlylisten ingtoor
when youselect adifferen tmedium. Ifan
option isselect ed,itremains selectedafter
COMAND isswitch edon oroff. Bluet
ooth®
aud iomode Connecting
Bluetooth®
aud iodevices
Conditions Bluet
ooth®
aud iodevice
Bluetoot h®
audio mode requires a
Bluetoot h®
-c apable audiodevice.
i Not allBluetoot h®
audio devices available
on the market areequally suitable. For
more detailed information onsuitable
Bluetoot h®
audio devices andon
con nectingBluetoot h®
audio devices to
COMAND ,visit
htt p://ww w.mbu sa-mobile.com (for
USA ).Alt ernat ively, calltheMercedes- Benz
Customer AssistanceCenter at
1-8 00- FOR-ME RCedes (1-800-367 -6372)
(for USA )or Customer Relationsat
1-8 00- 387 -0100(for Canada). Befor
eusing Bluetoot h®
audio mode, you
should checkyour Bluetooth ®
audio device
for the following (seetheBluetooth ®
audio
device's operating instructions):
R Bluetooth ®
audio profile
The Bluetooth ®
audio device mustsupport
the A2D Pand AVRCP Bluetooth ®
audio
profiles.
R Bluetooth ®
visibility
On cert ainBluetooth ®
audio devices, as
well asactivatin gthe Bluetooth ®
funct ion,
the device itselfmust alsobemade
"visible" toother devices (seethe
Bluetooth ®
audio device's operating
instr uctions).
R Bluetooth ®
device name
This device nameispredetermin edbut can
usual lybe changed. Tomake aclear
selection ofthe Bluetooth ®
device
possible, Mercedes-B enzrecomm ends
that youcustomiz ethe device name(see
the Bluetooth ®
audio device's operating
instr uctions).
i A2D P(Advanced AudioDistribution
Profile): Bluetooth ®
audio profile foraudio
data trans mission
AVRCP (AudioVideoRemote Control
Profile): Bluetooth ®
audio profile foraudio
data playb ack
X Act ivate Bluetooth ®
and Bluetooth ®
visibility onthe Bluetooth ®
audio device.
On COMAND
X Act ivate theBluetooth ®
funct ionin
COMAND (Ypage 45).
General information Before
usingyourBluetooth ®
audio device
with COMAND forthe first time, youwillneed
to authorize it.
When youauthorize anew Bluetooth ®
audio
device, itis conn ected automatically.
Connect ioninvolves firstsearching fora 172
Bluetooth ®
aud iomodeAudio
Page 175 of 234
Blu
etoo th®
au diodev iceand then authori zing
it.
You canauthori zeup tofifte enBlu etoo th®
dev ices.
i Ifyo uau thori zeamob ile pho nethat
su ppo rtsBluetoo th®
au dio, the A2DP and
AVRC PBlu etoo th®
au dio pro files are
connected automa tically. The mob ile
pho neisthen entere din both the
Blu etoo th®
tele pho nelist (Y page 116) and
in the Bluetoo th®
dev icelist (Y page 173).
Merce des-Benz recom mendsau thori zinga
mob ile pho neinBlu etoo th®
tele pho ny
(Y page 116).
Se archi ngfor and authori zinga
Blue tooth®
audio device X
Swi tch onBlu etoo th®
au dio mod e
(Y page 175).
If yo usee theNoBlue toothAudi o Devi
ceAuth orized mess
age, youwi ll
need toconnect theBluetoo th®
au dio
dev icefirst.
X Sele ctBT Audi
o by
sliding VÆ andturni ng
cVd theCOMAND controllerand press
W toconfir m.
X Co nfirm BluetoothAudi oDevi ceList by
pre ssing W the COMAND controller.
X To search: confirmUpda te by
pre ssing
W the COMAND controller.
CO MAND searches forBluetoo th®
au dio
dev iceswi thin rang eand adds them tothe
Blu etoo th®
dev icelist. Blu etoo th®
au dio
dev icesare dete cted ifthey suppo rtthe
Blu etoo th®
au dio pro files (A2DP, AVRCP).
The durati onofthe search depends onthe
numb erofBlu etoo th®
au diodev iceswi thin
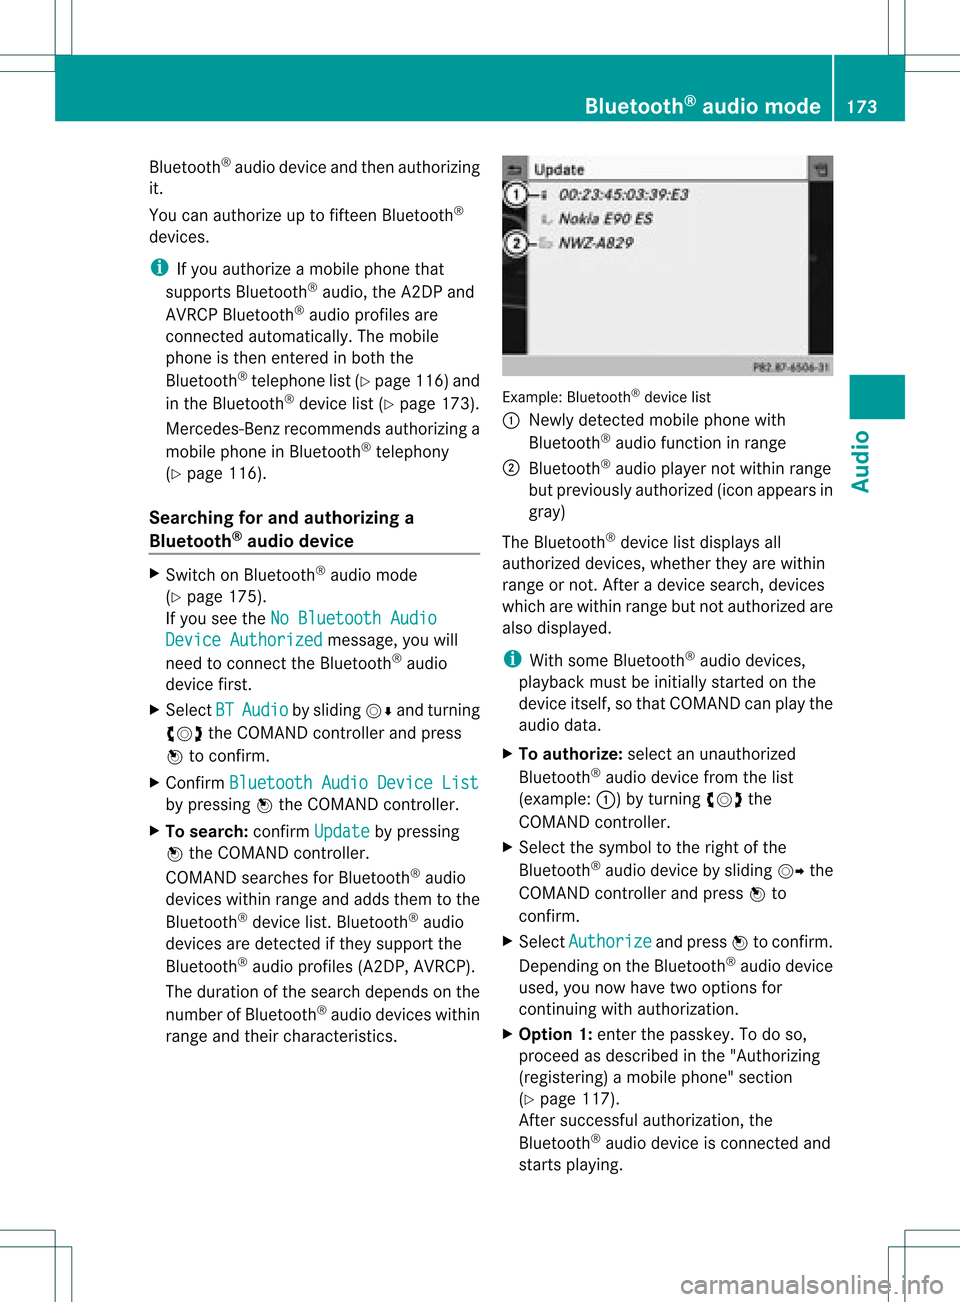
rang eand theircharacteristics. Example:
Bluetooth®
device list
: Newly detectedmobile phonewith
Bluetooth ®
audi ofunct ioninrange
; Bluetooth ®
audi oplay ernot within range
but previously authorized (iconappea rsin
gray)
The Bluetooth ®
device listdispla ysall
authorized devices,whether theyarewithin
range ornot. Afteradevice search, devices
which arewithin rangebutnot authorized are
also displa yed.
i With some Bluetooth ®
audi odevices,
play back must beinitially started onthe
device itself,sothat COMAND canplay the
audi odata.
X To auth orize: select anunauthorized
Bluetooth ®
audi odevice fromthelist
(example: :)byturning cVdthe
COMAND controller.
X Select thesymbol tothe right ofthe
Bluetooth ®
audi odevice bysliding VYthe
COMAND controller andpress Wto
confirm .
X Select Authorize and
press Wtoconfirm .
Depending onthe Bluetooth ®
audi odevice
used, younow have twooptions for
cont inuing withauthorization.
X Option 1:enter thepasskey. Todo so,
proceed asdescribed inthe "Authorizing
(registering) amobile phone" section
(Y page 117).
Aft ersuccessful authorization, the
Bluetooth ®
audi odevice isconn ected and
starts playing. Bluetooth
®
aud iomode 173Audio Z