2012 MERCEDES-BENZ C-Class USB port
[x] Cancel search: USB portPage 143 of 234

X
Sea rch foranentry inthe phoneboo kon
the mob ile pho ned (Ypage 126) .
X Sel ect the list symbo lto the right ofthe
entry bysliding VY theCOMAND
control lera nd pre ssW toconfi rm.
X Sel ect SaveEnt ry and
pressW to
confi rm.
The Saving Procedure Successful mes
sage appe ars. The phone book entry is
now saved asan addre ssbook entry .
The diconisreplaced bythe ¥icon. Importing
contacts
Information andrequirem ents You
canimport contacts (vCards) fromthe
memory cardandaUSB device intothe
address book,orreceive vCardsvia
Bluetooth ®
.
i Upto2500 entries canbeimported into
the address book.Amessage notifies you
when themaximum numberisreached.
You now have todelete existingentries
(Y page 137)ino rder toimport newentries.
Dependi ngon the source ofthe contact data,
differe ntrequ ireme ntsapply: Source Con
dition s Memory
card The
SDmemory cardmust
be inserted (Ypag e157)
and must contain
importa blecontact data. USB
device The
USB devicemust be
inserted inthe USB port
and must contain
importa blecontact data. Requiremen
tsfor rece ivingvCards via
Bluetoo th®
You canreceive vCards from devices(e.g.
from aPC) whichsup port thesending of
vCa rds viaBlue tooth ®
. It
is not necessary toauthorize thedevi cein
COMAND todo so.
Plea sebea rthe following inmind:
R Bluetooth ®
must beactivated inCOMAND
and onthe Bluetooth ®
device (see
operating instructionsforthe device).
R the Bluetooth ®
device mustbeable tosend
vCards viaBluetooth ®
(see operating
instruct ionsforthe device).
R the Bluetooth ®
device inthe vehicle must
be switched on.
Import ingfrom thememory cardorUSB
device Ent
ries imported fromthememory cardor
from aUSB device havethe¯ symbol.
The following conditionsmust befulfilled in
order toimport vCards:
R vCards (vcffiles) maybelocated inthe main
directory orinfolders. COMAND allowsfor
a targeted selection ofthe corresponding
directories.
R vCards musthavethefileexten sion".vcf".
i Avcffilecan also contai nseveral vCards.
COMAND supportsvCardsinversion s2.1
and 3.0.
X Select Address Book in
the address book
or, ifthe telephon ebasic menu isshown,
select Phone by
sliding VÆandturning
cVd theCOMAND controller andpress
W tocon firm.
X Select Downloa dContact s and
press W
to con firm.
Am enu appears.
X Select FromTheMemory Card or
From USB
Device in
the menu byturn ingcVd
the COMAND controller andpress Wto
con firm.
X Select Add or
Overwri te and
press Wto
con firm.
Add import
sthe entries from thememory
card orUSB device intothe address book. Using
theadd ress book
141Telephone Z
Page 144 of 234

Overwrite imports
theentries fromthe
memory cardorUSB device andoverwrites
all entries inthe address bookwiththe
¯ symbol. Theprevious entriesarethen
no longer available.
Aft erthe cont actdata hasbeen imported
successfully ,you willsee amessage tothis
effec t.The address bookorthe respect ive
telephon ebasic menu isdisplayed.
i You canselect theOverwri te menu
item
if the address bookalready contains
corr espondin gent ries. Amessage notifies
you when theaddress bookisfull.
Receiving vCardsvia Bluet ooth® Received
vCardsareidentif iedbythe ®
symbol inthe address book.
i Ifyou switch toanoth ermain function,
e.g. navigation ,while receivin gvCards, the
recept ionofvCards willbeterm inated.
X Select Address Book in
the address book
or, ifthe telephon ebasic menu isshown,
select Phone by
sliding VÆandturning
cVd theCOMAND controller andpress
W tocon firm.
Am enu appears.
X Select Downloa dContact s and
press W
to con firm.
X Select Receive dBusines sCards in
the
menu byturn ingcVd theCOMAND
con troller andpress Wtocon firm.
This interrupts theBluetoot h®
con nection
between COMAND andyour active mobile
phone. COMAND is,however, readyto
receive vCardsfromanoth erBluetoot h®
device (PC,mobile phone).
X Start the data transfer onthe external
Bluetoot h®
device (seetheoperatin g
inst ruct ions forthe device).
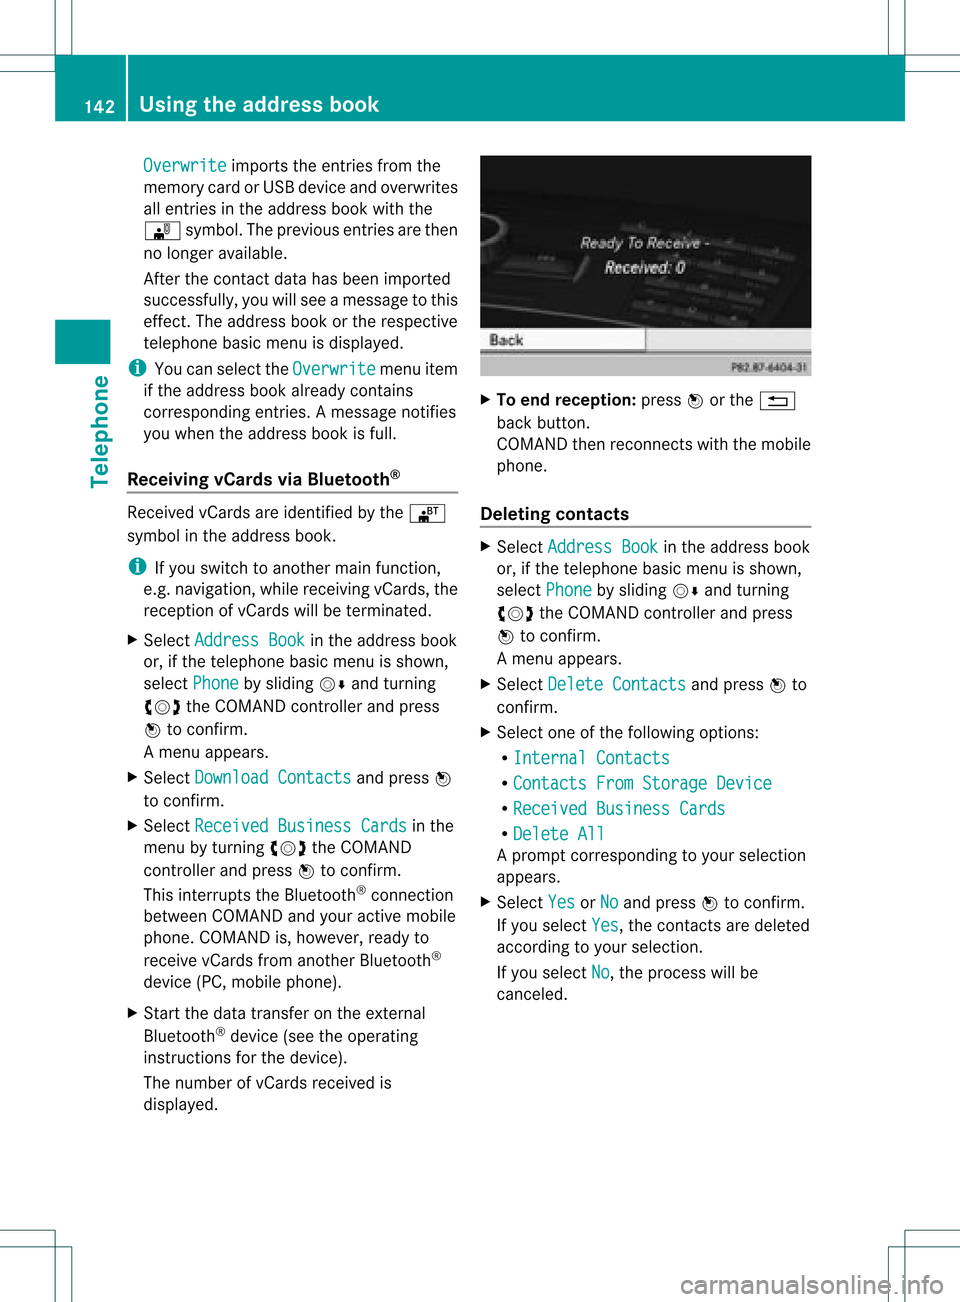
The number ofvCards received is
displayed. X
To end recept ion:press Worthe %
back button .
COMAND thenrecon nectswith themobile
phone.
Deleting contacts X
Select Address Book in
the address book
or, ifthe telephon ebasic menu isshown,
select Phone by
sliding VÆandturning
cVd theCOMAND controller andpress
W tocon firm.
Am enu appears.
X Select Delete Contacts and
press Wto
con firm.
X Select oneofthe following options:
R Interna lContact s R
Contact sFrom Storage Device R
Receive dBusines sCards R
Delete All Ap
rompt correspo ndingtoyou rselection
appears.
X Select Yes or
No and
press Wtocon firm.
If you select Yes ,
the contact sare deleted
accor dingtoyour select ion.
If you select No ,
the process willbe
canc eled. 142
Using
theadd ress bookTelephone
Page 159 of 234

Inser
ting anSD mem orycard X
Inser tthe memory cardintotheslot until it
engages inplace. Theside with the
cont acts must facedownwards andpoint
towards theslot.
COMAND loadsthememory cardand
shows amessage tothis effect .Ifn oMP3
track scan befound, youwillsee amessage
to this effect .
Ejecting anSD memor ycard X
Press thememory card.
The memory cardiseject ed.
X Take thememory cardoutofthe slot
(Y page 17),position H. Connec
tingaUSBdevice
The USB portislocated inthe stowage
compartmen tin the cent erconsole.
Elect ricalconsumpt ionatthis conn ection
must notexceed acont inuous current of
500 mA.Ifthe electrical consumpt ionis
higher, useaseparate sourcetoprovide
power forthe USB device (e.g.
12 Vp ower supply).
X Connect theUSB device (e.g.USBstick)to
the USB port. Ac
tiv atin gaudi oCD /DVD orMP3
mode
Opti on1 X
Inse rtaC D/DVD (Ypage 154) ,SDmem ory
car d(Y page 157) orconne ctaU SBdevice
(Y page 157) .
CO MAND load sthe med iumi nser tedand
sta rts toplay it.
Opti on2 X
Pre ssthe h functio nbu tton oneormor e
time s. i
Bypre ssing the functio nbutton
rep eatedly, youcan chang eth eoper ating
mod ein thefol lowin gord er:
R audio CD/DVD/vide oDV D/ MP3 CD/
MP3 DVDin theDV Dch ang er(disc
mod e)
R mem orycardmod e
R MUS ICREGI STER
R US Bstorag edev ice
R Medi aIn te rface oraudio AUXmod e
R Blue toot h®
audio mode
X Se lec tana udio mediumfrom themed ialist
(Y page 159).
Op tion 3 X
Se lec tAud io in
themain function bar by
slidi ngZV andturnin gcVd theCOMA ND
co ntrol ler and pressW toconfirm .
The lastactive audio sourceisno w
act ivat ed.
You canactivat eadiff ere ntaudio source
usin gth eaudio menu.
X Se lec tAud io by
slidi ngZV andturnin g
cVd theCOMA NDcontrol ler and press
W toconfirm .
The audio menuappear s.
X Se lec tDis c ,
Mem ory Card ,
Mus ic Reg
ister ,
USB Storage or
Med ia Int
erface and
pressW toconfirm .
This switches tothedesi redaudio source.
X Se lec tana udio mediumfrom themed ialist
(Y page 159). Aud
ioCD/DVD andMP3 mode
157Aud io Z
Page 162 of 234

Media
listshowing allmagazine trays
X Select thedata medium byturning cVd
the COMAND controller andpress Wto
confirm .
i Ifyou select avideo DVD,the system
switches tovideo DVDmode
(Y page 186).
Selec tingatrac kusing thenumber
keypa d X
Press anumber key,e.g.n, whenthe
<0004000900130010000C0001001A002200130005000C0005000300140009000F
000EV windowisactive.
The medium atthe corr espondin gposition
in the media listisloaded andthen played. Selecting
atrac k
Se lecti ng byskippin gto atrac k X
To ski pfo rwa rdsorbac kto atrac k:tur n
cVd theCOMAND controllerwh en the
di sp lay/ selectio nwindow isact ive.
or
X Press theE orF button.
The skip forward function skipsto the next
tr ack .
The skip back function skipsto the
begin ningof the curr enttrack ifthe track
has been playing formor ethan
eight seconds.Ift he track hasbeen playing
for less than eight seconds, itskips tothe
start ofthe previous track. If
you have selected theplay back options
Random Tracks or
Random Folder ,
the
track order israndom.
Selec tingatrac kusing thenumber
keypa d X
Press the¯ button onthe number
keypad.
An umer icalentry fiel dappear s.The
num berofposi tion soff ere dcorresponds to
the number oftrack sonthe CD/DV D.Onl y
num bers tha tcorr espond toatrac k
num beron the CD/DV Dcan beente red.
X Enter thedesired trac knum berus ing the
num berk eys.
The trackplays afterthe last possible
numb erisent ered.
i Press ingand holdin ganumb erkey for
mor ethan twoseco ndscom plete sthe
ent ry,and thecorrespo ndingtrack is
played.
Selecting atrac kusing music search Select
musicviacategor ies(e.g. album,
artist )with themusic search function.
If you select acategor y,COMAND startsa
search fortrac kinfor mation ifthe following
con ditions arefulfilled:
R the data carriers areinsert edorcon nect ed
R the trac kinfor mation fromthese data
carriers isnot yetcontained inthe
COMAND musicdatabase
COMAND importstrackinfor mation fromthe
following datacarriers:
R disc (audio CD/DVD/MP3)
R memory card
R MUSIC REGISTE R
R USB storage device
The Track informat ioniscomplete message
appearsoncethe search is
complet ed.COMAND storesthe music data
in its own database. Youcannow select the
available musicdatawithin thedesired
categor y. 160
Audio
CD/DVD andMP3 modeAudio
Page 171 of 234

If
music filesareavai lable,pla yba ckbegi nsat
the point lastlistened to.
If there arenomusic files,you willsee a
messag eto this effect.
X Confirm themessag eby pressi ngW the
COMAND controller andcopy themusic
files (Ypage 169).
Option 2 X
Select Audio in
the main function barby
slid ing ZV andturning cVdtheCOMAND
controller andpress Wtoconfirm.
If MUSIC REGISTER wasthelast mode
selected, itis now switched on.
If another audiosource isswitched on,you
can now switch onthe MUSIC REGISTER in
the audiomenu.
X Select Audio by
slid ing ZV andturning
cVd theCOMAND controller andpress
W toconfirm.
The audiomenu appears.
X Select Music Register and
press Wto
confirm.
Option 3 X
Press ther number key(DVD changer).
The MUSIC REGISTER isswitched on. Importing
musicfiles
Introductio n You
cancopy music filesinthe fileformats
MP3, WMA andAAC (withthe file
extensions .m4p,.m4a,.m4band.aac) from
the follo wing media :
R discs inthe DVD changer
R memory card
R USB storage device
i CDinformation suchasalb um name, disc
name, artistandtrack isprovide dby the
Gracenote MediaDataba se(Ypage 161). X
Switch onaud ioCD mode (Ypage 157).
X With anaud ioCD inserted, selectREC in
the
CD basi cdisplay byslidin gVÆ andturnin g
cVd theCOMA NDcontroller andpress
W tocon firm .
Step 1:selecting tracks toimp ort X
Selec tTrac k(s) by
turnin gcVd the
COMA NDcontroller andpress Wto
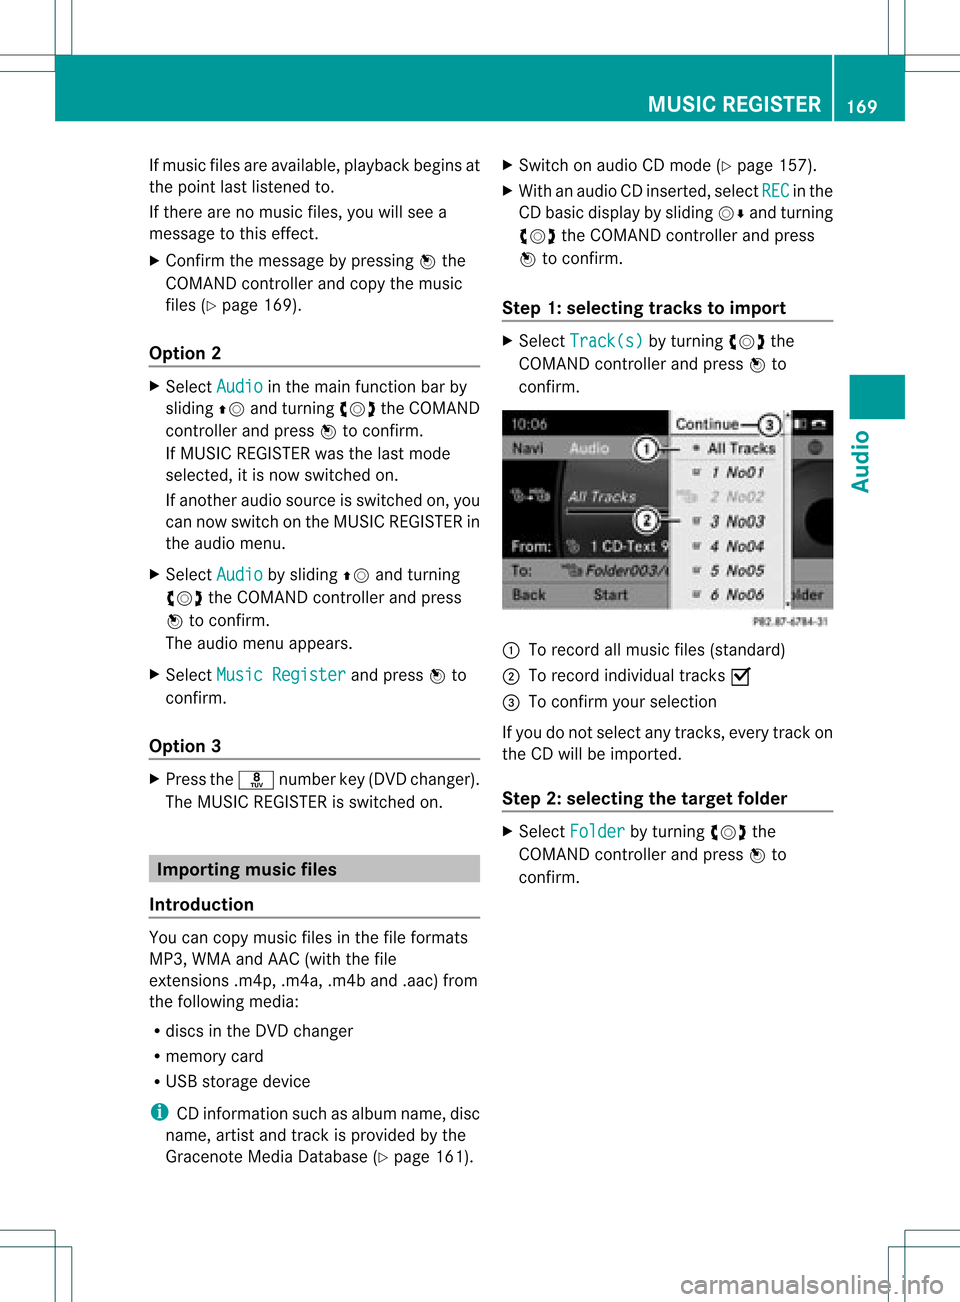
con firm . :
Torec ord allmusic files(standard )
; Torec ord indiv idual track sO
= Tocon firm your selec tion
If you donot selec tany trac ks,eve rytrac kon
the CDwillbe impo rted .
Ste p2:selectin gth eta rget folder X
Sele ctFol der by
turnin gcVd the
COMA NDcontroller andpres sW to
con firm. MUSIC
REGISTER
169Audio Z
Page 180 of 234

Media
Interface mode Co
nne ctio noption s
Overvi ew The
connection socketsareloca tedinthe
stowa gecompartme ntinthe center console.
Device-spe cificadapter cables,inclu dedwith
the Medi aInterface, arerequ iredtoconnect
external devicestothe Medi aInterface.
i Store individualparts inas afe plac e.
On lyuse genuine Mercedes-Ben z
co nn ect ion cabl es.
You canconn ect thefoll owin gdat amedi ato
COMA NDviatheMedia Inte rface:
R iPod ®
R cer tain MP3 player s
i iPod ®
is areg istere dtrademar kofApple
Inc .,Cupertino ,California, USA.
Supp orted devices For
details andalist ofsupported devices,
visit http://www .mbusa- mobile.com.
Alt ernat ively, calltheMercede s-Benz
Customer AssistanceCente rat
1-800-FOR-MERC edes(1-800-367-6372)
(for USA) orCu stomer Relatio nsat
1-800-387-0100 (forCanada ). Co
nne ctin gan exte rnal device
i Donot leaveexternal devicesinthe
vehi cle,astheir correct function cannotbe
gua ranteed ifthey aresubjected to
extreme temperatures,e.g.from expos ure
to dire ctsunl ight orvery lowoutsi de
tempera tures(seetheoper ating
instructio nsofthe respe ctivedevice).
Merced es-Benz USA,LLCaccep tsno
lia bil ity for dam agetoexternal devices.
Never connect morethanonedeviceata
time. Youwillotherw isenot beableto pla y
back fromtheexternal device. :
Four-p insocket for⅛inch stereo jack,
e.g. forMP3 players (audi oand video)
; iPod®
plu gfor connecting aniPo d®
= USB socket forconnecting anMP3 player
? Exampl eof devi ce:iPod®
X Connect theexternal devicewith sui tabl e
socket :,;or=.
COM AND activa testhe devi ce;amessa ge
app ears .
If you remove adevi ce,the NoDevice Connec
ted messa
geapp ears .
i Aconnected iPod®
or MP3 players hould
not besimultaneously operatedviathe
Media Interface andtheremote control
(e.g. Bluetooth ®
remote control)ordirectly
on the device itselfasthis may cause
unforeseen technicaldifficulties.
i Connect ingafully discharged iPod®
or
MP3 playercan result inan exten ded
initialization period.
Malfunction messagesappearwhile the
device isbeing activated if:
R COMAND doesnotsupport thedevice
conn ected (External Device Unavailable message).
R the conn ected device consumes toomuch
power.
R the Media Interface connection isfaulty.
R amass storage device(e.g.USBstick or
USB hard disk) isconn ected tothe Media
Int erface (Please Connect The Device
To
The Other USBPort message).178
Media
Interface modeAudio
Page 184 of 234

If
different sortingrulesare defined (e.g.in
iTu nes ®
), the search iscanceled without
any resul t. Playbac
koptio ns
The followi ng opti ons areavailab le:
R Nor mal TrackSequence Norm
altrack sequence: youhea rthe
track sin their normal order(e.g.numerical
or alpha betical).
R Random Medium All
the track son the medium areplay edin
random order.
R Random TrackList The
track sin the current lyactive category
or folder, including anysubfolders, are
play edinrandom order.
i For MP3 players, therandom playlists
offer amaximum of300 track schosen at
random.
X To selec ta playback option:select
Media Interface in
the basic displa yby
sliding VÆandturning cVdtheCOMAND
cont roller andpress Wtoconfirm .
The options listappea rs.The #dot
indicates theoption selected.
X Select anoption andpress Wtoconfirm . MP3
player instructions
Data forma ts MP3
andWMA aresupported asdata formats
with fixed andvariable bitrates (upto
320 kbits/s ).
Special considerationswhen using MP3
players Up
toeight directory levelswithupto1000
track sper directory aresupported.
Do not use USB exten sionleads oradapters.
They canimpair functionality. i
DRM (Digital RightsManagement)
protect edfiles arenot supported bythe
Media Interface. Audio
AUXmode Notes
onaudio AUXmode
You canconn ectanextern alaudi osource
(AUX) toCOMAND. Thesocket forthis is
located inthe glove box.
If COMAND isequipp edwith aMedia
Int erface, externalaudi osources are
conn ected usingthecorresponding cableset.
An AUX socket isnot provided. The
conn ections forthe Media Interface are
located inthe stowage compartmen tint he
cent erconsole.
i You willfind further information onlineat
htt <0010002C002100210017001700170020000D00020015001300010024000D000F
00020009000C000500200003000F000DH.O rcall
th eMer cedes-Ben zCust ome rAssistance
Center at1-80 0-FOR-ME RCedes
(1-800 -367-6372)(for theUSA) or
Customer Relations at1-80 0-387-0100
(for Canada ). Activating
audioAUXmode
When youconn ectanextern alaudi osource,
audi oAUX isnot selected automaticall y.
X Select Audio in
the main function barby
sliding ZVandturning cVdtheCOMAND
cont roller andpress Wtoconfirm.
If AUX mode wasthelast mode selected, it
will now beactive.
If another audiosource isswitched on,you
can now switch toaudi oAUX mode inthe
audi omenu.
X Select Audio using
ZVandpress Wto
confirm.
The audi omenu appears. 182
Audio
AUXmodeAudio