2012 MERCEDES-BENZ B-CLASS fuel pressure
[x] Cancel search: fuel pressurePage 304 of 340
Follow recommended tire inflation pressures
and check the pressure of all the tires
including the spare wheel:
R
monthly, at least
R if the load changes
R before beginning a long journey
R under different operating conditions, e.g.
off-road driving
If necessary, correct the tire pressure.
Use a suitable pressure gauge to check the
tire pressure. The outer appearance of a tire
does not permit
any reliable conclusion about
the tire pressure. On vehicles equipped with
the electronic tire pressure monitor, the tire
pressure can be checked in the on-board
computer.
The recommended tire pressures for the tires
mounted at the factory can be found on the
labels described here.
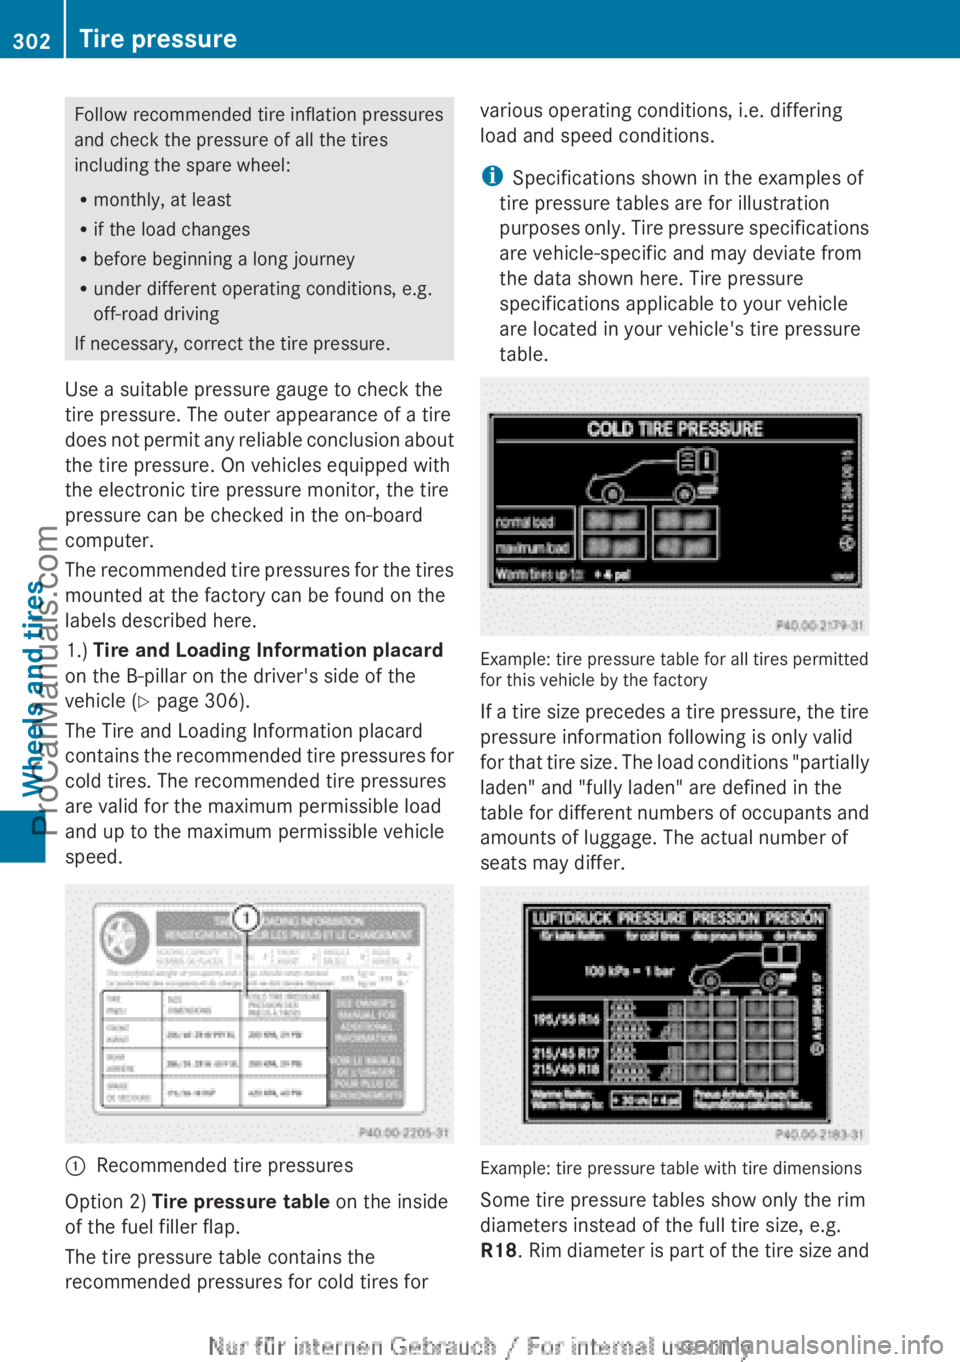
1.) Tire and Loading Information placard
on the B-pillar on the driver's side of the
vehicle ( Y page 306).
The Tire and Loading Information placard
contains the recommended
tire pressures for
cold tires. The recommended tire pressures
are valid for the maximum permissible load
and up to the maximum permissible vehicle
speed. :
Recommended tire pressures
Option 2) Tire pressure table on the inside
of the fuel filler flap.
The tire pressure table contains the
recommended pressures for cold tires for various operating conditions, i.e. differing
load and speed conditions.
i
Specifications shown in the examples of
tire pressure tables are for illustration
purposes only. Tire
pressure specifications
are vehicle-specific and may deviate from
the data shown here. Tire pressure
specifications applicable to your vehicle
are located in your vehicle's tire pressure
table. Example: tire pressure table for all tires permitted
for this vehicle by the factory
If a
tire
size precedes a tire pressure, the tire
pressure information following is only valid
for that tire size. The load conditions "partially
laden" and "fully laden" are defined in the
table for different numbers of occupants and
amounts of luggage. The actual number of
seats may differ. Example: tire pressure table with tire dimensions
Some tire pressure tables show only the rim
diameters instead of the full tire size, e.g.
R18. Rim diameter
is part of the tire size and302
Tire pressure
Wheels and tires
ProCarManuals.com
Page 306 of 340
Observe the recommended tire pressures for
cold tires:
R
on the Tire
and Loading Information placard
on the B-pillar on the driver's side
R in the tire pressure table on the inside of
the fuel filler flap Underinflated or overinflated tires
Underinflation G
WARNING
Tires with pressure that is too low can
overheat and burst as a consequence. In
addition, they also
suffer from excessive and/
or irregular wear, which can severely impair
the braking properties and the driving
characteristics. There is a risk of an accident.
Avoid tire pressures that are too low in all the
tires, including the spare wheel.
Underinflated tires may:
R wear quickly and unevenly
R have an adverse effect on fuel consumption
R overheat, leading to tire defects
R have an adverse effect on handling
characteristics
Overinflation G
WARNING
Tires with excessively high pressure can burst
because they are damaged more easily by
road debris, potholes etc. In addition, they
also suffer from irregular wear, which can
severely impair the
braking properties and the
driving characteristics. There is a risk of an
accident.
Avoid tire pressures that are too high in all the
tires, including the spare wheel.
Overinflated tires may:
R have an adverse effect on handling
characteristics
R wear quickly and unevenly R
be more susceptible to damage
R have an adverse effect on ride comfort
R increase the braking distance
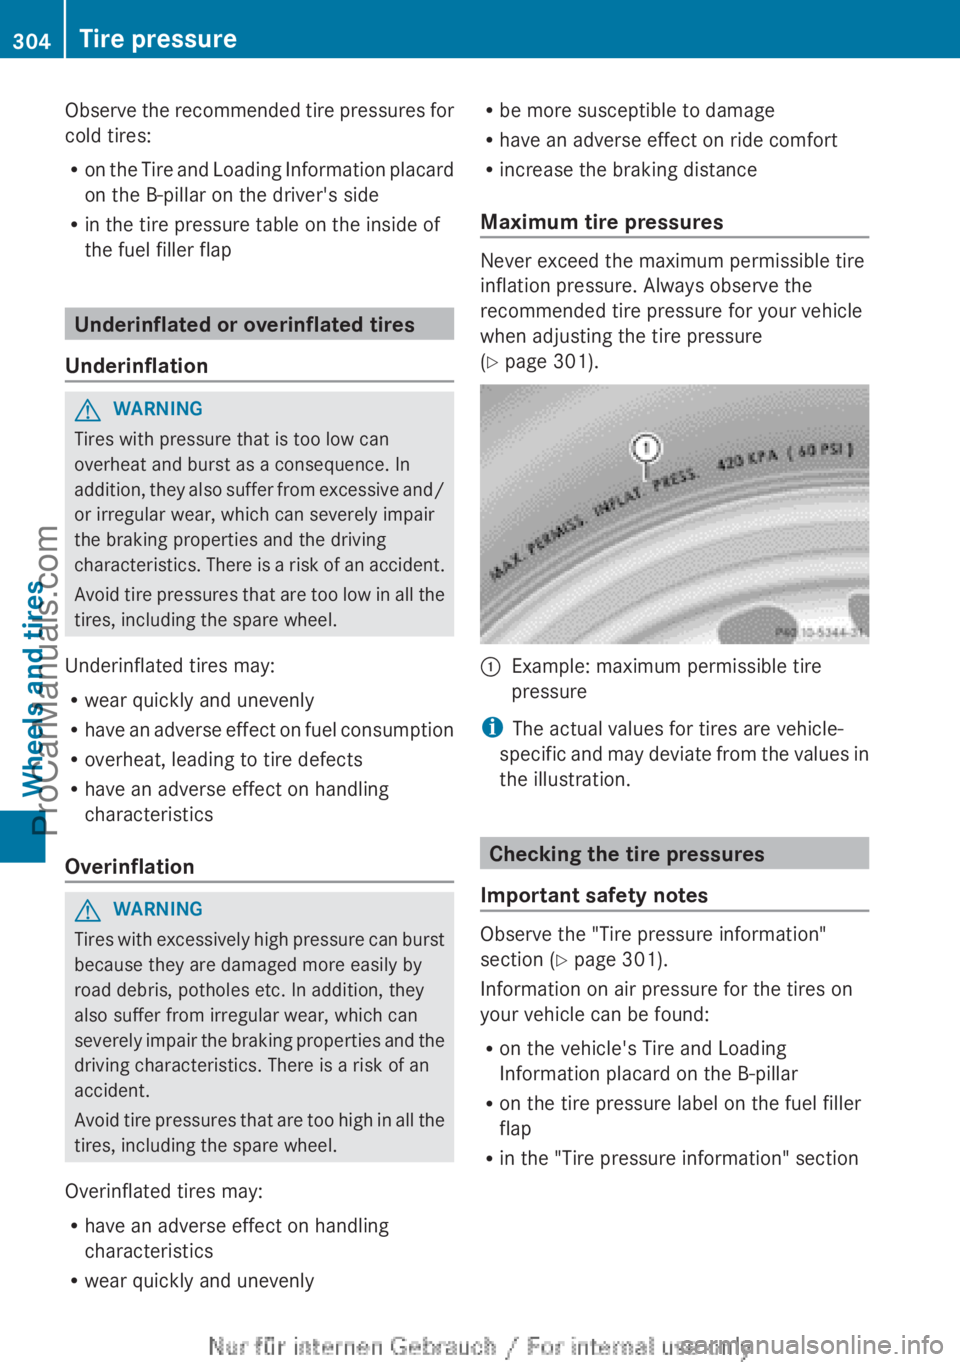
Maximum tire pressures Never exceed the maximum permissible tire
inflation pressure. Always observe the
recommended tire pressure for your vehicle
when adjusting the tire pressure
(Y page 301).
:
Example: maximum permissible tire
pressure
i The actual values for tires are vehicle-
specific and may
deviate from the values in
the illustration. Checking the tire pressures
Important safety notes Observe the "Tire pressure information"
section (
Y page 301).
Information on air pressure for the tires on
your vehicle can be found:
R on the vehicle's Tire and Loading
Information placard on the B-pillar
R on the tire pressure label on the fuel filler
flap
R in the "Tire pressure information" section304
Tire pressure
Wheels and tires
ProCarManuals.com
Page 307 of 340
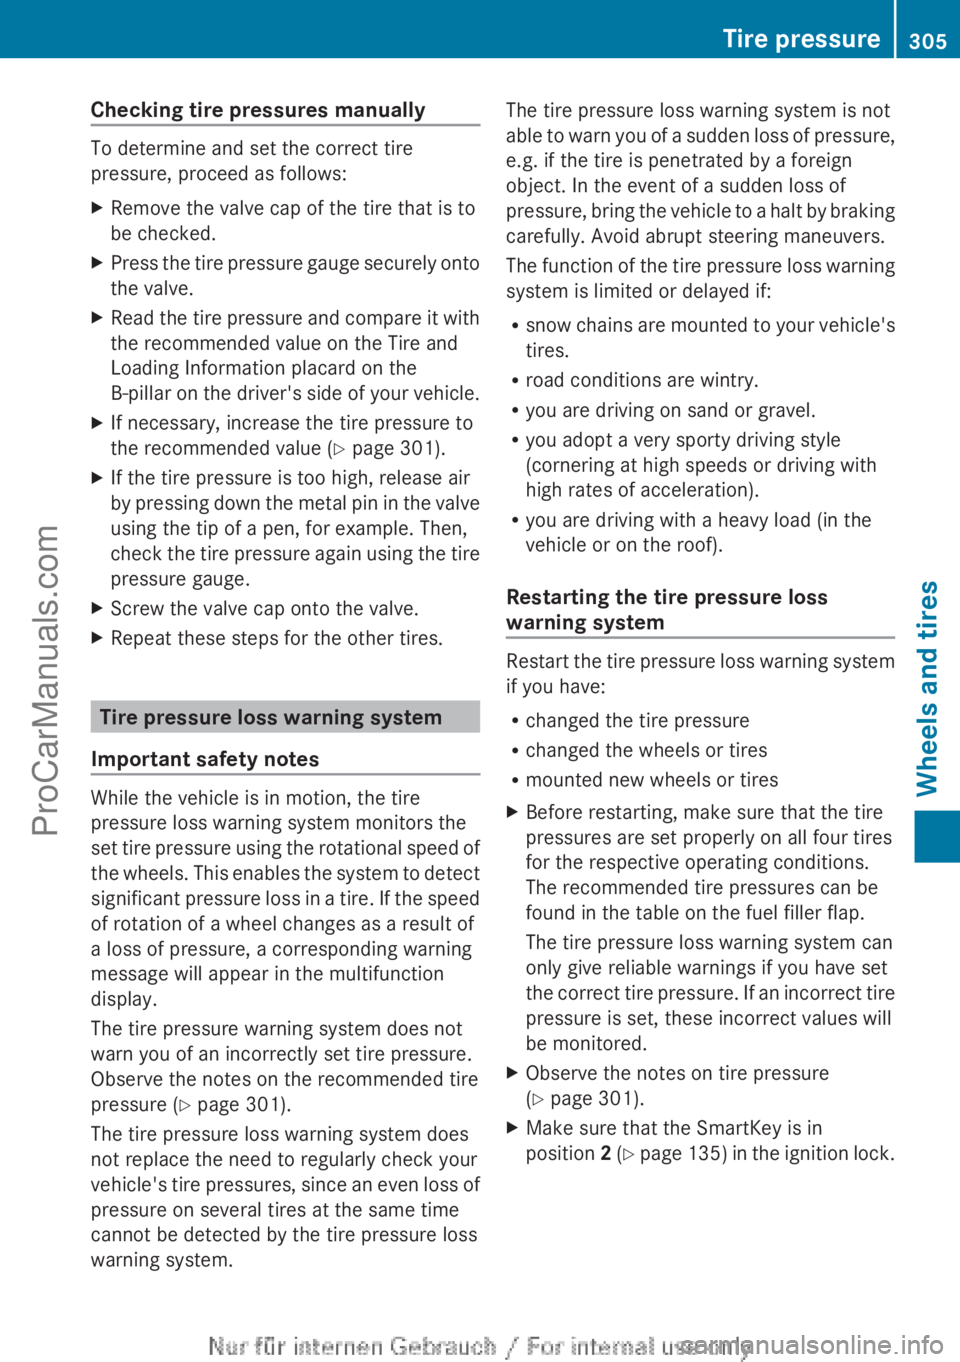
Checking tire pressures manually
To determine and set the correct tire
pressure, proceed as follows:
X
Remove the valve cap of the tire that is to
be checked.
X Press the tire pressure gauge securely onto
the valve.
X Read the tire pressure and compare it with
the recommended value on the Tire and
Loading Information placard on the
B-pillar on the
driver's side of your vehicle.
X If necessary, increase the tire pressure to
the recommended value ( Y page 301).
X If the tire pressure is too high, release air
by pressing down
the metal pin in the valve
using the tip of a pen, for example. Then,
check the tire pressure again using the tire
pressure gauge.
X Screw the valve cap onto the valve.
X Repeat these steps for the other tires. Tire pressure loss warning system
Important safety notes While the vehicle is in motion, the tire
pressure loss warning system monitors the
set
tire
pressure
using the rotational speed of
the wheels. This enables the system to detect
significant pressure loss in a tire. If the speed
of rotation of a wheel changes as a result of
a loss of pressure, a corresponding warning
message will appear in the multifunction
display.
The tire pressure warning system does not
warn you of an incorrectly set tire pressure.
Observe the notes on the recommended tire
pressure ( Y page 301).
The tire pressure loss warning system does
not replace the need to regularly check your
vehicle's tire pressures, since an even loss of
pressure on several tires at the same time
cannot be detected by the tire pressure loss
warning system. The tire pressure loss warning system is not
able to
warn
you of a sudden loss of pressure,
e.g. if the tire is penetrated by a foreign
object. In the event of a sudden loss of
pressure, bring the vehicle to a halt by braking
carefully. Avoid abrupt steering maneuvers.
The function of the tire pressure loss warning
system is limited or delayed if:
R snow chains are mounted to your vehicle's
tires.
R road conditions are wintry.
R you are driving on sand or gravel.
R you adopt a very sporty driving style
(cornering at high speeds or driving with
high rates of acceleration).
R you are driving with a heavy load (in the
vehicle or on the roof).
Restarting the tire pressure loss
warning system Restart the tire pressure loss warning system
if you have:
R
changed the tire pressure
R changed the wheels or tires
R mounted new wheels or tires
X Before restarting, make sure that the tire
pressures are set properly on all four tires
for the respective operating conditions.
The recommended tire pressures can be
found in the table on the fuel filler flap.
The tire pressure loss warning system can
only give reliable warnings if you have set
the correct tire
pressure. If an incorrect tire
pressure is set, these incorrect values will
be monitored.
X Observe the notes on tire pressure
(Y page 301).
X Make sure that the SmartKey is in
position 2 (Y page 135)
in the ignition lock. Tire pressure
305
Wheels and tires Z
ProCarManuals.com
Page 308 of 340
X
Press = or ; on the steering wheel
to select the Service menu.
X Press the 9 or : button to select
Tire Pressure.
X Press the a button.
The Run Flat Indicator Active
Press 'OK' to Restart message
appears in the multifunction display.
If you wish to confirm the restart:
X Press the a button.
The Tire Pressure Now OK? message
appears in the multifunction display.
X Press the 9 or : button to select
Yes.
X Press the a button.
The Run Flat Indicator Restarted
message appears in the multifunction
display.
After a teach-in period, the tire pressure
loss warning system will monitor the set
tire pressures of all four tires.
or
If you wish to cancel the restart:
X Press the % button.
or
X If the Tire Pressure Now OK? message
appears, use the 9 or : button to
select Cancel.
X Press the a button.
The tire pressure values stored at the last
restart will continue to be monitored. Loading the vehicle
Instruction labels for tires and loads
G
WARNING
Overloaded tires can overheat, causing a
blowout. Overloaded tires
can also impair the
steering and driving characteristics and lead
to brake failure. There is a risk of accident.
Observe the load rating of the tires. The load
rating must be at least half of the GAWR of your vehicle. Never overload the tires by
exceeding the maximum load.
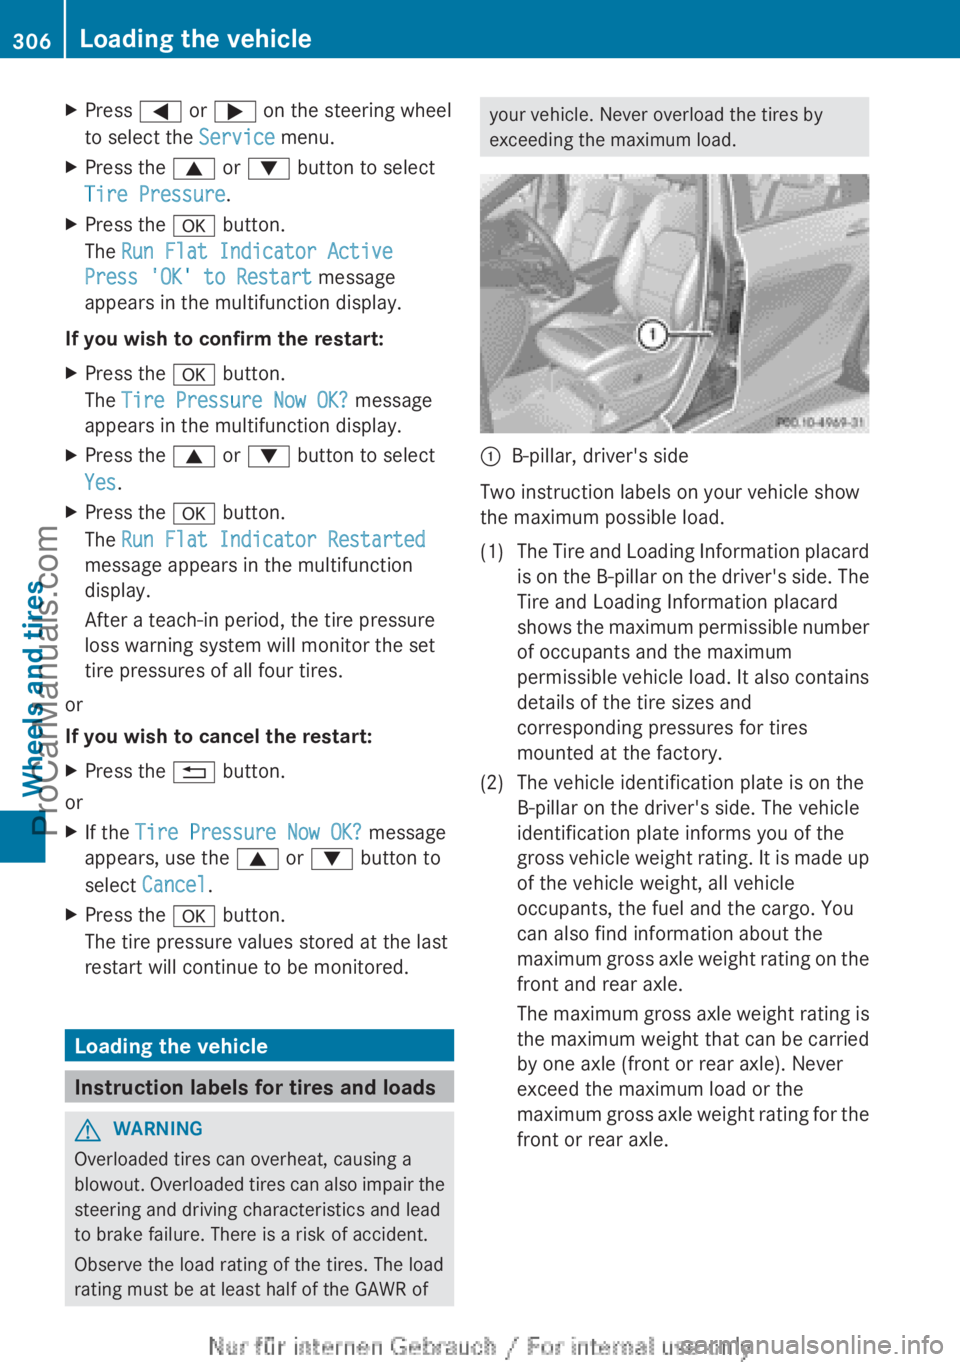
:
B-pillar, driver's side
Two instruction labels on your vehicle show
the maximum possible load.
(1) The Tire and Loading Information placard is on the
B-pillar on the driver's side. The
Tire and Loading Information placard
shows the maximum permissible number
of occupants and the maximum
permissible vehicle load. It also contains
details of the tire sizes and
corresponding pressures for tires
mounted at the factory.
(2) The vehicle identification plate is on the B-pillar on the driver's side. The vehicle
identification plate informs you of the
gross vehicle weight
rating. It is made up
of the vehicle weight, all vehicle
occupants, the fuel and the cargo. You
can also find information about the
maximum gross axle weight rating on the
front and rear axle.
The maximum gross axle weight rating is
the maximum weight that can be carried
by one axle (front or rear axle). Never
exceed the maximum load or the
maximum gross axle weight rating for the
front or rear axle. 306
Loading the vehicleWheels and tires
ProCarManuals.com
Page 319 of 340
GAWR (Gross Axle Weight Rating)
The GAWR is
the maximum gross axle weight
rating. The actual load on an axle must never
exceed the gross axle weight rating. The
gross axle weight rating can be found on the
vehicle identification plate on the B-pillar on
the driver's side. Speed rating
The speed rating is part of the tire
identification. It specifies
the speed range for
which the tire is approved. GVW (Gross Vehicle Weight)
The gross vehicle weight includes the weight
of the vehicle including fuel, tools, the spare
wheel, accessories installed, occupants,
luggage and the drawbar noseweight, if
applicable. The gross
vehicle weight must not
exceed the gross vehicle weight rating GVWR
as specified on the vehicle identification plate
on the B-pillar on the driver's side. GVWR (Gross Vehicle Weight Rating)
The GVWR is
the maximum permissible gross
weight of a fully loaded vehicle (the weight of
the vehicle including all accessories,
occupants, fuel, luggage and the drawbar
noseweight, if applicable). The gross vehicle
weight rating is specified on the vehicle
identification plate on the B-pillar on the
driver's side. Maximum loaded vehicle weight
The maximum weight is the sum of:
R the curb weight of the vehicle
R the weight of the accessories
R the load limit
R the weight of the factory installed optional
equipment Kilopascal (kPa)
Metric unit for tire pressure. 6.9 kPa
corresponds to 1 psi. Another unit for tire
pressure is bar. 100 kilopascal (kPa) is the
equivalent of 1 bar . Load index
In addition to
the load-bearing index, the load
index may also be imprinted on the sidewall
of the tire. This specifies the load-bearing
capacity more precisely. Curb weight
The weight of a vehicle with standard
equipment including the maximum capacity
of fuel, oil
and coolant. It also includes the air-
conditioning system and optional equipment
if these are installed in the vehicle, but does
not include passengers or luggage. Maximum load rating
The maximum load rating in kilograms or
pounds is the maximum weight for which a
tire is approved. Maximum permissible tire pressure
Maximum permissible tire pressure for one
tire. Maximum load on one tire
Maximum load on one tire. This is calculated
by dividing the
maximum axle load of one axle
by two. PSI (pounds per square inch)
A standard unit of measure for tire pressure. Definition of terms for tires and loading
317
Wheels and tires Z
ProCarManuals.com
Page 325 of 340

X
Place the ratchet wrench onto the hexagon
nut of the jack so that the letters AB are
visible.
X Turn the ratchet wrench until the vehicle is
once again standing firmly on the ground.
X Place the jack to one side.
X Tighten the wheel bolts evenly in a
crosswise pattern in the sequence
indicated ( : to A).
The tightening torque
must be 96 lb-ft (130 Nm).
X Turn the jack back to its initial position.
X Stow the jack and the rest of the vehicle
tools in the vehicle again.
X Check the tire pressure of the newly
mounted wheel and adjust it if necessary.
Observe the recommended tire pressure
(Y page 301). Wheel and tire combinations
General notes
! For safety reasons, Mercedes-Benz
recommends that you only use tires and
wheels which have been approved by
Mercedes-Benz specifically for your
vehicle.
These tires have
been specially adapted for
use with the control systems, such as ABS
or ESP ®
, and are marked as follows:
R MO = Mercedes-Benz Original
R MOE = Mercedes-Benz Original Extended
(tires featuring run-flat characteristics)
R MO1 = Mercedes-Benz Original (only
certain AMG tires)
Mercedes-Benz Original Extended tires
may only be used on wheels that have been
specifically approved by Mercedes-Benz.
Only use tires, wheels or accessories
tested and approved by Mercedes-Benz.
Certain characteristics, e.g. handling,
vehicle noise emissions or fuel
consumption, may otherwise be adversely
affected. In addition, when driving with a load, tire dimension variations could cause
the tires to come into contact with the
bodywork
and axle
components. This could
result in damage to the tires or the vehicle.
Mercedes-Benz accepts no liability for
damage resulting from the use of tires,
wheels or accessories other than those
tested and approved.
Information on tires, wheels and approved
combinations can be obtained from any
qualified specialist workshop.
! Retreaded tires are neither tested nor
recommended by Mercedes-Benz, since
previous damage cannot always be
detected on retreaded tires. As a result,
Mercedes-Benz cannot guarantee vehicle
safety if retreaded tires are mounted. Do
not mount used tires if you have no
information about their previous usage.
Overview of abbreviations used in the
following tire tables:
R BA: both axles
R FA: front axle
R RA: rear axle
The recommended pressures for various
operating conditions can be found:
R on the Tire and Loading Information placard
with the recommended tire pressures on
the B-pillar on the driver's side
R in the tire pressure table on the inside of
the fuel filler flap
Observe the notes on recommended tire
pressures under various operating conditions
(Y page 301).
Check tire pressures regularly, and only when
the tires are cold. Comply with the
maintenance recommendations of the tire
manufacturer in the vehicle document wallet. Wheel and tire combinations
323
Wheels and tires Z
ProCarManuals.com
Page 333 of 340
R
if the vehicle
is carrying a light load, e.g.
two passengers without luggage, do not
allow the engine to rev above 3000 rpm.
R if the vehicle is fully loaded or is being
operated in mountainous terrain, do not
depress the accelerator pedal further
than Ô of the pedal travel.
Only refuel using premium-grade unleaded
gasoline with a minimum octane rating of 91.
Reformulated Gasoline (RFG) and/or
unleaded gasoline with additives can be used.
The concentration of additives in the fuel,
however, must not exceed 10%, e.g.:
R Ethanol
R TAME
R ETBE
R IPA
R TBA
For MTBE, the concentration should not
exceed 15%.
The concentration of methanol in gasoline,
including other additives, must not exceed
3%.
Using mixtures of methanol and ethanol is not
permitted. Gasohol, a mixture of 10% ethanol
and 90% unleaded gasoline, may be used.
All of these blends must fulfill the fuel
requirements, e.g.:
R knock resistance
R boiling point
R vapor pressure
You will usually find information about the fuel
grade on the pump. If you cannot find the
label on the pump, ask the staff for
assistance.
i For more information, contact a qualified
specialist workshop.
Information on refueling (Y page 147).
Additives
! Operating the engine with fuel additives
can increase wear and tear to the fuel
system high-pressure pump and lead to contamination of the entire fuel system.
The repair costs are high. This does not
include additives for the removal and
prevention of residue buildup. gasoline
must only be mixed with additives
recommended by Mercedes-Benz. More
information about
recommended
additives
can be obtained from any authorized
Mercedes-Benz Center.
One of the main problems of poor fuel quality
is the forming of deposits that are created
during the gasoline combustion process.
Mercedes-Benz recommends that you use
branded fuels that have additives.
If you use fuels without these additives over
a longer period of time, carbon deposits may
build up. These deposits form at the inlet
valves and in the combustion chamber in
particular.
This could lead to engine problems, e.g.:
R longer engine warm-up phase
R uneven idle
R engine noise
R misfiring
R loss of power
Carbon deposits may form if the availability
of gasoline with relevant additives is
insufficient (in certain regions). In this case,
Mercedes-Benz recommends additives
approved for use in Mercedes-Benz vehicles;
see http://bevo.mercedes-benz.com.
For a list of approved products, consult an
authorized Mercedes-Benz Center. Comply
with the instructions for use on the product
label.
Do not mix other fuel additives with fuel. This
causes unnecessary costs and could damage
the engine. Service products and filling capacities
331
Technical data Z
ProCarManuals.com