2012 MERCEDES-BENZ B-CLASS battery
[x] Cancel search: batteryPage 75 of 340

Problem Possible causes/consequences and
M SolutionsThe engine cannot be
started using the
SmartKey. The on-board voltage is too low.
X
Switch off non-essential consumers, e.g. seat heating or interior
lighting, and try to start the engine again.
If this does not work:
X Check the starter battery and charge it if necessary
(Y page 285).
or
X Jump-start the vehicle (Y page 289).
or
X Consult a qualified specialist workshop. The engine cannot be
started using the
SmartKey. The steering lock is mechanically blocked.
X
Remove the SmartKey and reinsert it into the ignition lock. While
doing this, turn the steering wheel in both directions. Doors
Important safety notes
G
WARNING
If children are left unsupervised in the vehicle,
they could:
R open the doors, thus endangering other
people or road users.
R get out and disrupt traffic.
R operate the vehicle's equipment.
Additionally, children could set the vehicle in
motion if, for example, they:
R release the parking brake.
R shift the automatic transmission out of
parking position P.
R starting the engine.
There is a risk of an accident and injury.
When leaving the vehicle, always take the
SmartKey with you
and lock the vehicle. Never
leave children or animals unattended in the
vehicle. Always keep the SmartKey out of
reach of children. G
WARNING
If persons, particularly children are subjected
to prolonged exposure to extreme heat or
cold, there is a risk of injury, possibly even
fatal. Never leave children unattended in the
vehicle. Unlocking and opening doors from
the inside
X
To unlock a front door: pull door
handle ;.
Locking knob : pops up.
The door is unlocked and can be opened. Doors
73
Opening and closing Z
ProCarManuals.com
Page 93 of 340

Switching the seat heating on/off
Activating/deactivating G
WARNING
Repeatedly switching on the seat heating can
cause the seat cushion and backrest pads to
become very hot. The health of persons with
limited temperature sensitivity or a limited
ability to react to excessively high
temperatures may be affected or they may
even suffer burn-like injuries. There is a risk
of injury.
Therefore, do not switch the seat heating on
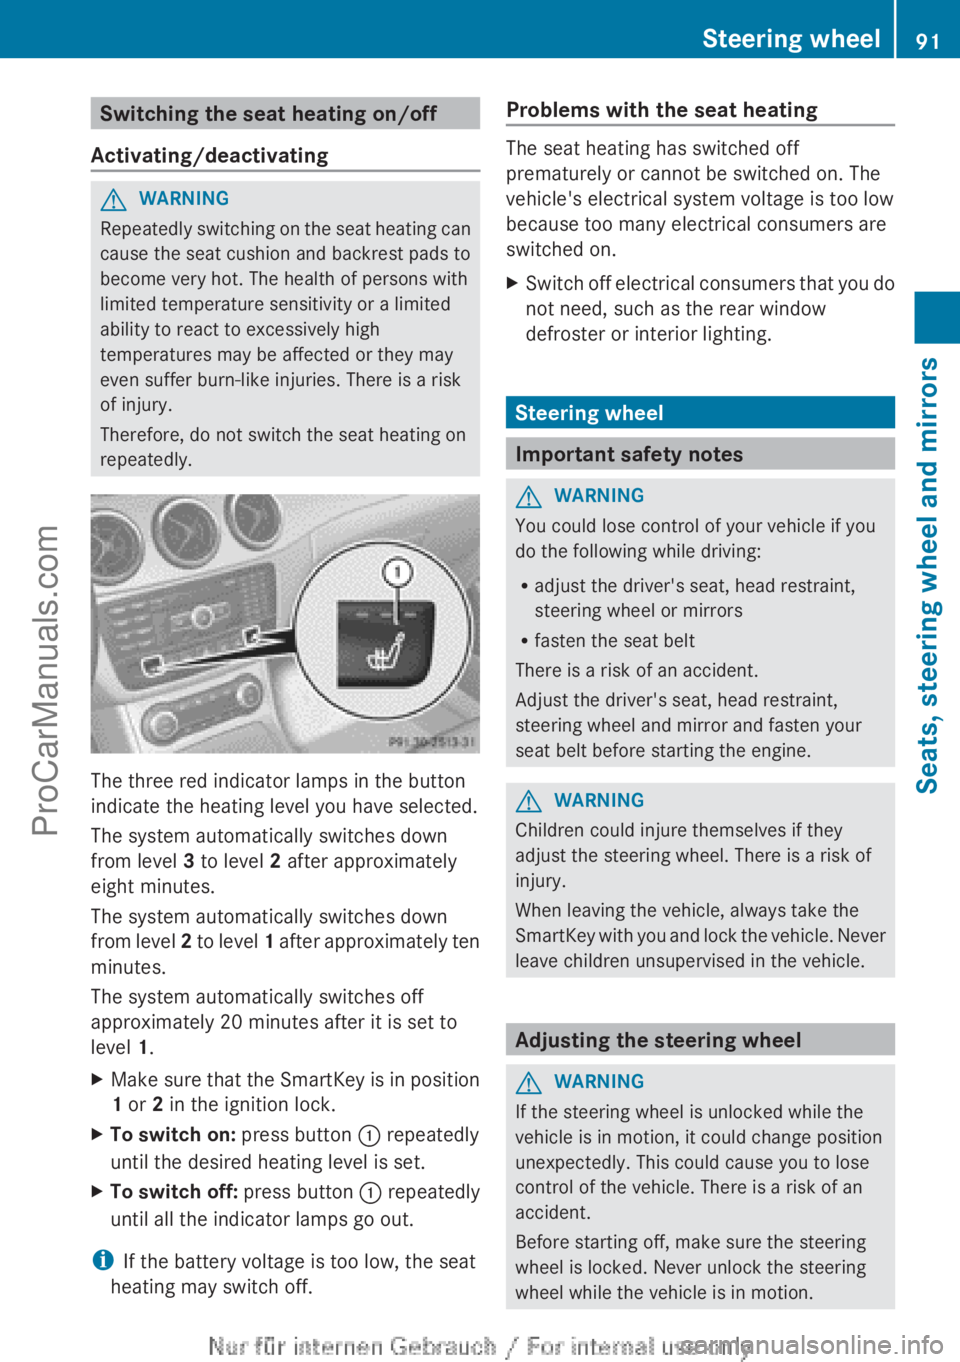
repeatedly. The three red indicator lamps in the button
indicate the heating level you have selected.
The system automatically switches down
from level 3 to level 2 after approximately
eight minutes.
The system automatically switches down
from level
2
to level 1 after approximately ten
minutes.
The system automatically switches off
approximately 20 minutes after it is set to
level 1.
X Make sure that the SmartKey is in position
1 or 2 in the ignition lock.
X To switch on: press button : repeatedly
until the desired heating level is set.
X To switch off: press button : repeatedly
until all the indicator lamps go out.
i If the battery voltage is too low, the seat
heating may switch off. Problems with the seat heating The seat heating has switched off
prematurely or cannot be switched on. The
vehicle's electrical system voltage is too low
because too many electrical consumers are
switched on.
X
Switch off electrical consumers that you do
not need, such as the rear window
defroster or interior lighting. Steering wheel
Important safety notes
G
WARNING
You could lose control of your vehicle if you
do the following while driving:
R adjust the driver's seat, head restraint,
steering wheel or mirrors
R fasten the seat belt
There is a risk of an accident.
Adjust the driver's seat, head restraint,
steering wheel and mirror and fasten your
seat belt before starting the engine. G
WARNING
Children could injure themselves if they
adjust the steering wheel. There is a risk of
injury.
When leaving the vehicle, always take the
SmartKey with you
and lock the vehicle. Never
leave children unsupervised in the vehicle. Adjusting the steering wheel
G
WARNING
If the steering wheel is unlocked while the
vehicle is in motion, it could change position
unexpectedly. This could cause you to lose
control of the vehicle. There is a risk of an
accident.
Before starting off, make sure the steering
wheel is locked. Never unlock the steering
wheel while the vehicle is in motion. Steering wheel
91
Seats, steering wheel and mirrors Z
ProCarManuals.com
Page 95 of 340

defroster is switched on and the outside
temperature is
low.
Mirror heating lasts up to
10 minutes.
i You can also heat up the exterior mirrors
manually by switching on the rear window
defroster.
Folding the exterior mirrors in or out
electrically X
Make sure that the SmartKey is in position
1 or 2 in the ignition lock.
X Briefly press button :.
Both exterior mirrors fold in or out.
i Make sure that the exterior mirrors are
always folded out fully while driving. They
could otherwise vibrate.
i If you are driving faster than
30 mph (47 km/h ), you can no longer fold
in the exterior mirrors.
Setting the exterior mirrors If the battery has been disconnected or
completely discharged, the exterior mirrors
must be reset. The exterior mirrors will
otherwise not fold in when you select the
"Fold in
mirrors
when locking" function in the
on-board computer (Y page 199).
X Make sure that the SmartKey is in
position 1 in the ignition lock.
X Briefly press button :. Folding the exterior mirrors in or out
automatically If the "Fold in mirrors when locking" function
is activated in the on-board computer
(Y page 199):
R
the exterior mirrors
fold in automatically as
soon as you lock the vehicle from the
outside.
R the exterior mirrors fold out again
automatically as soon as you unlock the
vehicle and then open the driver's or front-
passenger door.
i If the exterior mirrors have been folded in
manually, they do not fold out.
Exterior mirror pushed out of position If an exterior mirror has been pushed out of
position, proceed as follows:
X
Vehicles without electrically folding
exterior mirrors:
move
the exterior mirror
into the correct position manually.
X Vehicles with electrically folding
exterior mirrors: press and hold mirror-
folding button ( Y page
93) until you hear a
click and then the mirrors engage in
position.
The mirror housing is engaged again and
you can adjust the exterior mirrors as usual
(Y page 92). Automatic anti-glare mirrors
The "Automatic anti-glare
mirrors" function is
only available if the vehicle is equipped with
the "Mirrors package".
The rear-view mirror and the exterior mirror
on the driver's side automatically go into anti-
glare mode if:
R the ignition is switched on and
R incident light from headlamps strikes the
sensor in the rear-view mirror.
The mirrors do not go into anti-glare mode if
reverse gear is engaged or the interior lighting
is switched on. Mirrors
93
Seats, steering wheel and mirrors Z
ProCarManuals.com
Page 102 of 340

Rear fog lamp
The rear fog lamp improves visibility of your
vehicle for the traffic behind in the event of
thick fog. Please take note of the country-
specific regulations for the use of rear fog
lamps.
X
To switch on the rear fog lamps: turn the
SmartKey in the ignition lock to position 2
or start the engine.
X Turn the light switch to
L or Ã.
X Press the R button.
The yellow R indicator lamp in the
instrument cluster lights up.
X To switch off the rear fog lamp: press the
R
button.
The yellow R indicator lamp in the
instrument cluster goes out.
Parking lamps
! If the battery has been excessively
discharged, the parking lamps or standing
lamps are automatically switched off to
enable the next engine start. Always park
your vehicle safely and sufficiently lit
according to legal standards. Avoid the
continuous use of the T parking lamps
for several hours.
If possible, switch on the
X right or the W left standing lamp.
X To switch on: turn the light switch to
T.
The green T indicator lamp in the
instrument cluster lights up.
Standing lamps
Switching on the
standing lamps ensures the
corresponding side of the vehicle is
illuminated.
X To switch on the standing lamps: the
SmartKey is not in the ignition lock or it is
in position 0.
X Turn the light switch to W (left-hand side
of the vehicle) or
X (right-hand side of
the vehicle). Combination switch
Turn signal :
High-beam headlamps
; Turn signal, right
= High-beam flasher
? Turn signal, left
X To indicate briefly: press the
combination
switch briefly to the pressure point in the
direction of arrow
; or ?.
The corresponding turn signal flashes three
times.
X To indicate: press the combination
switch
beyond the pressure point in the direction
of arrow ; or ?.
High-beam headlamps X
To switch on the high-beam headlamps:
turn the SmartKey in the ignition lock to
position 2 or start the engine.
X Turn the light switch to L or Ã.
X Press the combination switch beyond the
pressure point in the direction of
arrow :.
In the à position, the high-beam
headlamps are only switched on when it is
dark and the engine is running. 100
Exterior lighting
Lights and windshield wipers
ProCarManuals.com
Page 106 of 340

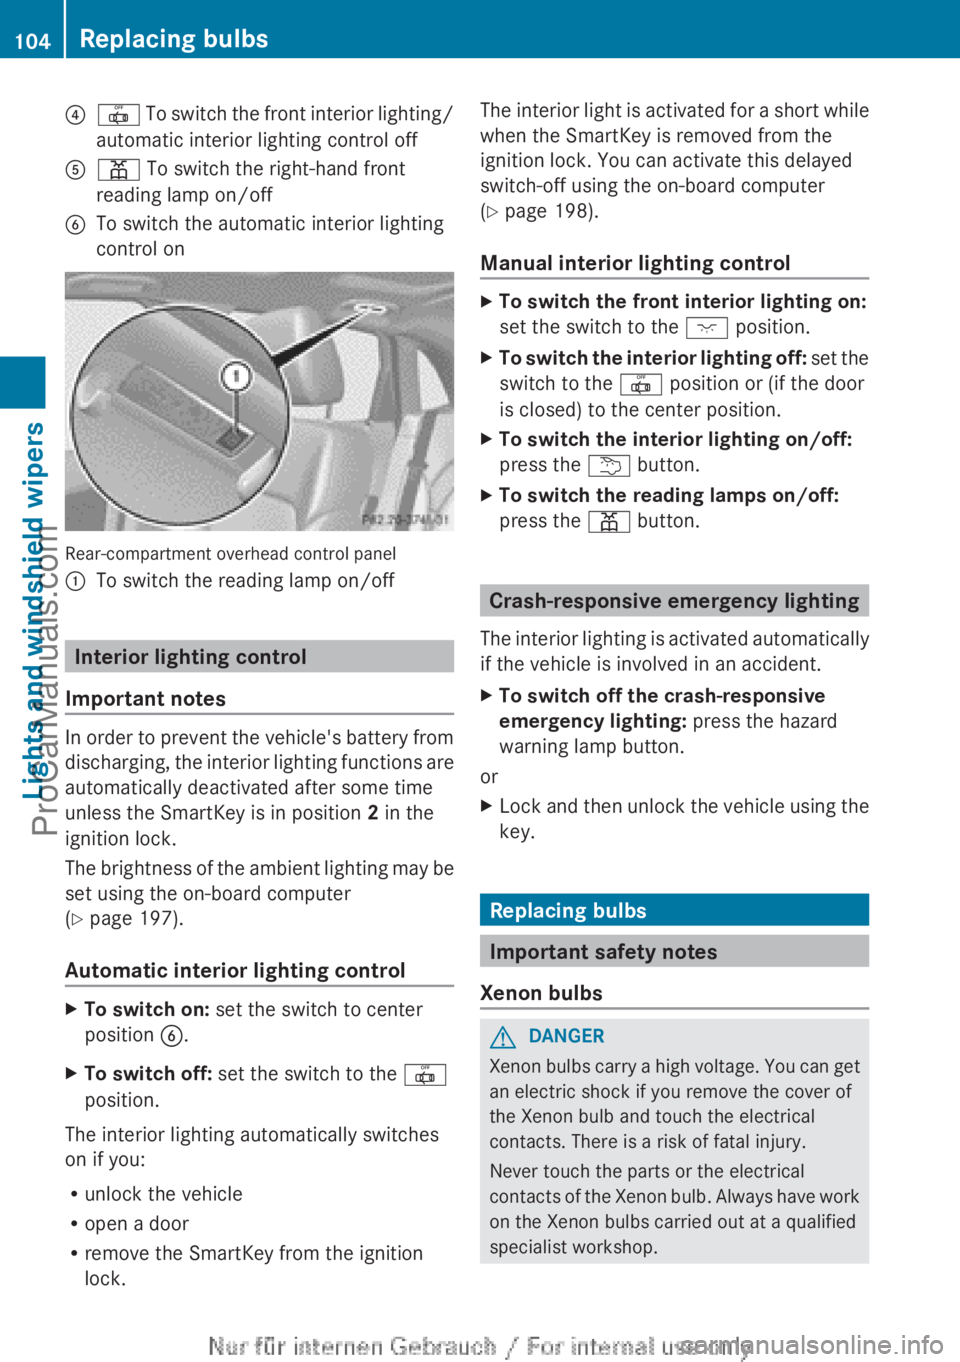
?
| To switch the front interior lighting/
automatic interior lighting control off
A p To switch the right-hand front
reading lamp on/off
B To switch the automatic interior lighting
control on Rear-compartment overhead control panel
:
To switch the reading lamp on/off Interior lighting control
Important notes In order to prevent the vehicle's battery from
discharging, the
interior
lighting functions are
automatically deactivated after some time
unless the SmartKey is in position 2 in the
ignition lock.
The brightness of the ambient lighting may be
set using the on-board computer
(Y page 197).
Automatic interior lighting control X
To switch on: set the switch to center
position B.
X To switch off: set the switch to the |
position.
The interior lighting automatically switches
on if you:
R unlock the vehicle
R open a door
R remove the SmartKey from the ignition
lock. The interior light is activated for a short while
when the SmartKey is removed from the
ignition lock. You can activate this delayed
switch-off using the on-board computer
(Y page 198).
Manual interior lighting control
X
To switch the front interior lighting on:
set the switch to the c position.
X To switch the interior lighting off: set the
switch to the |
position or (if the door
is closed) to the center position.
X To switch the interior lighting on/off:
press the u button.
X To switch the reading lamps on/off:
press the p button. Crash-responsive emergency lighting
The interior lighting
is activated automatically
if the vehicle is involved in an accident.
X To switch off the crash-responsive
emergency lighting: press the hazard
warning lamp button.
or
X Lock and then unlock the vehicle using the
key. Replacing bulbs
Important safety notes
Xenon bulbs G
DANGER
Xenon bulbs carry a high voltage. You can get
an electric shock if you remove the cover of
the Xenon bulb and touch the electrical
contacts. There is a risk of fatal injury.
Never touch the parts or the electrical
contacts of the
Xenon bulb. Always have work
on the Xenon bulbs carried out at a qualified
specialist workshop. 104
Replacing bulbs
Lights and windshield wipers
ProCarManuals.com
Page 130 of 340

i
You should only select this setting until
the windshield is clear again.
Dual-zone automatic climate control
X Activate the ¿ "Cooling with air
dehumidification" function.
X Activate automatic mode Ã.
X If the windows continue to fog up, activate
the "windshield defrosting" function
(Y page 127).
i You should only select this setting until
the windshield is clear again.
Windows fogged up on the outside X
Activate the windshield wipers.
X Set the air distribution to P or O.
i You should only select this setting until
the windshield is clear again. Rear window defroster
Activating/deactivating The rear window defroster has a high current
draw. You should therefore switch it off as
soon as the rear window is clear. Otherwise,
the rear window defroster switches off
automatically after several minutes.
If the battery voltage is too low, the rear
window defroster may switch off.
X
Turn the SmartKey to position 2 in the
ignition lock (Y page 135).
X Press the ¤ button.
The indicator lamp
in the ¤ button lights
up or goes out. 128
Operating the climate control systems
Climate control
ProCarManuals.com
Page 131 of 340

Problems with the rear window defroster
Problem Possible causes/consequences and
M SolutionsThe rear window
defroster has
deactivated
prematurely or cannot
be activated. The battery has not been sufficiently charged.
X
Switch off any consumers that are not required, e.g. reading
lamps, interior lighting or the seat heating.
When the battery is sufficiently charged, the rear window
defroster can be activated again. Activating/deactivating air-
recirculation mode
If you switch on air-recirculation mode, the
windows can fog up more quickly, in
particular at low temperatures. Only use air-
recirculation mode briefly to prevent the
windows from fogging up.
You can deactivate the flow of fresh air if
unpleasant odors are entering the vehicle
from outside. The air already inside the
vehicle will then be recirculated.
The operation of
air-recirculation mode is the
same for all control panels.
X Turn the SmartKey to position 2 in the
ignition lock (Y page 135).
X To activate: press the e button.
The indicator lamp
in the e button lights
up.
i Air-recirculation mode is activated
automatically at high outside
temperatures. When air-recirculation
mode
is activated automatically, the indicator
lamp in the e button is not lit.
Outside air is added after about
30 minutes.
X To deactivate: press the e button.
The indicator lamp
in the e button goes
out. i
Air-recirculation mode deactivates
automatically:
R after approximately five minutes at
outside temperatures below
approximately 41 ‡ (5 †)
R after approximately five minutes if the
"Cooling with air dehumidification"
function is deactivated
R after approximately 30 minutes at
outside temperatures above
approximately
41 ‡(5 †) if the "Cooling
with air dehumidification" function is
activated Activating/deactivating the residual
heat function
The residual heat
function is only available in
vehicles for Canada with dual-zone automatic
climate control.
It is possible to make use of the residual heat
of the engine to continue heating the vehicle
for approximately 30 minutes after the engine
has been switched off. The heating time
depends on the temperature that has been
set.
i The blower will run at a low speed
regardless of the airflow setting.
i If you activate the residual heat function
at high temperatures, only the ventilation
will be activated. The blower runs at
medium speed. Operating the climate control systems
129
Climate control
ProCarManuals.com
Page 132 of 340

X
Turn the SmartKey to position 0 in the
ignition lock or remove it ( Y page 135).
X To activate: press the Ì button.
The indicator lamp
in the Ì button lights
up.
X To deactivate: press the Ì button.
The indicator lamp
in the Ì button goes
out.
i Residual heat is deactivated
automatically:
R after approximately 30 minutes
R when the ignition is switched on
R if the battery voltage drops
R when the auxiliary heating is activated Setting the air vents
Important safety notes
G
WARNING
Very hot or very cold air can flow from the air
vents. This could
result in burns or frostbite in
the immediate vicinity of the air vents. There
is a risk of injury.
Make sure that all vehicle occupants always
maintain a sufficient distance to the air
outlets. If necessary, redirect the airflow to
another area of the vehicle interior.
In order to ensure the direct flow of fresh air
through the air vents into the vehicle interior,
please observe the following notes:
R keep the air inlet between the windshield
and the hood free of blockages, such as ice,
snow or leaves.
R never cover the air vents or air intake grilles
in the vehicle interior.
i You can move the adjusters for the air
vents vertically or horizontally to set the
direction of the airflow.
i For optimal climate control in the vehicle,
open the air vents completely and set the
adjusters to the central position. Setting the center air vents
X
To open the center air vent: turn the
adjuster in one of center air vents :
counter-clockwise.
X To close the center air vent: turn the
adjuster in one of center air vents :
clockwise until it engages. Setting the side air vents
:
Side window defroster vent
; Side air vent
X To open a side air vent: turn the adjuster
in side air vent ; counter-clockwise.
X To close a side air vent: turn the
adjuster
in side air vent ; clockwise until it
engages. 130
Setting the air vents
Climate control
ProCarManuals.com