Page 320 of 420

318
5-2. Steps to take in an emergency
■If the tire pressure warning system is not functioning
The tire pressure warning system will be disabled in the following conditions:
(When the condition becomes normal, the system will work properly.)
●If tires not equipped with tire pressure warning valves and transmitters are used
●If the ID code on the tire pressure warning valves and transmitters is not regis-
tered in the tire pressure warning computer
●If the tire inflation pressure is 73 psi (500 kPa, 5.1 kgf/cm2 or bar) or higher
The tire pressure warning system may be disabled in the following conditions:
(When the condition becomes normal, the system will work properly.)
●If electronic devices or facilities using similar radio wave frequencies are nearby
●If a radio set at similar frequencies is in use in the vehicle
●If there is a lot of snow or ice on the vehicle, particularly around the wheels or
wheel housings
●If non-genuine Lexus wheels are used (Even if you use Lexus wheels, the tire
pressure warning system may not work properly with some types of tires.)
●If a tire is repaired with the emergency tire puncture repair kit
■If the tire pressure warning light comes on after flashing frequently for 1 minute
If the tire pressure warning light comes on after flashing frequently for 1 minute
when the ignition switch is turned to th e “ON” position, have it checked by your
Lexus dealer.
■Customization that can be configured at Lexus dealer
The vehicle speed linked seat belt reminder buzzer can be disabled.
(Customizable features P. 383)
Page 321 of 420

5
When trouble arises
319
5-2. Steps to take in an emergency
CAUTION
■When the electric power steering system warning light comes on
The steering wheel may become extremely heavy.
If the steering wheel becomes heavier than usual when operating, hold firmly and
operate using more force than usual.
■If the tire pressure warning light comes on
Be sure to observe the following precaution s. Failure to do so could cause a loss of
vehicle control and result in death or serious injury.
●Stop your vehicle in a safe place as soon as possible. Adjust the tire inflation pres-
sure immediately.
●If the tire pressure warning light comes on even after tire inflation pressure adjust-
ment, it is probable that you have a flat tire. Check the tires. If a tire is flat, tempo-
rarily repair the tire using the em ergency tire puncture repair kit ( P. 3 3 2 ) a n d
then have the tire repaired or replaced by the nearest Lexus dealer.
●Avoid abrupt maneuvering and braking. If the vehicle tires deteriorate, you could
lose control of the steering wheel or the brakes.
■If a blowout or sudden air leakage should occur
The tire pressure warning system may not activate immediately.
Page 322 of 420

320
5-2. Steps to take in an emergency
CAUTION
■Maintenance of the tires
Each tire, including the spare (if provided), should be checked monthly when cold
and inflated to the inflation pressure re commended by the vehicle manufacturer on
the vehicle placard or tire inflation pressu re label (tire and load information label).
(If your vehicle has tires of a different size than the size indicated on the vehicle
placard or tire inflation pressure label [tire and load information label], you should
determine the proper tire inflation pressure for those tires.)
As an added safety feature, your vehicl e has been equipped with a tire pressure
monitoring system (TPMS-tire pressure warning system) that illuminates a low tire
pressure telltale (tire pressure warning light) when one or more of your tires is sig-
nificantly under-inflated. Accordingly, when the low tire pressure telltale (tire pres-
sure warning light) illuminates, you should stop and check your tires as soon as
possible, and inflate them to the proper pressure. Driving on a significantly under-
inflated tire causes the tire to overheat and can lead to tire failure. Under-inflation
also reduces fuel efficiency and tire tread life, and may affect the vehicle's handling
and stopping ability.
Please note that the TPMS (tire pressure warning system) is not a substitute for
proper tire maintenance, and it is the driv er's responsibility to maintain correct tire
pressure, even if under-inflation has not reached the level to trigger illumination of
the TPMS low tire pressure telltale (tire pressure warning light).
Your vehicle has also been equipped with a TPMS (tire pressure warning system)
malfunction indicator to indicate when th e system is not operating properly. The
TPMS (tire pressure warning system) malfunction indicator is combined with the
low tire pressure telltale (tire pressure warning light). When the system detects a
malfunction, the telltale will flash for approximately one minute and then remain
continuously illuminated. This sequence will continue upon subsequent vehicle
start-ups as long as the malfunction exists . When the malfunction indicator is illumi-
nated, the system may not be able to detect or signal low tire pressure as intended.
TPMS (tire pressure warning system) malfunctions may occur for a variety of rea-
sons, including the installation of replacem ent or alternate tires or wheels on the
vehicle that prevent the TPMS (tire pres sure warning system) from functioning
properly. Always check the TPMS (tire pressure warning system) malfunction tell-
tale after replacing one or more tires or wheels on your vehicle to ensure that the
replacement or alternate tires and wheels allow the TPMS (tire pressure warning
system) to continue to function properly.
Page 336 of 420

334
5-2. Steps to take in an emergency
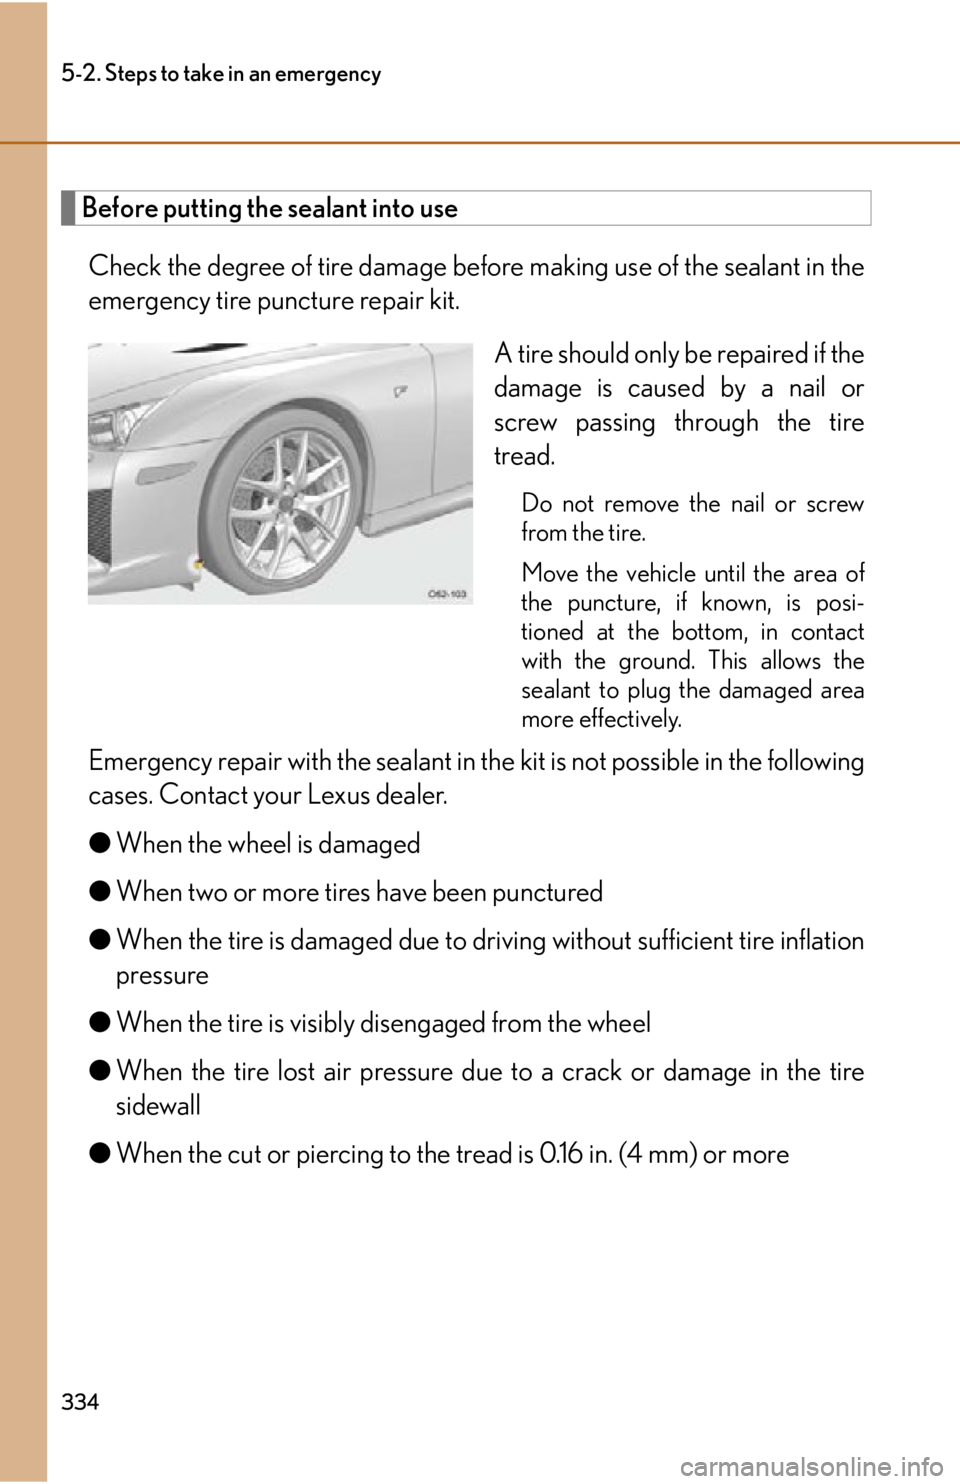
Before putting the sealant into useCheck the degree of tire damage befo re making use of the sealant in the
emergency tire puncture repair kit.
A tire should only be repaired if the
damage is caused by a nail or
screw passing through the tire
tread.
Do not remove the nail or screw
from the tire.
Move the vehicle until the area of
the puncture, if known, is posi-
tioned at the bottom, in contact
with the ground. This allows the
sealant to plug the damaged area
more effectively.
Emergency repair with the sealant in the kit is not possible in the following
cases. Contact your Lexus dealer.
● When the wheel is damaged
● When two or more tires have been punctured
● When the tire is damage d due to driving without sufficient tire inflation
pressure
● When the tire is visibly disengaged from the wheel
● When the tire lost air pressure due to a crack or damage in the tire
sidewall
● When the cut or piercing to the tread is 0.16 in. (4 mm) or more
Page 347 of 420

5
When trouble arises
345
5-2. Steps to take in an emergency
If the parking brake cannot be released
In the event that the battery is discharged or switch operation does not
release the parking brake, the parking brake can be released manually using
the procedure below. This procedure should be performed only if necessary,
such as in an emergency.
If the switch cannot be operated even when the battery is normal, the parking
brake system may be malfunctioning. Have the vehicle inspected by your
Lexus dealer immediately.
■ Before releasing the parking brake manually
●Select 1st gear or Reverse.
● Turn the ignition switch to the “LOCK” position.
● Check that the parking brake indicator is off.
● Chock the tires.
Releasing the parking brake manually
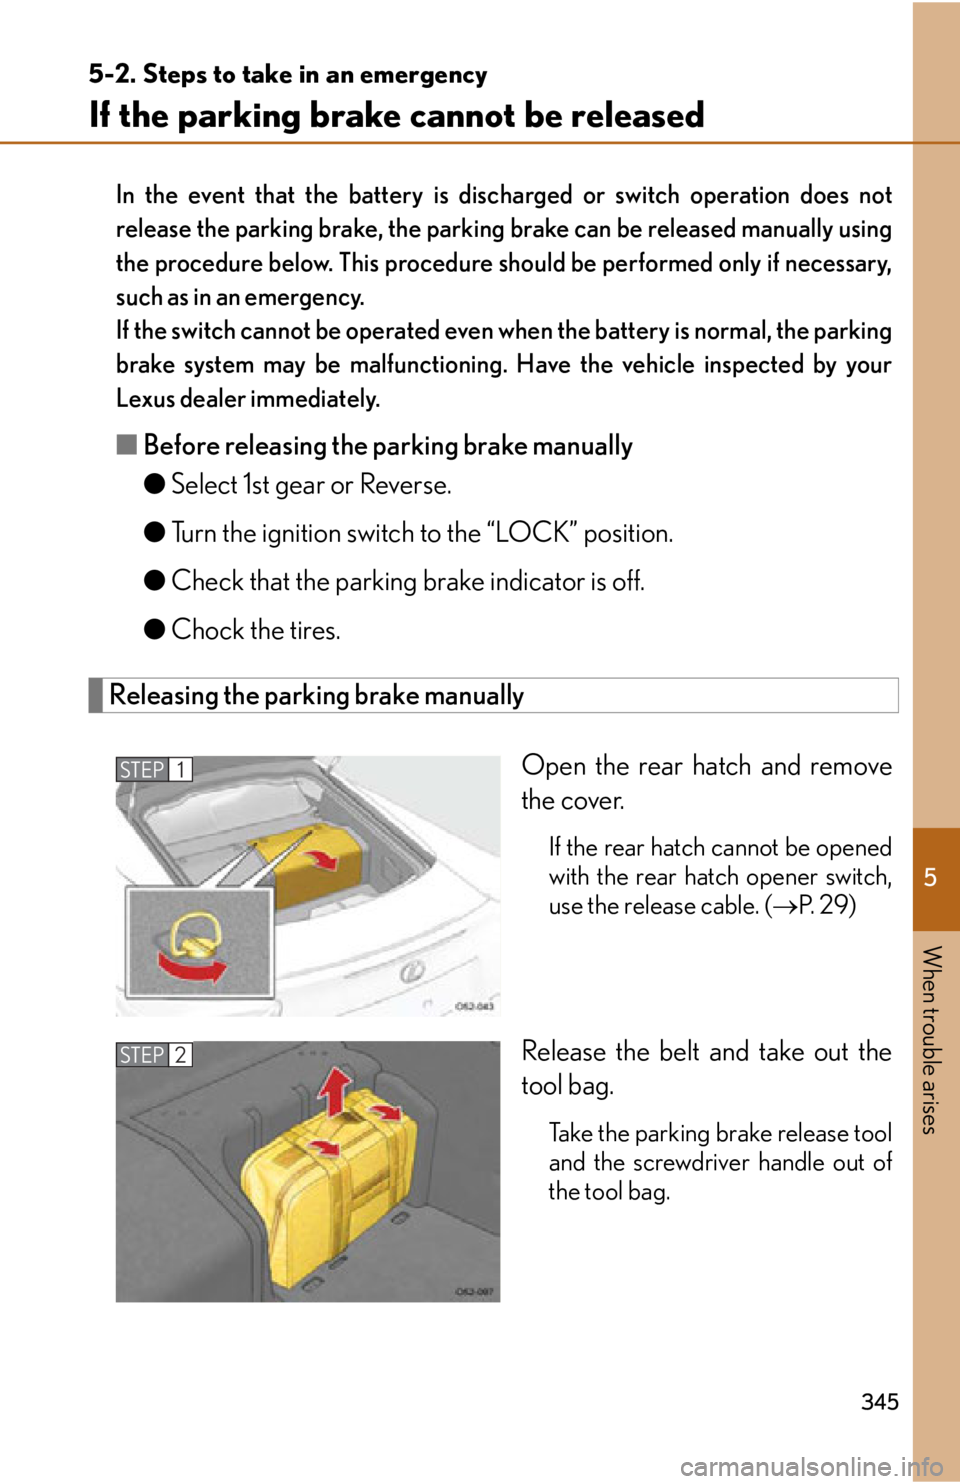
Open the rear hatch and remove
the cover.
If the rear hatch cannot be opened
with the rear hatch opener switch,
use the release cable. (P. 2 9 )
Release the belt and take out the
tool bag.
Take the parking brake release tool
and the screwdriver handle out of
the tool bag.
STEP1
STEP2
Page 349 of 420
5
When trouble arises
347
5-2. Steps to take in an emergency
CAUTION
■When releasing the parking brake manually
●Select 1st gear or Reverse, turn the ignition switch to the “LOCK” position and
chock the tires.
Failure to do so may cause the vehicle to move, resulting in an accident.
●Turn the ignition switch to the “LOCK” position and check that the parking brake
indicator is off.
Failure to do so may cause the system to operate and turn the parking brake
release tool that is inserted, resulting in an injury.
Page 356 of 420

354
5-2. Steps to take in an emergency
If the vehicle becomes stuck
Carry out the following procedures if the tires spin or the vehicle becomes
stuck in mud, dirt, or snow.
Set the parking brake, select Neutral and stop the engine.
Remove the mud, snow, or sand from around the stuck tire.
Place wood, stones or some other material to help provide trac-
tion under the tires.
Restart the engine.
Select 1st gear or Reverse, release the parking brake and care-
fully apply the accelerator to free the vehicle.
Turn off VSC and TRAC if these functions are hampering your attempts
to free the vehicle. ( P. 1 6 7 )
CAUTION
■When attempting to free a stuck vehicle
If you choose to rock the vehicle back and forth to free it, make sure the surround-
ing area is clear, to avoid striking other vehicles, objects or persons. The vehicle
may also lunge forward or lunge back suddenly as it becomes free. Use extreme
caution.
■When operating the paddle shift switches/reverse selector switch
Be careful not to operate the paddle shift switches/reverse selector switch with the
accelerator pedal depressed.
This may lead to unexpected rapid acceleration of the vehicle that may cause an
accident and result in death or serious injury.
NOTICE
■To avoid damaging the transm ission and other components
●Avoid spinning the wheels and do not rev the engine.
●If the vehicle remains stuck after trying these procedures, the vehicle may require
towing to be freed.
STEP1
STEP2
STEP3
STEP4
STEP5
Page 368 of 420
366
6-1. Specifications
Tires and wheels
Ti r e s i z e265/35ZR20 (95Y), 305/30ZR20 (99Y)
Front and rear tire inflation pres-
sure
(Recommended cold tire inflation
pressure) Front:
33 psi (230 kPa, 2.3 kgf/cm
2 or bar)
Rear: 33 psi (230 kPa, 2.3 kgf/cm
2 or bar)
Driving at high speeds (above 155 mph [250
km/h]) (in countries where such speeds are
permitted by law) Add 8 psi (50 kPa, 0.5 kgf/cm
2 or bar) to the
front tires and rear tires. Never exceed the
maximum cold tire inflation pressure indicated
on the tire sidewall.
Wheel size Front: 20
9 1 /2J
Rear: 20 11 1 /2J
Wheel bolt torque 81 ft•lbf (110 N•m, 11.2 kgf•m)