Page 108 of 407
106
3. MEMORY POINTS
ISF_IS_ISC_Navi_EE
1Press the “NAV” button, and touch
“Menu” if the map screen is dis-
played.
2Touch “Memory point” on the
“Menu” screen.
3Touch “Home” on the “Memory
point” screen.
4Touch “Delete”.
5Touch “Yes” to delete home and
touch “No” to cancel the deletion.
1Press the “NAV” button, and touch
“Menu” if the map screen is dis-
played.
2Touch “Memory point” on the
“Menu” screen.
3Touch “Quick access”.
4Touch the desired screen button.
DELETING HOMESETTING UP THE “Quick
access”
If quick access has been registered,
that information can be recalled by
using the quick access screen buttons
on the “Destination” screen. (See
“DESTINATION SEARCH BY
QUICK ACCESS” on page 65.)
No.FunctionPage
Registering quick access107
Editing quick access108
Deleting quick access109
Page 115 of 407
113
3. MEMORY POINTS
3
NAVIGATION SYSTEM
ISF_IS_ISC_Navi_EE
DISPLAYING MEMORY POINT
NAMES
1To display a memory point name,
touch “Show name”. The indicator
will illuminate. To hide memory
point names, touch “Show name”
again. The indicator will turn off.
TO CHANGE “Location”
1Touch “Location”.
2Touch one of the 8 directional screen
buttons to move the cursor to the
desired point on the map.
3Touch “OK”.
The previous screen will be displayed.
TO CHANGE “Tel. no.” (TELE-
PHONE NUMBER)
1Touch “Tel. no.”.
2Enter the number using the number
keys.
3Touch “OK”.
The previous screen will be displayed.
The name of a memory point can be
set to be displayed on the map.
Page 121 of 407
119
3. MEMORY POINTS
3
NAVIGATION SYSTEM
ISF_IS_ISC_Navi_EE
TO CHANGE “Location”
1Touch “Location”.
2Touch one of the 8 directional screen
buttons to move the cursor to the
desired point on the map screen.
3Touch “OK”.
The previous screen will be displayed.
Page 131 of 407
128
4. SETUP
ISF_IS_ISC_Navi_EE
POSITION/DIRECTION CALI-
BRATION
1Touch “Position / Direction”.
2Touch one of the 8 directional screen
buttons to move the cursor to the
desired point on the map.
3Touch “OK”.
4Touch either or to adjust the
direction of the current position
mark.
5Touch “OK”.
The map will be displayed.
When driving, the current position
mark will be automatically corrected
by GPS signals. If GPS reception is
poor due to location, the current po-
sition mark can be adjusted manual-
ly.
Page 137 of 407
134
4. SETUP
ISF_IS_ISC_Navi_EE
TO EDIT “Dealer” OR “Contact”
1Touch “Dealer” or “Contact”.
2Enter the name using the alphanu-
meric keys.
Up to 70 characters can be entered for
“Dealer” and 24 characters for “Con-
tact”.
3Touch “OK”.
The previous screen will be displayed.
TO EDIT “Location”
1Touch “Location”.
2Touch one of the 8 directional screen
buttons to move the cursor to the
desired point on the map.
3Touch “OK”.
The previous screen will be displayed.
Page 172 of 407
166
2. SETUP
ISF_IS_ISC_Navi_EE
1Touch “Call volume” on the “Sound
settings” screen.
2Touch “-” or “+” to adjust the call
volume.
3Touch “OK”.
1Touch “Ring tone volume” on the
“Sound settings” screen.
2Touch “-” or “+” to adjust the ring
tone volume.
3Touch “OK”.
1Touch “Ring tone” on the “Sound
settings” screen.
2Touch the screen button correspond-
ing to the desired ring tone.
Ring tones can be heard by touching
the screen buttons.
3Touch “OK”.
1Touch “Default” on the “Sound set-
tings” screen.
2Touch “Yes”.
CALL VOLUME SETTING
RING TONE VOLUME
SETTING
RING TONE SETTING
INITIALIZING THE
SETTINGS
The settings can be initialized.
Page 189 of 407
183
2. SETUP
4
TELEPHONE
ISF_IS_ISC_Navi_EE
1Touch “New message voice notifica-
tion tone”.
2Touch the desired new message noti-
fication tone.
New message notification tones can be
heard by touching the screen buttons.
3Touch “OK”.
1Touch “Message readout volume”.
2Touch “-” or “+” to adjust the mes-
sage read out volume.
3Touch “OK”.
NEW MESSAGE
NOTIFICATION TONE
SETTINGS
A new message voice notification
tone can be selected.MESSAGE READ OUT
VOLUME SETTINGS
Message read out volume can be ad-
justed.
INFORMATION
The system will automatically
increase the volume when the speed
exceeds 50 mph (80 km/h).
Page 210 of 407

203
1. AUDIO/VIDEO SYSTEM OPERATION
5
AUDIO/VIDEO SYSTEM
ISF_IS_ISC_Navi_EE
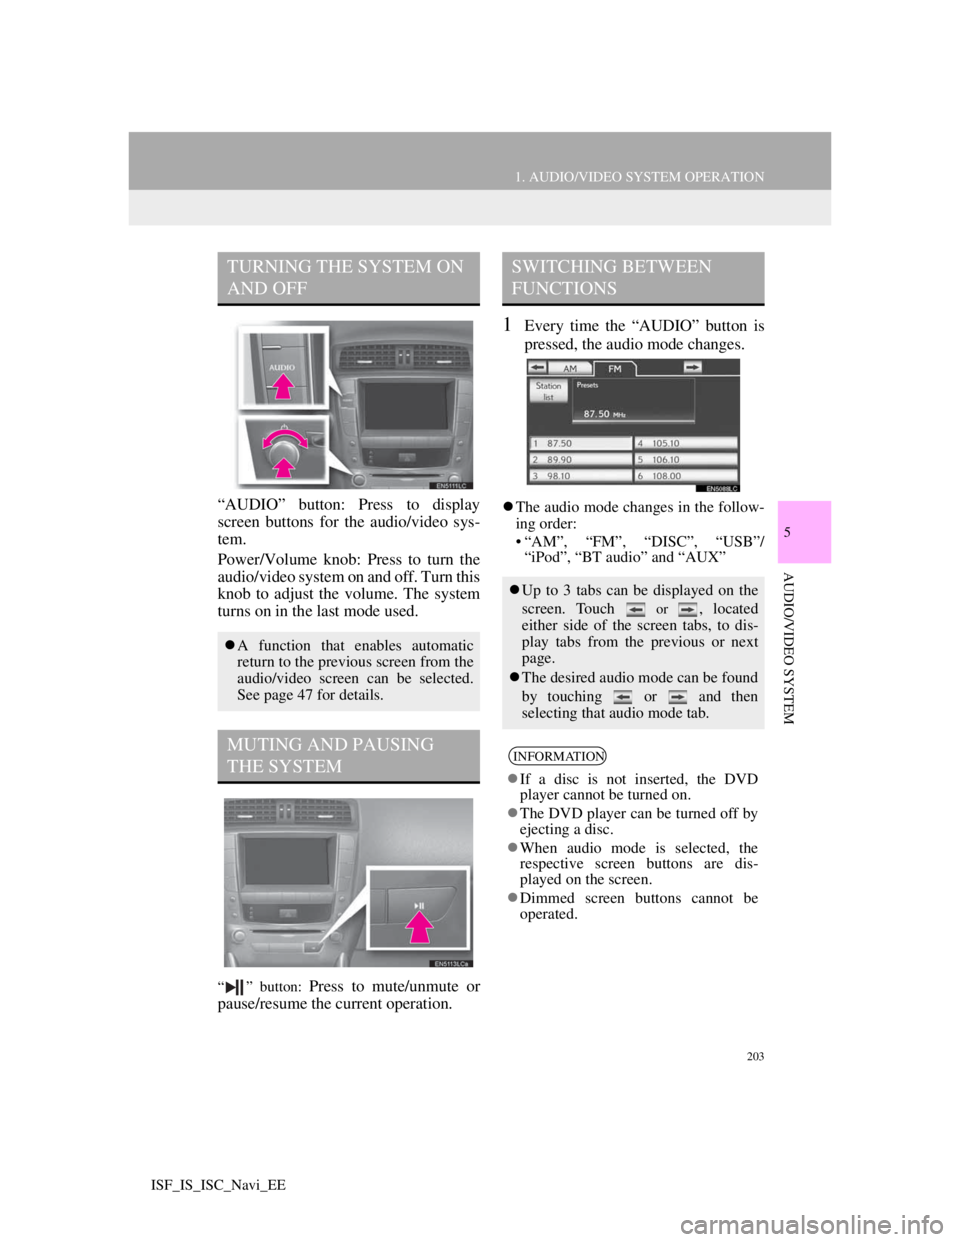
“AUDIO” button: Press to display
screen buttons for the audio/video sys-
tem.
Power/Volume knob: Press to turn the
audio/video system on and off. Turn this
knob to adjust the volume. The system
turns on in the last mode used.
“ ” button: Press to mute/unmute or
pause/resume the current operation.
1Every time the “AUDIO” button is
pressed, the audio mode changes.
The audio mode changes in the follow-
ing order:
• “AM”, “FM”, “DISC”, “USB”/
“iPod”, “BT audio” and “AUX”
TURNING THE SYSTEM ON
AND OFF
A function that enables automatic
return to the previous screen from the
audio/video screen can be selected.
See page 47 for details.
MUTING AND PAUSING
THE SYSTEM
SWITCHING BETWEEN
FUNCTIONS
Up to 3 tabs can be displayed on the
screen. Touch
or , located
either side of the screen tabs, to dis-
play tabs from the previous or next
page.
The desired audio mode can be found
by touching or and then
selecting that audio mode tab.
INFORMATION
If a disc is not inserted, the DVD
player cannot be turned on.
The DVD player can be turned off by
ejecting a disc.
When audio mode is selected, the
respective screen buttons are dis-
played on the screen.
Dimmed screen buttons cannot be
operated.