Page 69 of 257
68
2. SETUP
GS450h/250 (EE) NAVI 30C48E
13.12.17 15:42
1Press the “MENU” button on the Re-
mote Touch, then select “Setup”.
2Select “General” on the “Setup”
screen.
3Select “Button colour”.
4Select the desired screen button co-
lour.
The previous screen will be displayed.
5Select “OK”.
1Press the “MENU” button on the Re-
mote Touch, then select “Setup”.
2Select “General” on the “Setup”
screen.
3Select “Unit of measurement”.
4Select “km” or “mile”.
5Select “OK”.
SELECTING A BUTTON
COLOUR
The colour of the screen buttons can
be changed.UNIT OF MEASUREMENT
Distance unit can be changed.
This function is available only in
English. To switch language, see
“SELECTING A LANGUAGE” on
page 63.
Page 78 of 257

77
1. DESTINATION SEARCH
3
NAVIGATION SYSTEM
GS450h/250 (EE) NAVI 30C48E
13.12.17 15:42
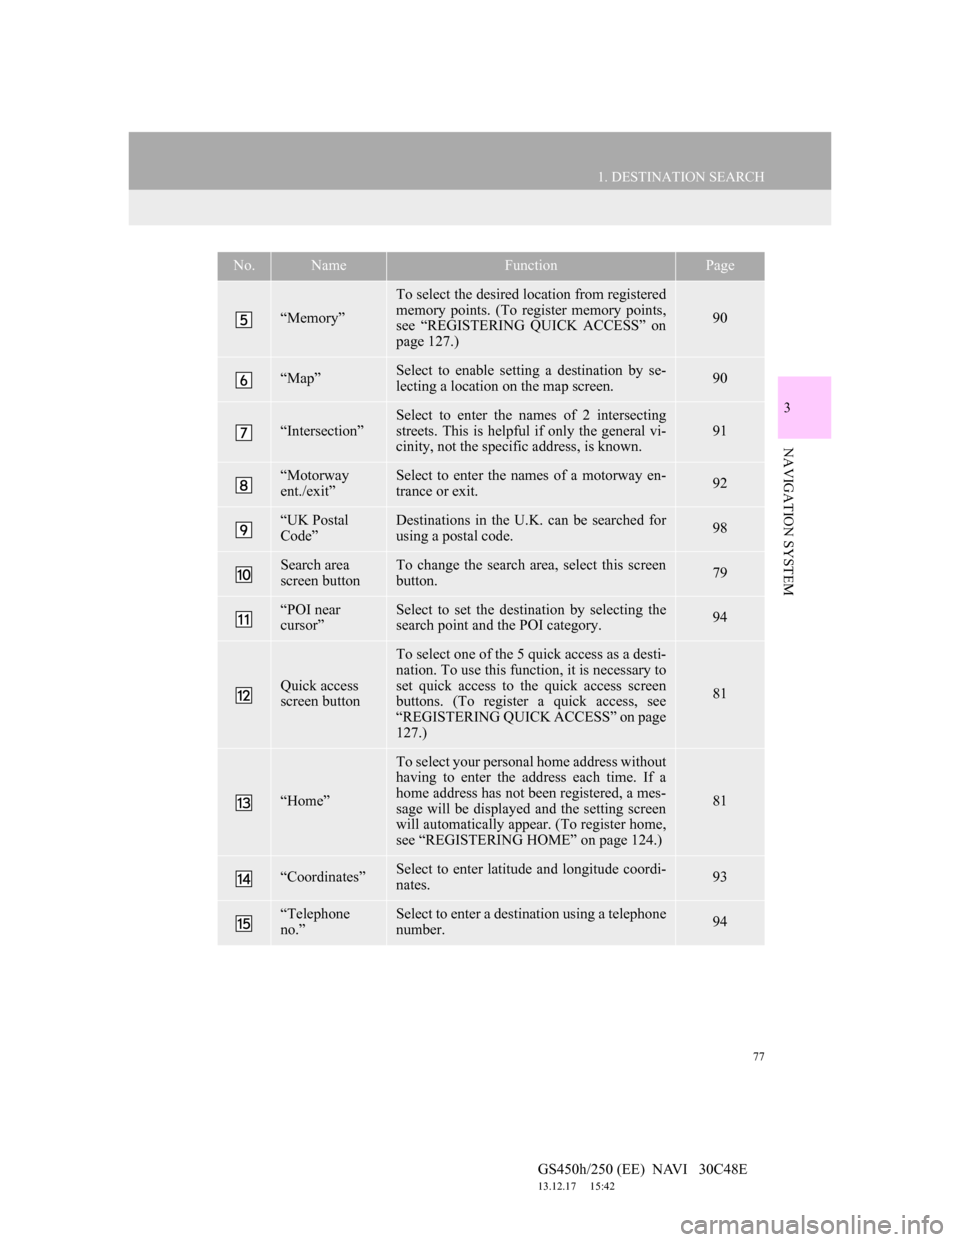
“Memory”
To select the desired location from registered
memory points. (To register memory points,
see “REGISTERING QUICK ACCESS” on
page 127.)
90
“Map”Select to enable setting a destination by se-
lecting a location on the map screen.90
“Intersection”
Select to enter the names of 2 intersecting
streets. This is helpful if only the general vi-
cinity, not the specific address, is known.
91
“Motorway
ent./exit”Select to enter the names of a motorway en-
trance or exit.92
“UK Postal
Code”Destinations in the U.K. can be searched for
using a postal code.98
Search area
screen buttonTo change the search area, select this screen
button.79
“POI near
cursor”Select to set the destination by selecting the
search point and the POI category.94
Quick access
screen button
To select one of the 5 quick access as a desti-
nation. To use this function, it is necessary to
set quick access to the quick access screen
buttons. (To register a quick access, see
“REGISTERING QUICK ACCESS” on page
127.)
81
“Home”
To select your personal home address without
having to enter the address each time. If a
home address has not been registered, a mes-
sage will be displayed and the setting screen
will automatically appear. (To register home,
see “REGISTERING HOME” on page 124.)
81
“Coordinates”Select to enter latitude and longitude coordi-
nates.93
“Telephone
no.”Select to enter a destination using a telephone
number.94
No.NameFunctionPage
Page 82 of 257

81
1. DESTINATION SEARCH
3
NAVIGATION SYSTEM
GS450h/250 (EE) NAVI 30C48E
13.12.17 15:42
1Press the “MENU” button on the Re-
mote Touch. (See “Remote Touch”
on page 10.)
2Select “Navi”, and select “Menu” if
the map screen is displayed.
3Select “Destination” on the navigation
menu screen.
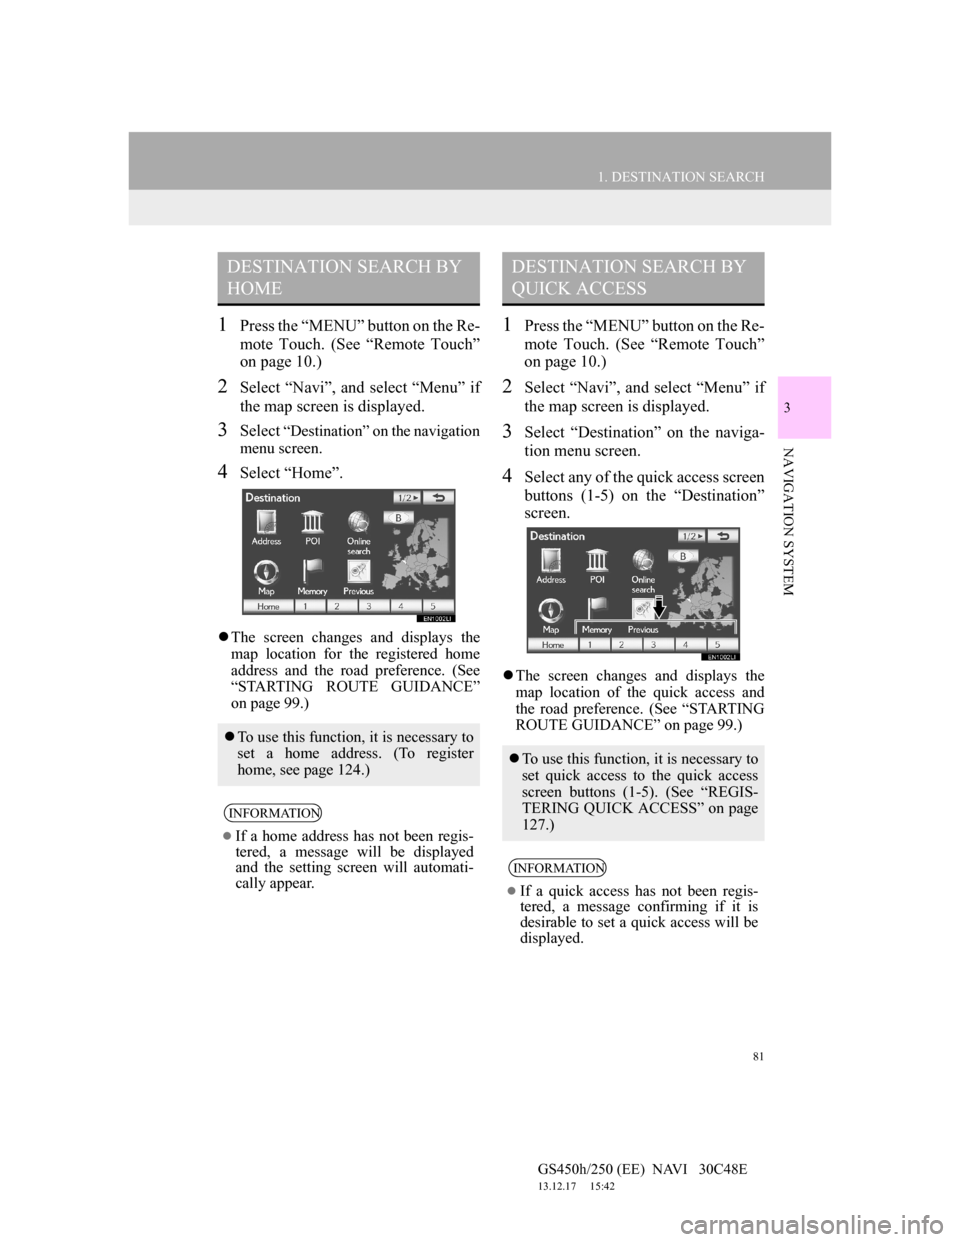
4Select “Home”.
The screen changes and displays the
map location for the registered home
address and the road preference. (See
“STARTING ROUTE GUIDANCE”
on page 99.)
1Press the “MENU” button on the Re-
mote Touch. (See “Remote Touch”
on page 10.)
2Select “Navi”, and select “Menu” if
the map screen is displayed.
3Select “Destination” on the naviga-
tion menu screen.
4Select any of the quick access screen
buttons (1-5) on the “Destination”
screen.
The screen changes and displays the
map location of the quick access and
the road preference. (See “STARTING
ROUTE GUIDANCE” on page 99.)
DESTINATION SEARCH BY
HOME
To use this function, it is necessary to
set a home address. (To register
home, see page 124.)
INFORMATION
If a home address has not been regis-
tered, a message will be displayed
and the setting screen will automati-
cally appear.
DESTINATION SEARCH BY
QUICK ACCESS
To use this function, it is necessary to
set quick access to the quick access
screen buttons (1-5). (See “REGIS-
TERING QUICK ACCESS” on page
127.)
INFORMATION
If a quick access has not been regis-
tered, a message confirming if it is
desirable to set a quick access will be
displayed.
Page 97 of 257

96
1. DESTINATION SEARCH
GS450h/250 (EE) NAVI 30C48E
13.12.17 15:42
1Select “Current position”.
The search point is set at the current
position, and the “POI near cursor”
screen is displayed.
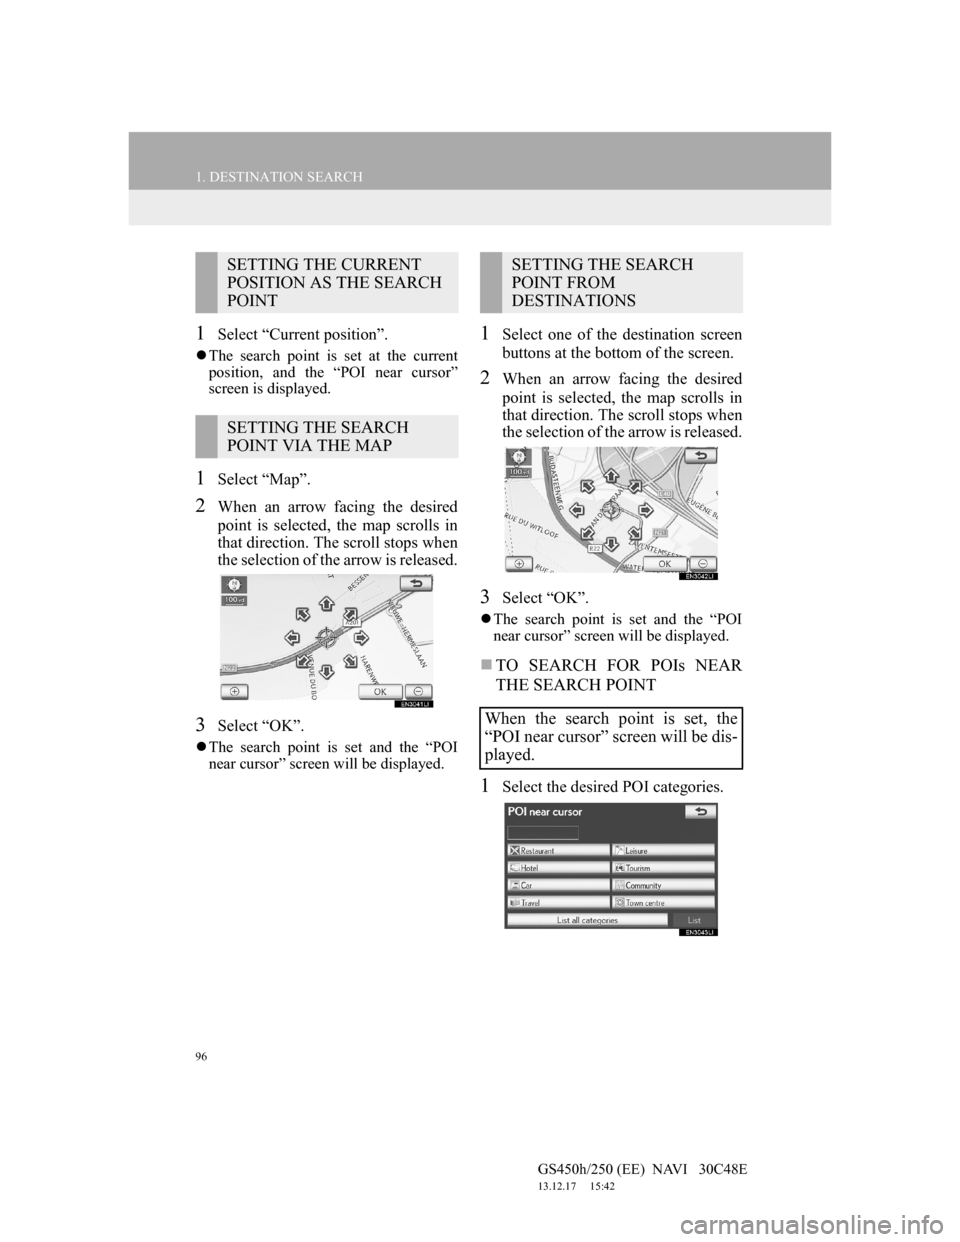
1Select “Map”.
2When an arrow facing the desired
point is selected, the map scrolls in
that direction. The scroll stops when
the selection of the arrow is released.
3Select “OK”.
The search point is set and the “POI
near cursor” screen will be displayed.
1Select one of the destination screen
buttons at the bottom of the screen.
2When an arrow facing the desired
point is selected, the map scrolls in
that direction. The scroll stops when
the selection of the arrow is released.
3Select “OK”.
The search point is set and the “POI
near cursor” screen will be displayed.
TO SEARCH FOR POIs NEAR
THE SEARCH POINT
1Select the desired POI categories.
SETTING THE CURRENT
POSITION AS THE SEARCH
POINT
SETTING THE SEARCH
POINT VIA THE MAP
SETTING THE SEARCH
POINT FROM
DESTINATIONS
When the search point is set, the
“POI near cursor” screen will be dis-
played.
Page 127 of 257
126
3. MEMORY POINTS
GS450h/250 (EE) NAVI 30C48E
13.12.17 15:42
1Press the “MENU” button on the Re-
mote Touch.
2Select “Navi”, and select “Menu” if
the map screen is displayed.
3Select “Memory point” on the navi-
gation menu screen.
4Select “Home” on the “Memory
point” screen.
5Select “Delete”.
6Select “Yes” to delete home and se-
lect “No” to cancel the deletion.
1Press the “MENU” button on the Re-
mote Touch. (See “Remote Touch”
on page 10.)
2Select “Navi”, and select “Menu” if
the map screen is displayed.
3Select “Memory point” on the navi-
gation menu screen.
4Select “Quick access”.
DELETING HOMESETTING UP THE “Quick
access”
If quick access has been registered,
that information can be recalled by
using the quick access screen buttons
on the “Destination” screen. (See
“DESTINATION SEARCH BY
QUICK ACCESS” on page 81.)
Page 135 of 257
134
3. MEMORY POINTS
GS450h/250 (EE) NAVI 30C48E
13.12.17 15:42
2Select one of the 8 directional screen
buttons to move the cursor to the
desired point on the map.
3Select “OK”.
The previous screen will be displayed.
TO CHANGE “Tel. no.” (TELE-
PHONE NUMBER)
1Select “Tel. no.”.
2Enter the number using the number
keys.
3Select “OK”.
The previous screen will be displayed.
TO SET OR CHANGE “Group”
1Select “Group”.
2Select the group the memory point is
to be registered with.
3Select “OK”.
The previous screen will be displayed.
To register a new group
1Select “New group”.
Memory point groups can be set and
changed.
Page 140 of 257
139
3. MEMORY POINTS
GS450h/250 (EE) NAVI 30C48E
13.12.17 15:42
3
NAVIGATION SYSTEM
TO CHANGE “Name”
1Select “Name”.
2Enter the name using the alphanu-
meric keys.
Up to 70 characters can be entered.
3Select “OK”.
The previous screen will be displayed.
DISPLAYING NAMES OF AR-
EAS TO BE AVOIDED
1To display a name of the area to
avoid, select “Show name”. The in-
dicator will illuminate. To hide a
name of the area to avoid, select
“Show name” again. The indicator
will turn off.
TO CHANGE “Location”
1Select “Location”.
2Select one of the 8 directional screen
buttons to move the cursor to the
desired point on the map screen.
3Select “OK”.
The previous screen will be displayed.
The name of an area to be avoided
can be displayed on the map.
Page 151 of 257
149
4. SETUP
GS450h/250 (EE) NAVI 30C48E
13.12.17 15:42
3
NAVIGATION SYSTEM
4Select the desired screen button.
POSITION/DIRECTION CALI-
BRATION
1Select “Position / Direction”.
2Select one of the 8 directional screen
buttons to move the cursor to the
desired point on the map.
3Select “OK”.
4Select either the or to adjust
the direction of the current position
mark.
5Select “OK”.
The map will be displayed.
For additional information on the
accuracy of a current position, see
“LIMITATIONS OF THE NAVIGA-
TION SYSTEM” on page 157.
When driving, the current position
mark will be automatically corrected
by GPS signals. If GPS reception is
poor due to location, the current po-
sition mark can be adjusted manual-
ly.