2012 Lancia Thema instrument panel
[x] Cancel search: instrument panelPage 138 of 316

dition, the EVIC will display the
“CLEAN PARK ASSIST”, “SERVICE
PARK ASSIST” or the “SERVICE
PARK ASSIST SYSTEM” message for
as long as the vehicle is in REVERSE
or DRIVE (at speeds less than
11 km/h). Under this condition
ParkSense® will not operate. Refer to
“Electronic Vehicle Information Cen-
ter (EVIC)” in “Understanding Your
Instrument Panel” for further infor-
mation.
If “CLEAN PARK ASSIST” appears
in the Electronic Vehicle Information
Center (EVIC) make sure the outer
surface and the underside of the rear
fascia/bumper and/or front fascia/
bumper is clean and clear of snow, ice,
mud, dirt or other obstruction and
then cycle the ignition. If the message
continues to appear see an authorized
dealer.
If “SERVICE PARK ASSIST" or
“SERVICE PARK ASSIST SYSTEM”
appears in the EVIC, see an autho-
rized dealer.CLEANING THE
PARKSENSE® SYSTEM
Clean the ParkSense® sensors with
water, car wash soap and a soft cloth.
Do not use rough or hard cloths. Do
not scratch or poke the sensors. Oth-
erwise, you could damage the sensors.
PARKSENSE® SYSTEM
USAGE PRECAUTIONS
NOTE:
Ensure that the front and rear
bumper are free of snow, ice,
mud, dirt and debris to keep the
ParkSense® system operating
properly.
Jackhammers, large trucks, and other vibrations could affect the
performance of ParkSense®.
When you turn ParkSense® off, the EVIC will display “PARK
ASSIST SYSTEM OFF.” Further-
more, once you turn
ParkSense® off, it remains off
until you turn it on again, even if
you cycle the ignition key. When you move the shift lever to
the REVERSE or DRIVE posi-
tion and ParkSense® is turned
off, the EVIC will display “PARK
ASSIST SYSTEM OFF” message
for approximately five seconds
in REVERSE or for 5 seconds
when the vehicle is in DRIVE.
Clean the ParkSense® sensors regularly, taking care not to
scratch or damage them. The
sensors must not be covered
with ice, snow, slush, mud, dirt
or debris. Failure to do so can
result in the system not working
properly. The ParkSense® sys-
tem might not detect an obstacle
behind or in front of the fascia/
bumper, or it could provide a
false indication that an obstacle
is behind or in front of the
fascia/bumper.
132
Page 147 of 316

WARNING!
Do not place ashes inside the cubby
bin located on the center console on
vehicle's not equipped with the ash
receiver tray. A fire leading to bodily
injury could result.
The center console outlet is powered
directly from the battery (power
available at all times). Items plugged
into this outlet may discharge the bat-
tery and/or prevent the engine from
starting.
There is also a 12 volt power outlet
located on the back of the center con-
sole for rear passengers. This power
outlet has power available only when
the ignition is placed in the ACC or
RUN position.
WARNING!
To avoid serious injury or death:
Only devices designed for use in this type of outlet should be in-
serted into any 12 Volt outlet.
Do not touch with wet hands.
Close the lid when not in use and
while driving the vehicle.
If this outlet is mishandled, it may
cause an electric shock and fail-
ure.CAUTION!
Many accessories that can beplugged in draw power from the
vehicle's battery even when not in
use (i.e., cellular phones, etc.).
Eventually, if plugged in long
enough, the vehicle's battery will
discharge sufficiently to degrade
battery life and/or prevent the en-
gine from starting.
Accessories that draw higher
power (i.e., coolers, vacuum
cleaners, lights, etc.) will degrade
the battery even more quickly.
Only use these intermittently and
with greater caution.
(Continued)
Center Console Power Outlet
Rear Center Console Power Outlet
Power Outlet Fuse Locations
1 — #12 Fuse 20 A Yellow Cigar
Lighter Instrument Panel And
Power Outlet Console Rear
2 — #38 Fuse 20 A Yellow Power
Outlet Inside Arm Rest
141
Page 149 of 316

Lighted Cupholders (for
versions/markets, where
provided)
On some vehicles the rear cupholders
are equipped with a light ring that
illuminates the cupholders for the
rear passengers. The light ring iscon-
trolled by the Dimmer Control. Refer
to “Lights” in “Understanding The
Features Of Your Vehicle” for further
information. STORAGE
GLOVEBOX STORAGE
The glovebox storage compartment is
located on the passenger side of the
instrument panel.
CONSOLE FEATURES
There is a cubby bin located forward
of the shift lever. The cubby bin is
covered with a push-push actuated
door. Push inward on the door to open
it, push the door a second time to close
it.
Two separate storage compartments
are also located underneath the center
console armrest.
Inside the center console armrest,
there is a removable upper storage
tray that can be slid forward/
rearward on rails for access to the
lower storage area. This tray has an
integrated coin holder, along with ad-
ditional area for small items like an
ipod or phone. Below the upper tray,
the lower storage compartment is
made for larger items, like CDs and
Rear Seat Cupholders
Light Ring In Rear Cupholder
Glovebox Storage Compartment
Opened Glovebox Storage
Compartment
Center Console
143
Page 155 of 316

4
UNDERSTANDING YOUR INSTRUMENT
PANEL
INSTRUMENT PANEL FEATURES . . . . . . . . . . . 152
INSTRUMENT CLUSTER . . . . . . . . . . . . . . . . . . 153
INSTRUMENT CLUSTER DESCRIPTIONS . . . . 154
ELECTRONIC VEHICLE INFORMATION CENTER (EVIC) . . . . . . . . . . . . . . . . . . . . . . . . . 159
ELECTRONIC VEHICLE INFORMATION CENTER (EVIC) DISPLAYS . . . . . . . . . . . . . . 160
EVIC WHITE TELLTALES . . . . . . . . . . . . . . . 161
EVIC AMBER TELLTALES . . . . . . . . . . . . . . . 162
EVIC RED TELLTALES . . . . . . . . . . . . . . . . . 162
OIL CHANGE DUE . . . . . . . . . . . . . . . . . . . . . 164
DIESEL PARTICULATE FILTER (DPF) MESSAGES . . . . . . . . . . . . . . . . . . . . . . . . . . 164
FUEL ECONOMY . . . . . . . . . . . . . . . . . . . . . . 165
CRUISE CONTROL . . . . . . . . . . . . . . . . . . . . 165
VEHICLE SPEED . . . . . . . . . . . . . . . . . . . . . . 166
TRIP INFO . . . . . . . . . . . . . . . . . . . . . . . . . . . 166
TIRE BAR . . . . . . . . . . . . . . . . . . . . . . . . . . . 166
VEHICLE INFO (CUSTOMER INFORMATION FEATURES) . . . . . . . . . . . . . . 167
149
Page 158 of 316

INSTRUMENT PANEL FEATURES1 — Air Outlet7 — ESC Off Switch13 — Engine Start/Stop Button
2 — Instrument Cluster 8 — Uconnect Touch™ System Hard
Controls 14 — Trunk Release Button
3 — Hazard Switch 9 — SD Memory Card Slot15 — Dimmer Controls
4 — Uconnect Touch™ System 10 — Power Outlet 16 — Hood Release
5 — Climate Control Hard Controls 11 — CD/DVD Slot 17 — Headlight Switch
6 — Glove Compartment 12 — Storage Compartment18 — Analog Clock
152
Page 173 of 316

the SELECT button and one of the
following will be displayed:
If tire pressure is OK for all tires avehicle ICON is displayed with tire
pressure values in each corner of
the ICON.
If one or more tires have low pres- sure, "Tire Pressure LOW" is dis-
played with the vehicle ICON and
the tire pressure values in each cor-
ner of the ICON.
If the Tire Pressure system requires service, "Service Tire Pressure Sys-
tem" is displayed.
Tire pressure is an information only
function and cannot be reset. Press
and release the BACK button to re-
turn to the main menu.
VEHICLE INFO
(CUSTOMER
INFORMATION FEATURES)
Press and release the UP or DOWN
button until "Vehicle Info" is high-
lighted in the EVIC. Press and release
the SELECT button and Coolant
Temp will be displayed. Press the UP or DOWN button to scroll through the
following information displays.
Coolant Temp
Displays the actual coolant tempera-
ture.
Oil Pressure (for versions/
markets, where provided)
Displays the actual oil pressure.
Trans Temperature
Displays the actual transmission tem-
perature.
Engine Hours
Displays the number of hours of en-
gine operation.
MESSAGES #
Select from Main Menu using the UP
or DOWN buttons. This feature shows
the number of stored warning mes-
sages (in the # place holder). Pressing
the SELECT button will allow you to
see what the stored messages are.
Pressing the BACK button takes you
back to the Main Menu.
TURN MENU OFF
Select from Main Menu using the
DOWN button. Pressing the SELECT
button blanks the menu display. Pressing any one of the four steering
wheel buttons brings the menu back.
Uconnect Touch™
SETTINGS
The Uconnect Touch™ system uses a
combination of soft and hard keys
located on the center of the instru-
ment panel that allows you to access
and change the customer program-
mable features.
HARD-KEYS
Hard-Keys are located below the
Uconnect Touch™ system in the cen-
ter of the instrument panel. In addi-
tion, there is a Scroll/Enter control
knob located on the right side of the
Climate Controls in the center of the
instrument panel. Turn the control
knob to scroll through menus and
change settings (i.e., 30, 60, 90),
press the center of the control knob
one or more times to select or change a
setting (i.e., ON, OFF).
SOFT-KEYS
Soft-Keys are accessible on the
Uconnect Touch™ display.
167
Page 181 of 316

Engine Off Power Delay (forversions/markets, where
provided)
When this feature is selected, the
power window switches, radio,
Uconnect™ phone system (for
versions/markets, where provided),
DVD video system (for versions/
markets, where provided), power
sunroof (for versions/markets, where
provided), and power outlets will re-
main active for up to 10 minutes after
the ignition is cycled to OFF. Opening
either front door will cancel this fea-
ture. To change the Engine Off Power
Delay status touch the 0 seconds,
45 seconds, 5 minutes or 10 minutes
soft-key. Then touch the arrow back
soft-key. Headlight Off Delay (for
versions/markets, where
provided)
When this feature is selected, the
driver can choose to have the head-
lights remain on for 0, 30, 60, or
90 seconds when exiting the vehicle.
To change the Headlight Off Delay
status touch the + or - soft-key to
select your desired time interval.
Touch the back arrow soft-key to re-
turn to the previous menu.
Compass Settings
After pressing the Compass Settings
soft-key the following settings will be
available.
Variance (for versions/markets, where provided)
Compass Variance is the difference
between Magnetic North and Geo-
graphic North. To compensate for the
differences the variance should be set
for the zone where the vehicle is
driven, per the zone map. Once prop-
erly set, the compass will automati-
cally compensate for the differences,
and provide the most accurate com-
pass heading. NOTE:
Keep magnetic materials away
from the top of the instrument
panel, such as iPod's, Mobile
Phones, Laptops and Radar Detec-
tors. This is where the compass
module is located, and it can cause
interference with the compass sen-
sor, and it may give false readings.
175
Page 184 of 316

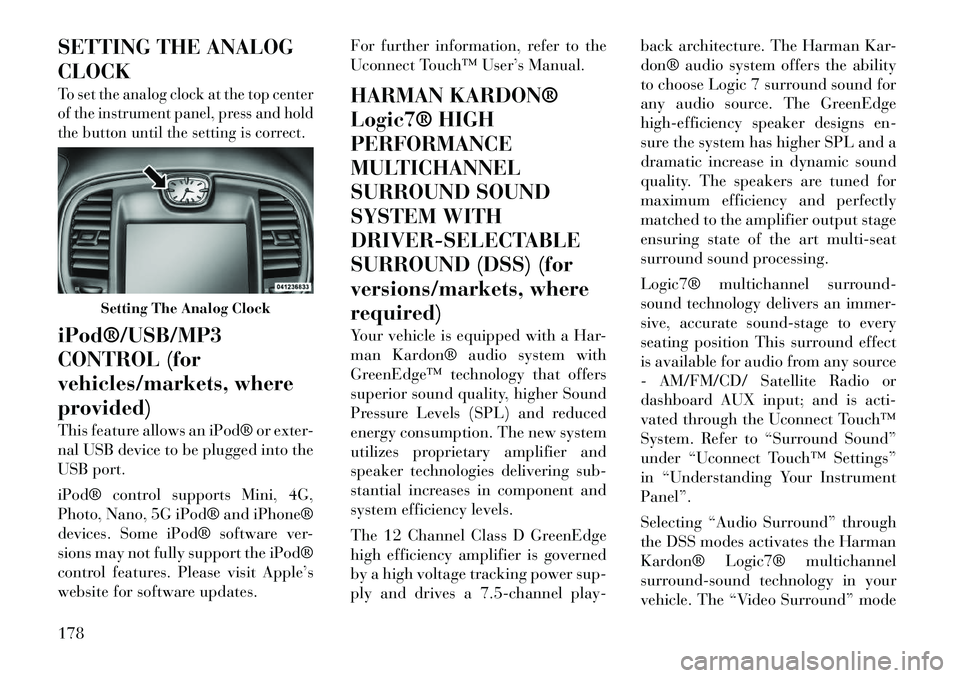
SETTING THE ANALOG
CLOCKTo set the analog clock at the top center
of the instrument panel, press and hold
the button until the setting is correct.iPod®/USB/MP3
CONTROL (for
vehicles/markets, where
provided)
This feature allows an iPod® or exter-
nal USB device to be plugged into the
USB port.
iPod® control supports Mini, 4G,
Photo, Nano, 5G iPod® and iPhone®
devices. Some iPod® software ver-
sions may not fully support the iPod®
control features. Please visit Apple’s
website for software updates.For further information, refer to the
Uconnect Touch™ User’s Manual.
HARMAN KARDON®
Logic7® HIGH
PERFORMANCE
MULTICHANNEL
SURROUND SOUND
SYSTEM WITH
DRIVER-SELECTABLE
SURROUND (DSS) (for
versions/markets, where
required)
Your vehicle is equipped with a Har-
man Kardon® audio system with
GreenEdge™ technology that offers
superior sound quality, higher Sound
Pressure Levels (SPL) and reduced
energy consumption. The new system
utilizes proprietary amplifier and
speaker technologies delivering sub-
stantial increases in component and
system efficiency levels.
The 12 Channel Class D GreenEdge
high efficiency amplifier is governed
by a high voltage tracking power sup-
ply and drives a 7.5-channel play-back architecture. The Harman Kar-
don® audio system offers the ability
to choose Logic 7 surround sound for
any audio source. The GreenEdge
high-efficiency speaker designs en-
sure the system has higher SPL and a
dramatic increase in dynamic sound
quality. The speakers are tuned for
maximum efficiency and perfectly
matched to the amplifier output stage
ensuring state of the art multi-seat
surround sound processing.
Logic7® multichannel surround-
sound technology delivers an immer-
sive, accurate sound-stage to every
seating position This surround effect
is available for audio from any source
- AM/FM/CD/ Satellite Radio or
dashboard AUX input; and is acti-
vated through the Uconnect Touch™
System. Refer to “Surround Sound”
under “Uconnect Touch™ Settings”
in “Understanding Your Instrument
Panel”.
Selecting “Audio Surround” through
the DSS modes activates the Harman
Kardon® Logic7® multichannel
surround-sound technology in your
vehicle. The “Video Surround” mode
Setting The Analog Clock
178