2012 Lancia Thema check engine
[x] Cancel search: check enginePage 169 of 316
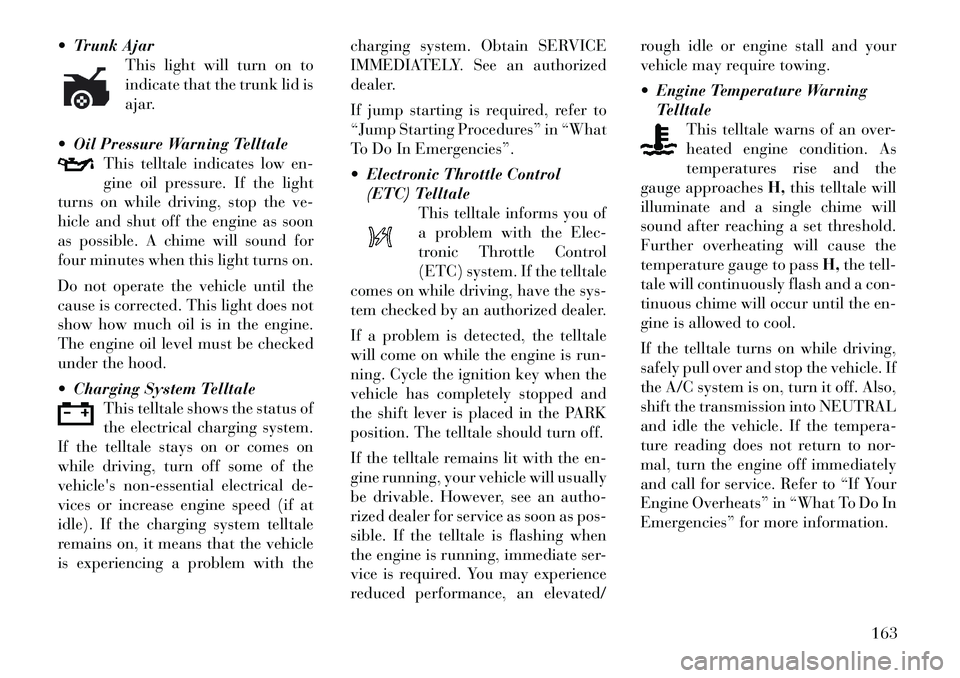
Trunk AjarThis light will turn on to
indicate that the trunk lid is
ajar.
Oil Pressure Warning Telltale This telltale indicates low en-
gine oil pressure. If the light
turns on while driving, stop the ve-
hicle and shut off the engine as soon
as possible. A chime will sound for
four minutes when this light turns on.
Do not operate the vehicle until the
cause is corrected. This light does not
show how much oil is in the engine.
The engine oil level must be checked
under the hood.
Charging System Telltale This telltale shows the status of
the electrical charging system.
If the telltale stays on or comes on
while driving, turn off some of the
vehicle's non-essential electrical de-
vices or increase engine speed (if at
idle). If the charging system telltale
remains on, it means that the vehicle
is experiencing a problem with the charging system. Obtain SERVICE
IMMEDIATELY. See an authorized
dealer.
If jump starting is required, refer to
“Jump Starting Procedures” in “What
To Do In Emergencies”.
Electronic Throttle Control
(ETC) Telltale
This telltale informs you of
a problem with the Elec-
tronic Throttle Control
(ETC) system. If the telltale
comes on while driving, have the sys-
tem checked by an authorized dealer.
If a problem is detected, the telltale
will come on while the engine is run-
ning. Cycle the ignition key when the
vehicle has completely stopped and
the shift lever is placed in the PARK
position. The telltale should turn off.
If the telltale remains lit with the en-
gine running, your vehicle will usually
be drivable. However, see an autho-
rized dealer for service as soon as pos-
sible. If the telltale is flashing when
the engine is running, immediate ser-
vice is required. You may experience
reduced performance, an elevated/ rough idle or engine stall and your
vehicle may require towing.
Engine Temperature Warning
Telltale This telltale warns of an over-
heated engine condition. As
temperatures rise and the
gauge approaches H,this telltale will
illuminate and a single chime will
sound after reaching a set threshold.
Further overheating will cause the
temperature gauge to pass H,the tell-
tale will continuously flash and a con-
tinuous chime will occur until the en-
gine is allowed to cool.
If the telltale turns on while driving,
safely pull over and stop the vehicle. If
the A/C system is on, turn it off. Also,
shift the transmission into NEUTRAL
and idle the vehicle. If the tempera-
ture reading does not return to nor-
mal, turn the engine off immediately
and call for service. Refer to “If Your
Engine Overheats” in “What To Do In
Emergencies” for more information.
163
Page 174 of 316
CUSTOMER
PROGRAMMABLE
FEATURES — Uconnect
Touch™ SYSTEM 8.4
SETTINGS
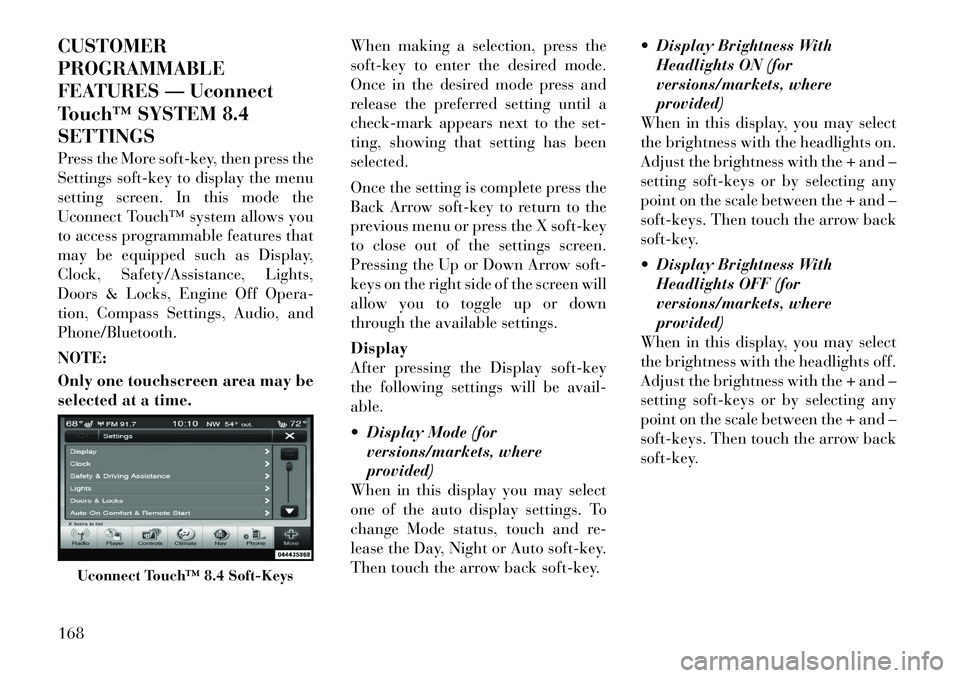
Press the More soft-key, then press the
Settings soft-key to display the menu
setting screen. In this mode the
Uconnect Touch™ system allows you
to access programmable features that
may be equipped such as Display,
Clock, Safety/Assistance, Lights,
Doors & Locks, Engine Off Opera-
tion, Compass Settings, Audio, and
Phone/Bluetooth.
NOTE:
Only one touchscreen area may be
selected at a time.When making a selection, press the
soft-key to enter the desired mode.
Once in the desired mode press and
release the preferred setting until a
check-mark appears next to the set-
ting, showing that setting has been
selected.
Once the setting is complete press the
Back Arrow soft-key to return to the
previous menu or press the X soft-key
to close out of the settings screen.
Pressing the Up or Down Arrow soft-
keys on the right side of the screen will
allow you to toggle up or down
through the available settings.
Display
After pressing the Display soft-key
the following settings will be avail-
able.
Display Mode (for
versions/markets, where
provided)
When in this display you may select
one of the auto display settings. To
change Mode status, touch and re-
lease the Day, Night or Auto soft-key.
Then touch the arrow back soft-key. Display Brightness With
Headlights ON (for
versions/markets, where
provided)
When in this display, you may select
the brightness with the headlights on.
Adjust the brightness with the + and –
setting soft-keys or by selecting any
point on the scale between the + and –
soft-keys. Then touch the arrow back
soft-key.
Display Brightness With Headlights OFF (for
versions/markets, where
provided)
When in this display, you may select
the brightness with the headlights off.
Adjust the brightness with the + and –
setting soft-keys or by selecting any
point on the scale between the + and –
soft-keys. Then touch the arrow back
soft-key.
Uconnect Touch™ 8.4 Soft-Keys
168
Page 179 of 316
Headlights With Wipers (forversions/markets, where
provided)
When this feature is selected, and the
headlight switch is in the AUTO posi-
tion, the headlights will turn on ap-
proximately 10 seconds after the wip-
ers are turned on. The headlights will
also turn off when the wipers are
turned off if they were turned on by
this feature. To make your selection,
touch the Headlights With Wipers
soft-key, until a check-mark appears
next to setting, showing that setting
has been selected. Touch the back ar-
row soft-key to return to the previous
menu.
Auto Dim High Beams “SmartBeam™” (for
versions/markets, where
provided)
When this feature is selected, the high
beam headlights will deactivate auto-
matically under certain conditions. To
make your selection, touch the Auto
High Beams soft-key, until a check-
mark appears next to setting, showing
that setting has been selected. Touch
the back arrow soft-key to return to the previous menu. Refer to “Lights/
SmartBeam™ (for versions/markets,
where provided)” in “Understanding
The Features Of Your Vehicle” for
further information.
Daytime Running Lights (for
versions/markets, where
provided)
When this feature is selected, the
headlights will turn on whenever the
engine is running. To make your se-
lection, touch the Daytime Running
Lights soft-key, until a check-mark
appears next to setting, showing that
setting has been selected. Touch the
back arrow soft-key to return to the
previous menu.
Steering Directed Lights (for versions/markets, where
provided)
When this feature is selected, the
headlights turn relative to a change in
direction of the steering wheel. To
make your selection, touch the Steer-
ing Directed Lights soft-key, until a
check-mark appears next to setting,
showing that setting has been se-
lected. Touch the back arrow soft-key
to return to the previous menu. Doors & Locks
After pressing the Doors & Locks soft-
key the following settings will be
available.
Auto Unlock On Exit (for
versions/markets, where
provided)
When this feature is selected, all doors
will unlock when the vehicle is
stopped and the transmission is in the
PARK or NEUTRAL position and the
driver's door is opened. To make your
selection, touch the Auto Unlock On
Exit soft-key, until a check-mark ap-
pears next to setting, showing that
setting has been selected. Touch the
back arrow soft-key to return to the
previous menu.
1st Press Of Key Fob Unlocks (for versions/markets, where
provided)
When 1st Press Of Key Fob Unlocks is
selected, only the driver's door will
unlock on the first press of the Remote
Keyless Entry (RKE) transmitter UN-
LOCK button. When 1st Press Of Key
Fob Unlocks is selected, you must
press the RKE transmitter UNLOCK
button twice to unlock the passenger's
173
Page 180 of 316
doors. When Unlock All Doors On 1st
Press is selected, all of the doors will
unlock on the first press of the RKE
transmitter UNLOCK button.
NOTE:
If the vehicle is programmed 1st
Press Of Key Fob Unlocks, all
doors will unlock no matter which
Passive Entry equipped door
handle is grasped. If 1st Press Of
Key Fob Unlocks is programmed,
only the driver’s door will unlock
when the driver’s door is grasped.
With Passive Entry, if 1st Press Of
Key Fob Unlocks is programmed
touching the handle more than
once will only result in the driver’s
door opening. If driver door first is
selected, once the driver door is
opened, the interior door lock/
unlock switch can be used to un-
lock all doors (or use RKE trans-
mitter). Passive Entry (for
versions/markets, where
provided)
This feature allows you to lock and
unlock the vehicle’s door(s) without
having to press the Remote Keyless
Entry (RKE) transmitter lock or un-
lock buttons. To make your selection,
touch the Passive Entry soft-key, until
a check-mark appears next to setting,
showing that setting has been se-
lected. Touch the back arrow soft-key
to return to the previous menu. Refer
to “Keyless Enter-N-Go” in “Things
To Know Before Starting Your Ve-
hicle”.
Personal Settings Linked To FOB
(for versions/markets, where
provided)
This feature provides automatic
driver seat positioning to enhance
driver mobility when entering and ex-
iting the vehicle. To make your selec-
tion, touch the Memory Linked To
FOB soft-key, until a check-mark ap-
pears next to setting, showing that
setting has been selected. Touch the
back arrow soft-key to return to the
previous menu. NOTE:
The seat will return to the memo-
rized seat location (if Recall
Memory with Remote Key Unlock
is set to ON) when the Remote Key-
less Entry (RKE) transmitter is
used to unlock the door. Refer to
“Driver Memory Seat” in “Under-
standing The Features Of Your Ve-
hicle” for further information.
Engine Off Options
After pressing the Engine Off Options
soft-key the following settings will be
available.
Easy Exit Seat (for
versions/markets, where
provided)
This feature provides automatic
driver seat positioning to enhance
driver mobility when entering and ex-
iting the vehicle. To make your selec-
tion, touch the Easy Exit Seats soft-
key, until a check-mark appears next
to setting, showing that setting has
been selected. Touch the back arrow
soft-key to return to the previous
menu.
174
Page 203 of 316
WARNING!
Never use the PARK position as asubstitute for the parking brake.
Always apply the parking brake
fully when parked to guard
against vehicle movement and
possible injury or damage.
Your vehicle could move and in-
jure you and others if it is not in
PARK. Check by trying to move
the shift lever out of PARK with
the brake pedal released. Make
sure the transmission is in PARK
before leaving the vehicle.
It is dangerous to move the shift
lever out of PARK or NEUTRAL if
the engine speed is higher than
idle speed. If your foot is not
firmly pressing the brake pedal,
the vehicle could accelerate
quickly forward or in reverse. You
could lose control of the vehicle
and hit someone or something.
Only shift into gear when the en-
gine is idling normally and when
your foot is firmly pressing the
brake pedal.
(Continued)
WARNING!(Continued)
Unintended movement of a ve-
hicle could injure those in or near
the vehicle. As with all vehicles,
you should never exit a vehicle
while the engine is running. Be-
fore exiting a vehicle, always ap-
ply the parking brake, shift the
transmission into PARK, and turn
the engine off. When the ignition
is in the OFF position, the shift
lever is locked in PARK, securing
the vehicle against unwanted
movement.
When leaving the vehicle, always
remove the key fob and lock your
vehicle.
Never leave children alone in a
vehicle, or with access to an un-
locked vehicle. Allowing children
to be in a vehicle unattended is
dangerous for a number of rea-
sons. A child or others could be
seriously or fatally injured. Chil-
dren should be warned not to
touch the parking brake, brake
pedal or the shift lever.
(Continued)
WARNING!(Continued)
Do not leave the key fob in or near
the vehicle, and do not leave Key-
less Enter-N-Go in the ACC or
ON/RUN mode. A child could op-
erate power windows, other con-
trols, or move the vehicle.CAUTION!
Before moving the shift lever outof PARK, you must turn the igni-
tion switch from the LOCK/OFF
position to the ON/RUN position,
and also press the brake pedal.
Otherwise, damage to the shift le-
ver could result.
DO NOT race the engine when
shifting from PARK or NEUTRAL
into another gear range, as this
can damage the drivetrain.
The following indicators should be
used to ensure that you have engaged
the shift lever into the PARK position:
When shifting into PARK, press the lock button on the shift lever and
push the lever all the way forward
197
Page 206 of 316

GEAR RANGES
DO NOT race the engine when shift-
ing from PARK or NEUTRAL into
another gear range.
PARK
This range supplements the parking
brake by locking the transmission.
The engine can be started in this
range. Never attempt to use PARK
while the vehicle is in motion. Apply
the parking brake when leaving the
vehicle in this range.
When parking on a level surface, you
may place the shift lever in the PARK
position first, and then apply the
parking brake.
When parking on a hill, apply the
parking brake before placing the shift
lever in PARK, otherwise the load on
the transmission locking mechanism
may make it difficult to move the shift
lever out of PARK. As an added pre-
caution, turn the front wheels toward
the curb on a downhill grade and
away from the curb on an uphill
grade.
WARNING!
Never use the PARK position as asubstitute for the parking brake.
Always apply the parking brake
fully when parked to guard
against vehicle movement and
possible injury or damage.
Your vehicle could move and injure
you and others if it is not com-
pletely in PARK. Check by trying to
move the shift lever rearward (with
the brake pedal released), after you
have placed it in PARK. Make sure
the transmission is in PARK before
leaving the vehicle.It is dangerous to move the shift
lever out of PARK or NEUTRAL if
the engine speed is higher than idle
speed. If your foot is not firmly
pressing the brake pedal, the ve-
hicle could accelerate quickly for-
ward or in reverse. You could lose
control of the vehicle and hit some-
one or something. Only shift into
gear when the engine is idling nor-
mally and when your foot is firmly
pressing the brake pedal.
(Continued)
WARNING! (Continued)
Unintended movement of a ve-
hicle could injure those in or near
the vehicle. As with all vehicles,
you should never exit a vehicle
while the engine is running. Be-
fore exiting a vehicle, always ap-
ply the parking brake, shift the
transmission into PARK, and turn
the engine off. When the ignition
is in the OFF position, the shift
lever is locked in the PARK, secur-
ing the vehicle against unwanted
movement.
When leaving the vehicle, always
remove the key fob and lock your
vehicle.
Never leave children alone in a
vehicle, or with access to an un-
locked vehicle. Allowing children
to be in a vehicle unattended is
dangerous for a number of rea-
sons. A child or others could be
seriously or fatally injured. Chil-
dren should be warned not to
touch the parking brake, brake
pedal or the shift lever.
(Continued)
200
Page 211 of 316

SHALLOW STANDING
WATER
Although your vehicle is capable of
driving through shallow standing wa-
ter, consider the following Caution
and Warning before doing so.CAUTION!
Always check the depth of thestanding water before driving
through it. Never drive through
standing water that is deeper than
the bottom of the tire rims
mounted on the vehicle.
Determine the condition of the
road or the path that is under
water and if there are any ob-
stacles in the way before driving
through the standing water.
Do not exceed 8 km/h when driv-
ing through standing water. This
will minimize wave effects.
(Continued)
CAUTION!(Continued)
Driving through standing water
may cause damage to your vehi-
cle’s drivetrain components. Al-
ways inspect your vehicle’s fluids
(i.e., engine oil, transmission,
axle, etc.) for signs of contamina-
tion (i.e., fluid that is milky or
foamy in appearance) after driv-
ing through standing water. Do
not continue to operate the vehicle
if any fluid appears contami-
nated, as this may result in further
damage. Such damage is not cov-
ered by the New Vehicle Limited
Warranty.
Getting water inside your vehi-
cle’s engine can cause it to lock up
and stall out, and cause serious
internal damage to the engine.
Such damage is not covered by the
New Vehicle Limited Warranty.
WARNING!
Driving through standing waterlimits your vehicle’s traction ca-
pabilities. Do not exceed 8 km/h
when driving through standing
water.
Driving through standing water
limits your vehicle’s braking ca-
pabilities, which increases stop-
ping distances. Therefore, after
driving through standing water,
drive slowly and lightly press on
the brake pedal several times to
dry the brakes.
Getting water inside your vehi-
cle’s engine can cause it to lock up
and stall out, and leave you
stranded.
Failure to follow these warnings
may result in injuries that are se-
rious or fatal to you, your passen-
gers, and others around you.
205
Page 220 of 316

engine running. If this should occur,
turn the steering wheel completely to
the left and then to the right. The “ESC
Activation/Malfunction Indicator
Light” should go out. However, if the
light remains on, have the ESC and BAS
checked at your authorized dealer as
soon as possible.TIRES — GENERAL
INFORMATION
TIRE PRESSURE
Proper tire inflation pressure is essen-
tial to the safe and satisfactory opera-
tion of your vehicle. Three primary
areas are affected by improper tire
pressure:
SafetyWARNING!
Improperly inflated tires are dan-gerous and can cause collisions.
Under-inflation increases tire
flexing and can result in tire over-
heating and failure.
(Continued)
WARNING!(Continued)
Over-inflation reduces a tir e's
ability to cushion shock. Objects
on the road and chuckholes can
cause damage that result in tire
failure.
Over -inflated or under-inflated
tires can affect vehicle handling
and can fail suddenly, resulting in
loss of vehicle control.
Unequal tire pressures can cause
steering problems. You could lose
control of your vehicle.
Unequal tire pressures from one
side of the vehicle to the other can
cause the vehicle to drift to the
right or left.
Always drive with each tire in-
flated to the recommended cold
tire inflation pressure.
Economy
Improper inflation pressures can
cause uneven wear patterns to de-
velop across the tire tread. These ab-
normal wear patterns will reduce
tread life resulting in a need for earlier
tire replacement. Under-inflation also
increases tire rolling resistance result-
ing in higher fuel consumption. Ride Comfort And Vehicle
Stability
Proper tire inflation contributes to a
comfortable ride. Over-inflation pro-
duces a jarring and uncomfortable
ride.
TIRE INFLATION
PRESSURES
The proper cold tire inflation pressure
is listed on the
driver's side “B” Pillar
or rear edge of the driver's side door.
Some vehicles may have Supplemen-
tal Tire Pressure Information for ve-
hicle loads that are less than the maxi-
mum loaded vehicle condition. These
pressure conditions will be found in
the “Supplemental Tire Pressure In-
formation” section of this manual.
The pressure should be checked and
adjusted as well as inspecting for signs
of tire wear or visible damage at least
once a month. Use a good quality
pocket-type gauge to check tire pres-
sure. Do not make a visual judgement
when determining proper inflation.
Radial tires may look properly in-
flated even when they are under-
inflated.
214