2012 KIA Sportage lock
[x] Cancel search: lockPage 117 of 387
427
Features of your vehicle
D090200AAM
Closing the hood
1. Before closing the hood, check the fol-lowing:
ment must be correctly installed.
bustible material must be removed
from the engine compartment.
2. Return the support rod to its clip to prevent it from rattling.
3. Lower the hood until it is about 30 cm (1 ft.) above the closed position and let
it drop. Make sure that it locks into
place.WARNING
Before closing the hood, ensurethat all obstructions are removed
from the hood opening. Closing
the hood with an obstruction
present in the hood opening may
result in property damage or
severe personal injury.
Do not leave gloves, rags or any other combustible material in the
engine compartment. Doing so
may cause a heat-induced fire.
WARNING
Always double check to be surethat the hood is firmly latched
before driving away. If it is not
latched, the hood could open
while the vehicle is being driven,
causing total loss of visibility,
which might result in an accident.
The support rod must be inserted completely into the hole provided
whenever you inspect the engine
compartment. This will prevent
the hood from falling and possi-
bly injuring you.
Do not move the vehicle with the hood raised. The view will be
blocked and the hood could fall
or get damaged.
Page 118 of 387
Features of your vehicle
28
4
D100100AAM
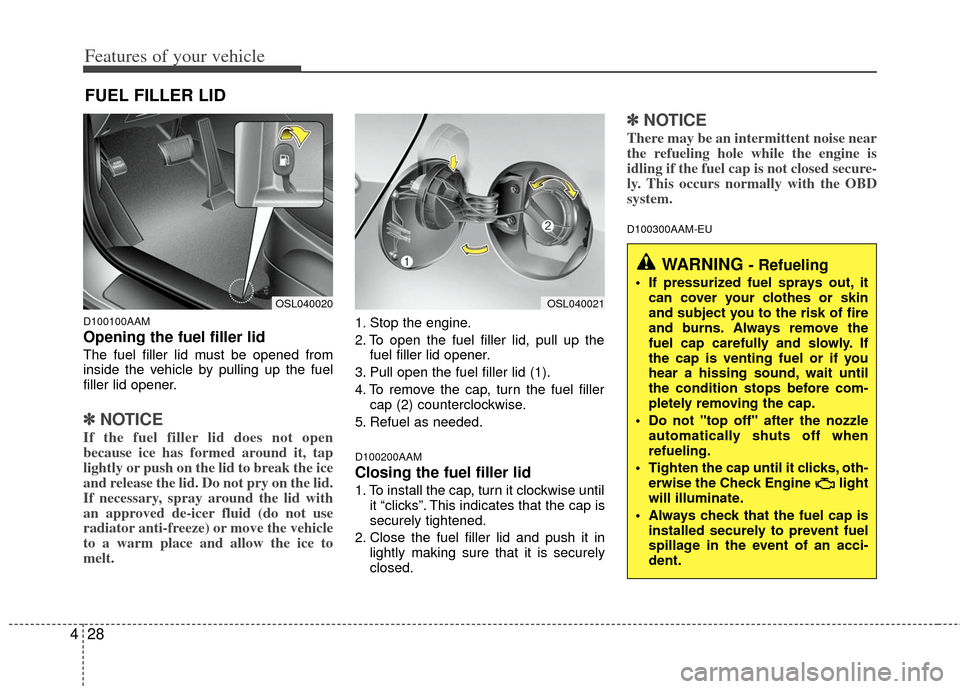
Opening the fuel filler lid
The fuel filler lid must be opened from
inside the vehicle by pulling up the fuel
filler lid opener.
✽ ✽
NOTICE
If the fuel filler lid does not open
because ice has formed around it, tap
lightly or push on the lid to break the ice
and release the lid. Do not pry on the lid.
If necessary, spray around the lid with
an approved de-icer fluid (do not use
radiator anti-freeze) or move the vehicle
to a warm place and allow the ice to
melt.
1. Stop the engine.
2. To open the fuel filler lid, pull up the
fuel filler lid opener.
3. Pull open the fuel filler lid (1).
4. To remove the cap, turn the fuel filler cap (2) counterclockwise.
5. Refuel as needed.
D100200AAM
Closing the fuel filler lid
1. To install the cap, turn it clockwise until it “clicks”. This indicates that the cap is
securely tightened.
2. Close the fuel filler lid and push it in lightly making sure that it is securely
closed.
✽ ✽NOTICE
There may be an intermittent noise near
the refueling hole while the engine is
idling if the fuel cap is not closed secure-
ly. This occurs normally with the OBD
system.
D100300AAM-EU
FUEL FILLER LID
WARNING - Refueling
If pressurized fuel sprays out, it
can cover your clothes or skin
and subject you to the risk of fire
and burns. Always remove the
fuel cap carefully and slowly. If
the cap is venting fuel or if you
hear a hissing sound, wait until
the condition stops before com-
pletely removing the cap.
Do not "top off" after the nozzle automatically shuts off when
refueling.
Tighten the cap until it clicks, oth- erwise the Check Engine light
will illuminate.
Always check that the fuel cap is installed securely to prevent fuel
spillage in the event of an acci-
dent.
OSL040020OSL040021
Page 124 of 387
Features of your vehicle
34
4
Electric power steering
Power steering uses the motor to assist
you in steering the vehicle. If the engine
is off or if the power steering system
becomes inoperative, the vehicle may
still be steered, but it will require
increased steering effort.
The motor driven power steering is con-
trolled by the power steering control unit
which senses the steering wheel torque
and vehicle speed to command the
motor.
The steering wheel becomes heavier as
the vehicle’s speed increases and
becomes lighter as the vehicle’s speed
decreases for better control of the steer-
ing wheel.
Should you notice any change in the
effort required to steer during normal
vehicle operation, have the power steer-
ing checked by an authorized Kia dealer.
✽ ✽
NOTICE
The following symptoms may occur dur-
ing normal vehicle operation:
• The EPS warning light does not illu-
minate.
• The steering effort is high immediate- ly after turning the ignition switch on.
This happens as the system performs
the EPS system diagnostics. When the
diagnostics is completed, the steering
wheel will return to its normal condi-
tion.
• A click noise may be heard from the EPS relay after the ignition switch is
turned to the ON or LOCK position.
• Motor noise may be heard when the vehicle is at a stop or at a low driving
speed.
• The steering effort can suddenly increase, if the operation of the EPS
system is stopped to prevent serious
accidents when it detects malfunction
of the EPS system by self-diagnosis.
• The steering effort increases if the steering wheel is rotated continuously
when the vehicle is not in motion.
However, after a few minutes, it will
return to its normal conditions.
• When you operate the steering wheel in low temperature, abnormal noise
could occur. If temperature rises, the
noise will disappear. This is a normal
condition.
STEERING WHEEL
CAUTION
If the EPS system does not operate
normally, the warning light will illu-minate on the instrument cluster. The steering wheel may becomedifficult to control or operate abnor-mally. Take your vehicle to an authorized Kia dealer and have thevehicle checked as soon as possi- ble.
Page 125 of 387
435
Features of your vehicle
D130300AUN
Tilt steering/
Telescope steering (if equipped)
Tilt steering allows you to adjust the
steering wheel before you drive.
You can also raise the steering wheel to
give your legs more room when you exit
and enter the vehicle (if equipped).
The steering wheel should be positioned
so that it is comfortable for you to drive,
while permitting you to see the instru-
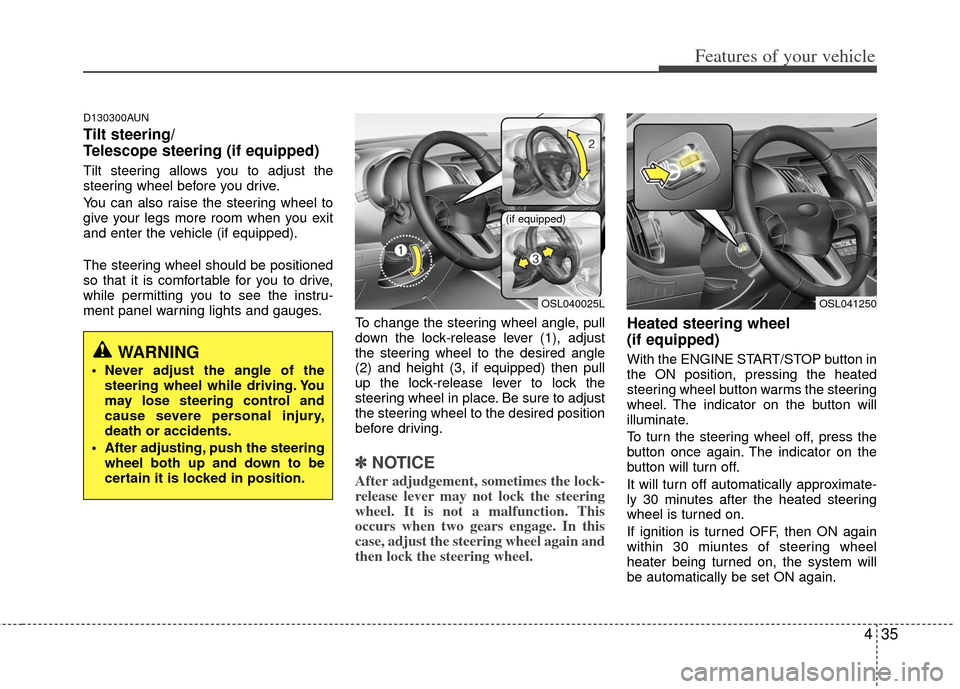
ment panel warning lights and gauges.To change the steering wheel angle, pull
down the lock-release lever (1), adjust
the steering wheel to the desired angle
(2) and height (3, if equipped) then pull
up the lock-release lever to lock the
steering wheel in place. Be sure to adjust
the steering wheel to the desired position
before driving.
✽ ✽NOTICE
After adjudgement, sometimes the lock-
release lever may not lock the steering
wheel. It is not a malfunction. This
occurs when two gears engage. In this
case, adjust the steering wheel again and
then lock the steering wheel.
Heated steering wheel
(if equipped)
With the ENGINE START/STOP button in
the ON position, pressing the heated
steering wheel button warms the steering
wheel. The indicator on the button will
illuminate.
To turn the steering wheel off, press the
button once again. The indicator on the
button will turn off.
It will turn off automatically approximate-
ly 30 minutes after the heated steering
wheel is turned on.
If ignition is turned OFF, then ON again
within 30 miuntes of steering wheel
heater being turned on, the system will
be automatically be set ON again.WARNING
Never adjust the angle of the
steering wheel while driving. You
may lose steering control and
cause severe personal injury,
death or accidents.
After adjusting, push the steering wheel both up and down to be
certain it is locked in position.
OSL040025L
(if equipped)
OSL041250
Page 131 of 387
441
Features of your vehicle
Rolling code programming
To train a garage door opener (or other
rolling code equipped devices) with the
rolling code feature, follow these instruc-
tions after completing the “Programming”
portion of this text. (A second person
may make the following training proce-
dures quicker & easier.)
4. Locate the “learn” or “smart” button onthe device’s motor head unit. Exact
location and color of the button may
vary by product brand. If there is diffi-
culty locating the “learn” or “smart” but-
ton, reference the device’s owner’s
manual or contact HomeLink at 1-800-
355-3515 or on the internet at
www.homelink.com.
5. Press and release the “learn” or “smart” button on the device’s motor
head unit. You have 30 seconds to
complete step number 6.
6. Return to the vehicle and firmly press and release the programmed
HomeLink button up to three times.
The rolling code equipped device
should now recognize the HomeLink
signal and activate when the
HomeLink button is pressed. The
remaining two buttons may now be
programmed if this has not previously
been done. Refer to the
“Programming” portion of this text. Operating HomeLink
To operate, simply press the pro-
grammed HomeLink button. Activation
will now occur for the trained product
(garage door, security system, entry door
lock, estate gate, or home or office light-
ing). For convenience, the hand-held
transmitter of the device may also be
used at any time. The HomeLink
Wireless Controls System (once pro-
grammed) or the original hand-held
transmitter may be used to activate the
device (e.g. garage door, entry door lock,
etc.). In the event that there are still pro-
gramming difficulties, contact HomeLink
at 1-800-355-3515 or on the internet at
www.homelink.com.
Erasing programmed HomeLink but-
tons
To erase the three programmed buttons
(individual buttons cannot be erased):
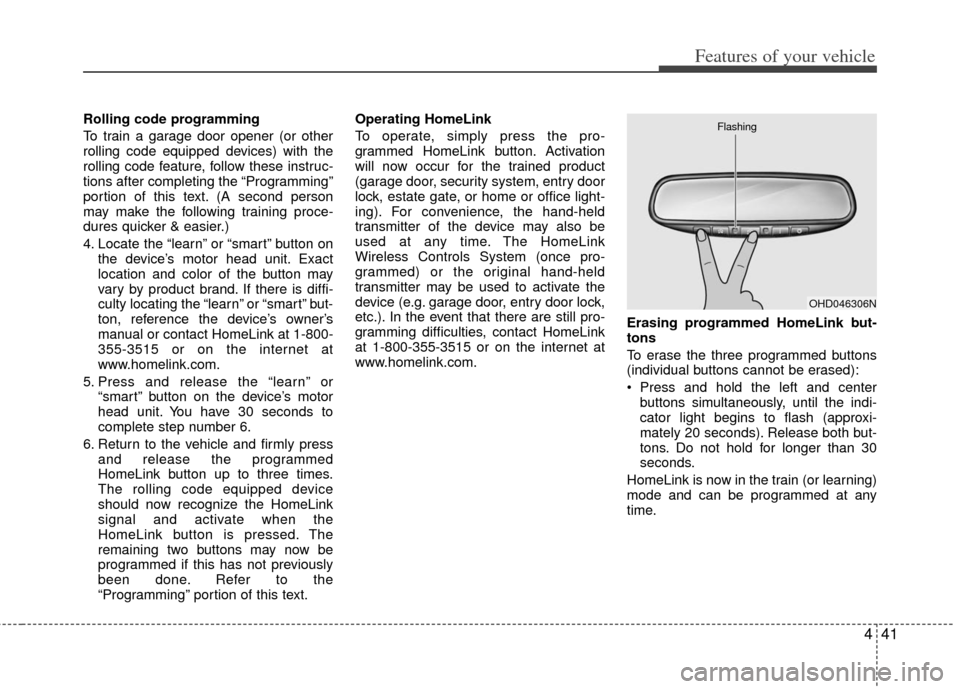
Press and hold the left and center
buttons simultaneously, until the indi-
cator light begins to flash (approxi-
mately 20 seconds). Release both but-
tons. Do not hold for longer than 30
seconds.
HomeLink is now in the train (or learning)
mode and can be programmed at any
time.
OHD046306N
Flashing
Page 144 of 387
Features of your vehicle
54
4
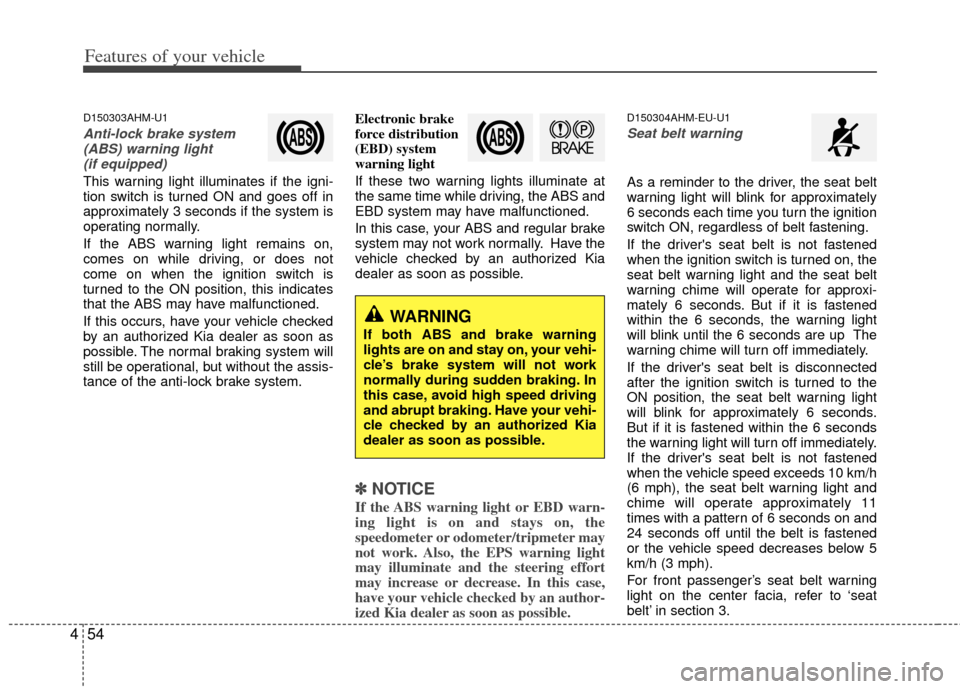
D150303AHM-U1
Anti-lock brake system
(ABS) warning light (if equipped)
This warning light illuminates if the igni-
tion switch is turned ON and goes off in
approximately 3 seconds if the system is
operating normally.
If the ABS warning light remains on,
comes on while driving, or does not
come on when the ignition switch is
turned to the ON position, this indicates
that the ABS may have malfunctioned.
If this occurs, have your vehicle checked
by an authorized Kia dealer as soon as
possible. The normal braking system will
still be operational, but without the assis-
tance of the anti-lock brake system. Electronic brake
force distribution
(EBD) system
warning light
If these two warning lights illuminate at
the same time while driving, the ABS and
EBD system may have malfunctioned.
In this case, your ABS and regular brake
system may not work normally. Have the
vehicle checked by an authorized Kia
dealer as soon as possible.
✽ ✽
NOTICE
If the ABS warning light or EBD warn-
ing light is on and stays on, the
speedometer or odometer/tripmeter may
not work. Also, the EPS warning light
may illuminate and the steering effort
may increase or decrease. In this case,
have your vehicle checked by an author-
ized Kia dealer as soon as possible.
D150304AHM-EU-U1
Seat belt warning
As a reminder to the driver, the seat belt
warning light will blink for approximately
6 seconds each time you turn the ignition
switch ON, regardless of belt fastening.
If the driver's seat belt is not fastened
when the ignition switch is turned on, the
seat belt warning light and the seat belt
warning chime will operate for approxi-
mately 6 seconds. But if it is fastened
within the 6 seconds, the warning light
will blink until the 6 seconds are up The
warning chime will turn off immediately.
If the driver's seat belt is disconnected
after the ignition switch is turned to the
ON position, the seat belt warning light
will blink for approximately 6 seconds.
But if it is fastened within the 6 seconds
the warning light will turn off immediately.
If the driver's seat belt is not fastened
when the vehicle speed exceeds 10 km/h
(6 mph), the seat belt warning light and
chime will operate approximately 11
times with a pattern of 6 seconds on and
24 seconds off until the belt is fastened
or the vehicle speed decreases below 5
km/h (3 mph).
For front passenger’s seat belt warning
light on the center facia, refer to ‘seat
belt’ in section 3.
WARNING
If both ABS and brake warning
lights are on and stay on, your vehi-
cle’s brake system will not work
normally during sudden braking. In
this case, avoid high speed driving
and abrupt braking. Have your vehi-
cle checked by an authorized Kia
dealer as soon as possible.
Page 150 of 387
Features of your vehicle
60
4
D150325AAM
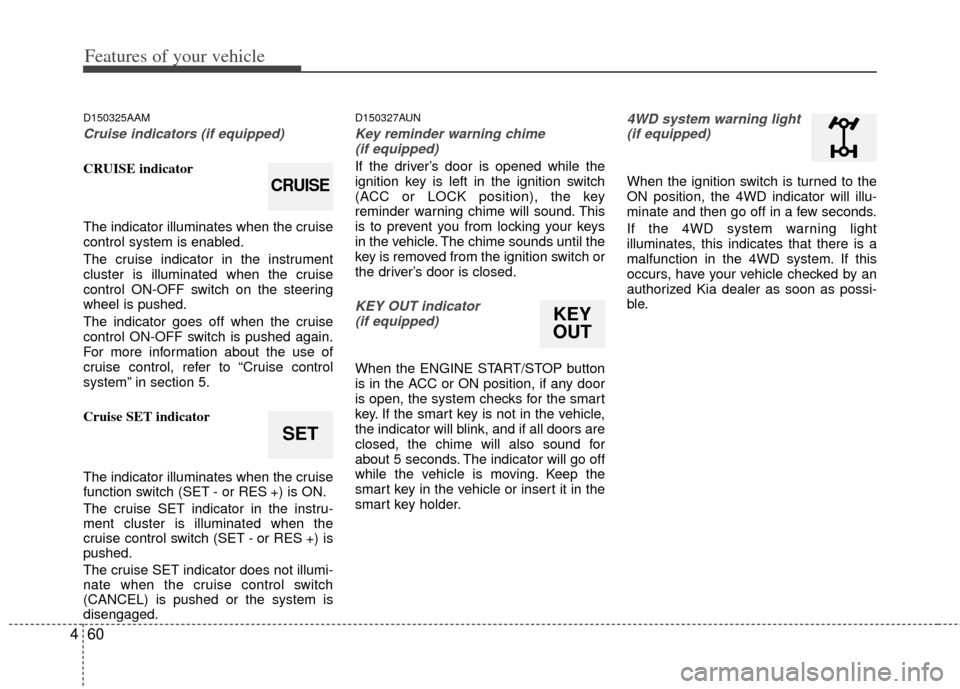
Cruise indicators (if equipped)
CRUISE indicator
The indicator illuminates when the cruise
control system is enabled.
The cruise indicator in the instrument
cluster is illuminated when the cruise
control ON-OFF switch on the steering
wheel is pushed.
The indicator goes off when the cruise
control ON-OFF switch is pushed again.
For more information about the use of
cruise control, refer to “Cruise control
system” in section 5.
Cruise SET indicator
The indicator illuminates when the cruise
function switch (SET - or RES +) is ON.
The cruise SET indicator in the instru-
ment cluster is illuminated when the
cruise control switch (SET - or RES +) is
pushed.
The cruise SET indicator does not illumi-
nate when the cruise control switch
(CANCEL) is pushed or the system is
disengaged.
D150327AUN
Key reminder warning chime
(if equipped)
If the driver’s door is opened while the
ignition key is left in the ignition switch
(ACC or LOCK position), the key
reminder warning chime will sound. This
is to prevent you from locking your keys
in the vehicle. The chime sounds until the
key is removed from the ignition switch or
the driver’s door is closed.
KEY OUT indicator (if equipped)
When the ENGINE START/STOP button
is in the ACC or ON position, if any door
is open, the system checks for the smart
key. If the smart key is not in the vehicle,
the indicator will blink, and if all doors are
closed, the chime will also sound for
about 5 seconds. The indicator will go off
while the vehicle is moving. Keep the
smart key in the vehicle or insert it in the
smart key holder.
4WD system warning light(if equipped)
When the ignition switch is turned to the
ON position, the 4WD indicator will illu-
minate and then go off in a few seconds.
If the 4WD system warning light
illuminates, this indicates that there is a
malfunction in the 4WD system. If this
occurs, have your vehicle checked by an
authorized Kia dealer as soon as possi-
ble.
SET
CRUISE
KEY
OUT
Page 151 of 387
461
Features of your vehicle
4WD LOCK indicator (if equipped)
The 4WD LOCK indicator light is illumi-
nated when the 4WD LOCK button is
pushed. The purpose of this 4WD LOCK
mode is to increase the drive power
when driving on wet pavement, snow-
covered roads and/or off-road. The 4WD
LOCK indicator light is turned off by
pushing the button again.
LCD display warning (if equipped)
Key not in vehicle
If the smart key is not in the vehicle and
if any door is opened or closed with the
ENGINE START/STOP button in the
ACC, ON, or START position, the warn-
ing illuminates on the LCD display. Also,
the chime sounds for 5 seconds when
the smart key is not in the vehicle and the
door is closed.
Always have the smart key with you.
Key not detected
If the smart key is not in the vehicle or is
not detected and you press the ENGINE
START/STOP button, the warning illumi-
nates on the LCD display for 10 seconds.
Also, the immobilizer indicator and the
key holder light blinks for 10 seconds.
Low key battery
If the ENGINE START/STOP button turns
to the OFF position when the smart key
in the vehicle discharges, the warning
illuminates on the LCD display for about
10 seconds. Also, the warning chime
sounds once.
Replace the battery with a new one. Press brake pedal to start engine
If the ENGINE START/STOP button turns
to the ACC position twice by pressing the
button repeatedly without depressing the
brake pedal, the warning illuminates on
the LCD display for about 10 seconds to
indicate that you should depress the
brake pedal to start the engine.
Press cluch pedal to start engine
If the ENGINE START/STOP button turns
to the ACC position twice by pressing the
button repeatedly without depressing the
clutch pedal, the warning illuminates on
the LCD display for about 10 seconds to
indicate that you should depress the
clutch pedal to start the engine.
Remove key
When you turn off the engine with the
smart key in the smart key holder, the
warning illuminates on the LCD display
for about 10 seconds. Also, the smart key
holder light blinks for about 10 seconds.
To remove the smart key push the smart
key once and pull it out from the smart
key holder.
CAUTION
Do not use 4WD LOCK mode on dry
paved roads or highway, it cancause noise, vibration or damage of4WD related parts.