2012 KIA Sportage air condition
[x] Cancel search: air conditionPage 85 of 387
363
Safety features of your vehicle
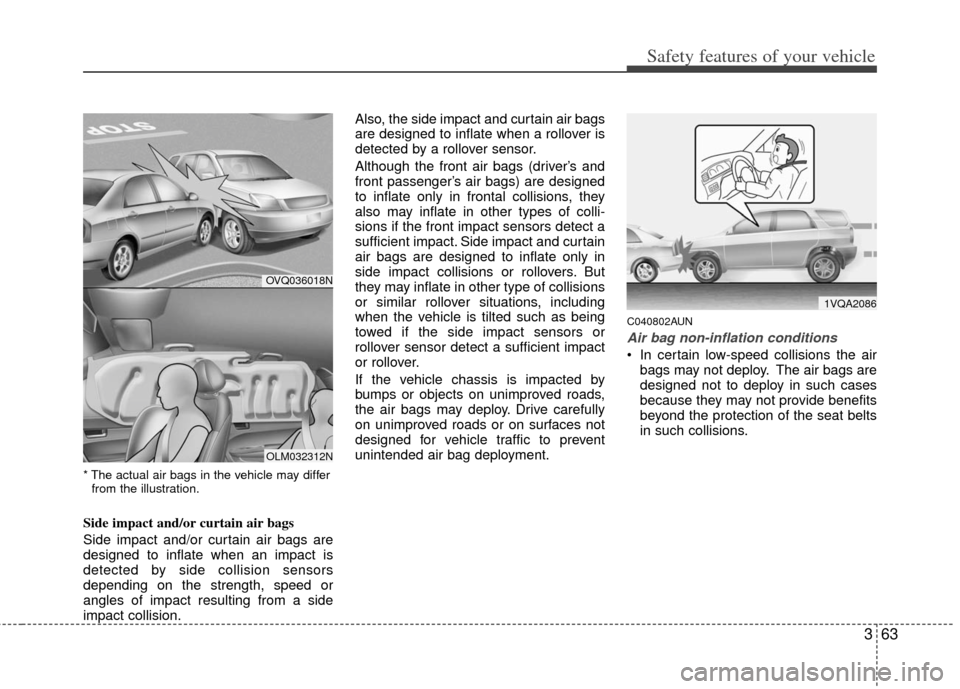
* The actual air bags in the vehicle may differfrom the illustration.
Side impact and/or curtain air bags
Side impact and/or curtain air bags are
designed to inflate when an impact is
detected by side collision sensors
depending on the strength, speed or
angles of impact resulting from a side
impact collision. Also, the side impact and curtain air bags
are designed to inflate when a rollover is
detected by a rollover sensor.
Although the front air bags (driver’s and
front passenger’s air bags) are designed
to inflate only in frontal collisions, they
also may inflate in other types of colli-
sions if the front impact sensors detect a
sufficient impact. Side impact and curtain
air bags are designed to inflate only in
side impact collisions or rollovers. But
they may inflate in other type of collisions
or similar rollover situations, including
when the vehicle is tilted such as being
towed if the side impact sensors or
rollover sensor detect a sufficient impact
or rollover.
If the vehicle chassis is impacted by
bumps or objects on unimproved roads,
the air bags may deploy. Drive carefully
on unimproved roads or on surfaces not
designed for vehicle traffic to prevent
unintended air bag deployment.
C040802AUN
Air bag non-inflation conditions
In certain low-speed collisions the air
bags may not deploy. The air bags are
designed not to deploy in such cases
because they may not provide benefits
beyond the protection of the seat belts
in such collisions.
1VQA2086
OVQ036018N
OLM032312N
Page 97 of 387
47
Features of your vehicle
D020200AAM-EU
Transmitter precautions
✽
✽NOTICE
The transmitter will not work if any of
the following occurs:
• The ignition key is in the ignition
switch.
• You exceed the operating distance limit (10 m [about 30 feet]).
• The battery in the transmitter is weak.
• Other vehicles or objects may be blocking the signal.
• The weather is extremely cold.
• The transmitter is close to a radio transmitter such as a radio station or
an airport which can interfere with
normal operation of the transmitter.
When the transmitter does not work
properly, open and close the door with
the ignition key. If you have a problem
with the transmitter, contact an author-
ized Kia dealer.
This device complies with Industry
Canada Standard RSS-210.
Operation is subject to the following two
conditions:
1. This device may not cause harmful
interference, and
2. This device must accept any interfer- ence received, including interference
that may cause undesired operation.
D020300AHM
Battery replacement
A transmitter uses a 3 volt lithium battery
which will normally last for several years.
When replacement is necessary, use the
following procedure.
1. Insert a slim tool into the slot and gen-tly pry open the transmitter center
cover.
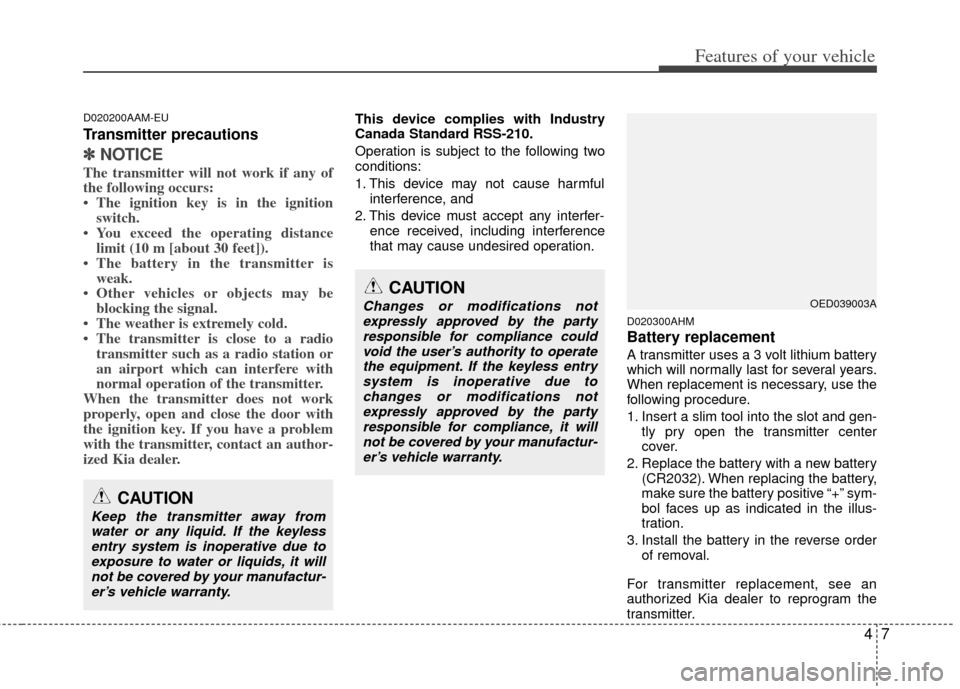
2. Replace the battery with a new battery (CR2032). When replacing the battery,
make sure the battery positive “+” sym-
bol faces up as indicated in the illus-
tration.
3. Install the battery in the reverse order of removal.
For transmitter replacement, see an
authorized Kia dealer to reprogram the
transmitter.
CAUTION
Changes or modifications not expressly approved by the party responsible for compliance couldvoid the user’s authority to operatethe equipment. If the keyless entry system is inoperative due tochanges or modifications not expressly approved by the partyresponsible for compliance, it willnot be covered by your manufactur- er’s vehicle warranty.
CAUTION
Keep the transmitter away fromwater or any liquid. If the keylessentry system is inoperative due toexposure to water or liquids, it willnot be covered by your manufactur- er’s vehicle warranty.
OED039003A
Page 101 of 387
411
Features of your vehicle
D040103AHM
Tailgate unlocking
If you are within 0.7~1 m (28~40 in.) from
the outside tailgate handle, with your
smart key in possession, the tailgate will
unlock and open when you press the tail-
gate handle switch.
The hazard warning lights will blink twice
to indicate that the tailgate is unlocked.
Also, once the tailgate is opened and
then closed, the tailgate will lock auto-
matically.
D040104AHM
Start-up
You can start the engine without inserting
the key. For detailed information refer to
“Starting the engine with a smart key” in
section 5.
D040300AHM
Smart key precautions
✽ ✽NOTICE
• If, for some reason, you happen to lose
your smart key, you will not be able to
start the engine. Tow the vehicle, if
necessary, and contact an authorized
Kia dealer.
• A maximum of 2 smart keys can be registered to a single vehicle. If you
lose a smart key, you should immedi-
ately take the vehicle and key to your
authorized Kia dealer to protect it
from potential theft.
• The smart key will not work if any of the following occurs:
- The smart key is close to a radiotransmitter such as a radio station or
an airport which can interfere with
normal operation of the smart key.
- The smart key is near a mobile two- way radio system or a cellular
phone.
- Another vehicle’s smart key is being operated close to your vehicle.
When the smart key does not work
properly, open and close the door with
the mechanical key. If you have a
problem with the smart key, contact
an authorized Kia dealer.
This device complies with Industry
Canada Standard RSS-210.
Operation is subject to the following two
conditions:
1. This device may not cause harmful
interference, and
2. This device must accept any interfer- ence received, including interference
that may cause undesired operation.
CAUTION
Keep the smart key away fromwater or any liquid. If the keylessentry system is inoperative due to exposure to water or liquids, it willnot be covered by your manufactur-er’s vehicle warranty.
WARNING
Changes or modifications not
expressly approved by the party
responsible for compliance could
void the user's authority to operate
the equipment.
Page 127 of 387
437
Features of your vehicle
D140100AHM
Inside rearview mirror
Adjust the rearview mirror so that the
center view through the rear window is
seen. Make this adjustment before you
start driving.
D140101AHM
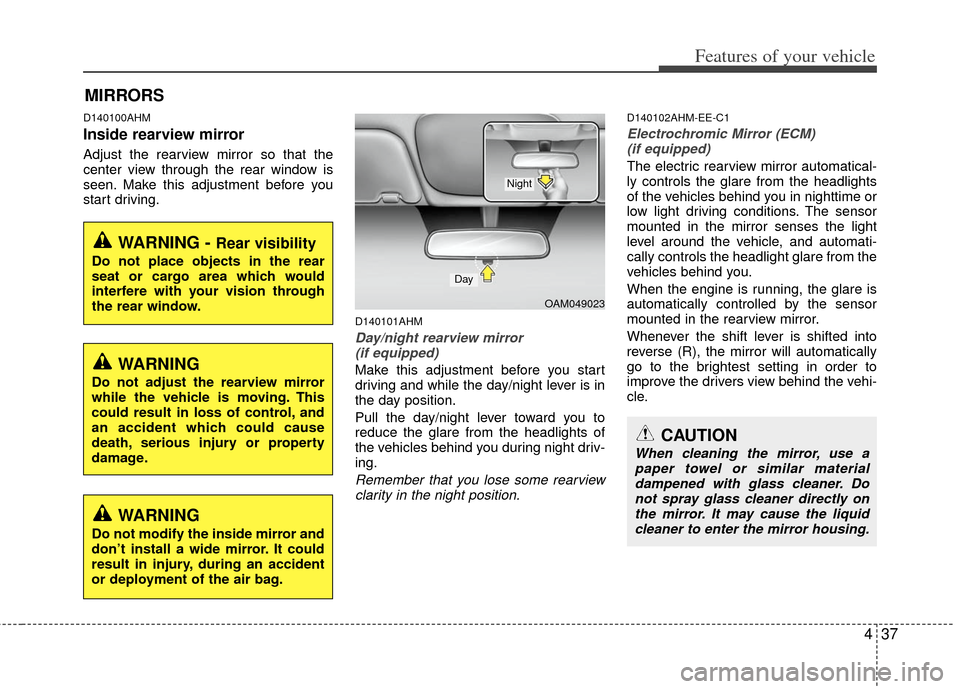
Day/night rearview mirror (if equipped)
Make this adjustment before you start
driving and while the day/night lever is in
the day position.
Pull the day/night lever toward you to
reduce the glare from the headlights of
the vehicles behind you during night driv-
ing.
Remember that you lose some rearviewclarity in the night position.
D140102AHM-EE-C1
Electrochromic Mirror (ECM) (if equipped)
The electric rearview mirror automatical-
ly controls the glare from the headlights
of the vehicles behind you in nighttime or
low light driving conditions. The sensor
mounted in the mirror senses the light
level around the vehicle, and automati-
cally controls the headlight glare from the
vehicles behind you.
When the engine is running, the glare is
automatically controlled by the sensor
mounted in the rearview mirror.
Whenever the shift lever is shifted into
reverse (R), the mirror will automatically
go to the brightest setting in order to
improve the drivers view behind the vehi-
cle.
MIRRORS
WARNING - Rear visibility
Do not place objects in the rear
seat or cargo area which would
interfere with your vision through
the rear window.
CAUTION
When cleaning the mirror, use apaper towel or similar materialdampened with glass cleaner. Donot spray glass cleaner directly on the mirror. It may cause the liquidcleaner to enter the mirror housing.
WARNING
Do not adjust the rearview mirror
while the vehicle is moving. This
could result in loss of control, and
an accident which could cause
death, serious injury or property
damage.
WARNING
Do not modify the inside mirror and
don’t install a wide mirror. It could
result in injury, during an accident
or deployment of the air bag.
OAM049023
Day
Night
Page 143 of 387
453
Features of your vehicle
D150301AAM-EU
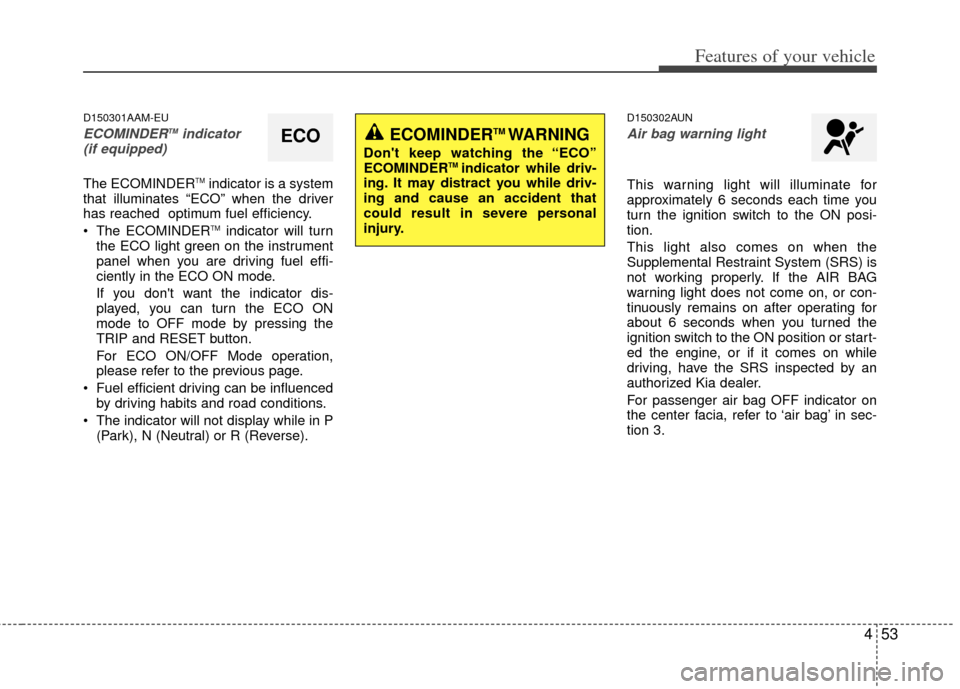
ECOMINDERTMindicator
(if equipped)
The ECOMINDERTMindicator is a system
that illuminates “ECO” when the driver
has reached optimum fuel efficiency.
The ECOMINDER
TMindicator will turn
the ECO light green on the instrument
panel when you are driving fuel effi-
ciently in the ECO ON mode.
If you don't want the indicator dis-
played, you can turn the ECO ON
mode to OFF mode by pressing the
TRIP and RESET button.
For ECO ON/OFF Mode operation,
please refer to the previous page.
Fuel efficient driving can be influenced by driving habits and road conditions.
The indicator will not display while in P (Park), N (Neutral) or R (Reverse).
D150302AUN
Air bag warning light
This warning light will illuminate for
approximately 6 seconds each time you
turn the ignition switch to the ON posi-
tion.
This light also comes on when the
Supplemental Restraint System (SRS) is
not working properly. If the AIR BAG
warning light does not come on, or con-
tinuously remains on after operating for
about 6 seconds when you turned the
ignition switch to the ON position or start-
ed the engine, or if it comes on while
driving, have the SRS inspected by an
authorized Kia dealer.
For passenger air bag OFF indicator on
the center facia, refer to ‘air bag’ in sec-
tion 3.
ECOECOMINDERTM WARNING
Don't keep watching the “ECO”
ECOMINDERTM indicator while driv-
ing. It may distract you while driv-
ing and cause an accident that
could result in severe personal
injury.
Page 154 of 387
Features of your vehicle
64
4
The sensing distance while the rear
parking assist system is in operation is
approximately 120 cm (47 in.).
When more than two objects are sensed at the same time, the closest
one will be recognized first.
Types of warning sound
When an object is 120 cm to 81 cm (47in. to 32 in.) from the rear bumper:
Buzzer beeps intermittently.
When an object is 80 cm to 41 cm (31 in. to 16 in.) from the rear bumper:
Buzzer beeps more frequently.
When an object is within 40 cm (15 in.) of the rear bumper:
Buzzer sounds continuously.
Non-operational conditions of
rear parking assist system
The rear parking assist system may
not operate properly when:
1. Moisture is frozen to the sensor. (It will operate normally when the moisture
has been cleared.)
2. The sensor is covered with foreign matter, such as snow or water, or the
sensor cover is blocked. (It will operate
normally when the material is removed
or the sensor is no longer blocked.)
3. Driving on uneven road surfaces (unpaved roads, gravel, bumps, gradi-
ent).
4. Objects generating excessive noise (vehicle horns, loud motorcycle
engines, or truck air brakes) are within
range of the sensor.
5. Heavy rain or water spray exists.
6. Wireless transmitters or mobile phones are within range of the sensor.
7. The sensor is covered with snow.
8. Trailer towing The detecting range may decrease
when:
1. The sensor is stained with foreign mat-
ter such as snow or water. (The sens-
ing range will return to normal when
removed.)
2. Outside air temperature is extremely hot or cold.
The following objects may not be rec-
ognized by the sensor:
1. Sharp or slim objects such as ropes, chains or small poles.
2. Objects which tend to absorb the sen- sor frequency such as clothes, spongy
material or snow.
3. Undetectable objects smaller than 1 m (40 in.) in height and narrower than 14
cm (6 in.) in diameter.
Page 170 of 387
Features of your vehicle
80
4
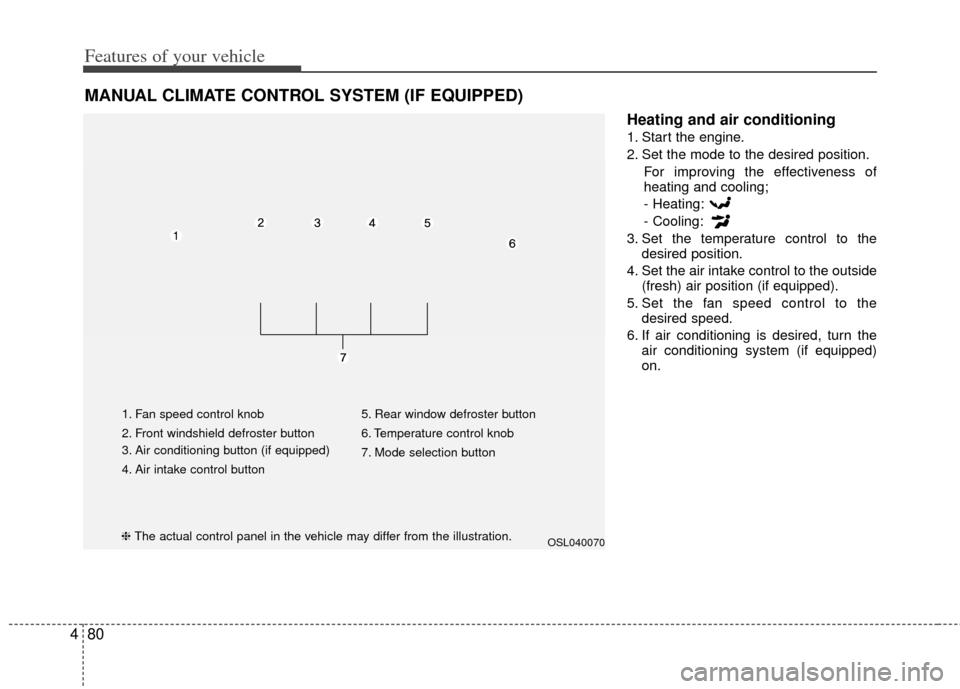
Heating and air conditioning
1. Start the engine.
2. Set the mode to the desired position.
For improving the effectiveness of
heating and cooling;
- Heating:
- Cooling:
3. Set the temperature control to the desired position.
4. Set the air intake control to the outside (fresh) air position (if equipped).
5. Set the fan speed control to the desired speed.
6. If air conditioning is desired, turn the air conditioning system (if equipped)
on.
MANUAL CLIMATE CONTROL SYSTEM (IF EQUIPPED)
OSL040070
1. Fan speed control knob
2. Front windshield defroster button
3. Air conditioning button (if equipped)
4. Air intake control button 5. Rear window defroster button
6. Temperature control knob
7. Mode selection button
❈
The actual control panel in the vehicle may differ from the illustration.
Page 173 of 387
483
Features of your vehicle
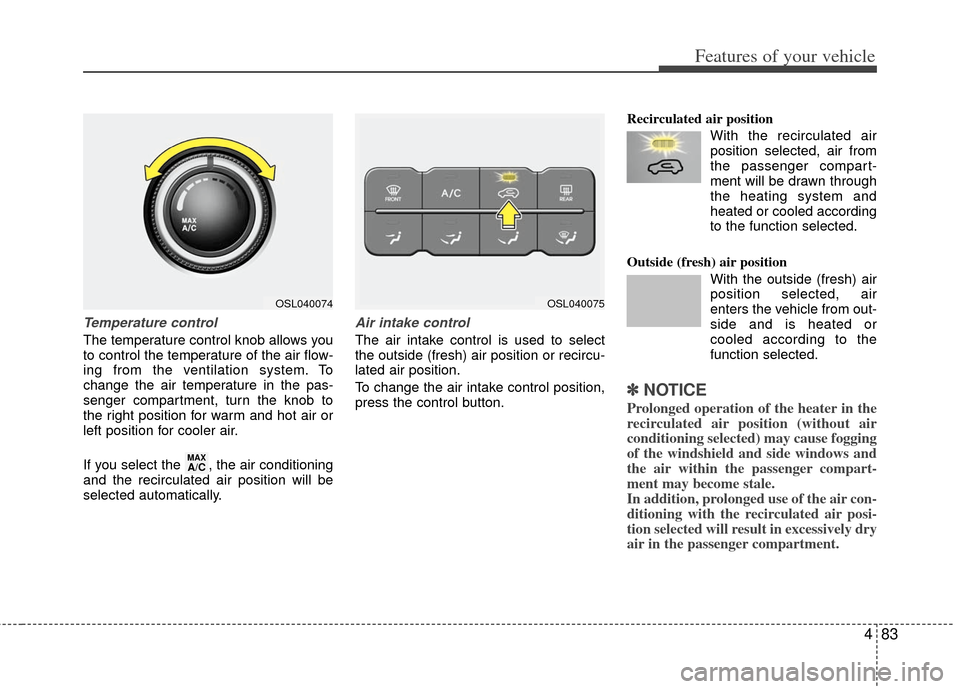
Temperature control
The temperature control knob allows you
to control the temperature of the air flow-
ing from the ventilation system. To
change the air temperature in the pas-
senger compartment, turn the knob to
the right position for warm and hot air or
left position for cooler air.
If you select the , the air conditioning
and the recirculated air position will be
selected automatically.
Air intake control
The air intake control is used to select
the outside (fresh) air position or recircu-
lated air position.
To change the air intake control position,
press the control button.Recirculated air position
With the recirculated airposition selected, air from
the passenger compart-
ment will be drawn through
the heating system and
heated or cooled according
to the function selected.
Outside (fresh) air position With the outside (fresh) air
position selected, air
enters the vehicle from out-
side and is heated or
cooled according to the
function selected.
✽ ✽NOTICE
Prolonged operation of the heater in the
recirculated air position (without air
conditioning selected) may cause fogging
of the windshield and side windows and
the air within the passenger compart-
ment may become stale.
In addition, prolonged use of the air con-
ditioning with the recirculated air posi-
tion selected will result in excessively dry
air in the passenger compartment.
MAXA/C
OSL040074OSL040075