Page 17 of 124

Installing The Child Restraint Using The Vehicle Seat Belts
• To install a child restraint, first, pull enough of the seat belt webbing from
the retractor to route it through the belt path of the child restraint and
slide the latch plate into the buckle.
• Next, extract all the seat belt webbing out of the retractor and then allow
the belt to retract into the retractor. Finally, pull on any excess webbing
to tighten the lap portion around the child restraint. Any seat belt system
will loosen with time, so check the belt occasionally, and pull it tight if
necessary.
• Once you have completed securing the child restraint with the seat belt,
secure the top tether strap. The tether strap should be attached to the
tether anchor on the rear of the seatback using the most direct path. For
the outboard seating positions, route the tether underneath the head
rest and attach the hook to the tether anchor located on the back of the
seat.
WARNING!
• In a collision, an unrestrained child, even a tiny baby, can become a
projectile inside the vehicle. The force required to hold even an
infant on your lap could become so great that you could not hold
the child, no matter how strong you are. The child and others could
be severely injured or killed. Any child riding in your vehicle should
be in a proper restraint for the child's size.
• Improper installation of a child restraint to the LATCH anchorages
can lead to failure of an infant or child restraint. The child could be
severely injured or killed. Follow the manufacturer’s directions
exactly when installing an infant or child restraint.
• An incorrectly anchored tether strap could lead to increased head
motion and possible injury to the child. Use only the anchor
positions directly behind the child seat to secure a child restraint
top tether strap.
• Rearward-facing child seats must never be used in the front seat of
a vehicle with a front passenger air bag. An air bag deployment
could cause infants in this position to be severely injured or killed.
GETTING STARTED
15
Page 19 of 124

• The front passenger seats have a track memory which returns the seat to
just past the halfway point of the track, regardless of its original position.
• The recliner and easy entry levers should not be used during the automatic
returning of the seat to its fully upright position.
WARNING!
• Adjusting a seat while the vehicle is moving is dangerous. The
sudden movement of the seat could cause you to lose control. The
seat belt might not be properly adjusted, and you could be severely
injured or killed. Only adjust a seat while the vehicle is parked.
• Do not ride with the seatback reclined so that the seat belt is no
longer resting against your chest. In a collision, you could slide
under the seat belt and be severely injured or killed. Use the recliner
only when the vehicle is parked.
REAR SEATS
Folding Rear Seat
• Be sure that the front seats are fully upright and positioned forward. This
will allow the rear seat to fold down easily.
To Fold The Rear Seat
• Lift the seatback release lever and fold the seatback forward (two-door
models).
• Slowly flip the entire seat
(two-door models) forward.
GETTING STARTED
17
Page 20 of 124
• Locate the pull strap, located on the outboard side of the seat, and pull it
toward you until the seatback releases (four-door models).
To Raise The Rear Seat
• Lift up on the seatback to return it to the upright position.
WARNING!
• It is extremely dangerous to ride in a cargo area, inside or outside of
a vehicle. In a collision, people riding in these areas are more likely
to be severely injured or killed. Do not allow people to ride in any
area of your vehicle that is not equipped with seats and seat belts.
Be sure everyone in your vehicle is in a seat and using a seat belt
properly.
• Be certain that the seatback is securely locked into position. If the
seatback is not securely locked into position, the seat will not
provide the proper stability for child seats and/or passengers. An
improperly latched seat could cause you or others to be severely
injured or killed.
GETTING STARTED
18
Page 21 of 124
TILT STEERING COLUMN
• The tilt lever is located on the
steering column, below the turn
signal lever.
• Push down on the lever to unlock
the steering column.
• With one hand firmly on the
steering wheel, move the steering
column up or down as desired.
• Pull upward on the lever to lock
the column firmly in place.
WARNING!
Do not adjust the steering column while driving. Adjusting the
steering column while driving, or driving with the steering column
unlocked, could cause the driver to lose control of the vehicle. Be sure
the steering column is locked before driving your vehicle. Failure to
follow this warning may result in you or others being severely injured
or killed.
GETTING STARTED
19
Page 22 of 124

HEATED SEATS
Front Heated Seats
• The controls for front heated seats
are located near the bottom
center of the instrument panel
(below the heater/air conditioning
controls).
• Press the switch once to select
High-level heating. Press the
switch a second time to select
Low-level heating. Press the
switch a third time to shut the
heating elements Off.
• If the High-level setting is selected, the system will automatically switch
to Low-level after approximately 30 minutes. The Low-level setting will
turn Off automatically after approximately 30 minutes.
WARNING!
• Persons who are unable to feel pain to the skin because of
advanced age, chronic illness, diabetes, spinal cord injury,
medication, alcohol use, exhaustion or other physical conditions
must exercise care when using the seat heater. It may cause burns
even at low temperatures, especially if used for long periods of time.
• Do not place anything on the seat or seatback that insulates against
heat, such as a blanket or cushion. This may cause the seat heater to
overheat. Sitting in a seat that has been overheated could cause
serious burns due to the increased surface temperature of the seat.
GETTING STARTED
20
Page 70 of 124

NOTE:
• The USB port supports certain Mini, Classic, Nano, Touch, and iPhone®
devices. The USB port also supports playing music from compatible
external USB Mass Storage Class memory devices. For supported audio file
formats, refer to the USB Port section in the Owner's Manual on the DVD.
Refer to www.UconnectPhone.com website for a list of tested iPod®s. Some
iPod® software versions may not fully support the USB port features.
Please visit Apple’s website for iPod® software updates.
WARNING!
Do not plug in or remove the iPod® or external device while driving.
Failure to follow this warning could result in a collision.
Uconnect™ Phone
• To determine if your vehicle is equipped with Uconnect™ Phone, press
the “Uconnect™ Phone” button. If your vehicle has this feature, after
a couple seconds you will hear a voice prompt. If not, you will see a
message on the radio “Uconnect phone not available”.
• The Uconnect™ Phone is a voice-activated, hands-free, in-vehicle
communications system with Voice Command Capability (see Voice
Command section).
NOTE:To access the tutorial, press the “Uconnect™ Phone” button
.
After the BEEP, say “tutorial”. Press any hard-key/button or touch the display
(Touch-Screen radio) to cancel the tutorial.
• The Uconnect™ Phone allows you to dial a phone number with your
mobile phone using simple voice commands.
• Refer to your vehicle Owner's Manual on the DVD for further details.
NOTE:The Uconnect™ Phone requires a mobile phone equipped with the
Bluetooth® Hands-Free Profile, Version 1.0 or higher. For Uconnect™ customer
support, call 1–877–855–8400 or visit www.UconnectPhone.com.
Phone Pairing
NOTE:Pairing is a one-time initial setup before using the phone.
• Press the “Phone” button
to begin.
• Wait for the “ready” prompt and BEEP.
• (After the BEEP), say ”setup” or “Uconnect device setup”.
• (After the BEEP), say “device pairing”.
ELECTRONICS
68
Page 73 of 124

WARNING!
• Any voice commanded system should be used only in safe driving
conditions following local laws and phone use. All attention should
be kept on the roadway ahead. Failure to do so may result in a
collision causing you and others to be severely injured or killed.
• In an emergency, to use Uconnect™ Phone, your mobile phone must
be:
• turned on,
• paired to Uconnect™ Phone,
• and have network coverage.
Uconnect™ VOICE COMMAND
• The Uconnect™ Voice Command system allows you to control your AM,
FM radio, satellite radio, disc player, HDD, Uconnect™ Phone, a memo
recorder, and supported portable media devices.
• When you press the “Voice Command” button
located on the
radio faceplate or steering wheel, you will hear a beep. The beep is your
signal to give a command. If you do not say a command within a few
seconds, the system will present you with a list of options. If you ever
wish to interrupt the system while it lists options, press the “Voice
Command” button
, listen for the BEEP, and say your command.
Voice Command Operation
• Start a dialogue by pressing the
“Voice Command” button,
you will hear a beep. The beep is
your signal to give a command.
Below are a list of voice
commands for each of the
different modes.
Common Voice Commands (Examples)
Main Menu “Radio” (to switch to the radio mode)
“Disc” (to switch to the disc mode)
“Memo” (to switch to the memo recorder)
“System Setup” (to switch to system setup)
Radio Mode “Frequency” (to change the frequency)
“Next Station” (to select the next station)
“Previous Station” (to select the previous station)
“Radio Menu” (to switch to the radio menu)
“Main Menu” (to switch to the main menu)
ELECTRONICS
71
Page 75 of 124

WARNING!
Any voice commanded system should be used only in safe driving
conditions following local laws and phone use. All attention should be
kept on the roadway ahead. Failure to do so may result in a collision
causing you and others to be severely injured or killed.
Bluetooth® STREAMING AUDIO
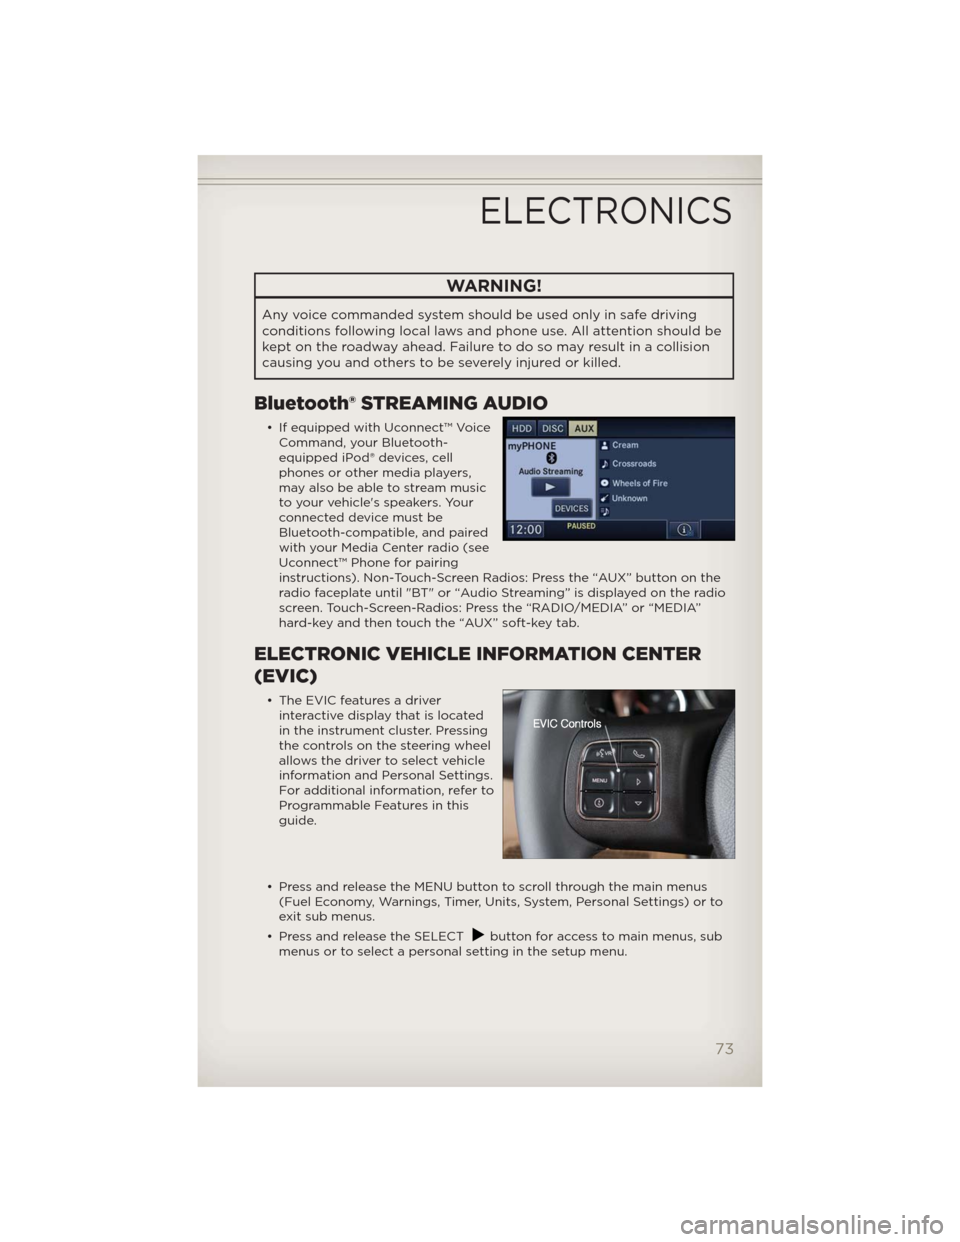
• If equipped with Uconnect™ Voice
Command, your Bluetooth-
equipped iPod® devices, cell
phones or other media players,
may also be able to stream music
to your vehicle's speakers. Your
connected device must be
Bluetooth-compatible, and paired
with your Media Center radio (see
Uconnect™ Phone for pairing
instructions). Non-Touch-Screen Radios: Press the “AUX” button on the
radio faceplate until "BT" or “Audio Streaming” is displayed on the radio
screen. Touch-Screen-Radios: Press the “RADIO/MEDIA” or “MEDIA”
hard-key and then touch the “AUX” soft-key tab.
ELECTRONIC VEHICLE INFORMATION CENTER
(EVIC)
• The EVIC features a driver
interactive display that is located
in the instrument cluster. Pressing
the controls on the steering wheel
allows the driver to select vehicle
information and Personal Settings.
For additional information, refer to
Programmable Features in this
guide.
• Press and release the MENU button to scroll through the main menus
(Fuel Economy, Warnings, Timer, Units, System, Personal Settings) or to
exit sub menus.
• Press and release the SELECT
button for access to main menus, sub
menus or to select a personal setting in the setup menu.
ELECTRONICS
73