2012 HYUNDAI TUCSON ECO mode
[x] Cancel search: ECO modePage 188 of 371
4107
Features of your vehicle
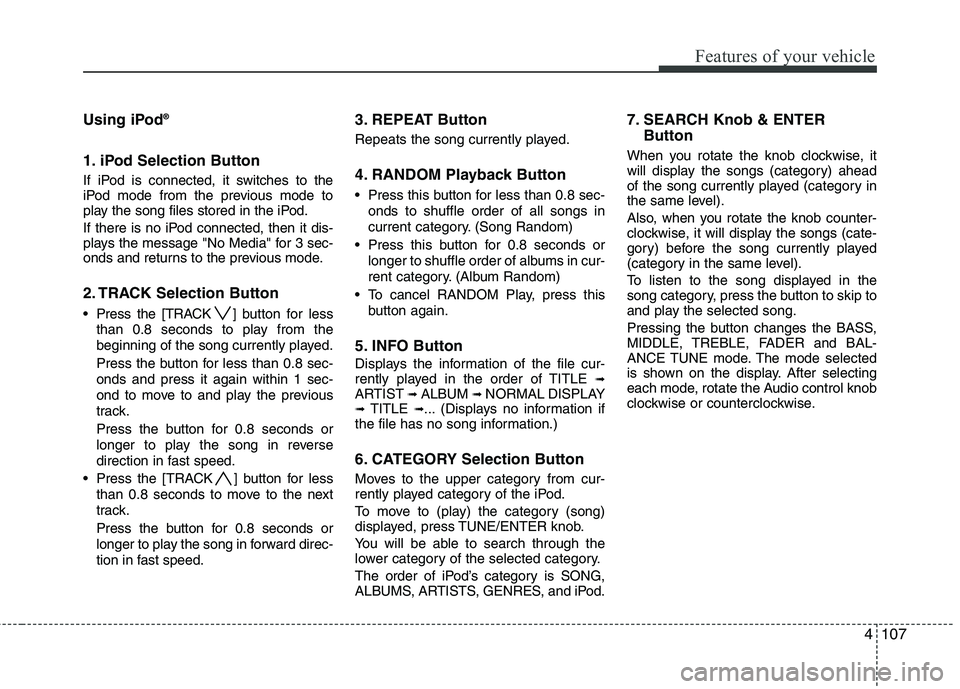
Using iPod®
1. iPod Selection Button
If iPod is connected, it switches to the
iPod mode from the previous mode to
play the song files stored in the iPod.
If there is no iPod connected, then it dis-
plays the message "No Media" for 3 sec-
onds and returns to the previous mode.
2. TRACK Selection Button
Press the [TRACK ] but ton for less
than 0.8 seconds to play from the
beginning of the song currently played.
Press the button for less than 0.8 sec- onds and press it again within 1 sec-
ond to move to and play the previous
track.
Press the button for 0.8 seconds or
longer to play the song in reverse
direction in fast speed.
Press the [TRACK ] button for less than 0.8 seconds to move to the next
track.
Press the button for 0.8 seconds or
longer to play the song in forward direc-
tion in fast speed.
3. REPEAT Button
Repeats the song currently played.
4. RANDOM Playback Button
Press this button for less than 0.8 sec-onds to shuffle order of all songs in
current category. (Song Random)
Press this button for 0.8 seconds or longer to shuffle order of albums in cur-
rent category. (Album Random)
To cancel RANDOM Play, press this button again.
5. INFO Button
Displays the information of the file cur-
rently played in the order of TITLE ➟ARTIST ➟ALBUM ➟NORMAL DISPLAY➟TITLE ➟... (Displays no information if
the file has no song information.)
6. CATEGORY Selection Button
Moves to the upper category from cur-
rently played category of the iPod.
To move to (play) the category (song)
displayed, press TUNE/ENTER knob.
You will be able to search through the
lower category of the selected category.
The order of iPod’s category is SONG,
ALBUMS, ARTISTS, GENRES, and iPod.
7. SEARCH Knob & ENTER
Button
When you rotate the knob clockwise, it
will display the songs (category) ahead
of the song currently played (category in
the same level).
Also, when you rotate the knob counter-
clockwise, it will display the songs (cate-
gory) before the song currently played
(category in the same level).
To listen to the song displayed in the
song category, press the button to skip to
and play the selected song.
Pressing the button changes the BASS,
MIDDLE, TREBLE, FADER and BAL-
ANCE TUNE mode. The mode selected
is shown on the display. After selecting
each mode, rotate the Audio control knob
clockwise or counterclockwise.
Page 190 of 371
4109
Features of your vehicle
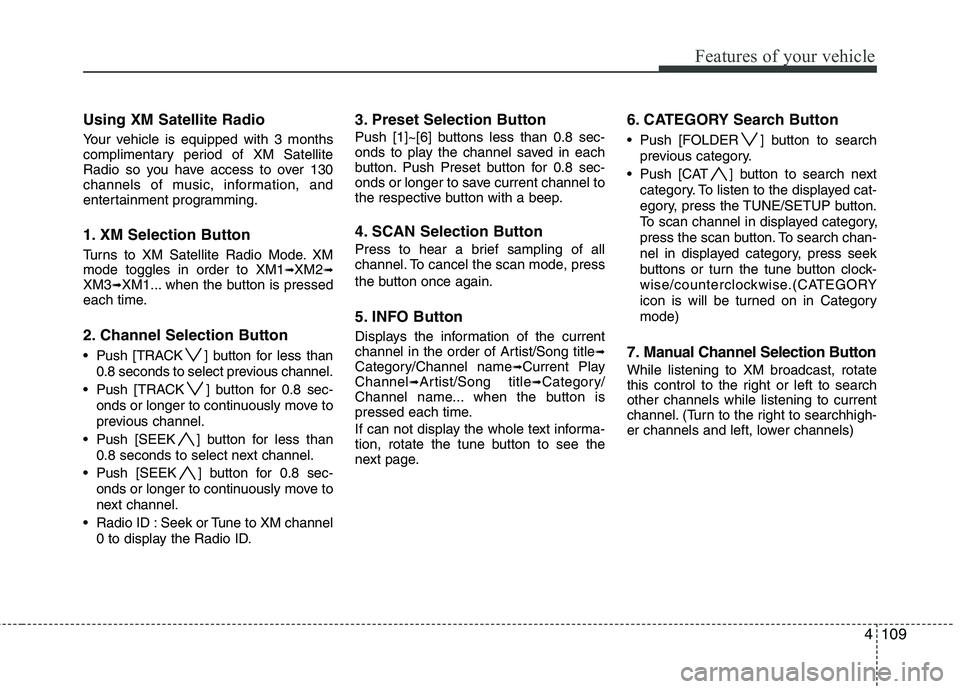
Using XM Satellite Radio
Your vehicle is equipped with 3 months
complimentary period of XM Satellite
Radio so you have access to over 130
channels of music, information, and
entertainment programming.
1. XM Selection Button
Turns to XM Satellite Radio Mode. XMmode toggles in order to XM1➟XM2➟XM3➟XM1... when the button is pressed
each time.
2. Channel Selection Button
Push [TRACK ] button for less than
0.8 seconds to select previous channel.
Push [TRACK ] button for 0.8 sec- onds or longer to continuously move to
previous channel.
Push [SEEK ] button for less than 0.8 seconds to select next channel.
Push [SEEK ] button for 0.8 sec- onds or longer to continuously move to
next channel.
Radio ID : Seek or Tune to XM channel 0 to display the Radio ID.
3. Preset Selection Button
Push [1]~[6] buttons less than 0.8 sec-
onds to play the channel saved in each
button. Push Preset button for 0.8 sec-
onds or longer to save current channel to
the respective button with a beep.
4. SCAN Selection Button
Press to hear a brief sampling of all
channel. To cancel the scan mode, press
the button once again.
5. INFO Button
Displays the information of the current
channel in the order of Artist/Song title➟Category/Channel name➟Current Play
Channel➟Artist/Song title➟Category/
Channel name... when the button is
pressed each time.
If can not display the whole text informa-
tion, rotate the tune button to see the
next page.
6. CATEGORY Search Button
Push [FOLDER ] button to search
previous category.
Push [CAT ] button to search next category. To listen to the displayed cat-
egory, press the TUNE/SETUP button.
To scan channel in displayed category,
press the scan button. To search chan-
nel in displayed category, press seek
buttons or turn the tune button clock-
wise/counterclockwise.(CATEGORY
icon is will be turned on in Categorymode)
7. Manual Channel Selection Button
While listening to XM broadcast, rotate
this control to the right or left to searchother channels while listening to current
channel. (Turn to the right to searchhigh-
er channels and left, lower channels)
Page 197 of 371
Features of your vehicle
116
4
■
Voice Recognition Activation
in the Bluetooth ®
System can be acti-
vated in the following conditions:
- Button Activation
The voice recognition system will be
active when the button is pressed
and after the sound of a Beep.
- Active Listening The voice recognition system will be
active for a period of time when the
Voice Recognition system has asked
for a customer response.
from zero to nine while number greater
than ten will not be recognized.
tion mode in following cases : When
pressing the button and saying
cancel following the beep. When not making a call and pressing the
button. When voice recognition has
failed 3 consecutive times.
will announce what commands are
available.
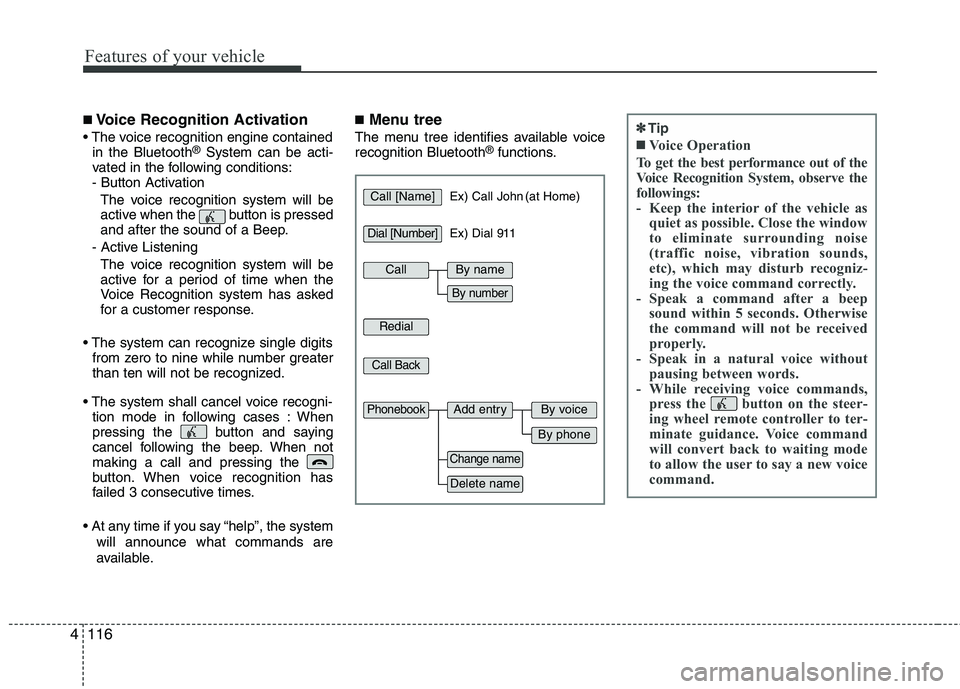
■ Menu tree
The menu tree identifies available voice recognition Bluetooth ®
functions.
Call [Name]Ex) Call John (at Home)
Ex) Dial 911
Dial [Number]
Redial
Call Back
Add entryPhonebook
Change name
Delete name
By phone
By voice
CallBy name
By number
✽✽Tip
■Voice Operation
To get the best performance out of the
Voice Recognition System, observe the
followings:
- Keep the interior of the vehicle as quiet as possible. Close the window
to eliminate surrounding noise
(traffic noise, vibration sounds,
etc), which may disturb recogniz-
ing the voice command correctly.
- Speak a command after a beep sound within 5 seconds. Otherwise
the command will not be received
properly.
- Speak in a natural voice without pausing between words.
- While receiving voice commands, press the button on the steer-
ing wheel remote controller to ter-
minate guidance. Voice command
will convert back to waiting mode
to allow the user to say a new voice
command.
Page 199 of 371
Features of your vehicle
118
4
■
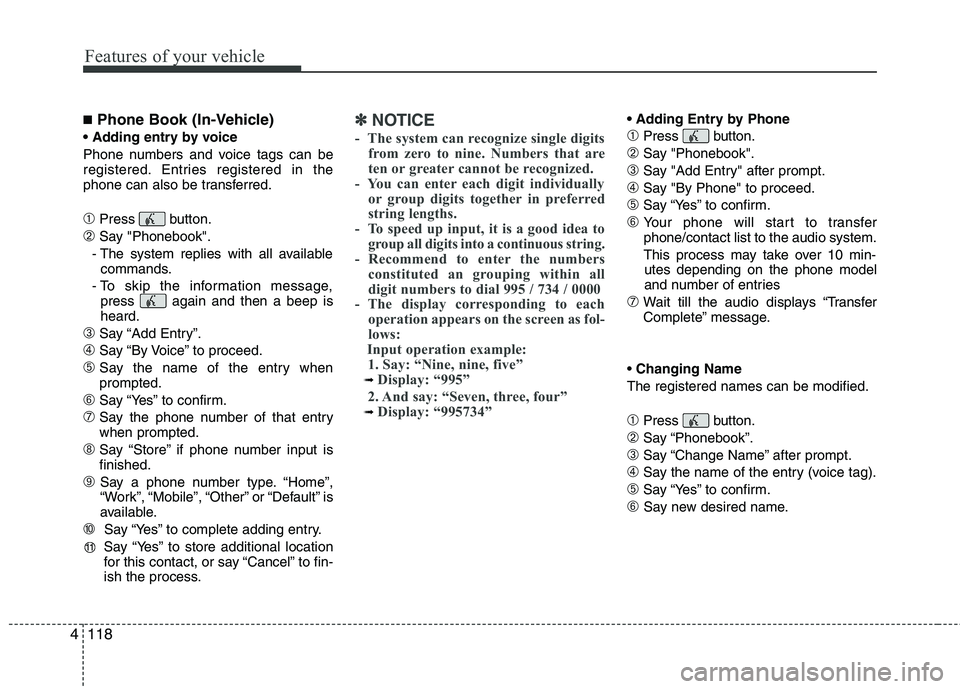
Phone Book (In-Vehicle)
Phone numbers and voice tags can be
registered. Entries registered in the
phone can also be transferred.
➀Press button.
➁Say "Phonebook".
- The system replies with all available commands.
- To skip the information message, press again and then a beep isheard.
➂Say “Add Entry”.
➃Say “By Voice” to proceed.
➄Say the name of the entry whenprompted.
➅Say “Yes” to confirm.
➆Say the phone number of that entrywhen prompted.
➇Say “Store” if phone number input isfinished.
➈ Say a phone number type. “Home”,
“Work”, “Mobile”, “Other” or “Default” is
available.
➉ Say “Yes” to complete adding entry.
Say “Yes” to store additional location
for this contact, or say “Cancel” to fin-
ish the process.
✽✽ NOTICE
- The system can recognize single digits from zero to nine. Numbers that are
ten or greater cannot be recognized.
- You can enter each digit individually or group digits together in preferred
string lengths.
- To speed up input, it is a good idea to
group all digits into a continuous string.
- Recommend to enter the numbers constituted an grouping within all
digit numbers to dial 995 / 734 / 0000
- The display corresponding to each
operation appears on the screen as fol-
lows:
Input operation example: 1. Say: “Nine, nine, five”
➟ Display: “995”
2. And say: “Seven, three, four”
➟ Display: “995734”
➀Press button.
➁Say "Phonebook".
➂Say "Add Entry" after prompt.
➃Say "By Phone" to proceed.
➄Say “Yes” to confirm.
➅ Your phone will start to transfer phone/contact list to the audio system.
This process may take over 10 min- utes depending on the phone model
and number of entries
➆Wait till the audio displays “Transfer
Complete” message.
Changing Name
The registered names can be modified.
➀Press button.
➁Say “Phonebook”.
➂Say “Change Name” after prompt.
➃Say the name of the entry (voice tag).
➄Say “Yes” to confirm.
➅ Say new desired name.
11
Page 221 of 371
Driving your vehicle
20
5
You must consciously take the effort to
learn how to corner in a AWD vehicle.
Do not rely on your experience in con-
ventional 2WD vehicles in choosing
safe cornering speed in AWD mode.
For starters, you must drive more slow-
ly in AWD.
Drive carefully off-road because your vehicle may be damaged by rocks or
roots of trees. Become familiar with the
off-road conditions where you are
going to drive before you begin driving.
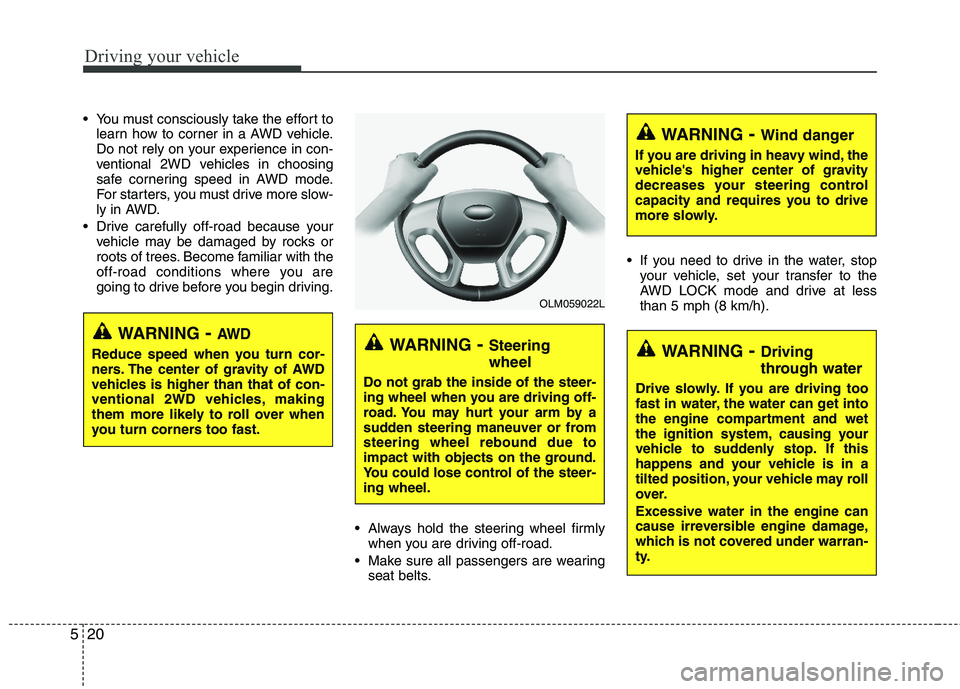
Always hold the steering wheel firmlywhen you are driving off-road.
Make sure all passengers are wearing seat belts. If you need to drive in the water, stop
your vehicle, set your transfer to the
AWD LOCK mode and drive at lessthan 5 mph (8 km/h).
WARNING - Steering wheel
Do not grab the inside of the steer-
ing wheel when you are driving off-
road. You may hurt your arm by a
sudden steering maneuver or fromsteering wheel rebound due to
impact with objects on the ground.
You could lose control of the steer-ing wheel.
WARNING- Wind danger
If you are driving in heavy wind, the
vehicle's higher center of gravity
decreases your steering control
capacity and requires you to drive
more slowly.
WARNING- Driving
through water
Drive slowly. If you are driving too
fast in water, the water can get into
the engine compartment and wet
the ignition system, causing your
vehicle to suddenly stop. If this
happens and your vehicle is in a
tilted position, your vehicle may roll
over. Excessive water in the engine can
cause irreversible engine damage,
which is not covered under warran-
ty.
OLM059022L
WARNING - AW D
Reduce speed when you turn cor-
ners. The center of gravity of AWD
vehicles is higher than that of con-
ventional 2WD vehicles, making
them more likely to roll over when
you turn corners too fast.
Page 241 of 371

Driving your vehicle
40
5
Active ECO operation
Active ECO helps improve fuel efficiency
by controlling the engine and transaxle.
But fuel-efficiency can be changed by the
driver's driving habits and road condi-
tions.
When the Active ECO button is
pressed the ECO indicator (green) will
illuminate to show that the Active ECO
is operating.
When the Active ECO is activated, it does not turn off even though the
engine is restarted again. To turn off
the system, press the active ECO but- ton again.
If Active ECO is turned off, it will return to the normal mode.
When Active ECO is activated :
Vehicle noise may become loud.
Vehicle speed may drop.
The air conditioner performance maydecline.
Limitation of Active ECO operation:
If the following conditions occur while
Active ECO is operating, the system
operation is limited even though there is
no change in the ECO indicator.
When the coolant temperature is low:
The system will be limited until engine
performance becomes normal.
When driving up a hill: The system will be limited to gain
power when driving uphill because the
engine torque is restricted.
When using sports mode: The system will be limited according to the shift location.
ACTIVE ECO SYSTEM (IF EQUIPPED)
OLM051043
Page 242 of 371
541
Driving your vehicle
Your vehicle's fuel economy depends
mainly on your style of driving, where you
drive and when you drive.
Each of these factors affects how many
miles (kilometers) you can get from a gal-
lon (liter) of fuel. To operate your vehicle
as economically as possible, use the fol-
lowing driving suggestions to help save
money in both fuel and repairs:
Drive smoothly. Accelerate at a moder-ate rate. Don't make "jack-rabbit" starts or full-throttle shifts and maintain a
steady cruising speed. Don't race
between stoplights. Try to adjust your
speed to the traffic so you don't have to
change speeds unnecessarily. Avoid
heavy traffic whenever possible.
Always maintain a safe distance from
other vehicles so you can avoid unnec-
essary braking. This also reduces
brake wear.
Drive at a moderate speed. The faster you drive the more fuel your vehicle
uses. Driving at a moderate speed, in
the highest gear appropriate for the
conditions, especially on the highway,
is one of the most effective ways to reduce fuel consumption. Don't "ride" the brake pedal or clutch
pedal. This can increase fuel consump-
tion and also increase wear on these
components. In addition, driving with
your foot resting on the brake pedal
may cause the brakes to overheat,
which reduces their effectiveness and
may lead to more serious conse-
quences.
Take care of your tires. Keep them inflated to the recommended pressure.
Incorrect inflation, either too much or
too little, results in unnecessary tire
wear. Check the tire pressures at leastonce a month.
Be sure that the wheels are aligned correctly. Improper alignment can
result from hitting curbs or driving too
fast over irregular surfaces. Poor align-
ment causes faster tire wear and may
also result in other problems as well as
greater fuel consumption. Keep your vehicle in good condition.
For better fuel economy and reduced
maintenance costs, maintain your vehi- cle in accordance with the mainte-
nance schedule in section 7. If you
drive your vehicle in severe conditions, more frequent maintenance is required
(see section 7 for details).
Keep your vehicle clean. For maximum service, your vehicle should be kept
clean and free of corrosive materials. It
is especially important that mud, dirt,
ice, etc. not be allowed to accumulate
on the underside of the vehicle. This
extra weight can result in increased
fuel consumption and also contributeto corrosion.
Travel lightly. Don't carry unnecessary weight in your vehicle. Weight reduces
fuel economy.
Don't let the engine idle longer than necessary. If you are waiting (and not
in traffic), turn off your engine and
restart only when you're ready to go.
ECONOMICAL OPERATION
Page 334 of 371
747
Maintenance
Cold Tire Pressure: The amount of
air pressure in a tire, measured in pounds per square inch (psi) or kilo-
pascals (kPa) before a tire has built
up heat from driving.
Curb Weight : This means the weight
of a motor vehicle with standard and optional equipment including the
maximum capacity of fuel, oil and
coolant, but without passengers and
cargo.
DOT Markings : A code molded into
the sidewall of a tire signifying that
the tire is in compliance with the U.S.
Department of Transportation motor
vehicle safety standards. The DOT
code includes the Tire Identification
Number (TIN), an alphanumeric des-ignator which can also identify the
tire manufacturer, production plant,
brand and date of production. GVWR : Gross Vehicle Weight Rating
GAWR FRT : Gross Axle Weight
Rating for the Front Axle.
GAWR RR : Gross Axle Weight
Rating for the Rear axle. Intended Outboard Sidewall
: The
side of an asymmetrical tire, that
must always face outward when
mounted on a vehicle.
Kilopascal (kPa) : The metric unit for
air pressure.
Load Index : An assigned number
ranging from 1 to 279 that corre-
sponds to the load carrying capacity
of a tire.
Maximum Inflation Pressure : The
maximum air pressure to which a
cold tire may be inflated. The maxi-
mum air pressure is molded onto the
sidewall.
Maximum Load Rating : The load
rating for a tire at the maximum per-
missible inflation pressure for that
tire.
Maximum Loaded Vehicle Weight :
The sum of curb weight; accessory
weight; vehicle capacity weight; and
production options weight.
Normal Occupant Weight :The
number of occupants a vehicle is
designed to seat multiplied by 150pounds (68 kg). Occupant Distribution
: Designated
seating positions.
Outward Facing Sidewall: The side
of a asymmetrical tire that has a par-
ticular side that faces outward when
mounted on a vehicle. The outward
facing sidewall bears white lettering
or bears manufacturer, brand, and/ormodel name molding that is higher ordeeper than the same moldings on
the inner facing sidewall.
Passenger (P-Metric) Tire : A tire
used on passenger cars and some
light duty trucks and multipurpose
vehicles. Recommended Inflation Pressure :
Vehicle manufacturer's recommend-
ed tire inflation pressure and shownon the tire placard.
Radial Ply Tire : A pneumatic tire in
which the ply cords that extend to the
beads are laid at 90 degrees to the
centerline of the tread. Rim : A metal support for a tire and
upon which the tire beads are seat- ed.
Sidewall : The portion of a tire
between the tread and the bead.