2012 HYUNDAI IX35 display
[x] Cancel search: displayPage 111 of 560
Features of your vehicle
36
4
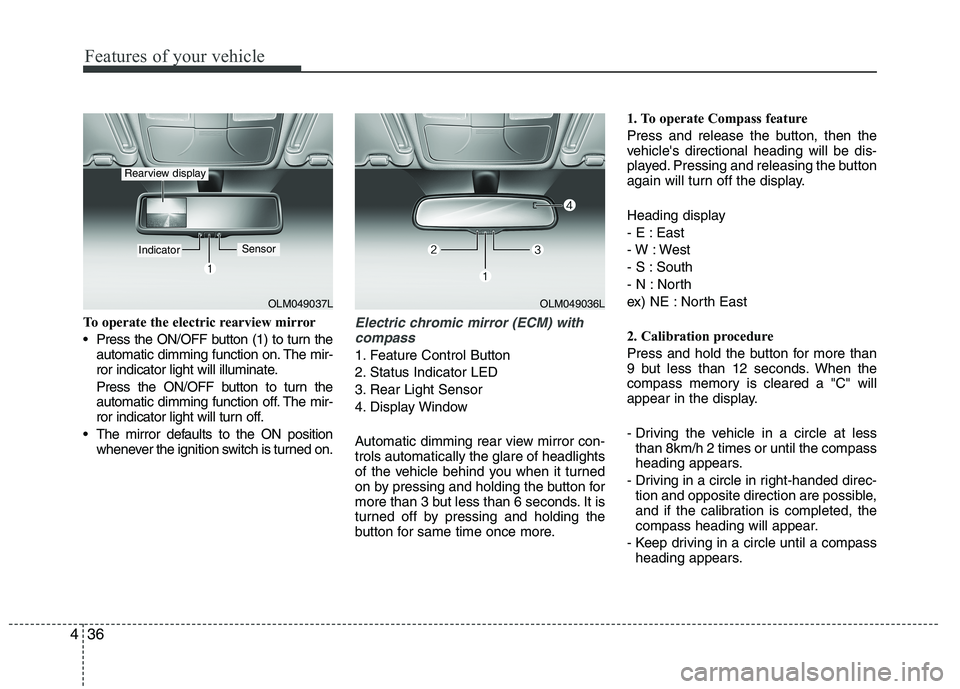
To operate the electric rearview mirror
Press the ON/OFF button (1) to turn the
automatic dimming function on. The mir-
ror indicator light will illuminate.
Press the ON/OFF button to turn the
automatic dimming function off. The mir-
ror indicator light will turn off.
The mirror defaults to the ON position whenever the ignition switch is turned on.Electric chromic mirror (ECM) with
compass
1. Feature Control Button
2. Status Indicator LED
3. Rear Light Sensor
4. Display Window
Automatic dimming rear view mirror con- trols automatically the glare of headlights
of the vehicle behind you when it turned
on by pressing and holding the button for
more than 3 but less than 6 seconds. It is
turned off by pressing and holding the
button for same time once more. 1. To operate Compass feature
Press and release the button, then the
vehicle's directional heading will be dis-
played. Pressing and releasing the button
again will turn off the display.
Heading display
- E : East
- W : West
- S : South
- N : North
ex) NE : North East
2. Calibration procedure
Press and hold the button for more than
9 but less than 12 seconds. When the
compass memory is cleared a "C" will
appear in the display.
- Driving the vehicle in a circle at less
than 8km/h 2 times or until the compass
heading appears.
- Driving in a circle in right-handed direc- tion and opposite direction are possible,
and if the calibration is completed, the
compass heading will appear.
- Keep driving in a circle until a compass heading appears.
OLM049037L
IndicatorSensor
Rearview display
OLM049036L
Page 113 of 560
Features of your vehicle
38
4
3. Setting the compass zone
1. Find your current location and vari-
ance zone number on the zone map.
2. Press and hold the button for more than 6 but less than 9 seconds. The
current zone number will appear in the
display.
3. Press the button until the new zone number appears in the display. After
you stop pressing the button in, the
display will show a compass direction
within a few seconds. 4. Changing Mirror Angle setting
(if equipped):
Due to mirror positions being angled
towards the driver, the compass mirror
can also compensate for drivers seated
on the Left Hand side of the vehicle
(steering wheel on the LH side of the
vehicle) or Right Hand side of the vehicle
(steering wheel on the RH side of the
vehicle).
To adjust the Left Hand, “L” or Right
Hand, “R”, setting:
1. Press and hold the button for more than 12 seconds.
2. Release then press the button to tog- gle between “L” and “R”.
✽✽ NOTICE
This procedure also causes the compass
to be de-calibrated.
3. To re-calibrate the compass, drive the vehicle in 2 complete circles at less than 8km/h (5mph).
CAUTION
1. Do not install the ski rack, anten-
na, etc. which are attached to thevehicle by means of a magnet.They affect the operation of the compass.
2. If the compass deviates from the correct indication soon afterrepeated adjustment, have thecompass checked at an author- ized HYUNDAI dealer.
3. The compass may not indicate the correct compass point in tun-nels or while driving up or down asteep hill.
(The compass returns to the cor-rect compass point when the
vehicle moves to an area wherethe geomagnetism is stabilized.)
4. When cleaning the mirror, use a paper towel or similar material
dampened with glass cleaner. Donot spray glass cleaner directly on the mirror as that may causethe liquid cleaner to enter the mir-
ror housing.
Page 120 of 560
445
Features of your vehicle
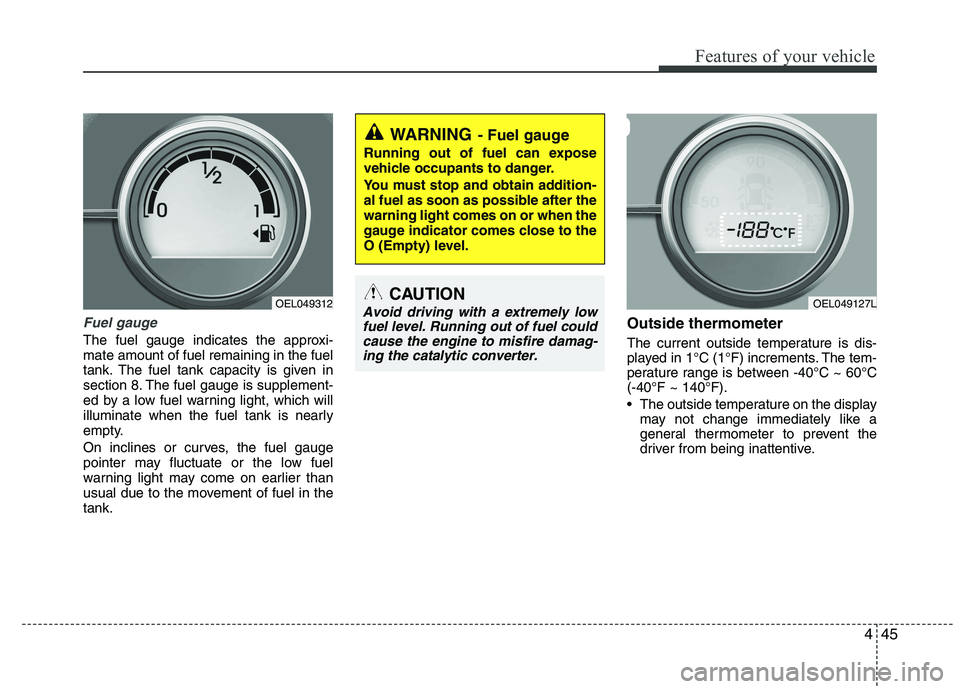
Fuel gauge
The fuel gauge indicates the approxi- mate amount of fuel remaining in the fuel
tank. The fuel tank capacity is given in
section 8. The fuel gauge is supplement-
ed by a low fuel warning light, which will
illuminate when the fuel tank is nearly
empty.
On inclines or curves, the fuel gauge
pointer may fluctuate or the low fuel
warning light may come on earlier than
usual due to the movement of fuel in thetank.Outside thermometer
The current outside temperature is dis-
played in 1°C (1°F) increments. The tem-
perature range is between -40°C ~ 60°C(-40°F ~ 140°F).
The outside temperature on the display
may not change immediately like a
general thermometer to prevent the
driver from being inattentive.
WARNING - Fuel gauge
Running out of fuel can expose
vehicle occupants to danger.
You must stop and obtain addition-
al fuel as soon as possible after thewarning light comes on or when the
gauge indicator comes close to the
O (Empty) level.
CAUTION
Avoid driving with a extremely low fuel level. Running out of fuel could cause the engine to misfire damag-ing the catalytic converter. OEL049312OEL049127L
Page 121 of 560
Features of your vehicle
46
4
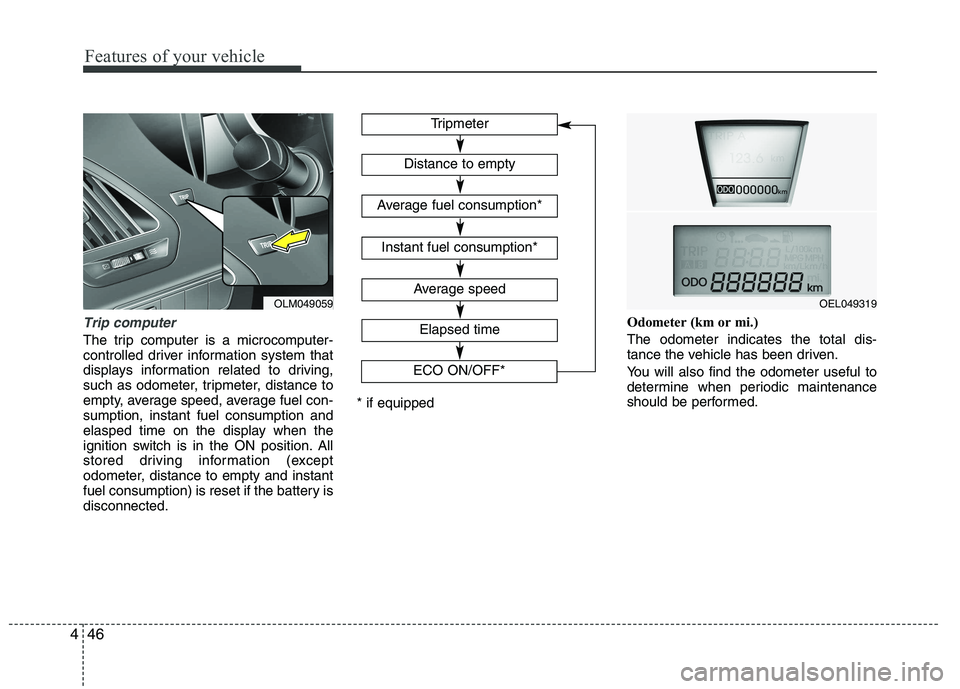
Trip computer
The trip computer is a microcomputer-
controlled driver information system that
displays information related to driving,
such as odometer, tripmeter, distance to
empty, average speed, average fuel con-sumption, instant fuel consumption and
elasped time on the display when the
ignition switch is in the ON position. All
stored driving information (except
odometer, distance to empty and instant
fuel consumption) is reset if the battery isdisconnected. Odometer (km or mi.) The odometer indicates the total dis-
tance the vehicle has been driven.
You will also find the odometer useful to
determine when periodic maintenance
should be performed.
Tripmeter
Average speed
Elapsed time
Distance to empty
Average fuel consumption*
Instant fuel consumption*
* if equipped
OEL049319
ECO ON/OFF*OLM049059
Page 122 of 560
447
Features of your vehicle
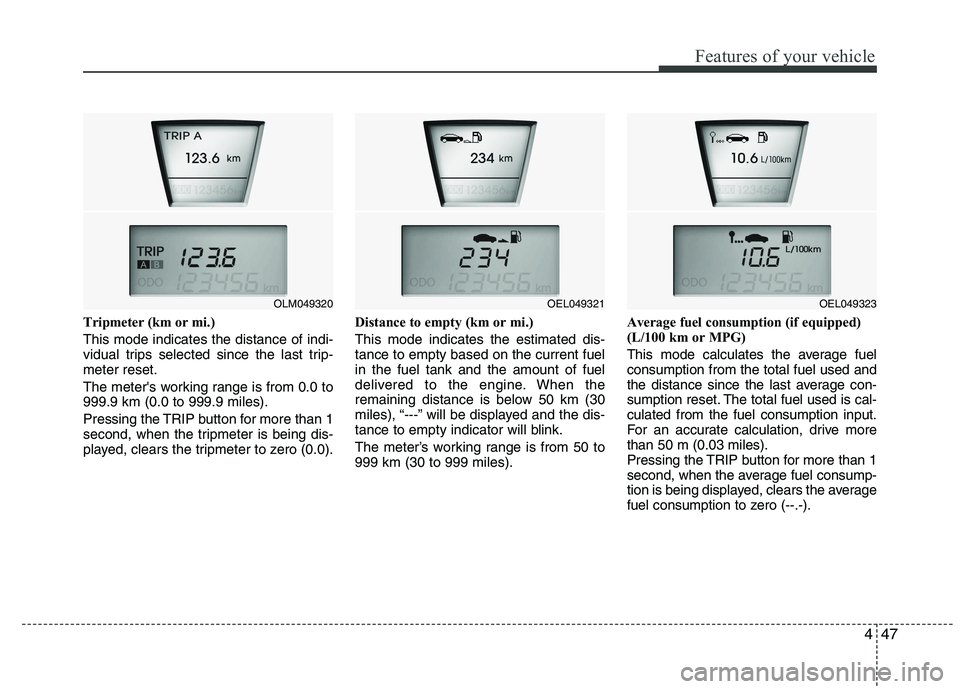
Tripmeter (km or mi.) This mode indicates the distance of indi-
vidual trips selected since the last trip-meter reset.
The meter's working range is from 0.0 to 999.9 km (0.0 to 999.9 miles).
Pressing the TRIP button for more than 1
second, when the tripmeter is being dis-
played, clears the tripmeter to zero (0.0).Distance to empty (km or mi.) This mode indicates the estimated dis- tance to empty based on the current fuelin the fuel tank and the amount of fuel
delivered to the engine. When the
remaining distance is below 50 km (30
miles), “---” will be displayed and the dis-
tance to empty indicator will blink.
The meter’s working range is from 50 to 999 km (30 to 999 miles).Average fuel consumption (if equipped)
(L/100 km or MPG)
This mode calculates the average fuel consumption from the total fuel used and
the distance since the last average con-
sumption reset. The total fuel used is cal-culated from the fuel consumption input.
For an accurate calculation, drive morethan 50 m (0.03 miles).
Pressing the TRIP button for more than 1
second, when the average fuel consump-
tion is being displayed, clears the average
fuel consumption to zero (--.-).
OEL049321OEL049323OLM049320
Page 123 of 560
Features of your vehicle
48
4
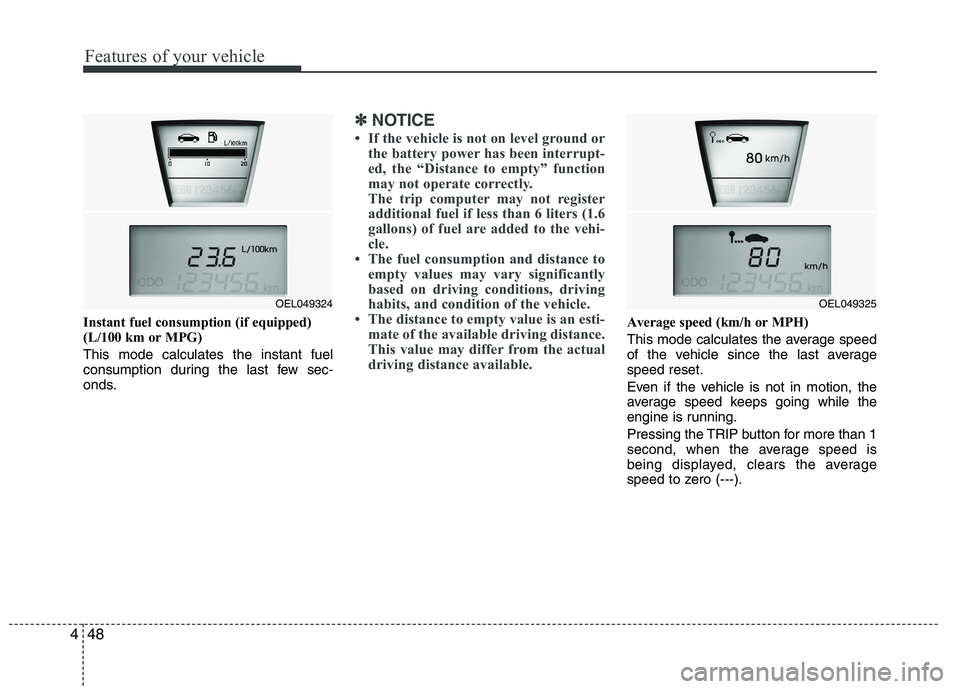
Instant fuel consumption (if equipped)
(L/100 km or MPG) This mode calculates the instant fuel
consumption during the last few sec-
onds.
✽✽
NOTICE
If the vehicle is not on level ground or the battery power has been interrupt-
ed, the “Distance to empty” function
may not operate correctly.
The trip computer may not register
additional fuel if less than 6 liters (1.6
gallons) of fuel are added to the vehi-
cle.
The fuel consumption and distance to
empty values may vary significantly
based on driving conditions, driving
habits, and condition of the vehicle.
The distance to empty value is an esti-
mate of the available driving distance.
This value may differ from the actual
driving distance available.
Average speed (km/h or MPH)
This mode calculates the average speed
of the vehicle since the last averagespeed reset.
Even if the vehicle is not in motion, the
average speed keeps going while the
engine is running.
Pressing the TRIP button for more than 1
second, when the average speed is
being displayed, clears the average
speed to zero (---).
OEL049325OEL049324
Page 124 of 560
449
Features of your vehicle
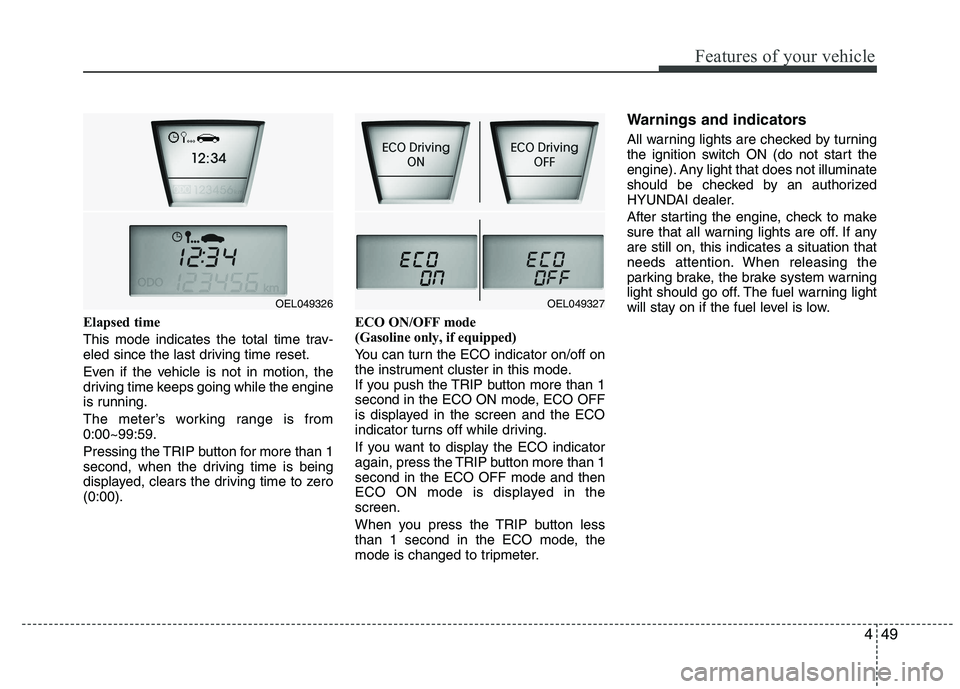
Elapsed time
This mode indicates the total time trav-
eled since the last driving time reset.
Even if the vehicle is not in motion, the
driving time keeps going while the engine
is running.
The meter’s working range is from 0:00~99:59.
Pressing the TRIP button for more than 1
second, when the driving time is being
displayed, clears the driving time to zero(0:00).ECO ON/OFF mode
(Gasoline only, if equipped)
You can turn the ECO indicator on/off on
the instrument cluster in this mode.
If you push the TRIP button more than 1
second in the ECO ON mode, ECO OFF
is displayed in the screen and the ECO
indicator turns off while driving.
If you want to display the ECO indicator
again, press the TRIP button more than 1second in the ECO OFF mode and then
ECO ON mode is displayed in thescreen.
When you press the TRIP button less
than 1 second in the ECO mode, the
mode is changed to tripmeter.Warnings and indicators
All warning lights are checked by turning
the ignition switch ON (do not start the
engine). Any light that does not illuminate
should be checked by an authorized
HYUNDAI dealer.
After starting the engine, check to make
sure that all warning lights are off. If anyare still on, this indicates a situation that
needs attention. When releasing the
parking brake, the brake system warning
light should go off. The fuel warning light
will stay on if the fuel level is low.
OEL049327OEL049326
Page 125 of 560
Features of your vehicle
50
4
ECO indicator
(if equipped)
ECO ON/OFF mode (Gasoline only) The ECO indicator is a system that helps
you to drive economically.
It is displayed if you drive fuel efficiently
to help you improve fuel efficiency.
The ECO indicator (green) will turn on when you are driving fuel efficiently in
the ECO ON mode.
If you don't want the indicator dis-
played, you can turn the ECO ON
mode to OFF mode by pressing the
TRIP button.
As per ECO ON/OFF Mode operation,
refer to the previous page.
The fuel-efficiency can be changed by the driver's driving habit and road con-dition.
The ECO indicator does not function in P (Park), N (Neutral), and R (Reverse). Active ECO system
(Diesel only)
When the active ECO is operating the
ECO indicator is green.
For more detailed information, refer to
“Active ECO” in chapter 5.
Air bag warning light
(if equipped)
This warning light will illuminate for
approximately 6 seconds each time you
turn the ignition switch to the ON posi-tion. This light also comes on when the SRS
is not working properly. If the AIRBAG
warning light does not come on, or con-
tinuously remains on after operating for
about 6 seconds when you turned the
ignition switch to the ON position or start-
ed the engine, or if it comes on while
driving, have the SRS inspected by an
authorized HYUNDAI dealer.
ECO
WARNING
Don't keep watching the indicator
while driving. It will distract youwhile driving and cause an acci-
dent that results in severe personal
injury.