2012 HYUNDAI IX35 change time
[x] Cancel search: change timePage 17 of 560
35
Safety system of your vehicle
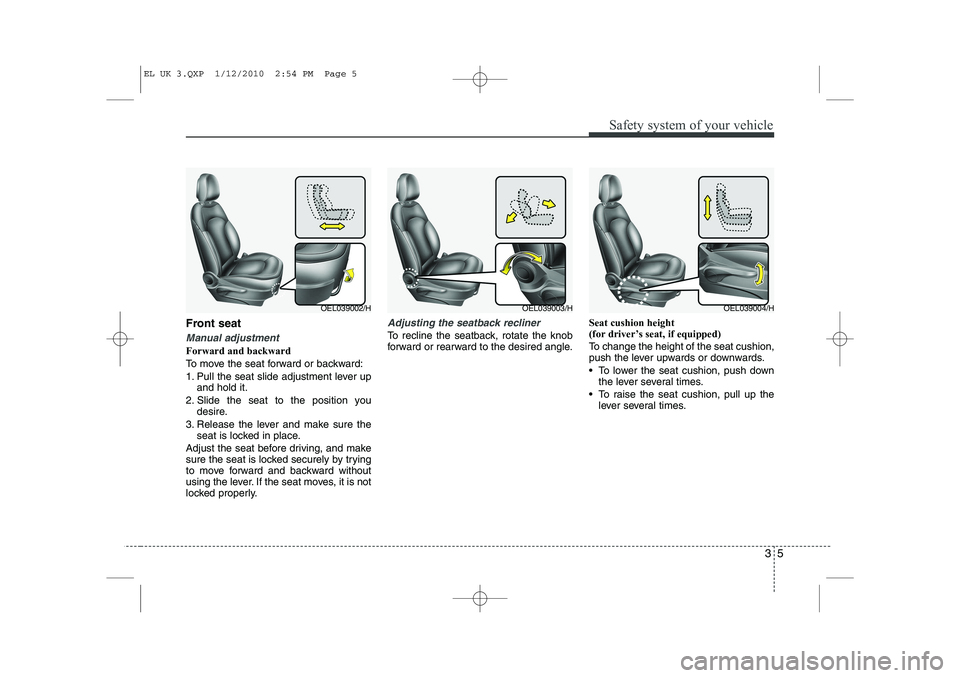
Front seat
Manual adjustment
Forward and backward
To move the seat forward or backward:
1. Pull the seat slide adjustment lever upand hold it.
2. Slide the seat to the position you desire.
3. Release the lever and make sure the seat is locked in place.
Adjust the seat before driving, and make
sure the seat is locked securely by trying
to move forward and backward without
using the lever. If the seat moves, it is not
locked properly.
Adjusting the seatback recliner
To recline the seatback, rotate the knob
forward or rearward to the desired angle. Seat cushion height
(for driver’s seat, if equipped)
To change the height of the seat cushion,
push the lever upwards or downwards.
To lower the seat cushion, push down
the lever several times.
To raise the seat cushion, pull up the lever several times.
OEL039002/HOEL039003/HOEL039004/H
EL UK 3.QXP 1/12/2010 2:54 PM Page 5
Page 124 of 560
449
Features of your vehicle
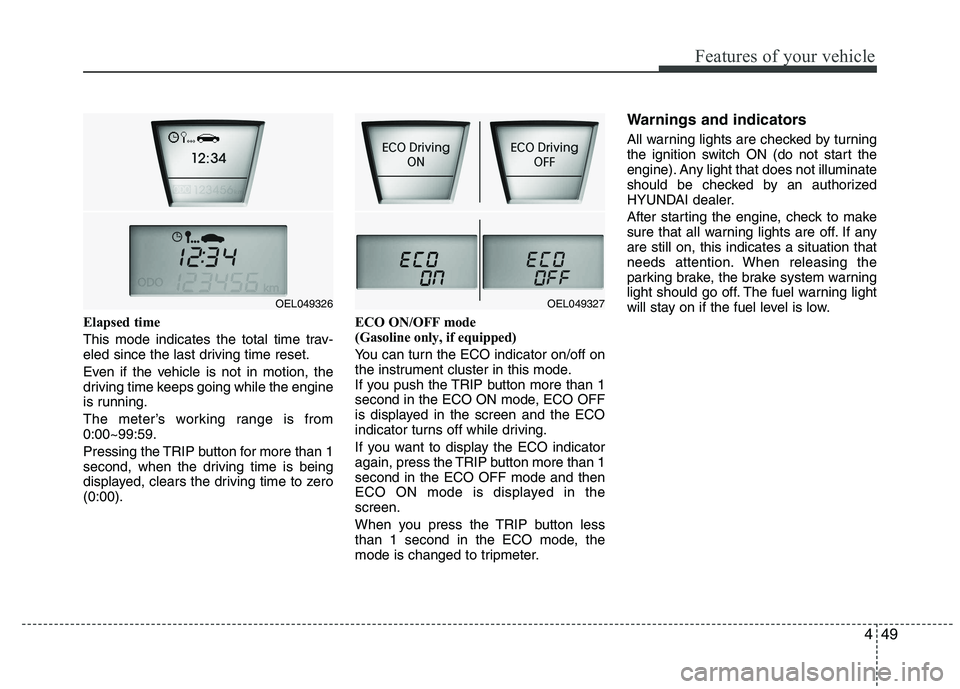
Elapsed time
This mode indicates the total time trav-
eled since the last driving time reset.
Even if the vehicle is not in motion, the
driving time keeps going while the engine
is running.
The meter’s working range is from 0:00~99:59.
Pressing the TRIP button for more than 1
second, when the driving time is being
displayed, clears the driving time to zero(0:00).ECO ON/OFF mode
(Gasoline only, if equipped)
You can turn the ECO indicator on/off on
the instrument cluster in this mode.
If you push the TRIP button more than 1
second in the ECO ON mode, ECO OFF
is displayed in the screen and the ECO
indicator turns off while driving.
If you want to display the ECO indicator
again, press the TRIP button more than 1second in the ECO OFF mode and then
ECO ON mode is displayed in thescreen.
When you press the TRIP button less
than 1 second in the ECO mode, the
mode is changed to tripmeter.Warnings and indicators
All warning lights are checked by turning
the ignition switch ON (do not start the
engine). Any light that does not illuminate
should be checked by an authorized
HYUNDAI dealer.
After starting the engine, check to make
sure that all warning lights are off. If anyare still on, this indicates a situation that
needs attention. When releasing the
parking brake, the brake system warning
light should go off. The fuel warning light
will stay on if the fuel level is low.
OEL049327OEL049326
Page 125 of 560
Features of your vehicle
50
4
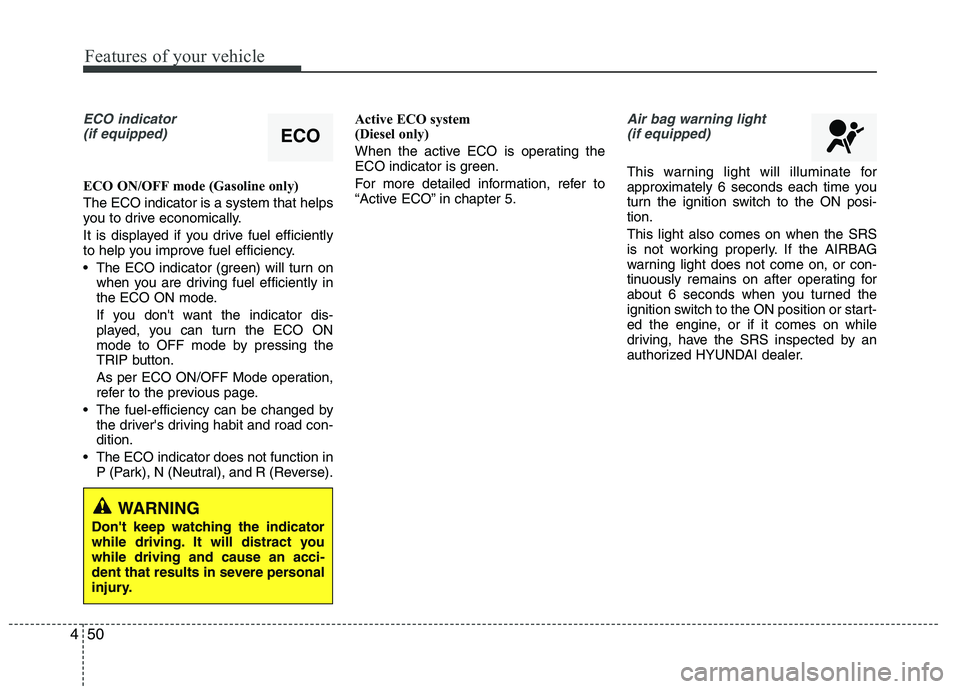
ECO indicator
(if equipped)
ECO ON/OFF mode (Gasoline only) The ECO indicator is a system that helps
you to drive economically.
It is displayed if you drive fuel efficiently
to help you improve fuel efficiency.
The ECO indicator (green) will turn on when you are driving fuel efficiently in
the ECO ON mode.
If you don't want the indicator dis-
played, you can turn the ECO ON
mode to OFF mode by pressing the
TRIP button.
As per ECO ON/OFF Mode operation,
refer to the previous page.
The fuel-efficiency can be changed by the driver's driving habit and road con-dition.
The ECO indicator does not function in P (Park), N (Neutral), and R (Reverse). Active ECO system
(Diesel only)
When the active ECO is operating the
ECO indicator is green.
For more detailed information, refer to
“Active ECO” in chapter 5.
Air bag warning light
(if equipped)
This warning light will illuminate for
approximately 6 seconds each time you
turn the ignition switch to the ON posi-tion. This light also comes on when the SRS
is not working properly. If the AIRBAG
warning light does not come on, or con-
tinuously remains on after operating for
about 6 seconds when you turned the
ignition switch to the ON position or start-
ed the engine, or if it comes on while
driving, have the SRS inspected by an
authorized HYUNDAI dealer.
ECO
WARNING
Don't keep watching the indicator
while driving. It will distract youwhile driving and cause an acci-
dent that results in severe personal
injury.
Page 150 of 560
475
Features of your vehicle
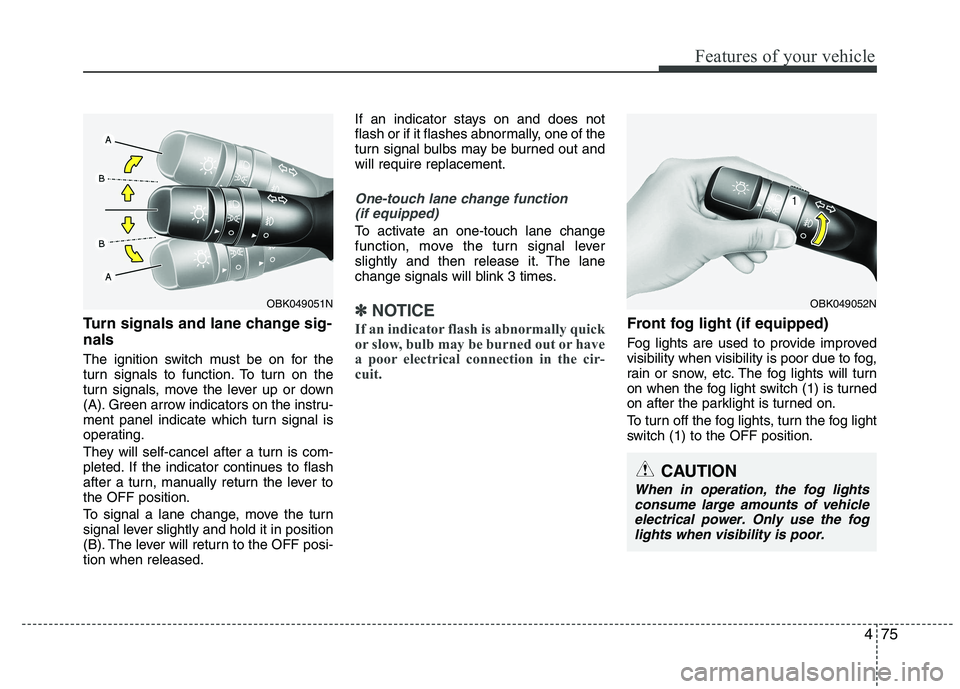
Turn signals and lane change sig- nals
The ignition switch must be on for the
turn signals to function. To turn on the
turn signals, move the lever up or down
(A). Green arrow indicators on the instru-
ment panel indicate which turn signal is
operating.
They will self-cancel after a turn is com-
pleted. If the indicator continues to flash
after a turn, manually return the lever tothe OFF position.
To signal a lane change, move the turn
signal lever slightly and hold it in position
(B). The lever will return to the OFF posi-tion when released.If an indicator stays on and does not
flash or if it flashes abnormally, one of the
turn signal bulbs may be burned out andwill require replacement.
One-touch lane change function
(if equipped)
To activate an one-touch lane change
function, move the turn signal lever
slightly and then release it. The lane
change signals will blink 3 times.
✽✽ NOTICE
If an indicator flash is abnormally quick
or slow, bulb may be burned out or have
a poor electrical connection in the cir-
cuit.Front fog light (if equipped)
Fog lights are used to provide improved
visibility when visibility is poor due to fog,
rain or snow, etc. The fog lights will turn
on when the fog light switch (1) is turned
on after the parklight is turned on.
To turn off the fog lights, turn the fog light
switch (1) to the OFF position.
OBK049052N
CAUTION
When in operation, the fog lights consume large amounts of vehicle electrical power. Only use the foglights when visibility is poor.
OBK049051N
Page 169 of 560
Features of your vehicle
94
4
Air conditioning system operation tips
If the vehicle has been parked in direct
sunlight during hot weather, open the
windows for a short time to let the hot
air inside the vehicle escape.
To help reduce moisture inside of the windows on rainy or humid days,
decrease the humidity inside the vehi-
cle by operating the air conditioningsystem.
During air conditioning system opera- tion, you may occasionally notice aslight change in engine speed as the
air conditioning compressor cycles.
This is a normal system operation
characteristic.
Use the air conditioning system every month only for a few minutes to ensure
maximum system performance. When using the air conditioning sys-
tem, you may notice clear water drip-
ping (or even puddling) on the ground
under the passenger side of the vehi-
cle. This is a normal system operation
characteristic.
Operating the air conditioning system in the recirculated air position provides
maximum cooling, however, continual
operation in this mode may cause the
air inside the vehicle to become stale.
During cooling operation, you may occasionally notice a misty air flow
because of rapid cooling and humid air
intake. This is a normal system opera-
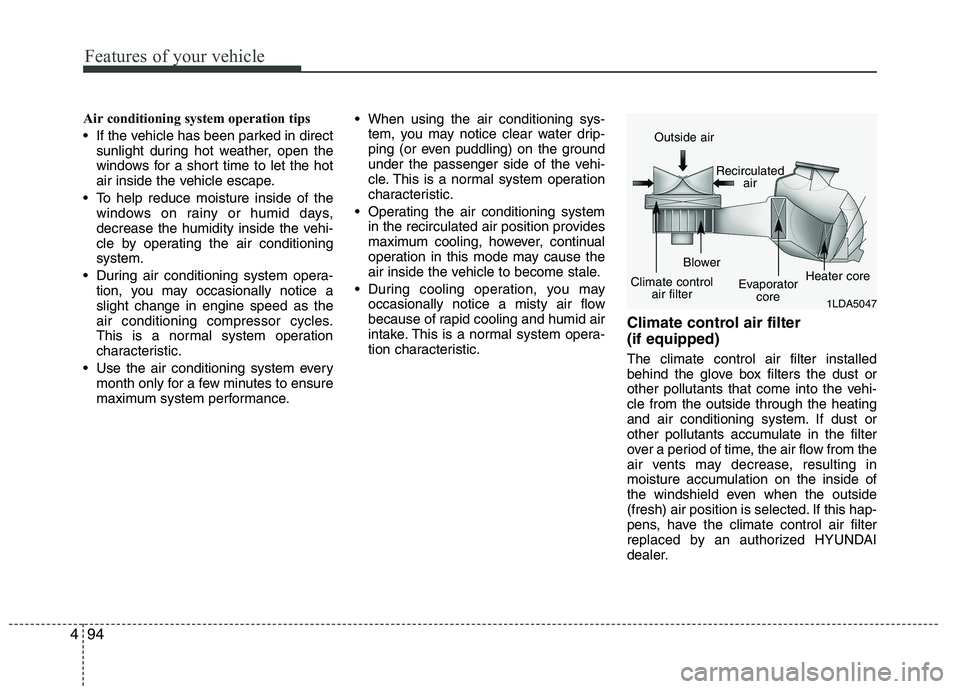
tion characteristic. Climate control air filter (if equipped) The climate control air filter installed
behind the glove box filters the dust or
other pollutants that come into the vehi-cle from the outside through the heating
and air conditioning system. If dust or
other pollutants accumulate in the filter
over a period of time, the air flow from the
air vents may decrease, resulting in
moisture accumulation on the inside of
the windshield even when the outside
(fresh) air position is selected. If this hap-
pens, have the climate control air filter
replaced by an authorized HYUNDAI
dealer.
1LDA5047
Outside air
Recirculatedair
Climate control air filter Blower
Evaporatorcore Heater core
Page 200 of 560
4125
Features of your vehicle
1. Power ON/OFF Button &Volume Control Button
Turns on/off the set when the IGNITION
SWITCH is on ACC or ON. If the button
is turned to the right, it increases the vol-
ume and left,decreases the volume.
Press this button to turn the audio sys- tem ON or OFF. (EUROPE MODEL
ONLY)
Depending on the model if the ignition switch is not on ACC or ON position.
the “Battery Discharge” warningappears on LCD after 10 seconds of
power-up, and automatically turns off
after 1 hours of operation.
Adjusts the volume of the car audio system. Rotate clockwise to increase
the volume or counterclockwise to
decrease.
2. FM Selection Button
Turns to FM mode and toggles FM1and
FM2 when the button is pressed each
time. ❈ May change in order of FM1 ➟FM2 ➟
FMA in some models. 3. AM Selection Button
Pressing the [AM] button selects the AM
band. AM Mode is displayed on the LCD. ❈
May change in order of AM ➟AMA in
some models.
4. Automatic Channel Selection Button
When the [SEEK ] button is pressed, it increases the band frequency to auto-
matically select channel. Stops at the
previous frequency if no channel is
found.
5. Preset Button
Push [1]~[6] buttons less than 0.8 sec-
ond to play the channel saved in each
button. Push Preset button for 0.8 sec-
ond or longer to save current channel to
the respective button with a beep. 6. AST(AUTO STORE Button)
When the button is pressed, it automati-
cally selects and saves channels with
high reception rate to PRESET buttons
[1]~[6] and plays the channel saved in
PRESET1. If no channel is saved after
AST, it will play the previous channel.
Saves only to the Preset memory
(1)~(6) of FMA or AMA mode in some
models.
7. SETUP Button
Press this button to turn to the SCROLL
option and the other adjustment mode.
If no action is taken for 5 seconds after
pressing the button, it will return to the
play mode. (After entering SETUP
mode, move between items using the
left, right and PUSH functions of the
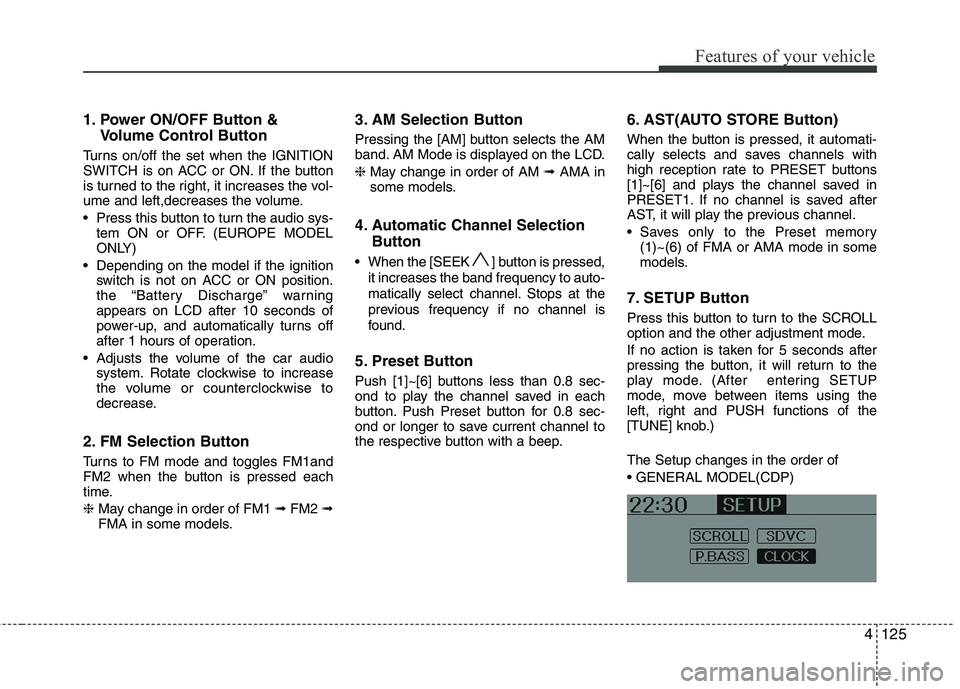
[TUNE] knob.) The Setup changes in the order of
Page 218 of 560
4143
Features of your vehicle
■■Voice Recognition Activation
The voice recognition engine con- tained in the Bluetooth System can be
activated in the following conditions:
- Button Activation
The voice recognition system will beactive when the button is pressed and after the sound of a
Beep.
- Active Listening The voice recognition system will beactive for a period of time when the
Voice Recognition system has asked
for a customer response.
The system can recognize single dig- itsfrom zero to nine while number
greater than ten will not be recognized.
If the command is not recognized, the system will announce "Pardon" or No
input voice signal from microphone.(No response)
The system shall cancel voice recogni- tion mode in following cases : When
pressing the button and saying
cancel following the beep. When not
making a call and pressing the but-
ton. When voice recognition has failed
3 consecutive times. At any time if you say “help”, the sys-
tem will announce what commands are
available.
■
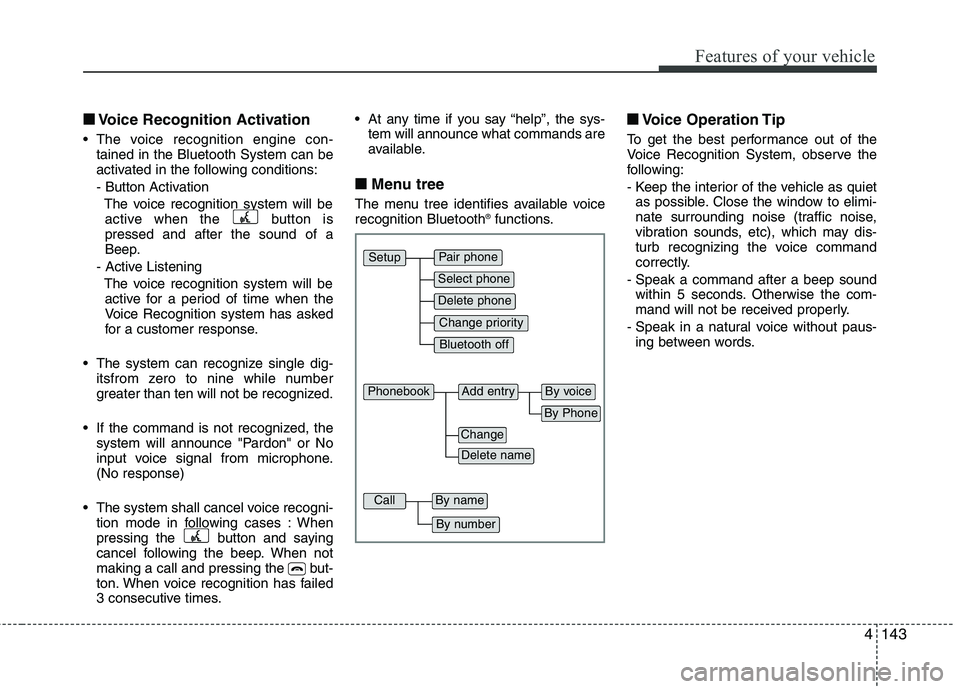
■ Menu tree
The menu tree identifies available voice recognition Bluetooth ®
functions. ■
■
Voice Operation Tip
To get the best performance out of the
Voice Recognition System, observe the
following:
- Keep the interior of the vehicle as quiet as possible. Close the window to elimi-
nate surrounding noise (traffic noise,
vibration sounds, etc), which may dis-
turb recognizing the voice command
correctly.
- Speak a command after a beep sound within 5 seconds. Otherwise the com-
mand will not be received properly.
- Speak in a natural voice without paus- ing between words.
Pair phone
Select phone
Change priority
Delete phone
Bluetooth off
Setup
Add entryPhonebook
Change
Delete name
By Phone
By voice
CallBy name
By number
Page 220 of 560
4145
Features of your vehicle
1. Press button.
2. Say “Set Up”.- The system replies with availablecommands.
- To skip the information message, press again and then a beep is heard.
3. Say “Pair Phone”
4. Proceed at Next step.
5. Say the name of your phone when prompted.
- Use any name to uniquely describe
your phone.
- Use Full name to voice tag.
- Not use to short name or similar to voice command.
6. Bluetooth ®
system will repeat the name
you stated.
7. Say "Yes" to confirm.
8. The audio displays “searching ---- passkey: 0000” and asks you to initiate
pairing procedure from the phone.
9. Search the Bluetooth ®
system on your
phone .Your phone should display your
[vehicle model name] on theBluetooth ®
device list. Then attempt
pairing on your phone
10. After Pairing is completed, your phone will start to transfer phone/contact list to the audio system. - This process may take from a few
minutes to over 10 minutes depend-
ing on the phone model and number
of entries in the phone/contact list.
11. By manual operation: - Select “PAIR” in PHONE menu,thenproceed from step 5
Note:
Until the audio displays “Transfer Complete”, Bluetooth ®
hands-free
feature may not be fully operational.
If the phone is paired to two or more vehicles of the same model, some
phones may not handle Bluetooth¢ç
devices of that name correctly. In
this case, you may need to change
the name displayed on your phone.
For example, if the vehicles' name is
HMC, you may need to change the
name displayed on you phone fromHMC.
Refer to your phone User’s Guide,
or contract your cellular carrier or
phone manufacturer for instruc-tions. When the Bluetooth
®
system is enabled,
the phone previously used is automati-
cally selected and re-connected. If you
want to select different phone previouslypaired, the phone can be selected
through “Select Phone” menu. Only a selected phone can be used with
the hands-free system at a time.
1. Press button.
2. Say "Set Up".
3. Say "Select Phone" after prompt
- The system lists all the registeredphone names.
4. Say the name or number of desired phone from the list.
5. Say "Yes" to confirm.
6. By manual operation: - Select “SELECT” in PHONE menu,then select desired phone from the list.