Page 290 of 441

289
uuBefore DrivinguMaximum Load Limit
Continued
Driving
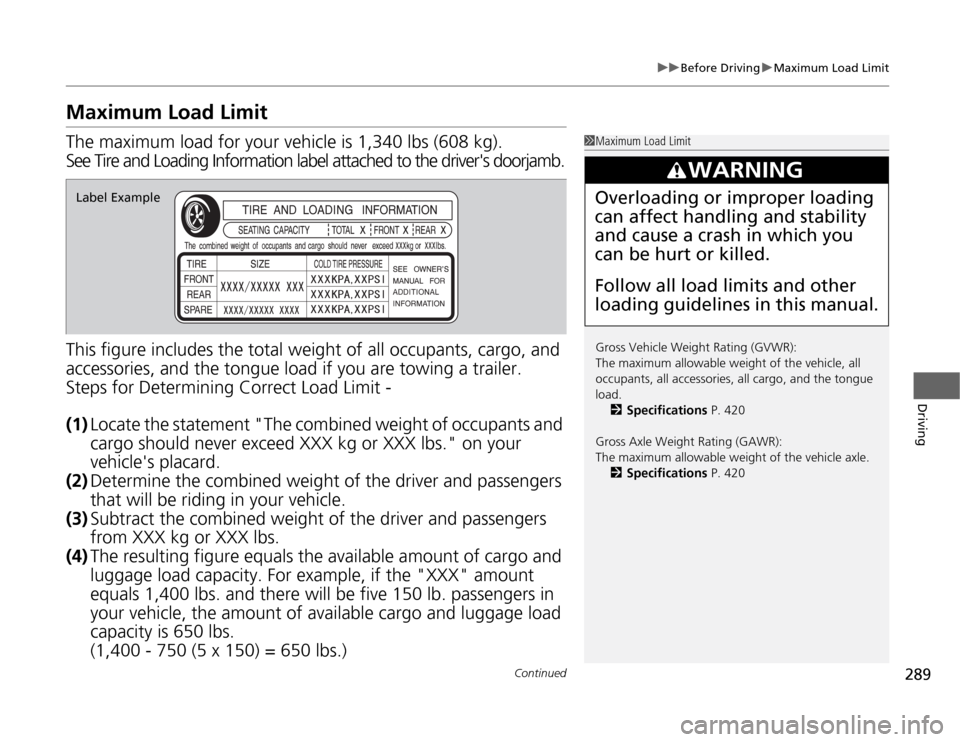
Maximum Load LimitThe maximum load for your vehicle is 1,340 lbs (608 kg).
See Tire and Loading Information label attached to the driver's doorjamb.
This figure includes the total weight of all occupants, cargo, and
accessories, and the tongue load if you are towing a trailer.
Steps for Determining Correct Load Limit -
(1)Locate the statement "The combined weight of occupants and
cargo should never exceed XXX kg or XXX lbs." on your
vehicle's placard.
(2)Determine the combined weight of the driver and passengers
that will be riding in your vehicle.
(3)Subtract the combined weight of the driver and passengers
from XXX kg or XXX lbs.
(4)The resulting figure equals the available amount of cargo and
luggage load capacity. For example, if the "XXX" amount
equals 1,400 lbs. and there will be five 150 lb. passengers in
your vehicle, the amount of available cargo and luggage load
capacity is 650 lbs.
(1,400 - 750 (5 x 150) = 650 lbs.)
1Maximum Load Limit
Gross Vehicle Weight Rating (GVWR):
The maximum allowable weight of the vehicle, all
occupants, all accessories, all cargo, and the tongue
load.
2Specifications P. 420
Gross Axle Weight Rating (GAWR):
The maximum allowable weight of the vehicle axle.
2Specifications P. 420
3
WARNING
Overloading or improper loading
can affect handling and stability
and cause a crash in which you
can be hurt or killed.
Follow all load limits and other
loading guidelines in this manual.
Label Example
Page 291 of 441
290
uuBefore DrivinguMaximum Load Limit
Driving
(5)Determine the combined weight of luggage and cargo being
loaded on the vehicle. That weight may not safely exceed the
available cargo and luggage load capacity calculated in step 4.
(6)If your vehicle will be towing a trailer, load from your trailer will
be transferred to your vehicle. Consult this manual to
determine how this reduces the available cargo and luggage
load capacity of your vehicle.
In addition, the total weight of the vehicle, all occupants,
accessories, cargo, and trailer tongue load must not exceed the
Gross Vehicle Weight Rating (GVWR) or the Gross Axle Weight
Rating (GAWR). Both are on a label on the driver’s doorjamb.
Load Limits Example
Example1
Max Load
1,340 lbs
(608 kg)Passenger Weight
150 lbs x 2 = 300 lbs
(68 kg x 2 = 136 kg)Cargo Weight
1,040 lbs
(472 kg)
Example2
Max Load
1,340 lbs
(608 kg)Passenger Weight
150 lbs x 5 = 750 lbs
(68 kg x 5 = 340 kg)Cargo Weight
590 lbs
(268 kg)
Page 327 of 441

uuRefuelinguHow to Refuel
326Driving
Qualifying gasoline retailers will, in most cases, identify their gasoline as having met
"TOP TIER Detergent Gasoline" standards at the retail location. This fuel is
guaranteed to contain the proper level of detergent additives and be free of metallic
additives. The proper level of detergent additives, and absence of harmful metallic
additives in gasoline, help avoid build-up of deposits in your engine and emission
control system.
For further important fuel-related information for your vehicle, or on information on
gasoline that does not contain MMT, visit www.hondacars.com. In Canada, visit
www.honda.ca for additional information on gasoline. For more information on top
tier gasoline, visit www.toptiergas.com.■
Fuel tank capacity: 21 US gal (79.5 liters)
How to Refuel
1.Stop your vehicle with the service station
pump on the left side of the vehicle in the
rear.
2.Turn off the engine.
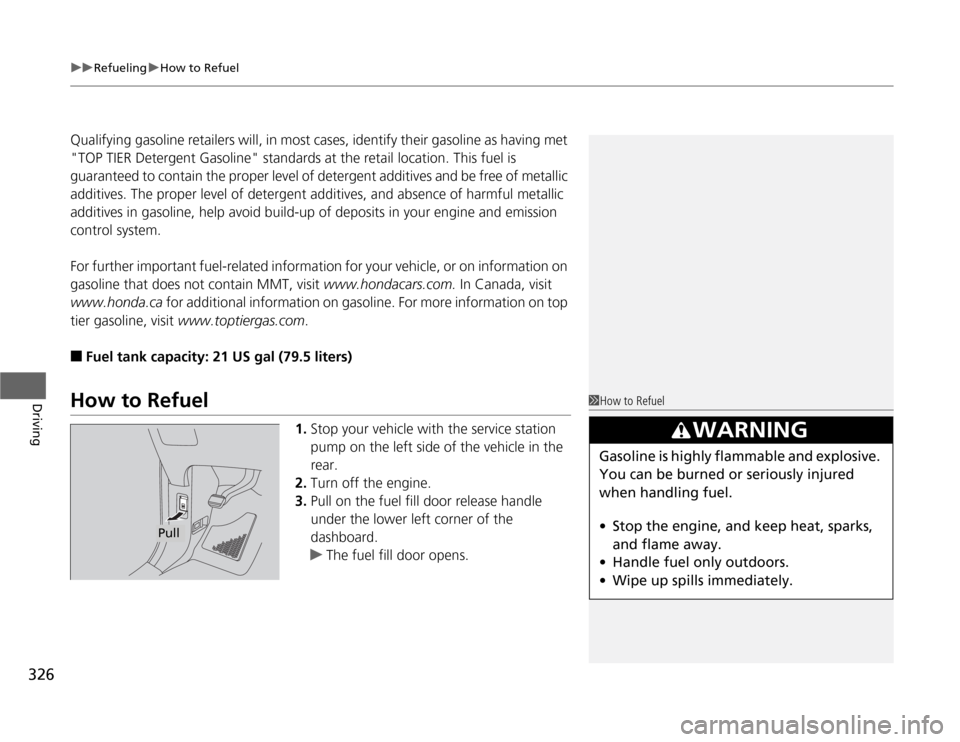
3.Pull on the fuel fill door release handle
under the lower left corner of the
dashboard.
uThe fuel fill door opens.
1How to Refuel
3
WARNING
Gasoline is highly flammable and explosive.
You can be burned or seriously injured
when handling fuel.
•Stop the engine, and keep heat, sparks,
and flame away.
•Handle fuel only outdoors.
•Wipe up spills immediately.
Pull
Page 328 of 441

327
uuRefuelinguHow to Refuel
Driving
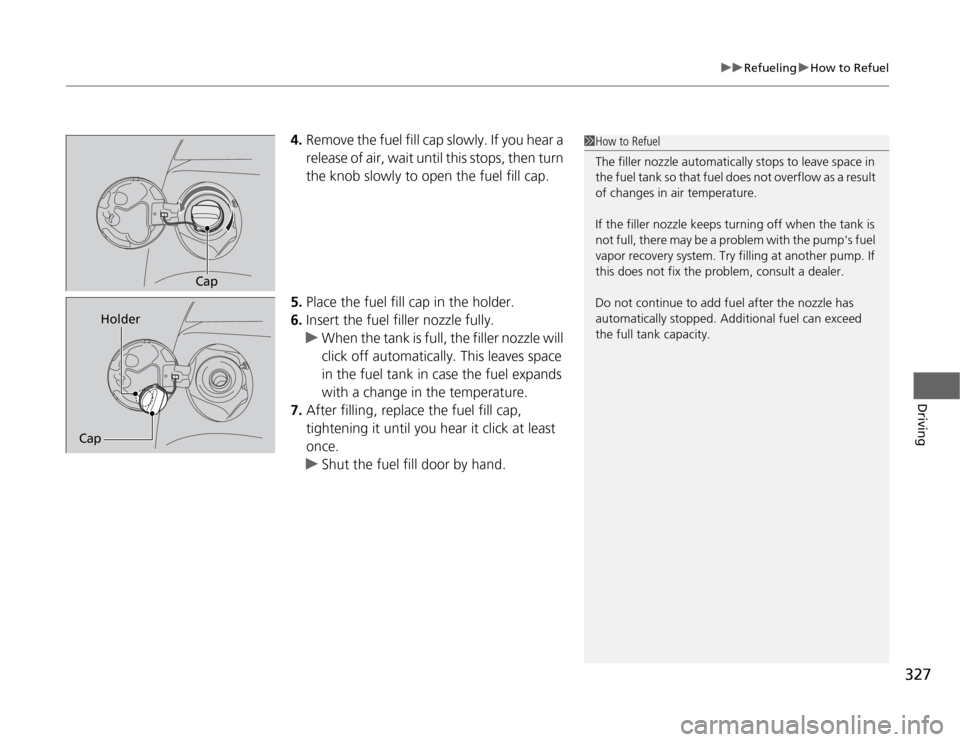
4.Remove the fuel fill cap slowly. If you hear a
release of air, wait until this stops, then turn
the knob slowly to open the fuel fill cap.
5.Place the fuel fill cap in the holder.
6.Insert the fuel filler nozzle fully.
uWhen the tank is full, the filler nozzle will
click off automatically. This leaves space
in the fuel tank in case the fuel expands
with a change in the temperature.
7.After filling, replace the fuel fill cap,
tightening it until you hear it click at least
once.
uShut the fuel fill door by hand.
1How to Refuel
The filler nozzle automatically stops to leave space in
the fuel tank so that fuel does not overflow as a result
of changes in air temperature.
If the filler nozzle keeps turning off when the tank is
not full, there may be a problem with the pump's fuel
vapor recovery system. Try filling at another pump. If
this does not fix the problem, consult a dealer.
Do not continue to add fuel after the nozzle has
automatically stopped. Additional fuel can exceed
the full tank capacity.
Cap
CapHolder
Page 371 of 441

370Maintenance
Checking and Maintaining TiresChecking TiresTo safely operate your vehicle, your tires must be of the proper type and size, in
good condition with adequate tread, and properly inflated.■
Inflation guidelines
Properly inflated tires provide the best combination of handling, tread life, and comfort.
Refer to the driver’s doorjamb label or specification’s page for the specified pressure.
Underinflated tires wear unevenly, adversely affect handling and fuel economy, and
are more likely to fail from overheating.
Overinflated tires make your vehicle ride harshly, are more prone to road hazards,
and wear unevenly.
Every day before you drive, look at each of the tires. If one looks lower than the
others, check the pressure with a tire gauge.
At least once a month or before long trips, use a gauge to measure the pressure in
all tires, including the spare. Even tires in good condition can lose 1 to 2 psi (10 to
20 kPa, 0.1 to 0.2 kgf/cm
2) per month.
■
Inspection guidelines
Every time you check inflation, also examine the tires and valve stems.
Look for:
•Bumps or bulges on the side or in the tread. Replace the tire if you find any cuts,
splits, or cracks in the side of the tire. Replace it if you see fabric or cord.
•Remove any foreign objects and inspect for air leaks.
•Uneven tread wear. Have a dealer check the wheel alignment.
•Excessive tread wear.
2Wear Indicators P. 375
•Cracks or other damage around valve stem.
1Checking Tires
Measure the air pressure when tires are cold. This
means the vehicle has been parked for at least three
hours, or driven less than 1 mile (1.6 km). If
necessary, add or release air until the specified
pressure is reached.
If checked when hot, tire pressure can be as much as
4–6 psi (30–40 kPa, 0.3–0.4 kgf/cm
2) higher than if
checked when cold.
Have a dealer check the tires if you feel a consistent
vibration while driving. New tires and any that have
been removed and reinstalled should be properly
balanced.
3
WARNING
Using tires that are excessively worn or
improperly inflated can cause a crash in
which you can be seriously hurt or killed.
Follow all instructions in this owner’s
manual regarding tire inflation and
maintenance.
Page 372 of 441

371
uuChecking and Maintaining TiresuTire and Loading Information Label
Continued
Maintenance
Tire and Loading Information LabelThe label attached to the driver’s doorjamb provides necessary tire and loading
information.Tire Labeling
The tires that came on your vehicle have a
number of markings. Those you should be
aware of are described below.
Whenever tires are replaced, they should be replaced with tires of the same size.
1Tire and Loading Information Label
The tire and loading information label attached to the
driver’s doorjamb contains:a
The number of people your vehicle can carry.
b
The total weight your vehicle can carry. Do not
exceed this weight.
c
The original tire sizes for front, rear, and spare.
d
The proper cold tire pressure for front, rear, and
spare.
Label
ExampleExample
Tire Size
Tire
Identification
Number (TIN)
Maximum
Tire Load
Maximum
Tire Pressure
Tire Size■
Tire Sizes
1Tire Size
Following is an example of tire size with an
explanation of what each component means.
P235/60 R18 102T
P: Vehicle type (P indicates passenger vehicle).
235: Tire width in millimeters.
60: Aspect ratio (the tire’s section height as a
percentage of its width).
R: Tire construction code (R indicates radial).
18: Rim diameter in inches.
102: Load index (a numerical code associated with
the maximum load the tire can carry).
T: Speed symbol (an alphabetical code indicating the
maximum speed rating).
Page 375 of 441

uuChecking and Maintaining TiresuDOT Tire Quality Grading (U.S. Vehicles)
374Maintenance
The traction grades, from highest to lowest, are AA, A, B, and C.
Those grades represent the tire's ability to stop on wet pavement
as measured under controlled conditions on specified
government test surfaces of asphalt and concrete. A tire marked
C may have poor traction performance.
The temperature grades are A (the highest), B, and C,
representing the tire's resistance to the generation of heat and its
ability to dissipate heat when tested under controlled conditions
on a specified indoor laboratory test wheel. Sustained high
temperature can cause the material of the tire to degenerate and
reduce tire life, and excessive temperature can lead to sudden tire
failure. The grade C corresponds to a level of performance which
all passenger car tires must meet under the Federal Motor Vehicle
Safety Standard No. 109. Grades B and A represent higher levels
of performance on the laboratory test wheel than the minimum
required by law.■
Traction
■
Temperature
1TractionWarning: The traction grade
assigned to this tire is based on
straight-ahead braking traction tests,
and does not include acceleration,
cornering, hydroplaning, or peak
traction characteristics.1TemperatureWarning: The temperature grade for
this tire is established for a tire that is
properly inflated and not
overloaded. Excessive speed,
underinflation, or excessive loading,
either separately or in combination,
can cause heat buildup and possible
tire failure.
Page 382 of 441
381
uuRemote Transmitter CareuReplacing the Button Battery
Maintenance
1.Unscrew the cover with a small Phillips-
head screwdriver. Press a button to pry
open the transmitter.
2.Open the keypad.
uSeparate the inner cover from the
keypad by releasing the two tabs on the
cover.
3.Make sure to replace the battery with the
correct polarity.
1Replacing the Battery
NOTICEAn improperly disposed of battery can damage the
environment. Always confirm local regulations for
battery disposal.
Replacement batteries are commercially available or
at a dealer.
Models with power sliding doorKeypad
Screw
Battery type: CR2025
BatteryTab