2012 HONDA FIT light
[x] Cancel search: lightPage 246 of 286

245
uuIf a Tire Goes FlatuTemporarily Repairing a Flat Tire
*
Continued
Handling the Unexpected
Temporarily Repairing a Flat Tire
*
If the tire has a large cut or is otherwise severely damaged, you will need to have the
vehicle towed. If the tire only has a small puncture, from a nail for instance, you can
use the tire repair kit so that you can drive to the nearest service station for a more
permanent repair.
If a tire goes flat while driving, grasp the steering wheel firmly, and brake gradually
to reduce speed. Then stop in a safe place.
1.Park the vehicle on firm, level, and non-slippery ground.
2.Put the shift lever in
(P
.
3.Set the parking brake.
4.Turn on the hazard warning lights and turn the ignition switch to LOCK
(0
.
■
Getting Ready to Temporarily Repair the Flat Tire
1Temporarily Repairing a Flat Tire
*
The kit should not be used in the following situations.
Instead, contact a dealer or a roadside assistant to
have the vehicle towed.•The tire sealant has expired.•More than two tires are punctured.•The puncture is greater than 3/16 inch (4 mm) in
diameter.•The tire side wall is damaged or the puncture is
outside the tire tread.•Damage has been caused by driving with the tires
extremely under inflated.•The tire bead is no longer seated.•A rim is damaged.
Do not remove a nail or screw that punctured the
tire. If you remove it from the tire, you may not be
able to repair the puncture using the kit.NOTICEDo not use a puncture-repairing agent other than the
one provided in the kit that came with your vehicle. If
used, you may permanently damage the tire pressure
sensor.
When the puncture is:
Smaller than 3/16 inch
(4 mm)
Larger than 3/16 inch
(4 mm) Kit Use
Yes
No Contact
Area
Instruction
Manual Air Compressor Wheel
Label Sealant Bottle Expiration Date
Speed Limit
Label
* Not available on all models
Page 251 of 286

250Handling the Unexpected
Engine Does Not StartChecking the EngineIf the engine does not start, turn the ignition switch to START
(e
and check the
starter.
Starter condition
Checklist
Starter doesn’t turn or turns
over slowly.
The battery may be dead. Check
each of the items on the right and
respond accordingly.
Check brightness of the interior light.
Turn on interior lights and check brightness.●
If the interior lights are dim or do not come on at all
2Battery P. 231
●
If the interior lights come on normally
2 Inspecting and Changing Fuses P. 263
The starter turns over normally
but the engine doesn’t start.
There may be a problem with the
fuse. Check each of the items on
the right and respond accordingly.
Review the engine start procedure.
Follow its instructions, and try to start the engine again.
2 Starting the Engine P. 161
Check the immobilizer system indicator.
When the immobilizer system indicator is blinking, the engine cannot be started.
2Immobilizer System P. 90
Check the fuel level.
There should be enough fuel in the tank.
2 Fuel Gauge P. 72
Check the fuse.
Check all fuses, or have the vehicle checked by a dealer.
2Inspecting and Changing Fuses P. 263
If the problem continues:
2Emergency Towing P. 264
1Checking the Engine
If you must start the vehicle immediately, use an
assisting vehicle to jump start it.
2Jump Starting P. 251
Page 252 of 286

251
Continued
Handling the Unexpected
Jump StartingTurn off the power to electric devices, such as audio and lights. Turn off the engine,
then open the hood.
1.Connect the first jumper cable to your
vehicle’s battery + terminal.
uRemove the cover from the under-hood
fuse box.
2Engine Compartment Fuse Box P. 260
2.Connect the other end of the first jumper
cable to the assisting vehicle’s + terminal.
uUse a 12-volt booster battery only.
3.Connect the second jumper cable to the
assisting vehicle’s - terminal.
4.Connect the other end of the second
jumper cable to the grounding strap as
shown.
Do not connect this jumper cable to any
other part.
5.If your vehicle is connected to another
vehicle, start the assisting vehicle’s engine
and increase its rpm slightly.
6.Attempt to start your vehicle’s engine. If it
turns over slowly, check that the jumper
cables have good metal-to-metal contact.
■
Jump Starting Procedure
1Jump Starting
Securely attach the jumper cables clips so that they
do not come off when the engine vibrates. Also be
careful not to tangle the jumper cables or allow the
cable ends to touch each other while attaching or
detaching the jumper cables.
Battery performance degrades in cold conditions and
may prevent the engine from starting.
3
WARNING
A battery can explode if you do not follow
the correct procedure, seriously injuring
anyone nearby.
Keep all sparks, open flames, and smoking
materials away from the battery.
Booster Battery
Page 255 of 286

254Handling the Unexpected
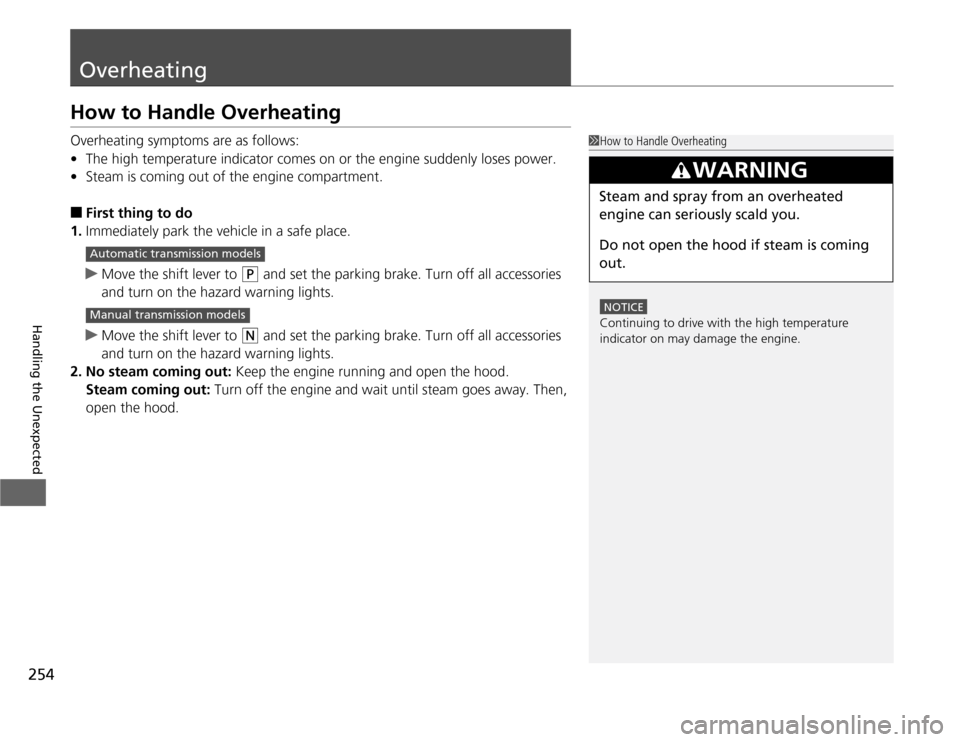
OverheatingHow to Handle OverheatingOverheating symptoms are as follows:
•The high temperature indicator comes on or the engine suddenly loses power.
•Steam is coming out of the engine compartment.■
First thing to do
1.Immediately park the vehicle in a safe place.
uMove the shift lever to
(P
and set the parking brake. Turn off all accessories
and turn on the hazard warning lights.
uMove the shift lever to
(N
and set the parking brake. Turn off all accessories
and turn on the hazard warning lights.
2. No steam coming out: Keep the engine running and open the hood.
Steam coming out: Turn off the engine and wait until steam goes away. Then,
open the hood.
1How to Handle Overheating
NOTICEContinuing to drive with the high temperature
indicator on may damage the engine.
3
WARNING
Steam and spray from an overheated
engine can seriously scald you.
Do not open the hood if steam is coming
out.
Automatic transmission modelsManual transmission models
Page 257 of 286

256Handling the Unexpected
Indicator, Coming On/BlinkingIf the Low Oil Pressure Indicator Comes On
■
Reasons for the indicator to come on
Comes on when the engine oil pressure is low.
■
What to do as soon as the indicator comes on
1.Immediately park the vehicle in a safe place.
2.If necessary, turn the hazard warning lights on.
■
What to do after parking the vehicle
1.Stop the engine and let it sit for about one minute.
2.Open the hood and check the oil level.
uAdd oil as necessary.
3.Start the engine and check the low oil pressure indicator.
uThe light goes out: Start driving again.
uThe light does not go out within 10 seconds: Stop the engine and
contact a dealer for repairs immediately.
If the Charging System Indicator Comes On
■
Reasons for the indicator to come on
Comes on when the battery is not being charged.
■
What to do when the indicator comes on
Turn off the heating and cooling
* system, rear defogger, and other
electrical systems, and immediately contact a dealer for repairs.
1If the Low Oil Pressure Indicator Comes On
NOTICERunning the engine with low oil pressure can cause
serious mechanical damage almost immediately.1If the Charging System Indicator Comes On
If you need to stop temporarily, do not turn off the
engine. Restarting the engine may rapidly discharge
the battery.
* Not available on all models
Page 259 of 286

258
uuIndicator, Coming On/BlinkinguIf the Brake System Indicator Comes On
Handling the Unexpected
If the Brake System Indicator Comes On
■
Reasons for the indicator to come on
•The brake fluid is low.
•There is a malfunction in the brake system.
■
What to do when the indicator comes on while driving
Press the brake pedal lightly to check pedal pressure.
•If normal, check the brake fluid level the next time you stop.
•If abnormal, take immediate action. If necessary, downshift the
transmission to slow the vehicle using engine braking.
If the EPS Indicator Comes On
■
Reasons for the indicator to come on
•Comes on when there is a problem with EPS.
•If you depress the accelerator pedal repeatedly to increase the engine
speed while the engine is idling, the indicator comes on, and
sometimes the steering wheel becomes harder to operate.
■
What to do when the indicator comes on
Stop the vehicle in a safe place and restart the engine.
If the indicator comes on and stays on, immediately have your vehicle
inspected by a dealer.
1If the Brake System Indicator Comes On
Have your vehicle repaired immediately.
It is dangerous to drive with low brake fluid. If there
is no resistance from the brake pedal, stop
immediately in a safe place. If necessary downshift
the gears.
If the brake system indicator and ABS indicator come
on simultaneously, the electronic brake distribution
system is not working. This can result in vehicle
instability under sudden braking.
Have your vehicle inspected by a dealer immediately.
U.S.
Canada
1If the EPS Indicator Comes On
NOTICEIf you repeatedly turn the steering wheel at an
extremely low speed, or hold the steering wheel on
the full left or right position for a while, the system
heats up. The system goes into a protective mode,
and limits its performance. The steering wheel
becomes harder and harder to operate. Once the
system cools down, EPS is restored. Repeated
operation under these conditions can eventually
damage the system.
Page 262 of 286

261
uuFusesuFuse Locations
Handling the Unexpected
Located behind the fuse lid. Pull the fuse lid
toward you.
Fuse locations are shown on the label on
the side panel.
Locate the fuse in question by the fuse
number and label number.■
Interior Fuse Box
Fuse Lid
Fuse Label
■
Circuit protected and fuse rating
Circuit Protected
Amps
1
Back Up
10 A
2
TPMS
*
(7.5 A)
3
Driver’s Power Window
20 A
4
−
−
5
Back Up Light
10 A
6
SRS
10 A
7
Transmission SOL
*
(10 A)
8
SRS
7.5 A
9
Fog Light
*
(20 A)
10
A/C
*
7.5 A
11
ABS/VSA
7.5 A
12
ACG
10 A
13
ACC Socket
20 A
14
Key Lock/Radio
7.5 A
15
Daytime Running Light
7.5 A
16
Rear Wiper
10 A
17
Front Passenger’s Power
Window
20 A
18
Rear Passenger’s Side
Power Window
20 A
19
Rear Driver’s Side Power
Window
20 A
20
Fuel Pump
15 A
21
Washer
15 A
22
Meter
7.5 A
23
Hazard
10 A
24
Stop/Horn
10 A
25
−
−
26
LAF
10 A
27
Door Lock Main
*
(30 A)
28
Headlight Main
20 A
29
Small Light
10 A
30
Main Fan Motor
30 A
31
−
−
32
Passenger’s Side Headlight
Low Beam
10 A
33
IG Coil
15 A
34
Driver’s Side Headlight Low
Beam
10 A
35
Door Lock
*
(15 A)
36
Door Lock
*
(15 A)
37
ABS/VSA FSR
30 A
38
Door Lock
*
(15 A)
39
IGP
15 A
40
−
−
41
−
−
42
−
−
Circuit Protected
Amps
* Not available on all models
Page 263 of 286

262
uuFusesuFuse Locations
Handling the Unexpected
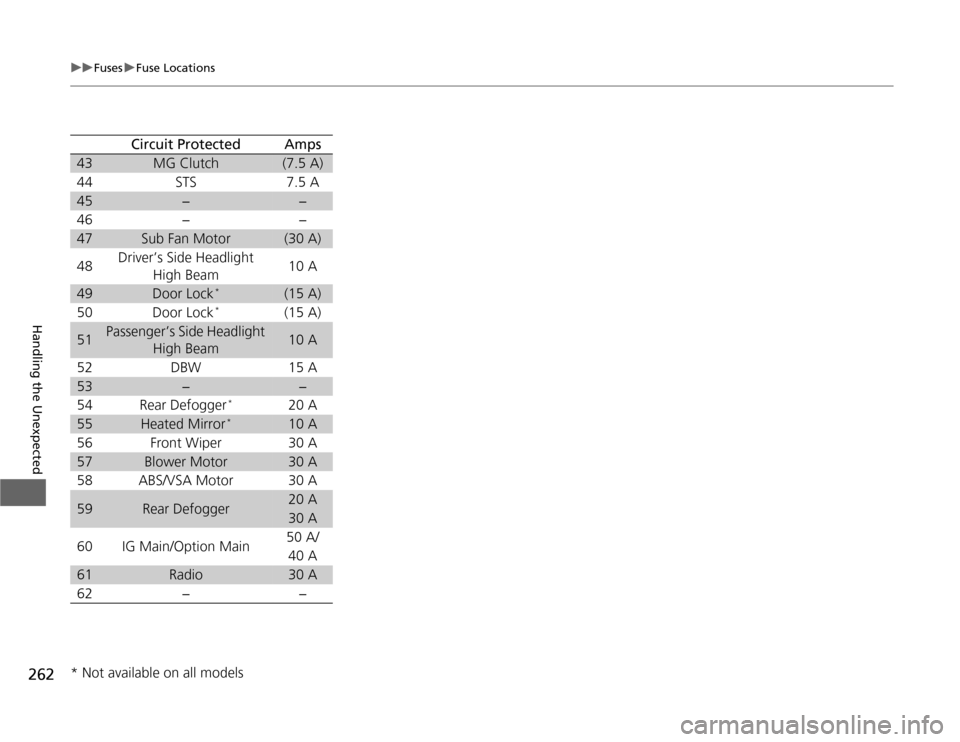
43
MG Clutch
(7.5 A)
44
STS
7.5 A
45
−
−
46
−
−
47
Sub Fan Motor
(30 A)
48
Driver’s Side Headlight
High Beam
10 A
49
Door Lock
*
(15 A)
50
Door Lock
*
(15 A)
51
Passenger’s Side Headlight
High Beam
10 A
52
DBW
15 A
53
−
−
54
Rear Defogger
*
20 A
55
Heated Mirror
*
10 A
56
Front Wiper
30 A
57
Blower Motor
30 A
58
ABS/VSA Motor
30 A
59
Rear Defogger
20 A30 A
60
IG Main/Option Main
50 A/40 A
61
Radio
30 A
62
−
−
Circuit Protected
Amps
* Not available on all models