Page 172 of 286
171
uuWhen DrivinguShifting
Continued
Driving
ShiftingFully depress the clutch pedal to operate the shift lever and change gears, then
slowly release the pedal.
Depress the clutch pedal, and pause for a few seconds before shifting into
(R
, or
shift into one of the forward gears for a moment. This stops the gears so they do not
“grind.”
■
Shift Lever Operation
Manual transmission models
1Shifting
NOTICEDo not shift to
(R
before the vehicle comes to a
complete stop.
Shifting to
(R
before stopping can damage the
transmission.
NOTICEBefore downshifting, make sure the engine will not
go into the tachometer’s red zone. Should this occur,
it can severely damage your engine.
Page 179 of 286
178
uuWhen DrivinguTPMS (Tire Pressure Monitoring System)
Driving
TPMS (Tire Pressure Monitoring System)
Monitors the tire pressure while you are
driving. If your vehicle’s tire pressure becomes
significantly low, the low tire pressure
indicator comes on.
U.S. models only
1TPMS (Tire Pressure Monitoring System)
Conditions such as low ambient temperature and
altitude change directly affect tire pressure and can
trigger the low tire pressure indicator to come on.
2If the Low Tire Pressure Indicator Comes
On P. 259
Tire pressure checked and inflated in:•Warm weather can become under-inflated in
colder weather.•Cold weather can become over-inflated in warmer
weather.
The low tire pressure indicator will not come on as a
result of over inflation.
Page 189 of 286

uuRefuelinguHow to Refuel
188Driving
4.Remove the fuel fill cap slowly. If you hear a
release of air, wait until this stops, then turn
the knob slowly to open the fuel fill cap.
5.Place the fuel fill cap in the holder.
6.Insert the filler nozzle fully.
uWhen the tank is full, the fuel nozzle will
click off automatically. This leaves space
in the fuel tank in case the fuel expands
with a change in the temperature.
7.After filling, replace the fuel fill cap,
tightening it until you hear it click at least
once.
uShut the fuel fill door by hand.
1How to Refuel
The filler nozzle automatically stops to leave space in
the fuel tank so that fuel does not overflow as a result
of changes in air temperature.
If the fuel nozzle keeps turning off when the tank is
not full, there may be a problem with the pump’s fuel
vapor recovery system. Try filling at another pump. If
this does not fix the problem, consult a dealer.
Do not continue to add fuel after the nozzle has
automatically stopped. Additional fuel can exceed
the full tank capacity.
Cap
Cap
Holder
Page 196 of 286

195
Continued
Maintenance
Maintenance Minder
TM
If the engine oil life is less than 15%, you will see the Maintenance Minder messages
appear on the information display every time you turn the ignition switch to ON
(w
.
The messages notify you when to change the engine oil, or when to bring your
vehicle to a dealer for indicated maintenance services.
To Use Maintenance Minder
TM
1.Turn the ignition switch to ON
(w
.
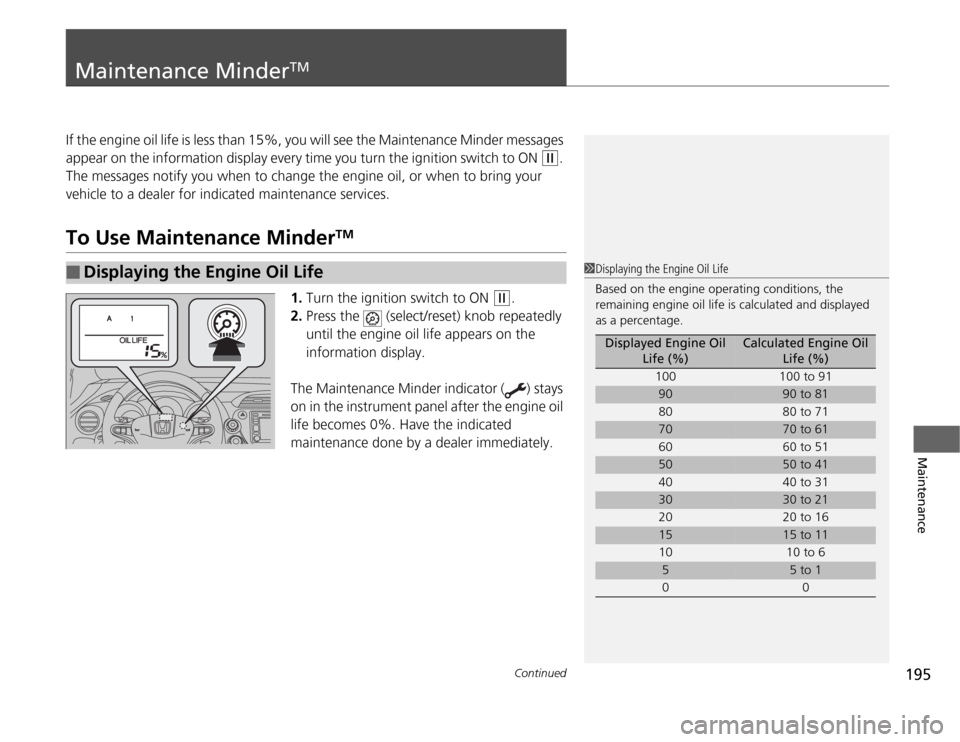
2.Press the (select/reset) knob repeatedly
until the engine oil life appears on the
information display.
The Maintenance Minder indicator ( ) stays
on in the instrument panel after the engine oil
life becomes 0%. Have the indicated
maintenance done by a dealer immediately.
■
Displaying the Engine Oil Life
1Displaying the Engine Oil Life
Based on the engine operating conditions, the
remaining engine oil life is calculated and displayed
as a percentage.
Displayed Engine Oil
Life (%)
Calculated Engine Oil
Life (%)
100 100 to 91
90
90 to 81
80 80 to 71
70
70 to 61
60 60 to 51
50
50 to 41
40 40 to 31
30
30 to 21
20 20 to 16
15
15 to 11
10 10 to 6
5
5 to 1
00
Page 198 of 286

197
uuMaintenance Minder
TMuTo Use Maintenance Minder
TM
Continued
Maintenance
■
Maintenance Service Items
1Maintenance Service Items•Independent of the Maintenance Minder
information, replace the brake fluid every 3 years.•Inspect idle speed every 160,000 miles (256,000
km).•Adjust the valves during services A, B, 1, 2, or 3 if
they are noisy.
Maintenance Minder Message Maintenance
Minder Indicator
Sub Items Main Item
*1: If a message SERVICE does not appear more than 12 months after the display is reset, change the
engine oil every year.
*2: Canadian A/T models only
# : See information on maintenance and emissions warranty.CODE
Maintenance Main Items
A
●
Replace engine oil
*1
B
●
Replace engine oil and oil filter
●
Inspect front and rear brakes/service as necessary
●
Check parking brake adjustment
●
Inspect tie rod ends, steering gearbox, and boots
●
Inspect suspension components
●
Inspect driveshaft boots
●
Inspect brake hoses and lines (Including ABS/VSA)
●
Inspect all fluid levels and condition of fluids
●
Inspect exhaust system
#
●
Inspect fuel lines and connections
#
●
Check expiration date for TRK bottle
*2
*3: If you drive in dusty conditions, replace the air cleaner element every 15,000 miles (24,000 km).
*4: If you drive primarily in urban areas that have high concentrations of soot in the air from industry and
from diesel-powered vehicles, replace every 15,000 miles (24,000 km).
*5: If you tow a Fit behind a motorhome, the transmission fluid must be changed every 2 years or 30,000
miles (48,000 km), whichever comes first. (For A/T only)CODE
Maintenance Sub Items
1
●
Rotate tires
2
●
Replace air cleaner element
*3
●
Replace dust and pollen filter
*4
●
Inspect drive belt
3
●
Replace transmission fluid
*5
4
●
Replace spark plugs
●
Inspect valve clearance
5
●
Replace engine coolant
Page 205 of 286

204
uuMaintenance Under the HooduChanging the Engine Oil and Oil Filter
Maintenance
Changing the Engine Oil and Oil FilterYou must change the engine oil and oil filter regularly in order to maintain the
engine’s lubrication. The engine may be damaged if they are not changed regularly.
Change the oil and filter in accordance with the Maintenance Minder message on
the information display.
1.Run the engine until it reaches normal
operating temperature, and then turn the
engine off.
2.Open the hood and remove the engine oil
fill cap.
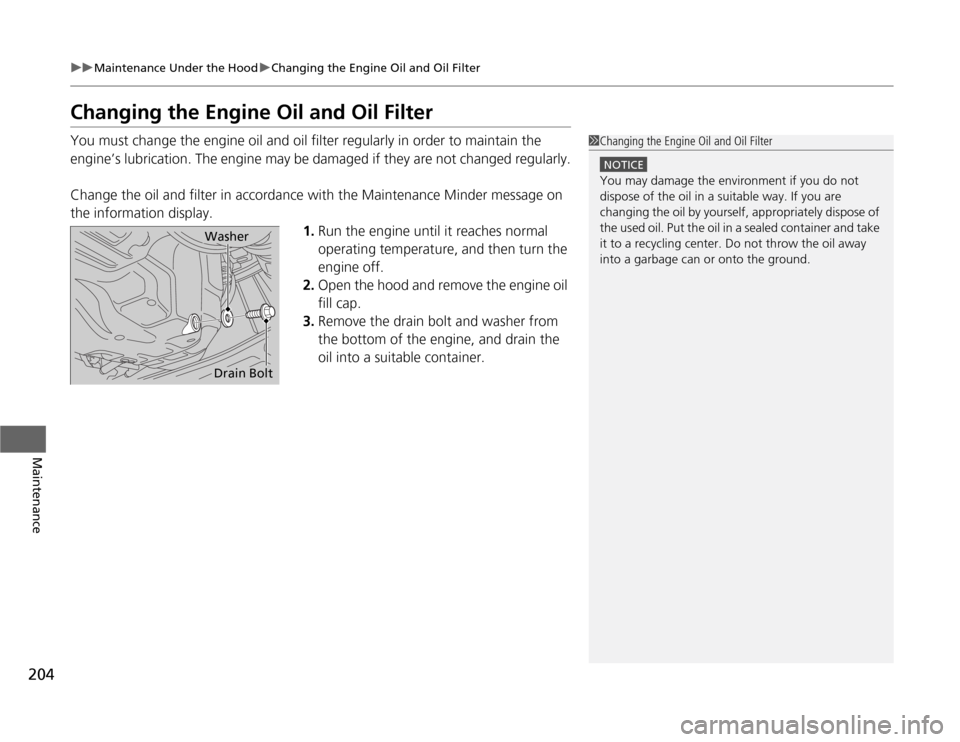
3.Remove the drain bolt and washer from
the bottom of the engine, and drain the
oil into a suitable container.
1Changing the Engine Oil and Oil Filter
NOTICEYou may damage the environment if you do not
dispose of the oil in a suitable way. If you are
changing the oil by yourself, appropriately dispose of
the used oil. Put the oil in a sealed container and take
it to a recycling center. Do not throw the oil away
into a garbage can or onto the ground.
WasherDrain Bolt
Page 206 of 286

205
uuMaintenance Under the HooduChanging the Engine Oil and Oil Filter
Maintenance
4.Remove the oil filter and dispose of the
remaining oil.
5.Check that the filter gasket is not stuck to
the engine contact surface.
uIf it is stuck, you must detach it.
6.Wipe away dirt and dust adhering to the
contact surface of the engine block, and
install a new oil filter.
uApply a light coat of new engine oil to
the oil filter rubber seal.
7.Put a new washer on the drain bolt, then
reinstall the drain bolt.
uTightening torque:
29 lbf∙ft (39 N∙m, 4.0 kgf∙m)
8.Pour the recommended engine oil into the
engine.
uEngine oil change capacity (including
filter):
3.8 US qt (3.6 L)
9.Reinstall the engine oil fill cap securely and
start the engine.
10.Run the engine for a few minutes, and
then check that there is no leak from the
drain bolt or oil filter.
11.Stop the engine, wait for three minutes,
and then check the oil level on the
dipstick.
uIf necessary, add more engine oil.
1Changing the Engine Oil and Oil Filter
You will need a special wrench to replace the oil
filter. You can buy this wrench from a dealer.
When installing the new oil filter, follow the
instructions supplied with the oil filter.
Reinstall the engine oil fill cap. Start the engine. The
low oil pressure indicator should go off within five
seconds. If it does not, turn off the engine, and check
your work.
Oil Filter
Page 243 of 286

uuIf a Tire Goes FlatuChanging a Flat Tire
*
242Handling the Unexpected
1.Place the jack under the jacking point
closest to the tire to be changed.
2.Turn the end bracket (as shown in the
image) clockwise until the top of the jack
contacts the jacking point.
uMake sure that the jacking point tab is
resting in the jack notch.
3.Raise the vehicle, using the jack handle bar
and the jack handle, until the tire is off the
ground.
■
How to Set Up the Jack
1How to Set Up the Jack
Do not use the jack with people or luggage in the
vehicle.
Use the jack provided in your vehicle.
Other jacks may not support the weight (“load”) or
their shape may not match.
The following instructions must be followed to use
the jack safely.•Do not use while the engine is running.•Use only where the ground is firm and level.•Use only at the jacking points.•Do not get in the vehicle while using the jack.•Do not put anything on top of or underneath the
jack.
3
WARNING
The vehicle can easily roll off the jack,
seriously injuring anyone underneath.
Follow the directions for changing a tire
exactly, and never get under the vehicle
when it is supported only by the jack.
Jack
Handle
BarWheel Nut
Wrench as Jack Handle