2012 HONDA FIT Flat tow
[x] Cancel search: Flat towPage 1 of 286

ContentsThis owner’s manual should be considered a permanent part of the
vehicle and should remain with the vehicle when it is sold.
This owner’s manual covers all models of your vehicle. You may find
descriptions of equipment and features that are not on your
particular model.
Images throughout this owner’s manual (including the front cover)
represent features and equipment that are available on some, but
not all, models. Your particular model may not have some of these
features.
This owner’s manual is for vehicles sold in the United States and
Canada.
The information and specifications included in this publication were
in effect at the time of approval for printing. Honda Motor Co., Ltd.
reserves the right, however, to discontinue or change specifications
or design at any time without notice and without incurring any
obligation.
2Safe Driving P. 21For Safe Driving P. 22 Seat Belts P. 26 Airbags P. 342Instrument Panel P. 63Indicators P. 64 Gauges and Displays P. 722Controls P. 75Setting the Clock P. 76 Locking and Unlocking the Doors P. 77
Opening and Closing the Windows P. 92
Adjusting the Seats P. 1032Features P. 121Audio System P. 122 Audio System Basic Operation P. 125
Bluetooth® HandsFreeLink®
* P. 140
2Driving P. 153Before Driving P. 154 Towing a Trailer P. 159
Refueling P. 186 Fuel Economy P. 1892Maintenance P. 191Before Performing Maintenance P. 192 Maintenance Minder
TM P. 195
Checking and Maintaining Wiper Blades P. 218
Heating and Cooling
* System Maintenance P. 233
2Handling the Unexpected P. 237Tools P. 238 If a Tire Goes Flat P. 239
Overheating P. 254 Indicator, Coming On/Blinking P. 2562Information P. 267Specifications P. 268 Identification Numbers P. 270
Emissions Testing P. 273 Warranty Coverages P. 275
Page 17 of 286
16Quick Reference Guide
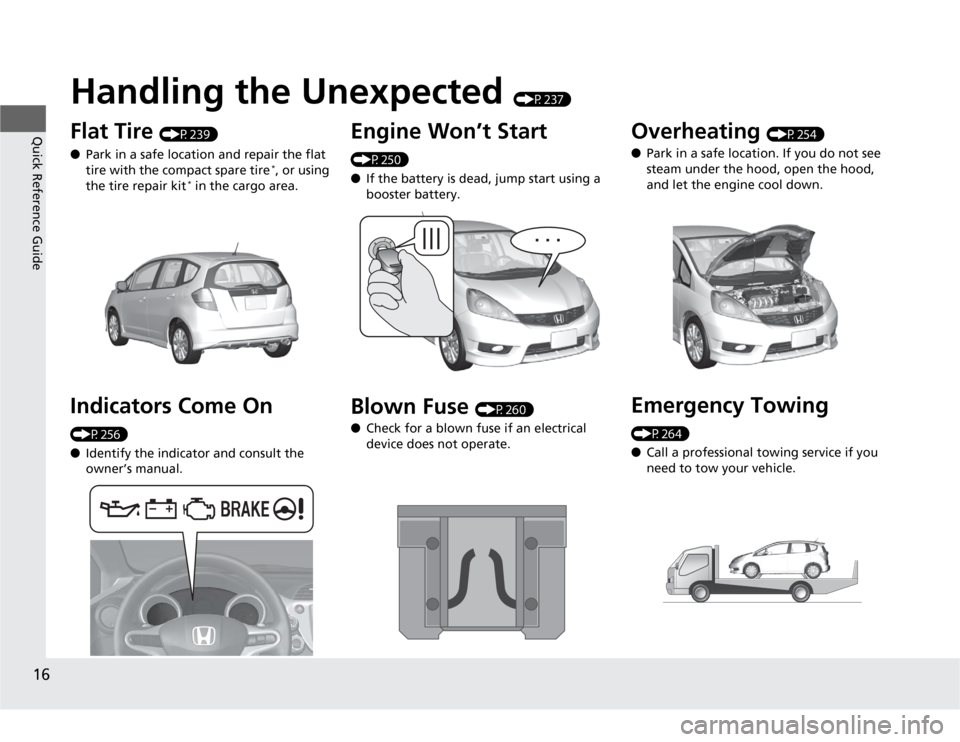
Handling the Unexpected
(P237)
Flat Tire
(P239)
●Park in a safe location and repair the flat
tire with the compact spare tire
*, or using
the tire repair kit
* in the cargo area.
Indicators Come On (P256)
●Identify the indicator and consult the
owner’s manual.
Engine Won’t Start (P250)
●If the battery is dead, jump start using a
booster battery.Blown Fuse
(P260)
●Check for a blown fuse if an electrical
device does not operate.
Overheating
(P254)
●Park in a safe location. If you do not see
steam under the hood, open the hood,
and let the engine cool down.
Emergency Towing (P264)
●Call a professional towing service if you
need to tow your vehicle.
Page 160 of 286
159
Continued
Driving
Towing a TrailerYour vehicle is not designed to tow a trailer. Attempting to do so can void your
warranties.Towing Your VehicleYour vehicle can be towed behind a motorhome.
Perform the following procedure before towing your vehicle.
1.Check the transmission fluid level.
uMake sure the fluid level is between the upper and lower marks.
2.Start the engine.
3.Depress the brake pedal. Move the shift lever through all its positions.
4.Shift to
(D
and hold for five seconds, then to
(N
. Let the engine run for three
minutes, then turn it off.
5.Release the parking brake.
6.Leave the ignition switch in ACCESSORY
(q
.
uMake sure the steering wheel does not lock.
7.Turn off all the electric devices. Do not use any accessory power sockets.
uThis can prevent the battery from running down.
1.Shift to
(N
.
2.Release the parking brake.
3.Turn the ignition switch to ACCESSORY
(q
.
uMake sure the steering wheel does not lock.
4.Turn off all the electric devices. Do not use any accessory power sockets.
uThis can prevent the battery from running down.
■
When Your Vehicle is Towed Behind a Motorhome
1Towing Your Vehicle
NOTICEFailure to follow the recommended instructions
exactly will result in severe automatic transmission
damage. If you cannot shift the transmission or start
the engine, your vehicle must be transported on a
flat-bed truck or trailer.
Do not exceed 65 mph (100 km/h).
Consult your towing parts sales or rental agency if
any other items are recommended or required for
your towing situation.
If you tow your vehicle behind a motorhome, the
transmission fluid must be changed every 2 years or
30,000 miles (48,000 km), whichever comes first.Automatic transmission modelsAutomatic transmission models
1When Your Vehicle is Towed Behind a Motorhome
NOTICESevere transmission damage will occur if the vehicle is
shifted from
(R
to
(N
and then towed with the drive
wheels on the ground.
Automatic transmission models
Automatic transmission modelsManual transmission models
Page 238 of 286

237
Handling the Unexpected
This chapter explains how to handle unexpected troubles.
Tools
Types of Tools .................................. 238
If a Tire Goes Flat
Changing a Flat Tire
*....................... 239
Temporarily Repairing a Flat Tire
*..... 245
Engine Does Not Start
Checking the Engine ........................ 250
Jump Starting.................................... 251
Shift Lever Does Not Move.............. 253
Overheating
How to Handle Overheating ............. 254Indicator, Coming On/Blinking
If the Low Oil Pressure Indicator Comes
On................................................ 256If the Charging System Indicator Comes
On ................................................. 256
If the Malfunction Indicator Lamp Comes
On or Blinks ..................................... 257If the Brake System Indicator Comes On .. 258If the EPS Indicator Comes On.......... 258
If the Low Tire Pressure Indicator Comes
On ................................................. 259
If the TPMS Indicator Comes On ...... 259Fuses
Fuse Locations ................................. 260
Inspecting and Changing Fuses ........ 263
Emergency Towing........................... 264
* Not available on all models
Page 246 of 286

245
uuIf a Tire Goes FlatuTemporarily Repairing a Flat Tire
*
Continued
Handling the Unexpected
Temporarily Repairing a Flat Tire
*
If the tire has a large cut or is otherwise severely damaged, you will need to have the
vehicle towed. If the tire only has a small puncture, from a nail for instance, you can
use the tire repair kit so that you can drive to the nearest service station for a more
permanent repair.
If a tire goes flat while driving, grasp the steering wheel firmly, and brake gradually
to reduce speed. Then stop in a safe place.
1.Park the vehicle on firm, level, and non-slippery ground.
2.Put the shift lever in
(P
.
3.Set the parking brake.
4.Turn on the hazard warning lights and turn the ignition switch to LOCK
(0
.
■
Getting Ready to Temporarily Repair the Flat Tire
1Temporarily Repairing a Flat Tire
*
The kit should not be used in the following situations.
Instead, contact a dealer or a roadside assistant to
have the vehicle towed.•The tire sealant has expired.•More than two tires are punctured.•The puncture is greater than 3/16 inch (4 mm) in
diameter.•The tire side wall is damaged or the puncture is
outside the tire tread.•Damage has been caused by driving with the tires
extremely under inflated.•The tire bead is no longer seated.•A rim is damaged.
Do not remove a nail or screw that punctured the
tire. If you remove it from the tire, you may not be
able to repair the puncture using the kit.NOTICEDo not use a puncture-repairing agent other than the
one provided in the kit that came with your vehicle. If
used, you may permanently damage the tire pressure
sensor.
When the puncture is:
Smaller than 3/16 inch
(4 mm)
Larger than 3/16 inch
(4 mm) Kit Use
Yes
No Contact
Area
Instruction
Manual Air Compressor Wheel
Label Sealant Bottle Expiration Date
Speed Limit
Label
* Not available on all models
Page 248 of 286
Continued
247
uuIf a Tire Goes FlatuTemporarily Repairing a Flat Tire
*
Handling the Unexpected
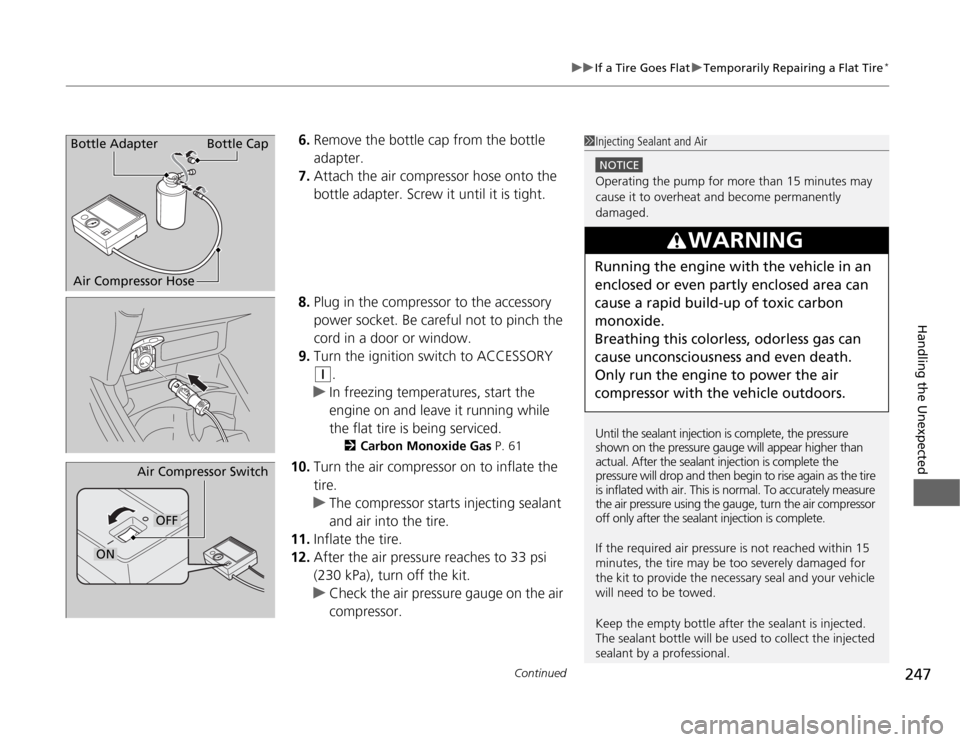
6.Remove the bottle cap from the bottle
adapter.
7.Attach the air compressor hose onto the
bottle adapter. Screw it until it is tight.
8.Plug in the compressor to the accessory
power socket. Be careful not to pinch the
cord in a door or window.
9.Turn the ignition switch to ACCESSORY
(q
.
uIn freezing temperatures, start the
engine on and leave it running while
the flat tire is being serviced.
2Carbon Monoxide Gas P. 61
10.Turn the air compressor on to inflate the
tire.
uThe compressor starts injecting sealant
and air into the tire.
11.Inflate the tire.
12.After the air pressure reaches to 33 psi
(230 kPa), turn off the kit.
uCheck the air pressure gauge on the air
compressor.
1Injecting Sealant and Air
NOTICEOperating the pump for more than 15 minutes may
cause it to overheat and become permanently
damaged.
Until the sealant injection is complete, the pressure
shown on the pressure gauge will appear higher than
actual. After the sealant injection is complete the
pressure will drop and then begin to rise again as the tire
is inflated with air. This is normal. To accurately measure
the air pressure using the gauge, turn the air compressor
off only after the sealant injection is complete.
If the required air pressure is not reached within 15
minutes, the tire may be too severely damaged for
the kit to provide the necessary seal and your vehicle
will need to be towed.
Keep the empty bottle after the sealant is injected.
The sealant bottle will be used to collect the injected
sealant by a professional.
3
WARNING
Running the engine with the vehicle in an
enclosed or even partly enclosed area can
cause a rapid build-up of toxic carbon
monoxide.
Breathing this colorless, odorless gas can
cause unconsciousness and even death.
Only run the engine to power the air
compressor with the vehicle outdoors.
Bottle Adapter
Air Compressor HoseBottle Cap
Air Compressor Switch
OFF
ON
Page 250 of 286
249
uuIf a Tire Goes FlatuTemporarily Repairing a Flat Tire
*
Handling the Unexpected
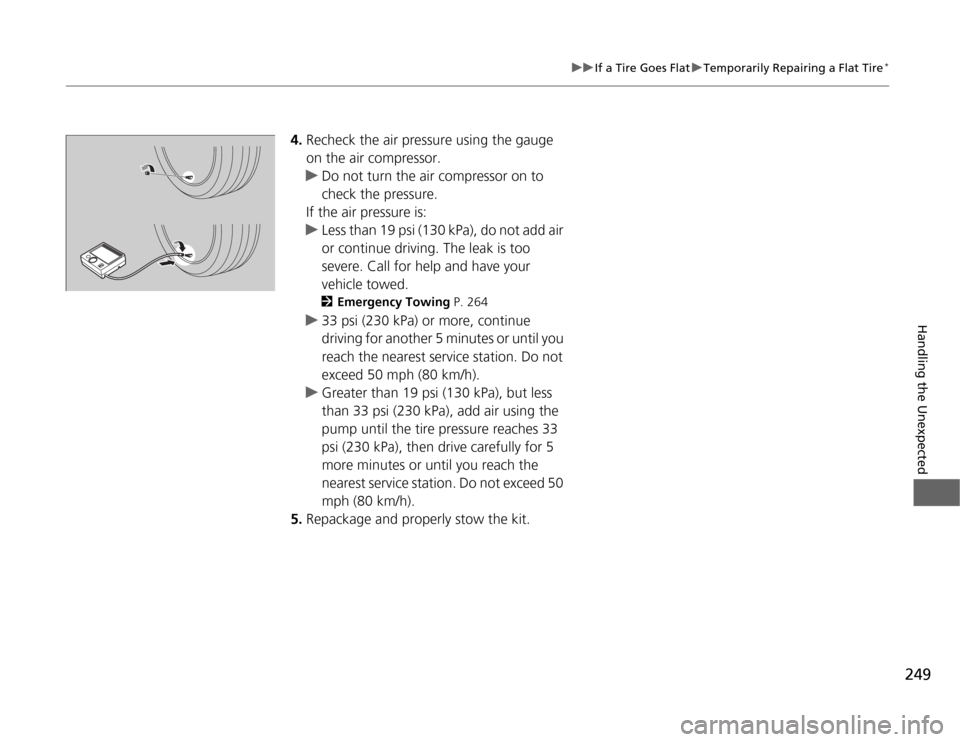
4.Recheck the air pressure using the gauge
on the air compressor.
uDo not turn the air compressor on to
check the pressure.
If the air pressure is:
uLess than 19 psi (130 kPa), do not add air
or continue driving. The leak is too
severe. Call for help and have your
vehicle towed.
2Emergency Towing P. 264
u33 psi (230 kPa) or more, continue
driving for another 5 minutes or until you
reach the nearest service station. Do not
exceed 50 mph (80 km/h).
uGreater than 19 psi (130 kPa), but less
than 33 psi (230 kPa), add air using the
pump until the tire pressure reaches 33
psi (230 kPa), then drive carefully for 5
more minutes or until you reach the
nearest service station. Do not exceed 50
mph (80 km/h).
5.Repackage and properly stow the kit.
Page 265 of 286
264Handling the Unexpected
Emergency TowingCall a professional towing service if you need to tow your vehicle.■
Flat bed equipment
The operator loads your vehicle on the back of a truck.
This is the best way to transport your vehicle.
■
Wheel lift equipment
The tow truck uses two pivoting arms that go under the front tires and lift them off
the ground. The rear tires remain on the ground. This is an acceptable way to
tow your vehicle.
1Emergency Towing
NOTICETrying to lift or tow your vehicle by the bumpers will
cause serious damage. The bumpers are not designed
to support the vehicle’s weight.NOTICEImproper towing such as towing behind a
motorhome or other motor vehicle can damage the
transmission.
Never tow your vehicle with just a rope or chain.
It is very dangerous, since ropes or chains may shift
from side to side or break.