Page 285 of 361
284
uuMaintenance Under the HooduRefilling Window Washer Fluid
Maintenance
Refilling Window Washer Fluid
Check the amount of window washer fluid using the washer fluid level gauge on the cap.If the level is low, fill the washer reservoir.
If the washer fluid is low, the indicator appears on the instrument panel.
Pour the washer fluid carefully. Do not overflow the reservoir.
1Refilling Window Washer Fluid
NOTICEDo not use engine antifreeze or a vinegar/water
solution in the windshield washer reservoir.
Antifreeze can damage your vehicle's paint. A
vinegar/water solution can damage the windshield washer pump.
Level Gauge
Models with washer level sensor
Page 313 of 361

312
uuCleaninguExterior Care
Maintenance
Exterior Care
Dust off the vehicle body after you drive.
Regularly inspect your vehicle for scratches on painted surfaces. A scratch on a
painted surface can result in body rust. If you find a scratch, promptly repair it.
Wash the vehicle regularly. Wash more frequently when driving in the following
conditions: •If driving on roads with road salt.
• If driving in coastal areas.
• If tar, soot, bird droppings, insects, or tree sap are stuck to painted surfaces.
• Remove the audio antenna.
2 Audio Antenna P. 152
• Fold in the door mirrors.
Make sure to follow the instructions indicated on the automated vehicle wash. • Keep sufficient distance between the cleaning nozzle and the vehicle body.
• Take particular care around the windows. Standing too close may cause water to
enter the vehicle interior. Do not spray water into the engine compartment.
■Washing the Vehicle
■Using an Automated Vehicle Wash
■Using High Pressure Cleaners
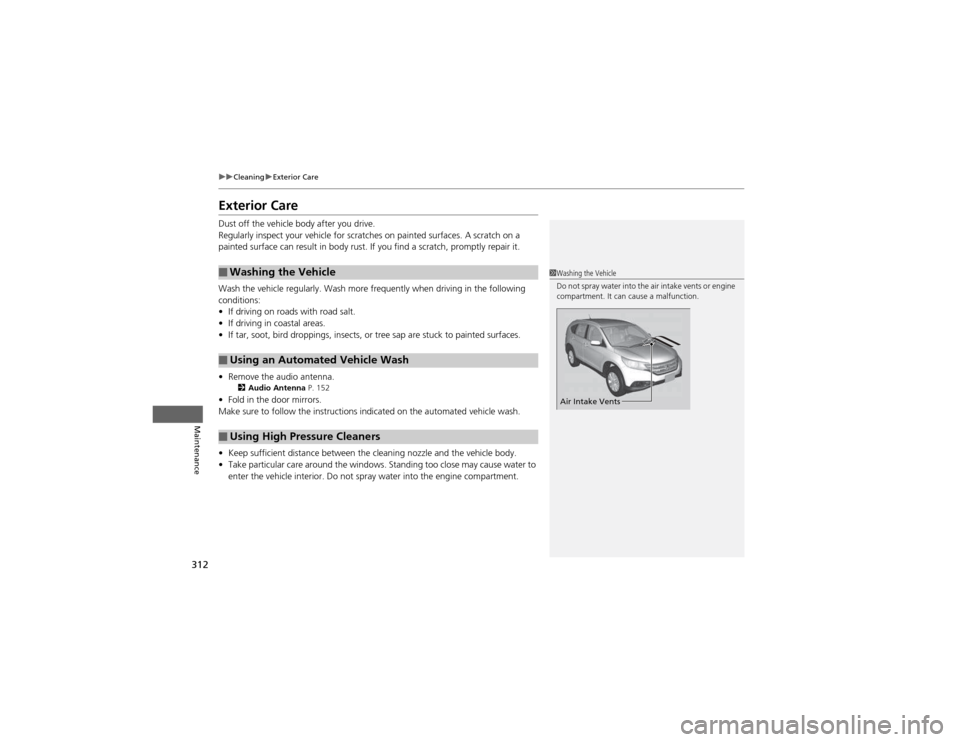
1Washing the Vehicle
Do not spray water into the air intake vents or engine
compartment. It can cause a malfunction.
Air Intake Vents
Page 314 of 361

313
uuCleaninguExterior Care
Maintenance
A good coat of automotive body wax helps protect your vehicle’s paint from the
elements. Wax will wear off over time and expose your vehicle’s paint to the
elements, so reapply as necessary.
If you get gasoline, oil, engine coolant, or battery fluid on resin coated parts, they
may be stained or the coating may peel. Promptly wipe it away using a soft cloth and
clean water.
Wipe using a glass cleaner.
Aluminum is susceptible to deterioration caused by salt and other road
contaminants. Use a sponge and mild detergent to wipe away promptly.
Be careful not to use harsh chemicals (including some commercial wheel cleaners) or
a stiff brush. They can damage the clear coat of the aluminum alloy wheels that
helps keep the aluminum from corroding and tarnishing.
■Applying Wax
■Maintaining the Bumpe rs and Other Resin Coated Parts
■Cleaning the Window
■Maintaining Aluminum Wheels *
1Applying Wax
NOTICEChemical solvents and strong cleaners can damage
the paint, metal, and plastic on your vehicle. Wipe up
spills immediately.
1Maintaining the Bumpers and Other Resin Coated Parts
Ask a dealer about the correct coating material when
you want to repair the painted surface of the parts
made of resin.
1Cleaning the Window
Wires are mounted to the inside of the rear window.
Wipe along the same direction as the wires with a
soft cloth so as not to damage them.
* Not available on all models
Page 316 of 361

315
Handling the UnexpectedThis chapter explains how to h andle unexpected troubles.
Tools
Types of Tools .................................. 316
If a Tire Goes Flat Changing a Flat Tire ......................... 317
Engine Does Not Start Checking the Engine ........................ 323
Jump Starting .................................... 324
Shift Lever Does Not Move .............. 326
Overheating How to Handle Overheating ............. 327 Indicator, Coming On/Blinking
If the Low Oil Pressure Indicator Comes
On ............................................. 329
If the Charging System Indicator Comes
On ................................................. 329
If the Malfunction Indicator Lamp Comes On or Blinks ................................... 330
If the Brake System Indicator Comes On ....... 331If the EPS System Indicator Comes On ......... 331If the Low Tire Pressure Indicator Comes
On ................................................. 332
If the TPMS Indicator Comes On ...... 332 Fuses
Fuse Locations ................................. 333
Inspecting and Changing Fuses ........ 335
Emergency Towing ........................... 336
When You Cannot Open the Tailgate..... 337
Page 321 of 361

uuIf a Tire Goes FlatuChanging a Flat Tire
320
Handling the Unexpected
1. Place the jack under the jacking point
closest to the tire to be changed.
2. Turn the end bracket (as shown in the
image) clockwise until the top of the jack
contacts the jacking point.
uMake sure that the jacking point tab is
resting in the jack notch.
3. Raise the vehicle, using the jack handle bar
and the jack handle, until the tire is off the
ground.
■How to Set Up the Jack1How to Set Up the Jack
Do not use the jack with people or luggage in the
vehicle.
Use the jack provided in your vehicle.
Other jacks may not support the weight ("load") or
their shape may not match.
The following instructions must be followed to use
the jack safely.
• Do not use while the engine is running.
• Use only where the ground is firm and level.
• Use only at the jacking points.
• Do not get in the vehicle while using the jack.
• Do not put anything on top of or underneath the jack.
3WARNING
The vehicle can easily roll off the jack,
seriously injuring anyone underneath.
Follow the directions for changing a tire
exactly, and never get under the vehicle
when it is supported only by the jack.
Jack
Handle
Bar Wheel Nut
Wrench as Jack Handle
Page 324 of 361

323
Handling the Unexpected
Engine Does Not Start
Checking the Engine
If the engine does not start, turn the ignition switch to START
(e and check the
starter.
Starter conditionChecklistStarter doesn’t turn or turns
over slowly.
The battery may be dead. Check
each of the items on the right and respond accordingly.Check brightness of the interior light.
Turn on interior lights and check brightness. ● If the interior lights are dim or do not come on at all
2Battery P. 305
● If the interior lights come on normally 2 Inspecting and Changing Fuses P. 335
The starter turns over normally
but the engine doesn’t start.
There may be a problem with the
fuse. Check each of the items on
the right and respond accordingly.Review the engine start procedure.
Follow its instructions, and try to start the engine again. 2
Starting the Engine P. 239
Check the immobilizer system indicator.
When the immobilizer system indicator is blinking, the engine cannot be started.
2Immobilizer System P. 106
Check the fuel level.
There should be enough fuel in the tank. 2
Fuel Gauge P. 77
Check the fuse.
Check all fuses, or have the vehicle checked by a dealer.
2Inspecting and Changing Fuses P. 335
If the problem continues:
2Emergency Towing P. 336
1Checking the Engine
If you must start the vehicle immediately, use an
assisting vehicle to jump start it.
2 Jump Starting P. 324
Page 325 of 361

324
Handling the Unexpected
Jump Starting
Turn off the power to electric devices, such as audio and lights. Turn off the engine,
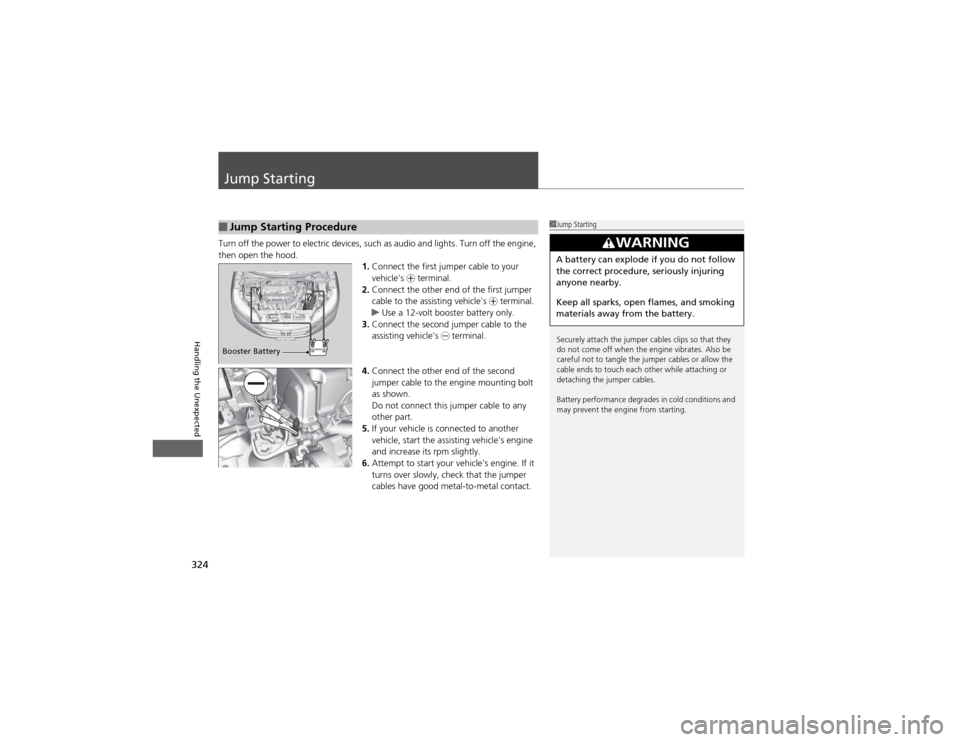
then open the hood.1.Connect the first jumper cable to your vehicle's + terminal.
2. Connect the other end of the first jumper
cable to the assisting vehicle's + terminal.
uUse a 12-volt booster battery only.
3. Connect the second jumper cable to the
assisting vehicle's - terminal.
4. Connect the other end of the second
jumper cable to the engine mounting bolt
as shown.
Do not connect this jumper cable to any
other part.
5. If your vehicle is connected to another
vehicle, start the assisting vehicle's engine
and increase its rpm slightly.
6. Attempt to start your vehicle's engine. If it
turns over slowly, check that the jumper
cables have good metal-to-metal contact.
■Jump Starting Procedure1Jump Starting
Securely attach the jumper cables clips so that they
do not come off when the engine vibrates. Also be
careful not to tangle the jumper cables or allow the
cable ends to touch each other while attaching or
detaching the jumper cables.
Battery performance degrades in cold conditions and
may prevent the engine from starting.
3WARNING
A battery can explode if you do not follow
the correct procedure, seriously injuring
anyone nearby.
Keep all sparks, open flames, and smoking
materials away from the battery.
Booster Battery
Page 326 of 361
325
uuJump Startingu
Handling the Unexpected
Once your vehicle's engine has started, remove the jumper cables in the following order. 1.Disconnect the jumper cable from your vehicle's ground.
2. Disconnect the other end of the jumper cable from the assisting vehicle's -
terminal.
3. Disconnect the jumper cable from your vehicle's + terminal.
4. Disconnect the other end of the jumper cable from the assisting vehicle's +
terminal.
Have your vehicle inspected by a nearby service station or a dealer.
■What to Do After the Engine Starts